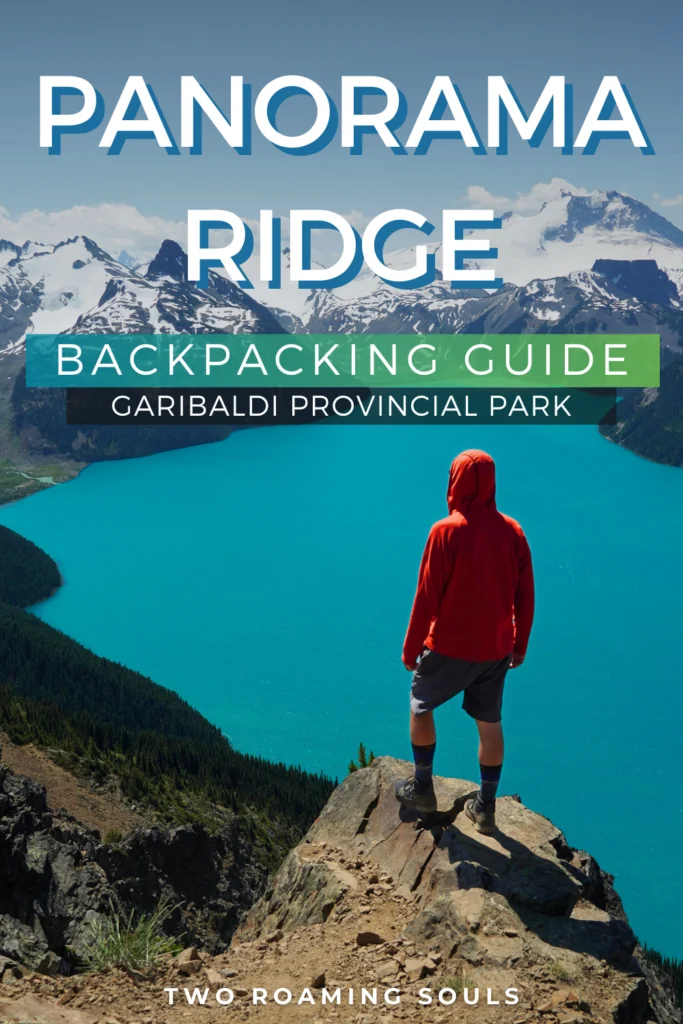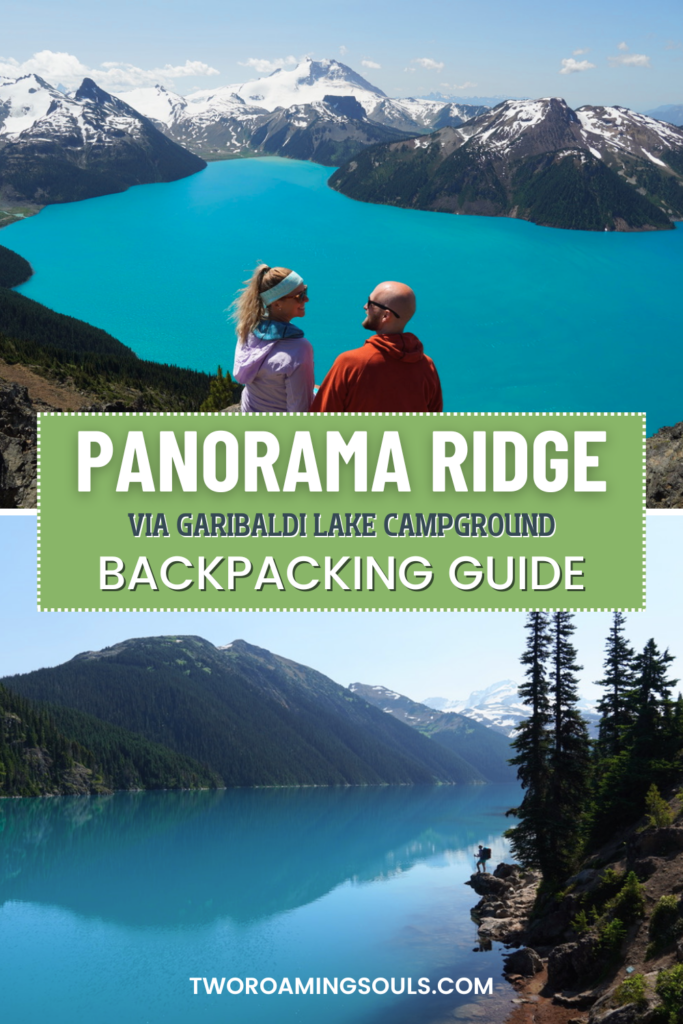
This guide explains how to do a backpacking trip to Panorama Ridge and Garibaldi Lake.
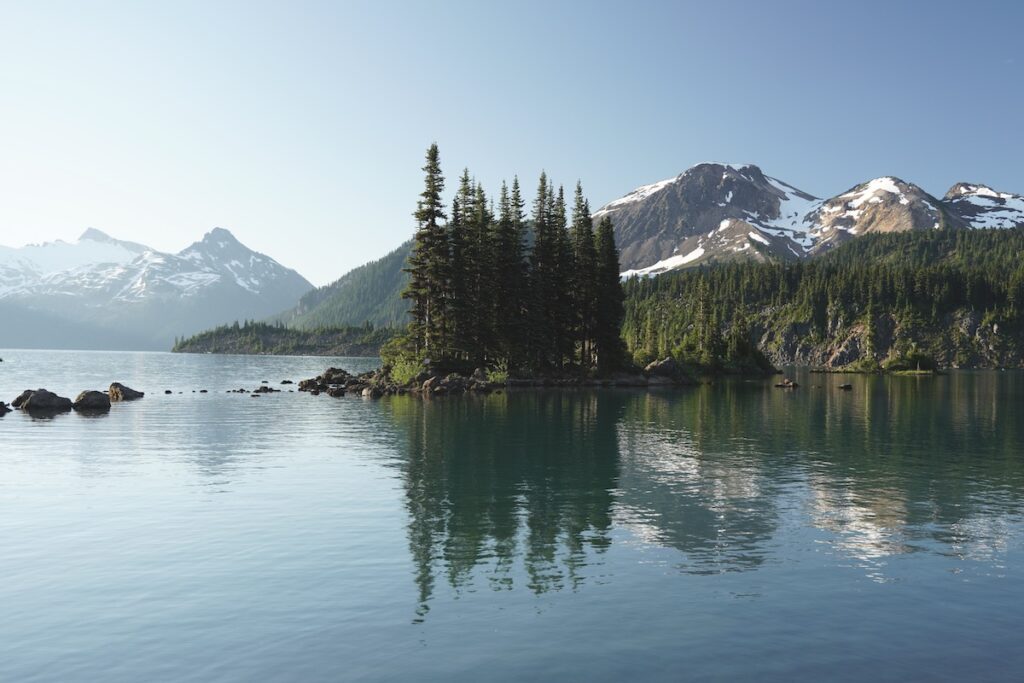
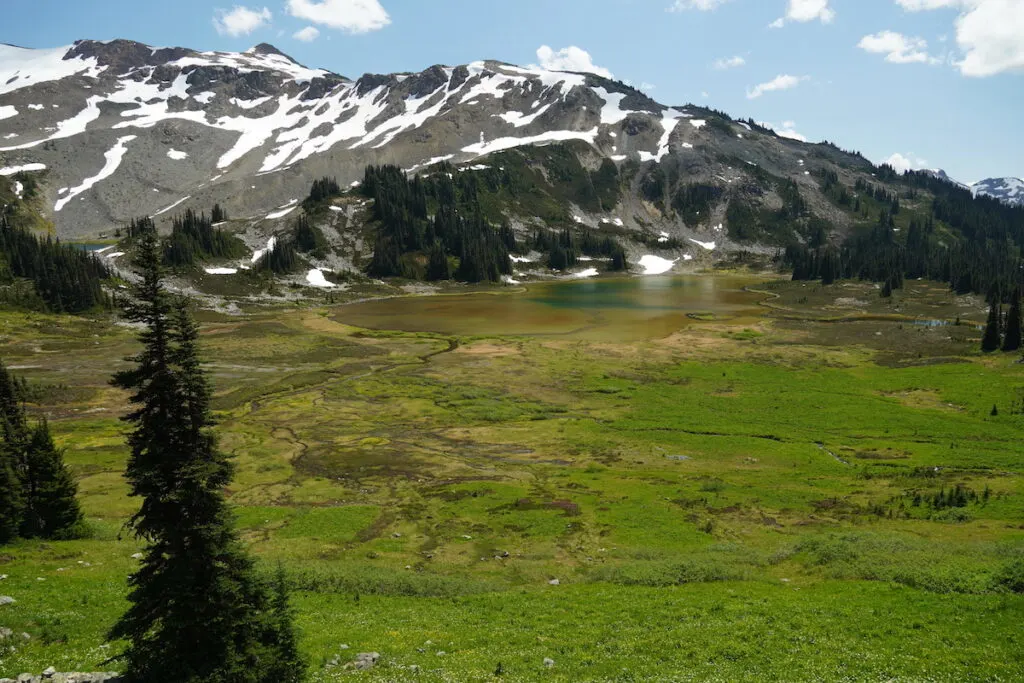
Located in British Columbia, Garibaldi Lake is a stunningly blue glacial lake that is, in itself, a worthy hiking destination. But the real show-stopper is the difficult hike to the top of Panorama Ridge. A mountain peak with simply breathtaking views!
This guide teaches what you need to know. From getting permits, to planning your route, and helpful tips for every step of the journey.
This post may contain affiliate links. Disclosure policy.
Or watch our video guide for this awesome trip!
Be Sure To Leave No Trace: When exploring these treasured outdoor spaces, you are responsible for understanding and following Leave No Trace Guidelines. Most importantly: pack out all garbage, travel only on trails and durable surfaces, and follow local rules for campsites and human waste disposal.
Best Ways To Hike Panorama Ridge
There are several popular ways to complete this hike.
Day Hiking
The most difficult (but fastest) way to hike Panorama Ridge is as a day hike. But this challenging 27-km (17-mile) hike should only be attempted by fit and experienced hikers.
If you do attempt a day hike, we recommend starting early and going through Taylor Meadows directly to Panorama Ridge. Then if you have time/energy, stop off at Garibaldi Lake on the way down for a refreshing swim in the afternoon sun!
Overnight Backpacking
Or you can complete Panorama Ridge as part of an overnight backpacking trip, like we did.
We highly recommend doing Panorama Ridge as an overnight backpacking trip, or better yet two nights, so you can really enjoy the journey at a leisurely pace.
We completed this trip in mid-July of 2024 and found our two-night backpacking itinerary to be quite perfect. With manageable distances each day, and plenty of time to relax and enjoy the lake.
The three best campgrounds near Panorama Ridge are Garibaldi Lake Campground, Taylor Meadows, or Helm Creek. All three require permits that you book on the BC Parks Website (more on permits below).

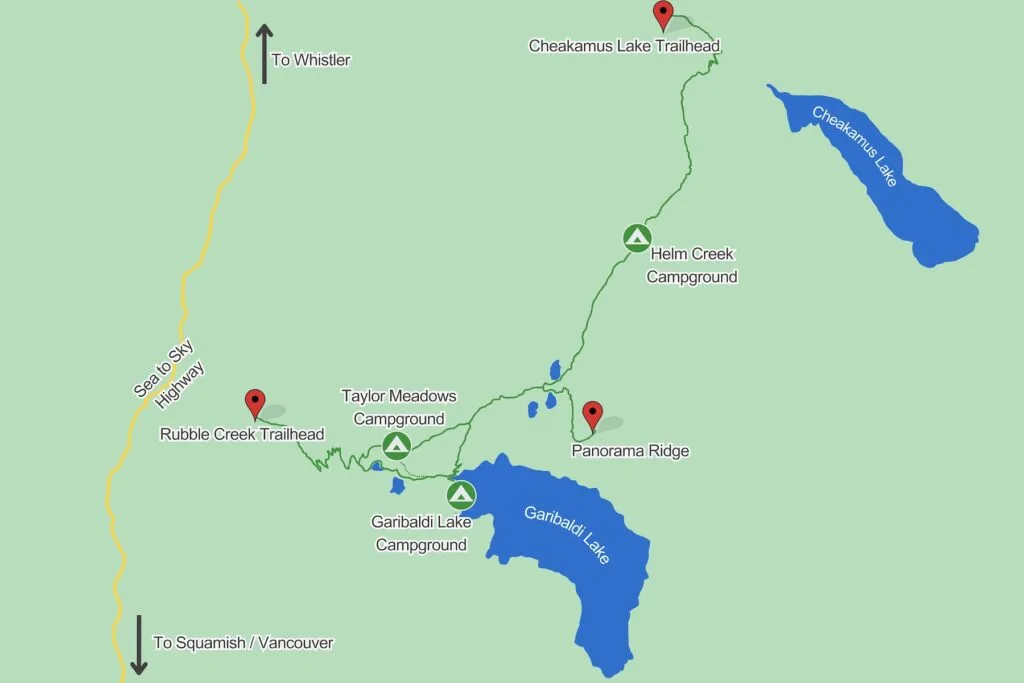
Both Garibaldi Lake Campground and Taylor Meadows Campground are reached by hiking from Rubble Creek Trailhead.
This trail is 28.3km total and can include a route through Taylor Meadows if you are camping there, or simply want to pass through.
Garibaldi Lake Campground is definitely the most sought-after because it provides great access for enjoying the lake. It is open year-round.

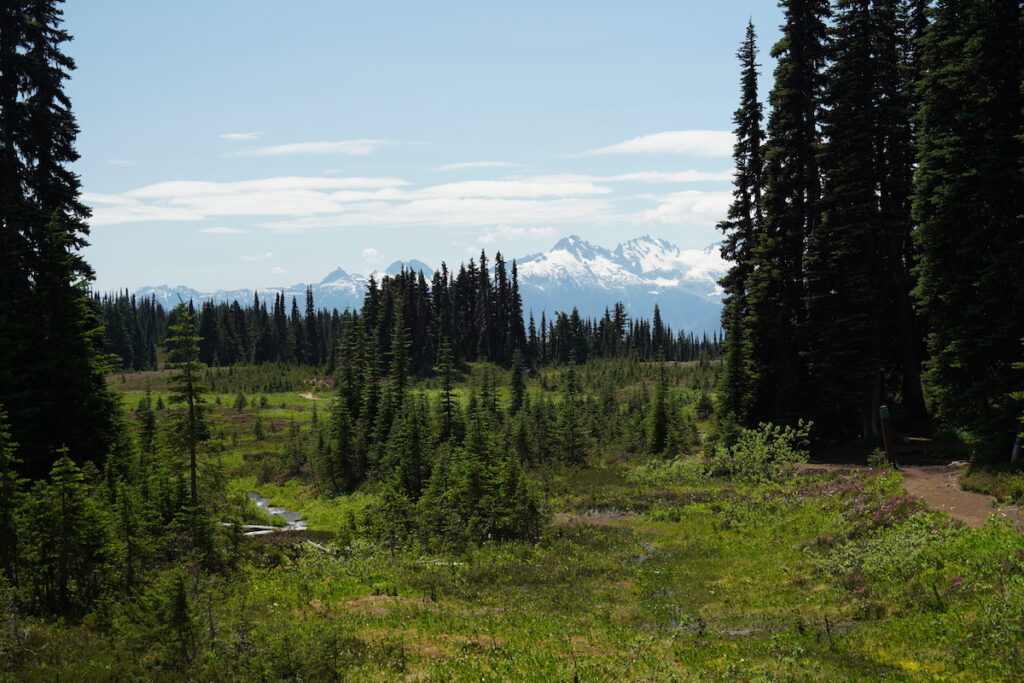
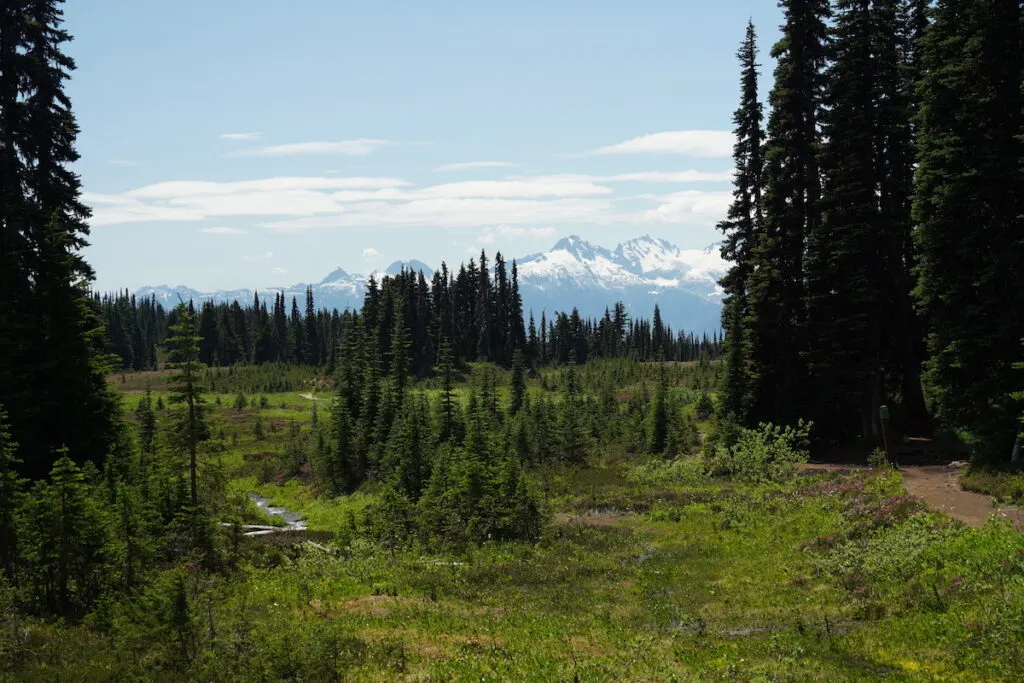
Taylor Meadows is the second most popular campsite, located in beautiful alpine meadows about 1.6 km from Garibaldi Lake. So if you camp here, you can still easily day hike to Garibaldi Lake to hang out. Taylor Meadows is only open in the summer.
The third and final campsite is Helms Creek. Typically visited by beginning at a different trailhead entirely.
The Helm Creek Route starts at Cheakamus Lake Parking and follows Helm Creek to reach Panorama Ridge from the north. This trail is 30 km, and thus slightly longer than the other route.

We highly recommend Garibaldi Lake Campground because relaxing and swimming at the lake is something that Taylor Meadows and Helms Creek simply can’t match.
And we heard that both other places can be exceptionally buggy.
Getting Your Permits For Panorama Ridge
Overnight camping in Garibaldi Provincial Park requires permits.
Permits are available on the BC parks website up to 4 months in advance (at 7am PST), often booking quickly for peak summer months. We find the ‘calendar view’ to be the easiest way to see what’s available.


And even day-hiking requires free day-use passes, but only in the summer.
Overnight camping permits cost $10 CAD per night per adult, plus a transaction fee of $6 per tent pad per night, maxing out at $18. So altogether for our 2-night reservation for 2 adults, we paid $54 Canadian dollars ($39 USD).
Print out your permit because park rangers often come around to check.
If you don’t see your desired dates available, check back diligently for cancellations. That’s how we scored our permits just a couple days before the trip.
We didn’t really plan ahead, and had initially booked 2 nights at Taylor Meadows because it was the only thing available.
But by diligently checking the website for cancellations, we eventually got lucky when some sites opened up at Garibaldi Lake. So we made the switch for a small change fee.
Or there are a few paid services that can assist you in getting sold out permits. Campnab and Schnerp are two such services that can help you know if any permits become available for your desired trip.
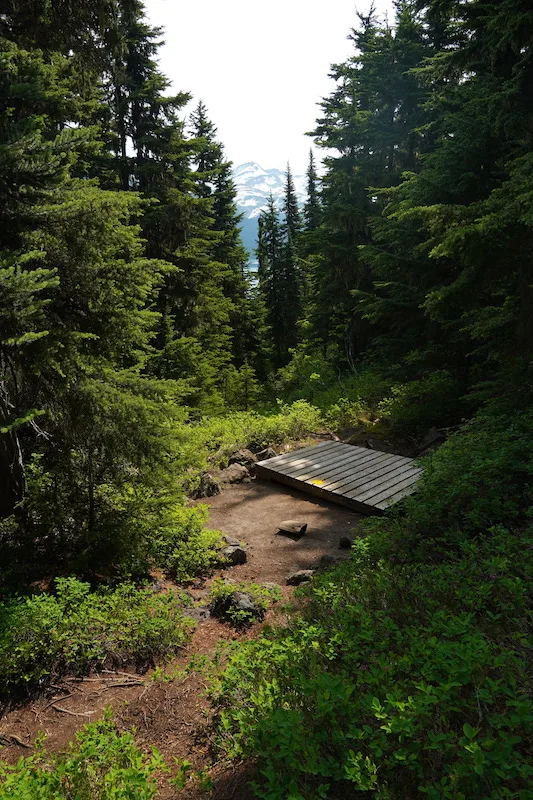
Garibaldi Lake Campground Information
All of the campsites at Garibaldi Lake Campground are wooded, which is good for privacy, but not so good for views. But a few that had some views were number 1, 2, 5, 27, 25.

While each campsite is numbered, we found that there wasn’t really good signage to tell you which sites are where. But we had taken a screenshot of the campground map beforehand, which was helpful.
Or, the map is also posted around the campground in a few places, such as in the shelters, and on the washrooms.
The campsites closest to the lake will experience the most noise from day hikers and people enjoying the lake. So choosing a campsite a little deeper in the woods will result in more privacy and less noise.
Once you choose a campsite, clip your permit onto the numbered post.

Campgrounds are equipped with outhouses, but bring your own toilet paper and hand sanitizer.
Drinking water can be filtered or boiled from Garibaldi Lake. There are also quite a few streams along the trail if you like to carry less water and filter water as you go.
And since this is bear country, you need to follow certain rules and procedures for bear safety.
For starters, always carry bear spray on you.
Then all food and scented items need to be suspended from the provided bear hangs or carried with you. Since there are bear hangs, you don’t need to bring a bear canister, just a bag to hang your items.
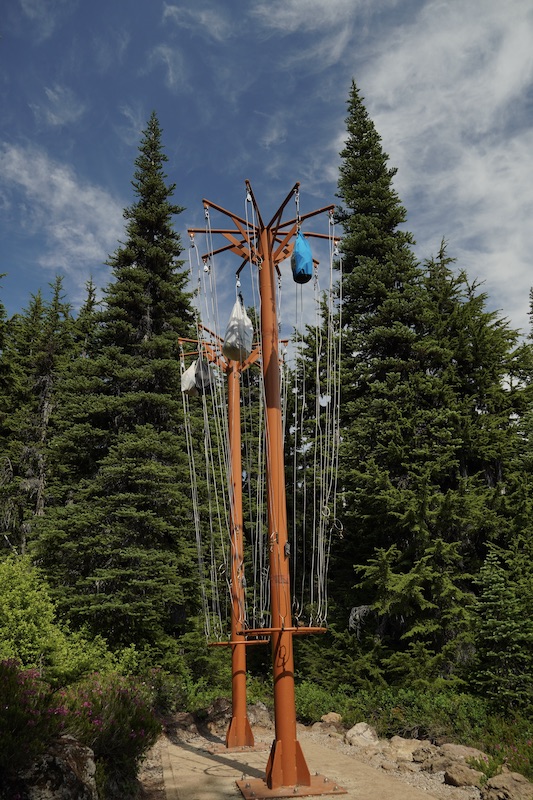

Mind you, the bear hangs are in the sun for most of the day, so if you have anything that will melt like chocolate, you should keep it on you during the day.
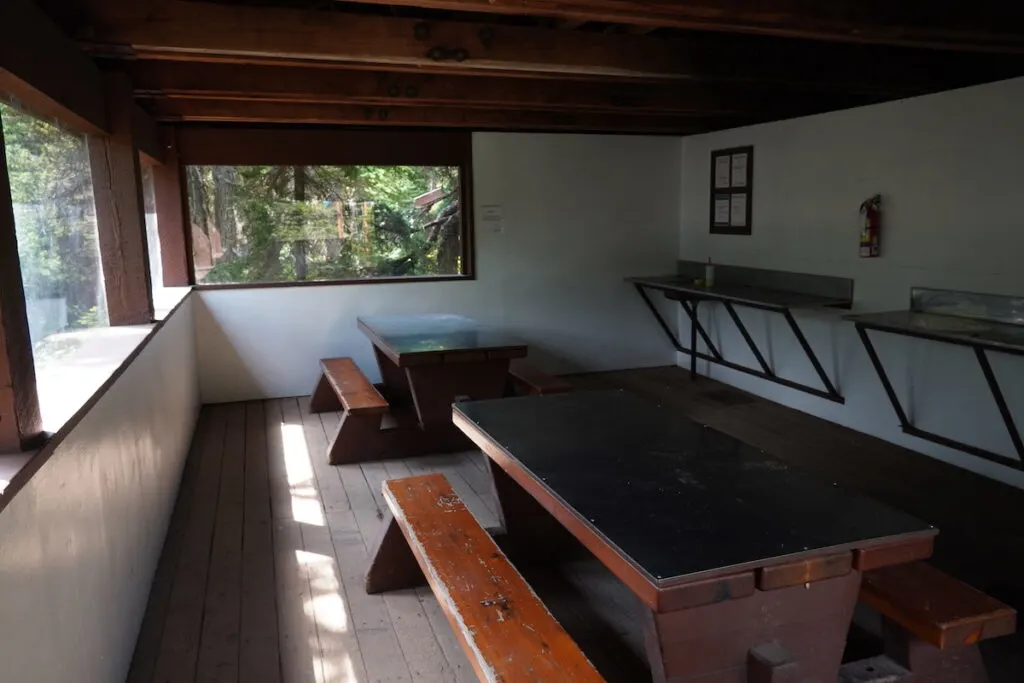
All cooking and washing should be done at the provided shelters away from campsites. The shelters have a sink basin and strainer, but no running water. When washing dishes, strain out food particles and pack them out with you as garbage.

Things that are not allowed in Garibaldi Provincial Park are campfires, pets, drones, and hammocks.
We only realized after this trip that hammocks are not allowed (only found it mentioned in one place on the website). I wish they would disclose all this information at the trailhead, so that people can pack accordingly.
Rubble Creek Trailhead Information
The Rubble Creek Trailhead is located about an hour and 15 minutes north of Vancouver and 25 minutes south of Whistler. From the Sea-to-Sky Highway (99), you exit onto Daisy Lake Road, and follow that for 2.7km (1.7 miles).
There are outhouses at the trailhead, but no other facilities.
There is a park ranger stationed along the road up to the trailhead (summer only). They check that you have a valid day-use pass (summer only) or overnight backpacking permit. (Your overnight permit is valid for parking).
This trailhead gets extremely busy in the summer. When we finished our backpacking trip on Saturday in July, we observed cars parked along the road for nearly 2km (1.2 miles).
And this road is pretty steep. So if you show up and have to park far down the hill, it can add significant distance and elevation to your hike.
Warning: the trailhead is within a slide hazard zone, so camping or sleeping in vehicles at the trailhead is not allowed. While a slide is unlikely, it’s recommended to not linger in the area or go near the creek.
Hiking From Rubble Creek To Garibaldi Lake Campground (or Taylor Meadows)
The trail up to Garibaldi Lake Campground from Rubble Creek Trailhead is 9 km (5.5 mi). It’s a steady incline almost the entire way. It’s basically tons of switchbacks with plenty of shade from trees.
Luckily, the trail is very well-maintained, with very few roots and rocks to navigate. And there are practically no views, so it’s easy to just put your head down and make progress.
At 5.7 km (3.6 mi) you reach a split in the trail. The left path goes to Taylor Meadows and the right path goes to Garibaldi Lake Campground. There is an outhouse here if you cannot wait until you reach Garibaldi Lake or Taylor Meadows.
Barrier Viewpoint
At about 6 km (3.7 miles) you reach an optional 100-meter spur trail for the Barrier Viewpoint. This is a worthy detour for incredible views of the Barrier Slide Hazard Zone.
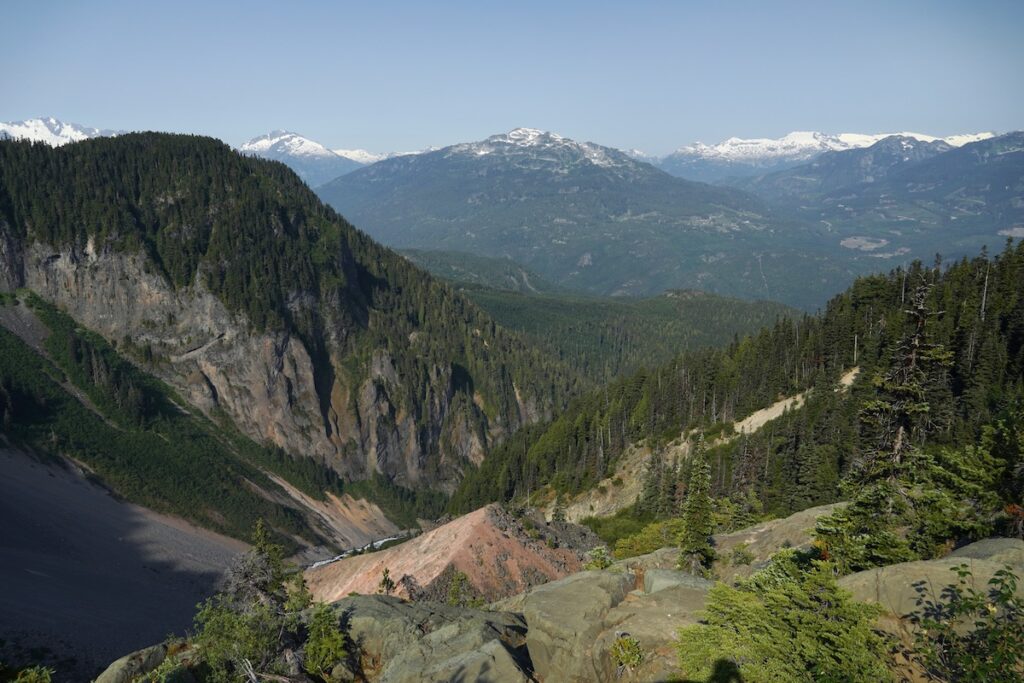
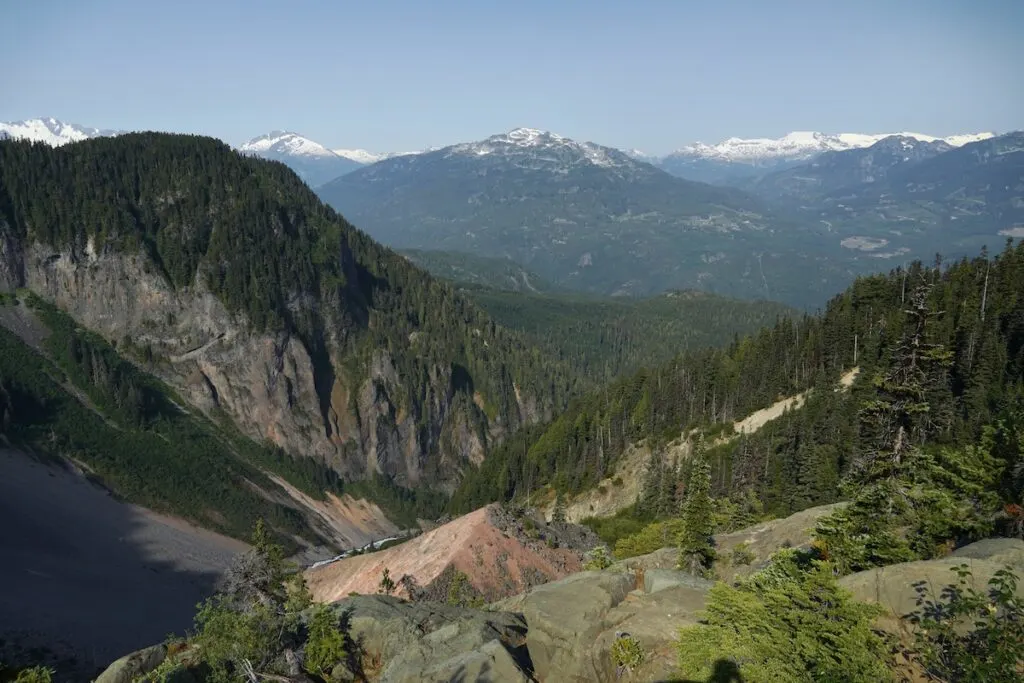
Here you can see evidence of a massive rock wall created when a volcanic lava flow collided with an ancient glacier. And true to its reputation, we literally saw a small rock slide happening while we stopped for a quick break.
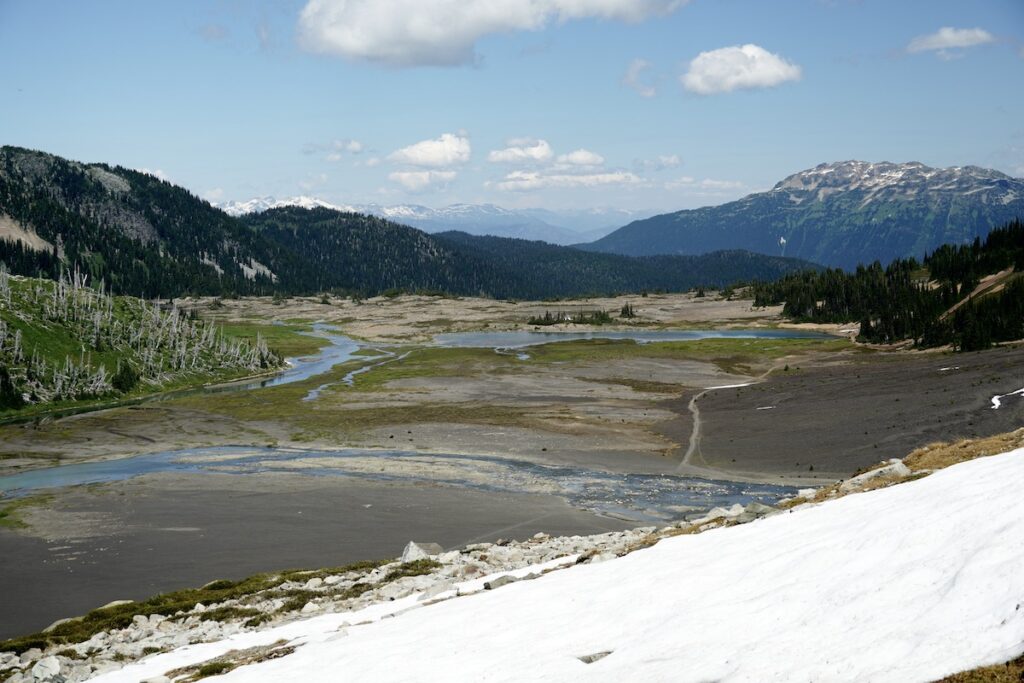
Hiking To The Top Of Panorama Ridge (From Garibaldi Lake)
The round-trip hike from Garibaldi Lake Campground to Panorama Ridge is 13.3km (8.3 miles) and 700m (2,300 ft) elevation.
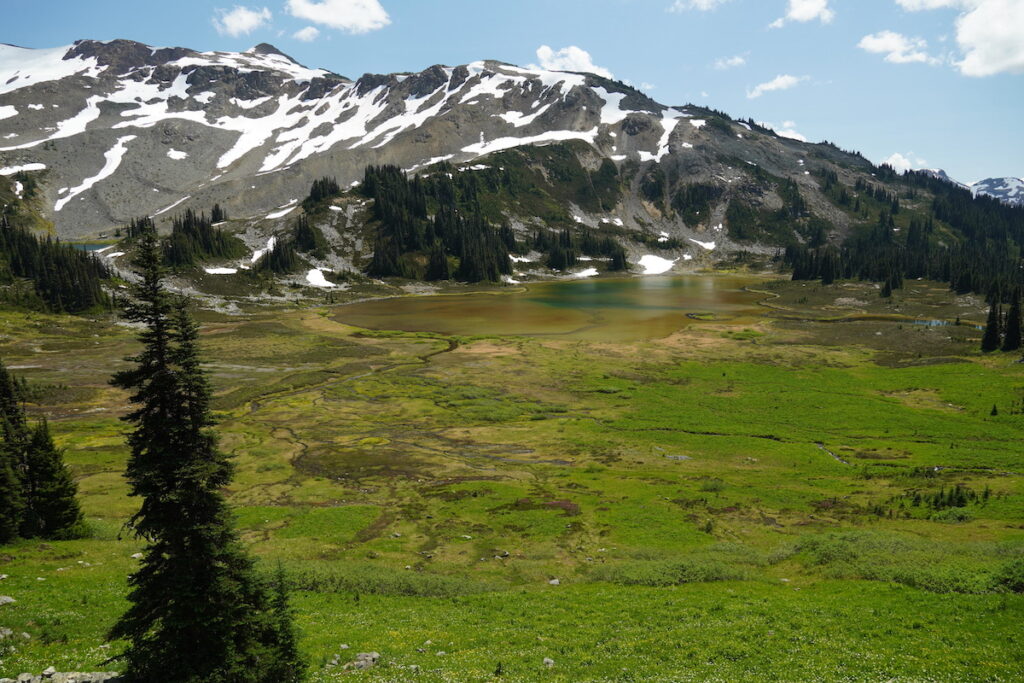
The hike is a pretty gradual ascent almost the whole way. It passes through alpine meadow and several small lakes.
But the last 1.6km or so is a pretty intense climb. The trail gets above treeline and is very rocky, snow-covered, or both.
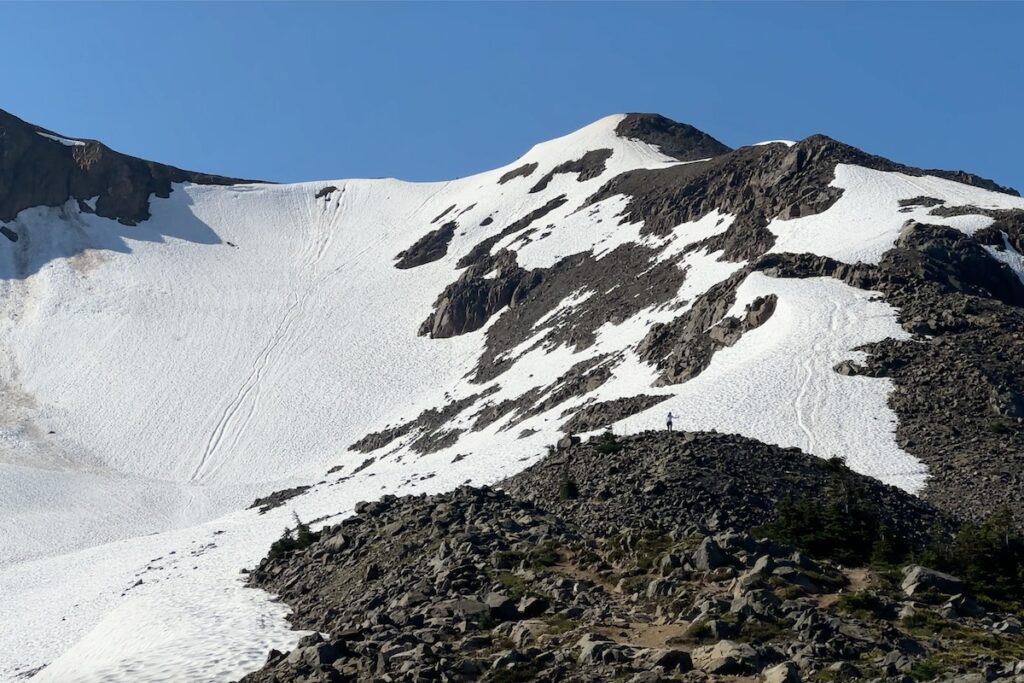

It’s common to still have snow patches lingering throughout the summer. But read some recent reviews on AllTrails to plan for what to expect when you visit.
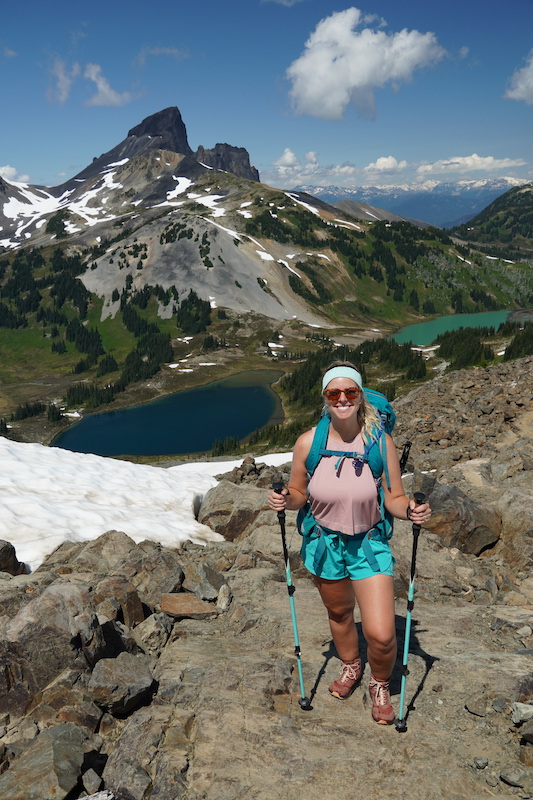
The trail becomes a little bit hard to follow, but just look for orange trail markers. And don’t forget to turn around for incredible views of the Black Tusk, a dramatic stratovolcano one of the most iconic peaks in the region.

And you will probably need several breaks because hiking over the loose rocks and snow is tiring.
We were very happy to have waterproof boots and trekking poles to help navigate the snow. Microspikes would also be helpful, but in an effort to save weight, we decided not to bring them.
If your footwear has good tread it’s usually enough if you hike carefully.
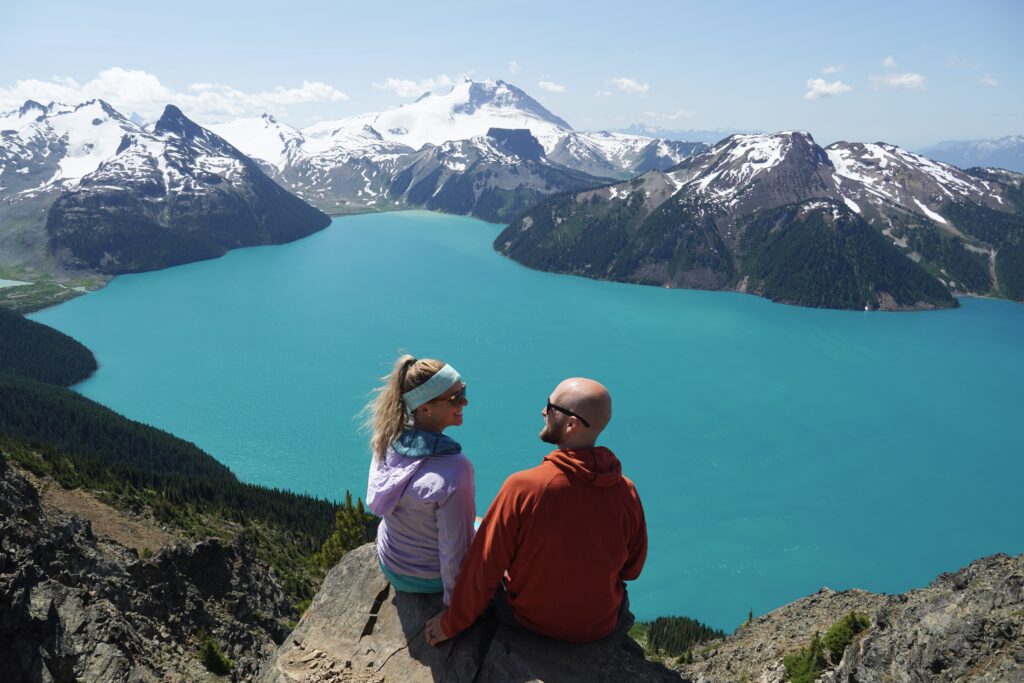
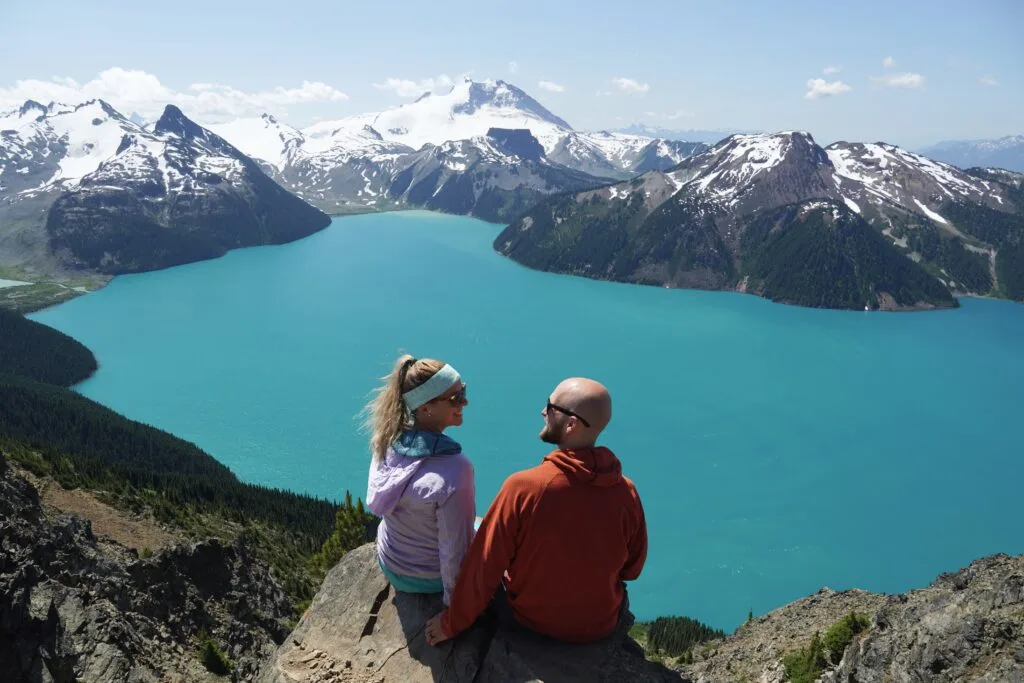
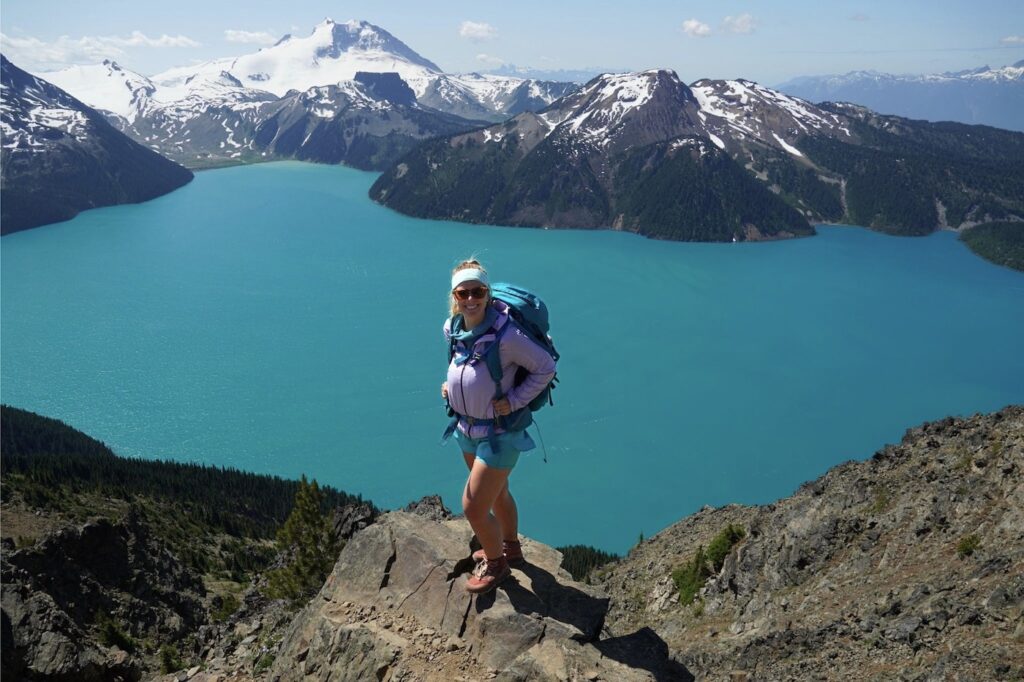
When you reach the top of Panorama Ridge, you are struck with the dazzling view of Garibaldi Lake from above. The water actually looks like this, no dramatic editing.
The last 0.7km (0.3 mi) of the trail curls around after Panorama Ridge to the summit of Panorama Peak. The peak offers slightly different views of the surrounding area.


However, the best views of the lake are on Panorama Ridge, so you can skip the peak if you are exhausted.
Sliding Down The Snow
A popular thing to do here is slide down the snow from the top of Panorama Ridge. It saves you a little effort on the way down (probably descending about 60 meters if I had to guess).
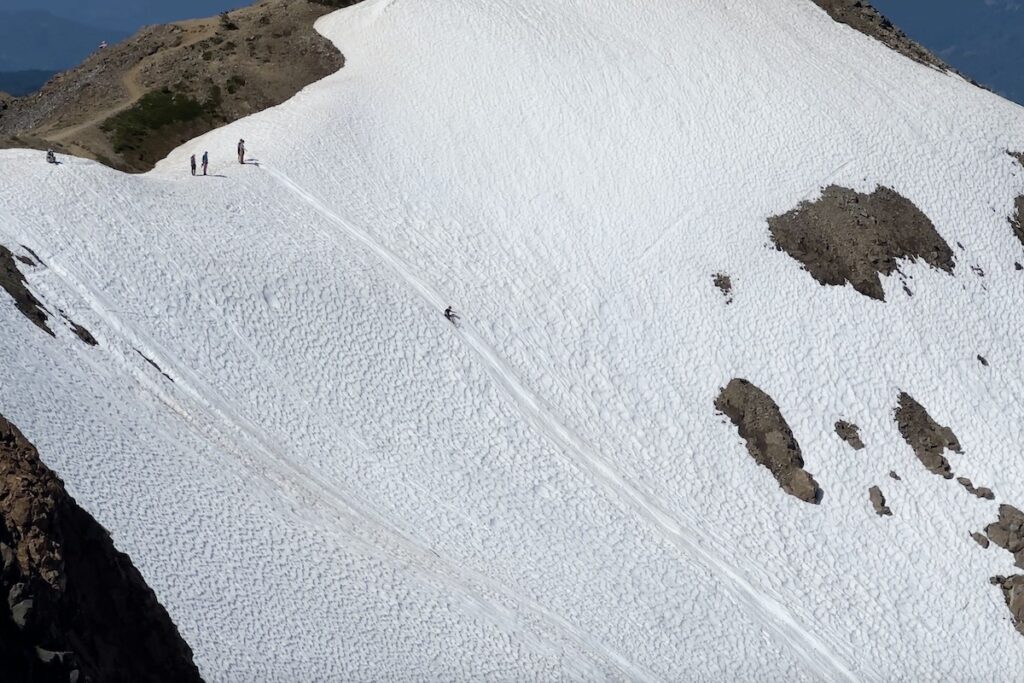
Personally, we tend to be risk-averse in the backcountry, since medical help is so far away. And honestly, we didn’t find the hike to be that hard, so we didn’t mind hiking down. Just be aware that doing this activity is exposing yourself to elevated risk.
People typically use their pack as a sled, or bring a heavy-duty trash bag. Make sure you PACK OUT the trash bag!
It’s also probably a good idea to have long pants so the slushy snow doesn’t cut up your skin.
Packing Considerations For This Trip
We have an entire post dedicated to what to bring on a backpacking trip. Check that out for a simple guide to packing for a backpacking trip, plus a helpful checklist.
But I want to note some packing considerations for this trip in particular.
Trekking poles have basically become something I wouldn’t consider leaving behind on any backpacking trip. But they were especially helpful for navigating the loose rocks and snow up to Panorama Ridge. (We love our Trail Buddy Poles, they are cheap but still very durable).
Microspikes can be very helpful as well. Especially for going down the snow.
No bear canister is needed, just bring a bag (preferably waterproof) for your food and scented items to go on the bear hang.
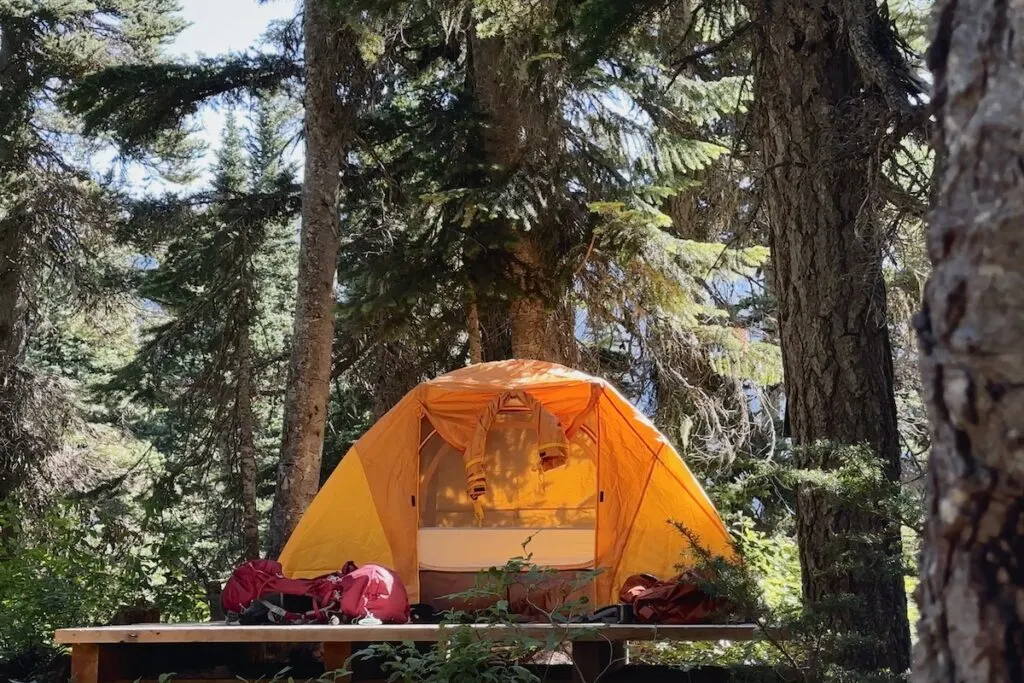
Nearly every campsite at Garibaldi Lake Campground has a wooden tent pad, so a tent ground sheet is not really necessary. And you probably don’t need tent stakes either.
Instead, plan to secure your tent with string to the rings on the tent pad. Most sites are pretty well protected from wind, so we didn’t even secure the tent either night. If there is wind in the forecast, you could use the guylines on your rain fly to secure the tent.
Our Hiking Times:
- Rubble Creek TH to Garibaldi Lake: 3.5 hr
- Garibaldi Lake to Panorama Ridge: 3hr
- Panorama Ridge to Garibaldi Lake: 2hr40m
- Garibaldi Lake to Rubble Creek TH: 2.5 hr
Other Things To Check Out
Another fun Whistler activity is floating the River of Golden Dreams. Read our guide for that adventure.
Share This Backpacking Guide on Pinterest!