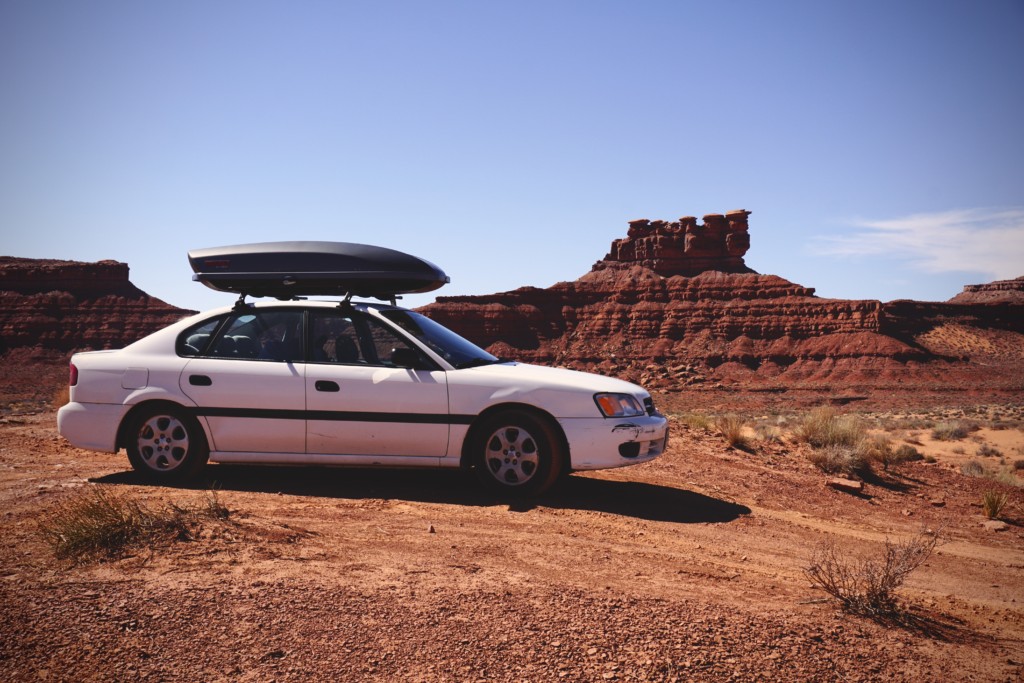
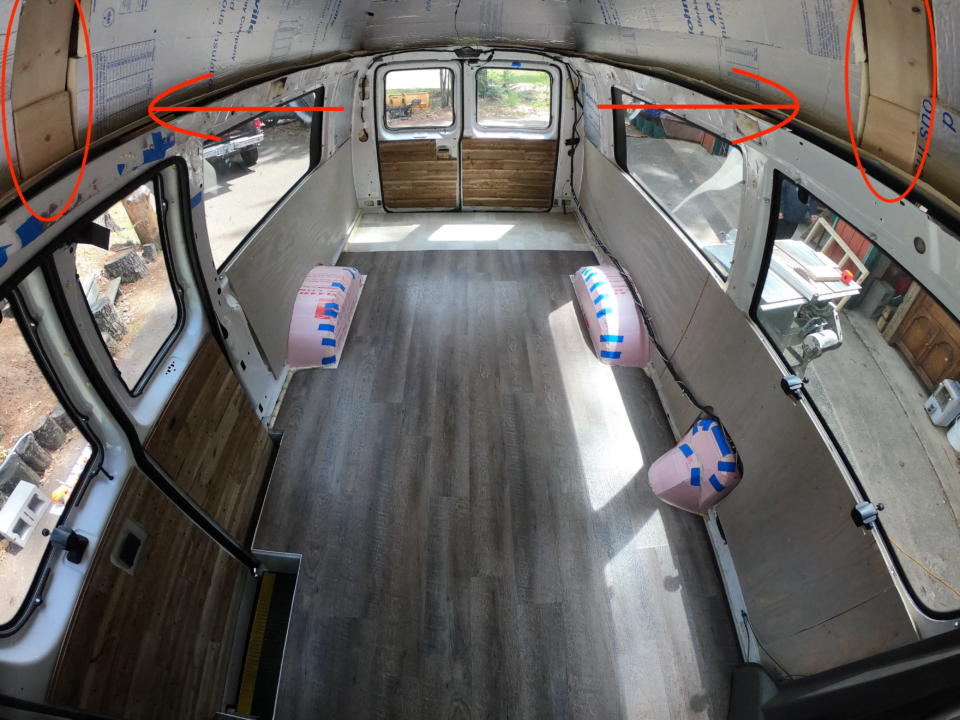
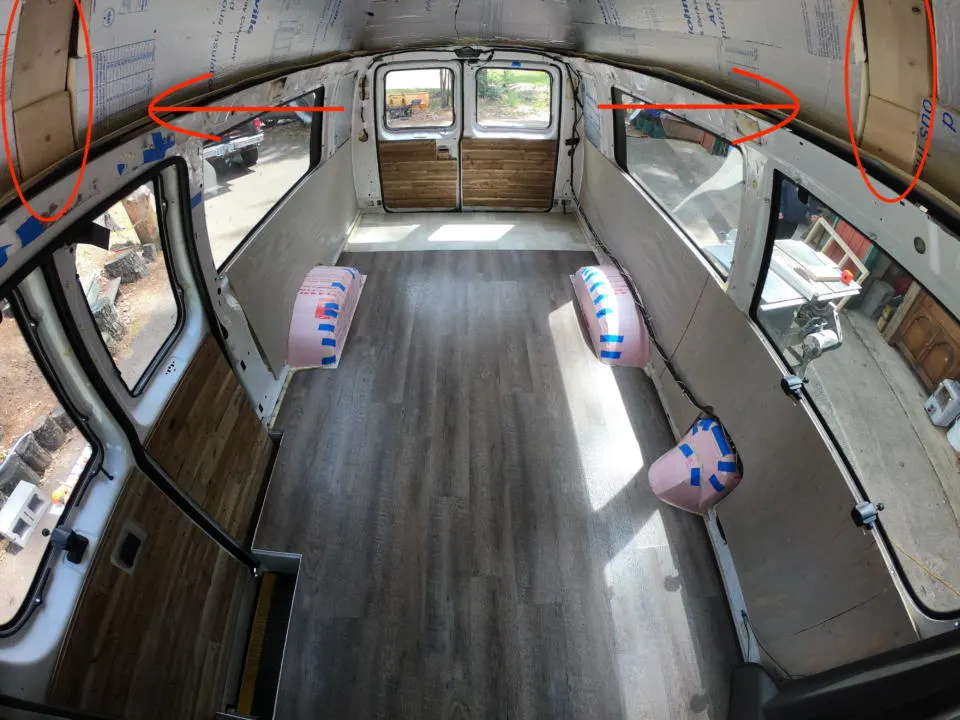
Fiberglass hightop van conversions present unique challenges because it’s more difficult to attach anything to the roof. When converting a van with a fiberglass hightop, you may want to mount a cargo ski box for hauling skis, toys, or extra storage. But mounting a ski box so that it’s sturdy enough for highway speeds and backcountry roads is difficult. How can you secure a heavy cargo box with only a thin, curved fiberglass surface?

We ended up making custom-shaped T-braces as our main anchor points. Then we used those T-braces to attach a rack. And then finally the ski box just attaches to the roof rack, just like any other vehicle would have. This post describes exactly how we attached a ski cargo box to our fiberglass hightop van.
I want to start by saying that I am not a professional. The method described here is my best attempt to make the most safe, sturdy, and affordable mounting system. After 2 years on the road, with plenty of highway and rugged backcountry roads, the ski box has held in place without problems. You assume any risks associated with trying to recreate our setup.
And also, not all fiberglass hightops are the same. They come in various shapes and sizes. They may vary in thicknesses, structure, and may or may not have interior supports. For what it’s worth, our fiberglass hightop has wooden ribs built into the fiberglass that run the length of the roof. And though you might assume fiberglass is weaker than steel, pound for pound it is actually stronger. So there is reason to have some confidence that a safe mounting system is reasonably achievable.
Okay, let’s begin.
This post may contain affiliate links. Disclosure policy.
Planning The Mounting Setup

Part of keeping this setup affordable was just using what we already had on hand. Before getting our campervan we had a Yakima Skybox mounted on the roof of my car with Thule Gutter-Mounted Cross Bars. We got both of these items used, so we saved a bunch of money. I planned on making these two items fit our campervan somehow. But the van’s gutters are about a foot lower than the highest part of the roof, so it’s not possible to use the gutter-mounted cross bars the proper way.
Even the “Super High” Gutter Feet aren’t tall enough for our particular fiberglass roof. And they do make Artificial Rain Gutters, so that you can use gutter-mounted racks on vehicles without gutters. But even those wouldn’t work for us either, but worth mentioning in case that works for you. So, I knew that I would have to find some way to attach the cross bars to the fiberglass itself. And fiberglass hightops are typically curved, so it basically requires some kind of custom fit mounting brackets to fit the curvature of the roof.
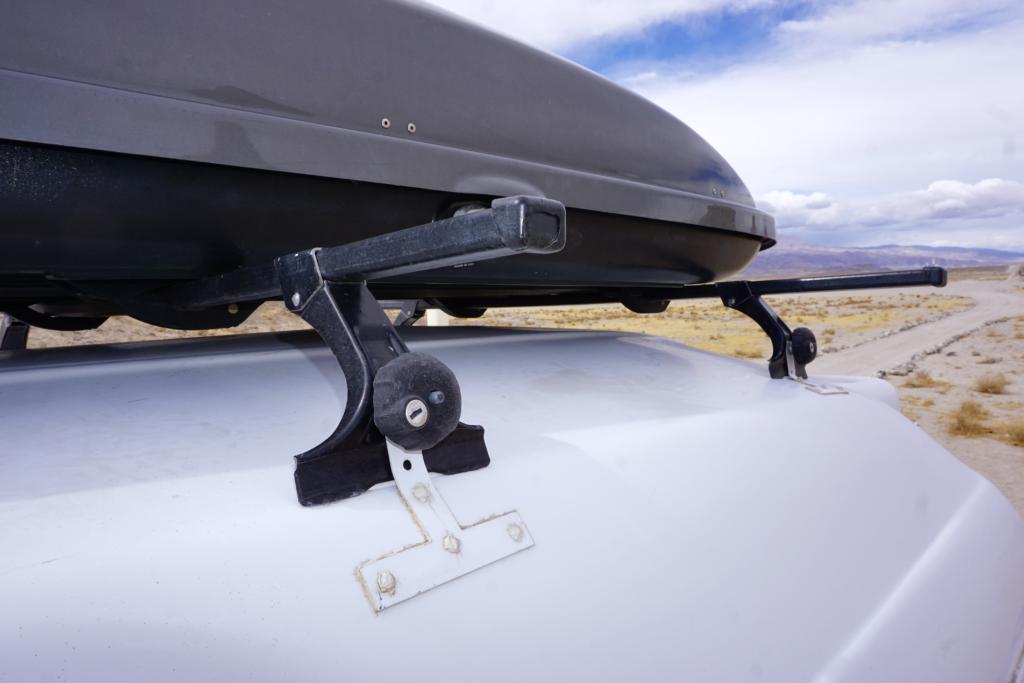
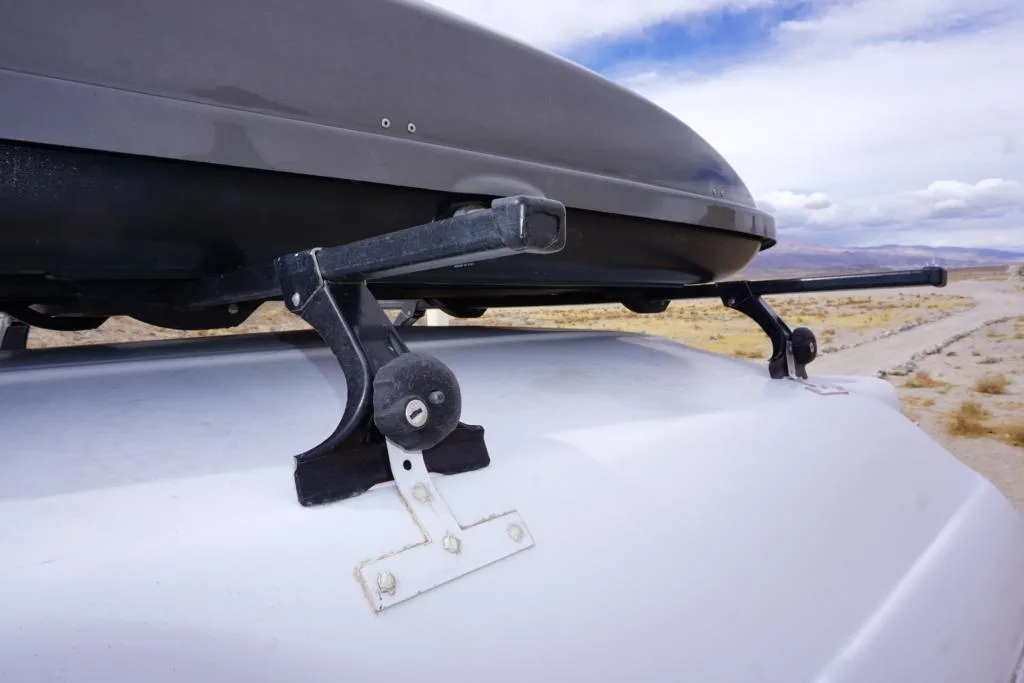
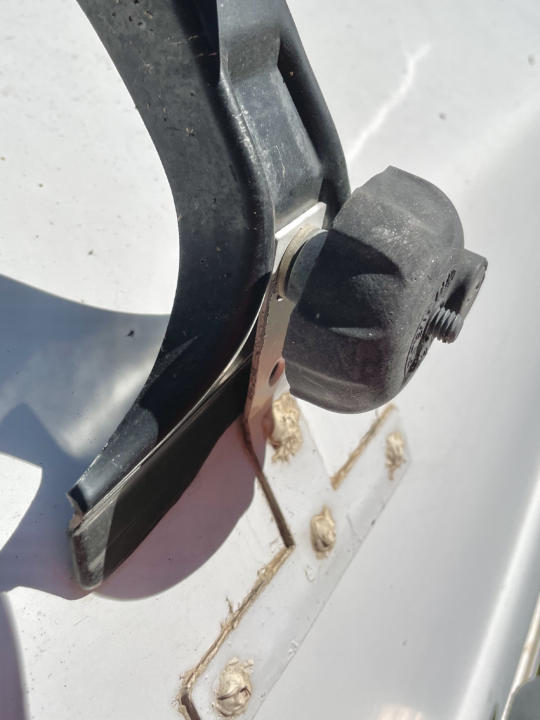
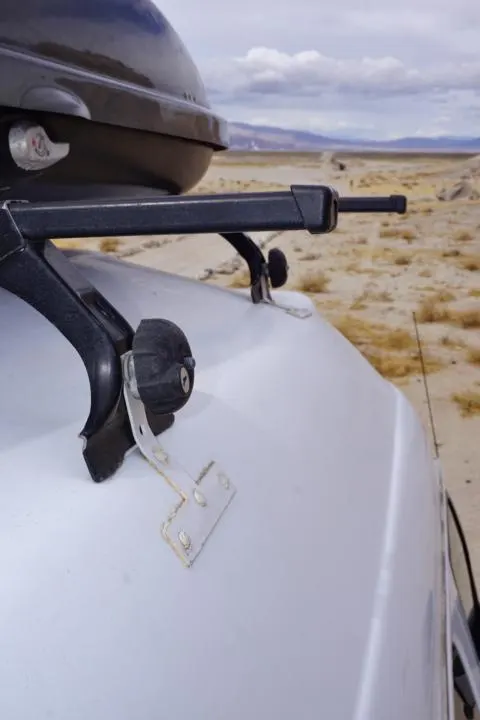
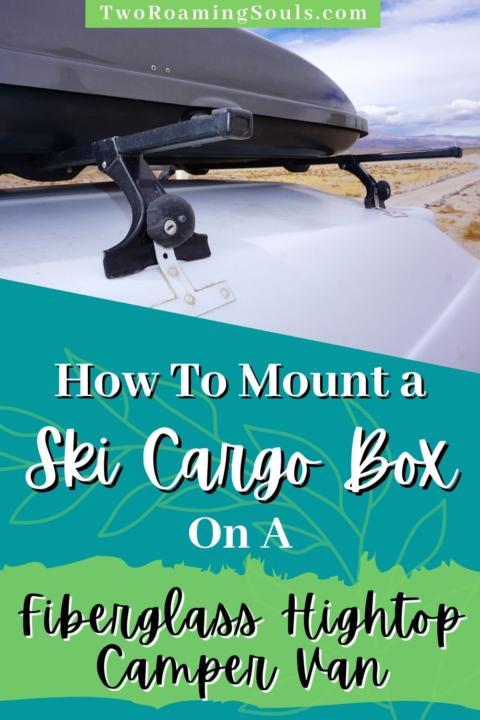
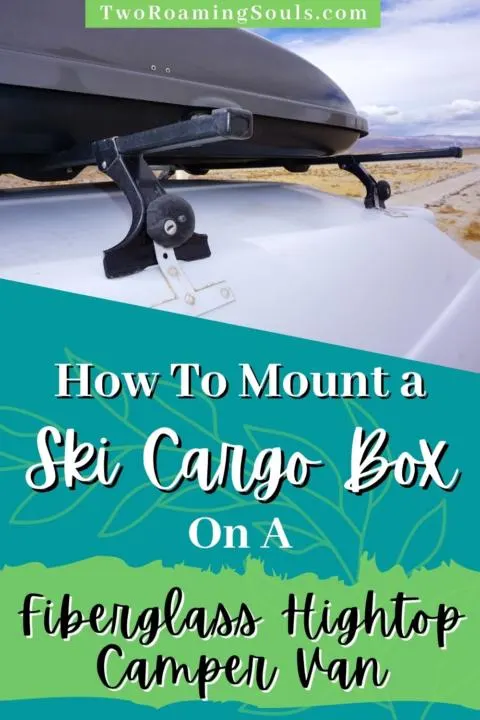
I decided to use steel T-braces because their shape and strength allows a secure mounting to the fiberglass, and the top hole can be used to attach the cross bars. The Thule Rack already has a bolt and tightening knob that typically just clamps down on the gutter rails. I modified its purpose by passing the bolt through the top hole of my T-braces, like this…

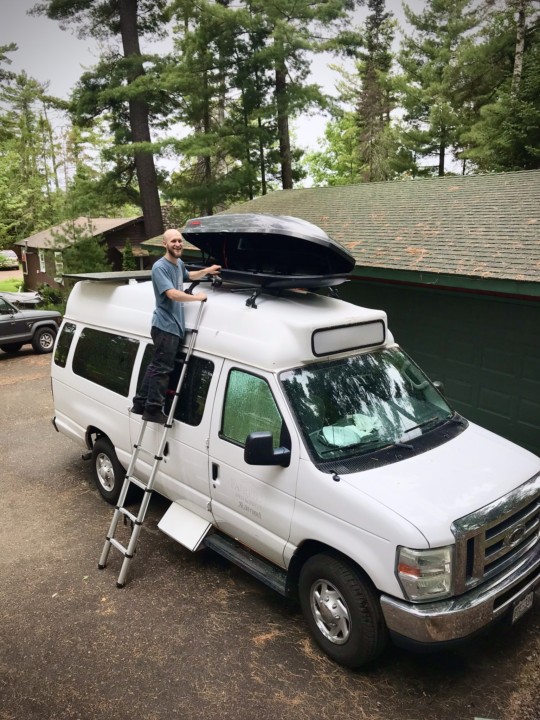
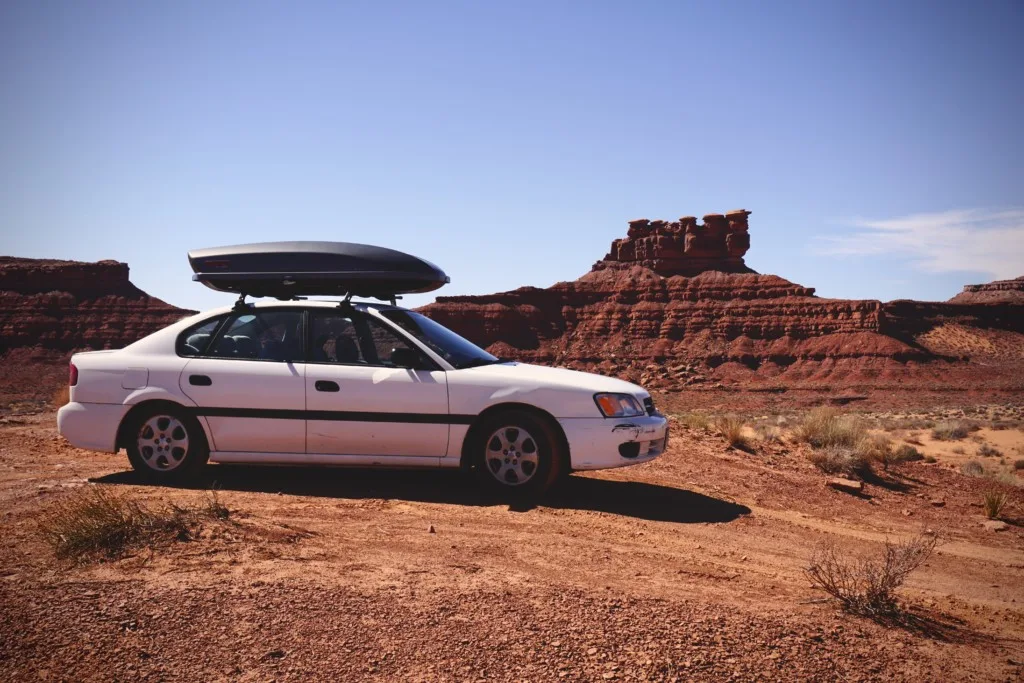
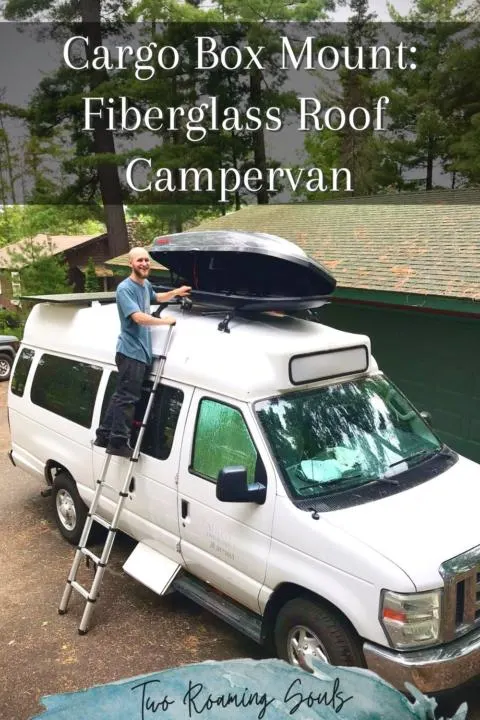
We had figured out pretty early in the conversion planning that our solar panel would go in the back, vent fan in the middle, and ski box in the front. We decided to mount everything right in the center of the van. Our Yakima Skybox opens from both sides, so with our telescoping ladder leaned up against the van we can easily reach anything stored in the cargo box.
Deciding Where to Mount The Cross Bars
So, once I knew roughly what the plan was, it was time to figure out where to put the cross bars so that the ski box would lay flat. The mounting clamps on the bottom of the Yakima Skybox can slide along tracks to accommodate a range of distances between your cross bars. The first thing I did was measure the minimum and maximum mounting distance the ski box could accommodate. The cargo box can be mounted on bars between 24” and 36” apart. I resolved that I should aim for about as far apart as possible to have the most stability. The distance we settled on was 33” apart, because our roof starts to curve more dramatically the closer you get to the front of the van.
Then it was time to dry fit everything to figure out exactly where to place the Thule Cross bars. This took a decent amount of trial and error on a ladder. I kept making small adjustments while keeping the two cross bars roughly 33″ inches apart. I wanted the ski box as far back as possible without interfering with our vent fan.
I also knew that I wanted the “feet” of the Thule cross bars to be as far towards the edge of the roof as possible. This placement helps transfer the weight of the cargo box down on the vertical “sides” of the roof, rather than having the weight over the middle of the roof.
The problem that I ran into was that the roof slopes down towards the front of the van. So in order to have the cross bars on the same horizontal plane, I had to place the mounting feet of the front bar closer to the center. This is hard to explain with words, so here’s a picture to illustrate.


Shaping And Mounting The T-Braces
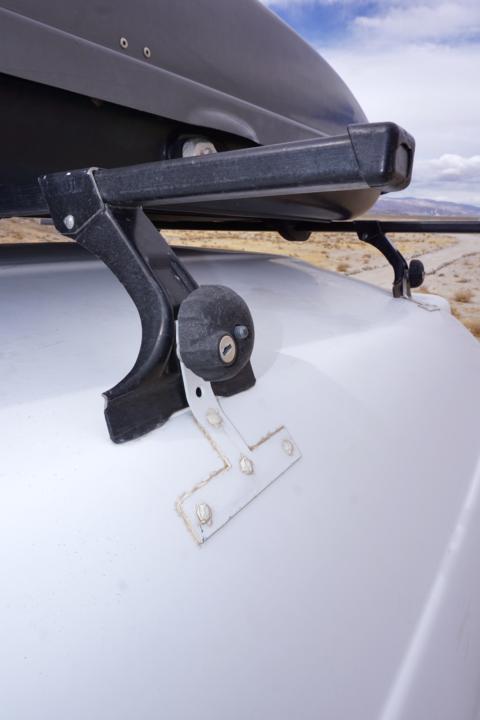

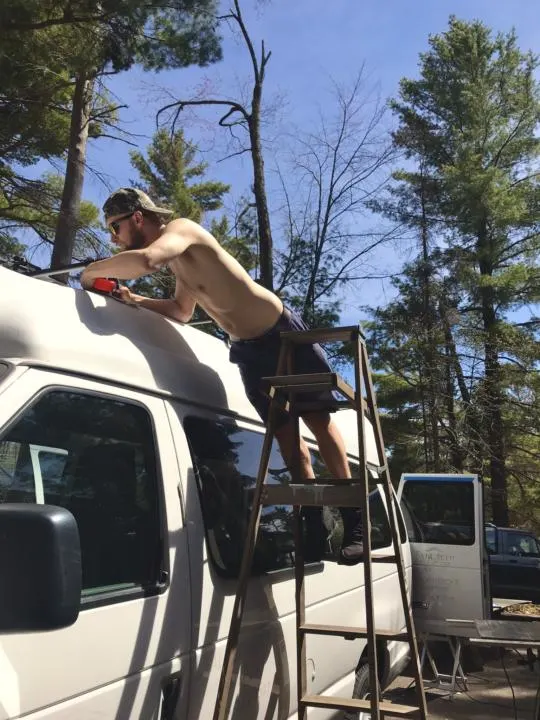
Once I had chosen the best place to put the cross bars, I marked their location with painter’s tape. Then I dry fit the steel T-brace directly next to the Thule mounting feet to see roughly where it would go. This gave me an idea of what curvature I needed to conform to. Each pair of T-braces (front and rear) was symmetrical, but mirror copies of each other. I also noticed that the centermost hole was too high up, so I drilled another hole in the middle of the T-brace. This gave me the fourth hole I wanted for stability.
I chose T-braces that were as thick as possible, while still possible to bend with hand tools and a table vice. This process required lots of trial and error as I kept shaping the T-brace and then checking it’s fit against the curved fiberglass roof. The fit doesn’t have to be absolutely perfect, because small flaws will be fixed when they are bolted tight. The closer the fit, the better, but generally within a 1/16” was an acceptable margin.
Next, with all four T-braces custom shaped to fit in their exact spot, I attached them to the Thule Cross Bars. Then I traced out the four bottom holes of each T-brace with pencil. The resulting marks are where I drilled through the fiberglass roof.
I also spray painted the T-braces with a couple coats of white paint, once they were finished. That way the blend into our white van better.
Adding Additional Wooden Interior Supports
To add more structure and strength, I glued some wooden supports to the inside of the fiberglass. I used 1” thick wooden boards that rested on the ledge where the fiberglass roof and original roof meet. These wooden supports also had to be somewhat curved to fit along the inside of the roof, so it’s made up a few pieces angled together. I glued them in place with JB Weld. My theory is that the weight of the ski box somewhat transfers to the wooden supports that are resting on the frame of the van. Perhaps overkill, but there really is no guide book on this stuff, so better safe than sorry.
Drill Holes And Assemble
With the wooden supports in place on the inside of the fiberglass, I finally drilled holes where I marked with pencil earlier. But I did wait a day, to make sure the epoxy had time to cure.
Then it was finally time to put everything together. The T-braces are designed to be used in wood screws, so the holes are countersunk on one side (they are slanted around the rim). But we can’t use wood screws for this job because the fiberglass wont tolerate the angled head of a wood screw. So instead, I flipped the T-brace over to the other side, where the holes are flat around the rim. Then I used stainless steel phillips head machine screws with round heads. This is important! The round-head screws are flat on the underside, so they lay flat against the T-brace and don’t stick out too far.
On the inside of the van the flat tip of the machine screw allows washers and nuts to secure the T-braces from the inside. You will need a second person to help, one person tightens the bolts from the outside while the person inside the van holds the nuts from spinning.
Seal The Cracks And Mount The Ski Cargo Box

After the T-braces and cross bars where mounted, I used 3M 4200 Marine Sealant to cover all the possible holes around the T-brace. This will ensure that water does not enter through the holes in the roof that you have created. I find it helpful to use a toothpick (or similar) for spreading out globs of the sealant in a more controlled way. Get all the heads of each bolt, all the edges of the T-brace where it meets the van, and don’t forget the top edge underneath.
Then I attached the Yakima Skybox cargo box to the cross bars using the typical clamps.
Conclusion | How to Mount a Ski Cargo Box On Fiberglass Hightop Campervan

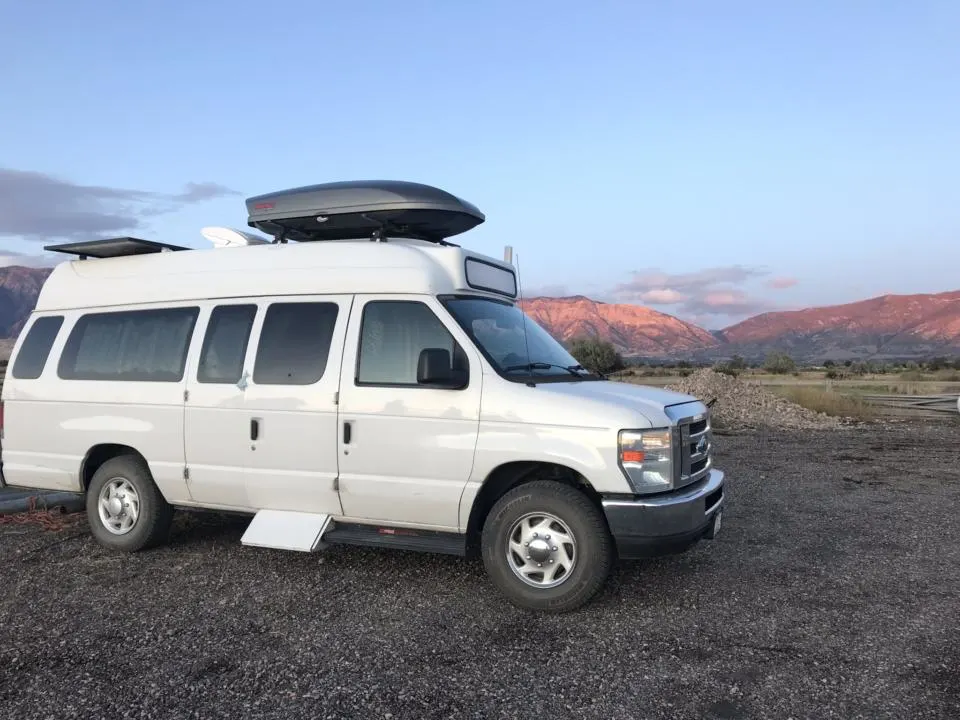
After 2 years of full-time travel, the cargo box is still holding strong. The mounts show no signs of movement or distortion. It’s admittedly not the easiest mounting system, but this is the reality of having a curved piece of fiberglass for a roof. I hope you find this information helpful if you are struggling with how to mount a ski cargo box to a fiberglass hightop van.
Help Share ‘How To Mount A Ski Cargo Box On a Fiberglass Hightop Van’ On Pinterest!

How Much Did Our DIY Camper Van Conversion Cost - tworoamingsouls
Monday 10th of April 2023
[…] We decided to add a cargo box for extra storage on our roof. Because our van came with a fiberglass hightop, we couldn’t just add our roof rack like you normally would to most any other car. (Learn how to install a cargo box on a fiberglass hightop) […]
Campervan Storage Hacks | How To Maximize A Small Space - tworoamingsouls
Friday 7th of April 2023
[…] There are a few different external cargo options that can help optimize the amount of space you have for storage in your campervan. Jake and I have a Yakima Skybox that is attached to our roof rack on our fiberglass hightop. If you have a fiberglass hightop, check out our guide for how to attach a cargo box on a fiberglass hightop roof. […]
How To Mount Things To The Roof Of A Fiberglass Hightop Van - tworoamingsouls
Wednesday 14th of July 2021
[…] You can read our entire post about How To Mount Ski Cargo Box On Fiberglass Hightop Camper Van […]