
Backpacking the Kalalau Trail in Kauai is one of the most sought-after hikes in the world. This challenging 22-mile backpacking trip skirts the scenic NaPali coast, ending at the incredible Kalalau Beach. Hiking and kayaking are the only ways to set foot on this unique natural treasure.
The trail is notoriously dangerous for its thin trail with sheer cliffs above the ocean. But with the danger comes incredible views of the coastline. Hiking the trail requires permits and considerable preparation. It should only be attempted by experienced hikers. But this Kalalau trail backpacking guide will walk you through everything you need to know.
Seriously, I get into the nitty-gritty logistical details. From permits and backpacking gear, to route planning and luggage storage, this post describes it all.
Permits For The Kalalau Trail
Be aware that you MUST plan ahead in order to backpack the Kalalau Trail. The rules for permits, parking passes, and reservations are enough to make your head spin. But don’t worry, I will simplify the process.
Part of the confusion comes from the fact that the trail exists in two separate, but adjacent, state parks. The beginning of the Kalalau trail (and parking/trailhead access) is in Haena State Park. The rest of the trail is in The NāPali Coast State Wilderness Park.
Secure a Camping Permit for NāPali Coast State Wilderness Park.
The first thing to do is secure a camping permit because without it you cannot hike the trail. Permits are made available online 90 days in advance, and sell out quickly, especially during the summer months. The permit costs $35 per person, per day ($10 per day discount for Hawaii Residents). They currently only allow 60 people on the trail at a time.
Remember to print your camping permit before getting to the trailhead.
Walk-In Permits
An additional 20 permits per day are made available for walk-in applicants only (But only for May 15 thru September 7 hiking dates). They are made available 30 days in advance at the Kauai State Parks Office in the State Office Building in Lihue. So they are really only geared towards people living in Kauai long-term. They are available on a first-come first-served basis from 8am-11am., Tuesday through Thursday, each week in the summer.
Parking/Access to Hā’ena State Park
Next, you need to decide how you plan to get to the trailhead in Hā’ena State Park. There are a couple different requirements based on how you get there.
The Kalalau Trail begins in Ha’ena State Park on the far north coast of Kauai. This is about 1 hour and 15 minute drive from Lihue Airport. However, you should plan to arrive in Kauai at least one day before so that you can get an early start on the trail.
Emily and I started the hike the day after we arrived in Kauai, but we would not recommend it. Hitting the trail the morning after a long travel day feels too rushed.
Plus, it doesn’t offer much flexibility if you experience any travel delays. Your camping permit is tied to specific dates and it cannot be changed. So adding an extra day for cushion would be wise.
Many people will opt to camp the night before, since they already have camping gear. Plus, it is by far the most affordable accommodation in Kauai. Camp Naue, Anini Beach Campground, and Kumu Camp are three great options. You can learn more in our complete guide to camping in Kauai.
To get to the Kalalau Trailhead the three best options are rent a car, take the shuttle, or arrange a ride.
Rent A Car
To park a car at the trailhead, you need to purchase a separate overnight parking permit for Hā’ena State Park. Do this only after you secure your camping permit (they will ask for it). To access the trail, you park your car at the Ke’e Beach Overflow Parking Lot.
Reservations open 30 days prior at 12am Hawaii time. And parking passes are quite limited so set a reminder to get one right when your date becomes available.
Renting a car is nice because you can reach the trail (mostly) on your own schedule (the lot is open 6:30am-5:40pm). When you are exhausted after the hike, you can simply hop in your car and go.
But the negative is that you are basically paying for the car to sit in the lot while you are on the trail. And vehicle break-ins can happen, so you shouldn’t leave any valuables in the car. I recommend a sedan so you can have any personal items in the trunk, not visible. (More on luggage storage below).
The cost for an overnight parking permit is $20 per day that your car occupies the lot. (For example, a 2-night trip pays for 3 days, a 4-night trip pays for 5 days, etc). Make sure you print your overnight parking pass.
Taking the Shuttle
Ha’ena State Park has a shuttle that takes visitors from the nearby town of Hanalei, with a few stops along the way. The round-trip cost is $35 for adults 16+, and $25 for kids, 0-3 yrs free. It includes entry into the park.
The shuttle runs every 20 minutes daily from 6:30am to 5:40pm. You will book your shuttle for a specific time. However, if you do miss your time or want to change, there is the option to ride stand-by.
Shuttle reservations open 30 days prior at 12am Hawaii time.
The shuttle route begins at The Waipa Park & Ride. Note that no overnight parking is allowed at the park & ride, so you must be dropped off or arrive on foot. It is clearly oriented toward Day-Use visitors to Haena State Park.
You can ride the Kauai Bus to Hanalei (Route 400 – Lihue to Hanalei). But sadly the last stop is still 0.6 miles from the park & ride. It’s a bummer that one of these services doesn’t close the gap between them. But as it stands now, you will be adding another 1.2 miles onto an already long and strenuous hike. Or you can try to hitchhike.
Overnight parking is also allowed at Ali’i Kai Resort in Princeville. And from there use the North Shore Shuttle. For more information please call (808) 826-9988
Arrange A Ride
If you arrange a ride to get dropped off and picked up (or arrive on foot/bike), then your Kalalau Trail camping permit is the only thing you need. You can arrange a ride to the trailhead with a local Kauai resident, taxi, or ride-share. Ride share apps like Uber and Lyft have the ability to schedule rides in the future, but I would personally be a little skeptical of this in Hawaii. And remember there is no cell service in Hā’ena State Park or anywhere along the trail.
So you NEED to make sure you pre-arrange your pick-up for when you have finished the trail. This can be a little difficult because it’s hard to know exactly how long it will take you to hike out. But this post will provide you with a good estimate.
And keep in mind that parking along the roadside before the park is illegal and strictly enforced.
Haena State Park now uses the Ke’e Beach Overflow Parking Lot for all visitors who drive in. It’s the closest you can get to the actual trailhead by car. This is where you will park your car if you are driving, and also where the shuttle drops off.
Sadly this overflow lot is still 0.3 miles from the actual “trailhead”. Which adds another 0.3 miles (0.6 miles round trip) onto an already very long hike. And the bathrooms and outdoor showers are also located 0.3 miles in at the former trailhead.
I know it doesn’t seem like much, but it actually ends up being quite an inconvenience. On the very first morning, I held a pee for way too long while we finished packing up our gear for the trail.
And at the very end of the hike, we would have loved to shower and change, but there was no way we could be talked into going back to our car for a clean change of clothes. Basically limping an extra 0.6 miles to shower. (Luckily we found some showers nearby at Haena Beach Park).
I would have been a little embarrassed to get on the shuttle smelling as bad as we did.
Kalalau Trail Highlights
First, let’s cover the main highlights of the trail so that you know what to expect.
Ke’e Beach (0.3 miles) – This is where the official trail begins in Ha’ena State Park
Hanakapi’ai Beach (Mile 2) – Scenic cove beach often with big surf
Hanakapi’ai Falls (Adds 4 miles) – A 2-mile spur trail to popular day hiking waterfall and swim spot
Hanakoa Valley (Mile 6) – “Halfway Point” Lush valley with campsites and flowing stream.
Hanakoa Falls (Adds 1 mile) – A half-mile spur trail to cascading waterfall
Crawler’s Ledge (Mile 7) – Infamous rocky ledge section overhanging the ocean
Kalalau Beach (Mile 11) – Final destination, huge beach with fluted green mountains towering over. With campsites, waterfall, sea caves, and more.

Route Planning
There are actually very few decisions to make as far as route planning goes. There are only two designated camping areas along the entire trail; Hanakoa Valley and Kalalau Beach. So you should plan your daily mileage around these locations. Campsites are first-come first-serve.
The real highlight for most people is Kalalau Beach and rightfully so. It takes the majority of a day to make it there from the trailhead.
You should plan to have at least one overnight at Kalalau Beach, but two or more would be better.
However, a detour to the two optional waterfall trails is a popular reason why people camp at Hanakoa Valley (the “halfway point”). Hanakoa Falls (add 1 mile) and especially Hanakapi’ai Falls (add 4 miles!) are long enough detours that you might need to camp at Hanakoa Valley.
If you include a waterfall trail or you get a late start on your first day, you may not have enough daylight (or energy) to make it all the way to Kalalau Beach in one day.
And lastly, bad weather is another reason that people might camp at Hanakoa.
Note: You cannot stay two consecutive nights at Hanakoa Valley. There is a very limited number of tent sites there, so this rule insures that there is space for people who need it.
How Many Nights To Book?
When you get a camping permit, you need to decide how many nights to book. The maximum number of nights allowed on the Kalalau Trail is five. The minimum length backpacking trip is just two days with a single overnight stay.
But I would strongly advise that you aim for two or even three nights. This ensures that you actually have enough time to enjoy the Na Pali Coast, Kalalau Beach, and the two optional waterfall trails along the way.
Technically, it is possible to complete the Kalalau Trail as a day hike, but you are still required to purchase a camping permit even if you don’t stay overnight. And also you basically need to trail run in order to complete the 22 miles in a day.
Personally, I think it is an irresponsible risk to attempt as a day hike. The trail conditions are not conducive to running (muddy, slippery, overgrown, exposure). And the lack of gear you would carry makes you too big of a liability for needing search & rescue.

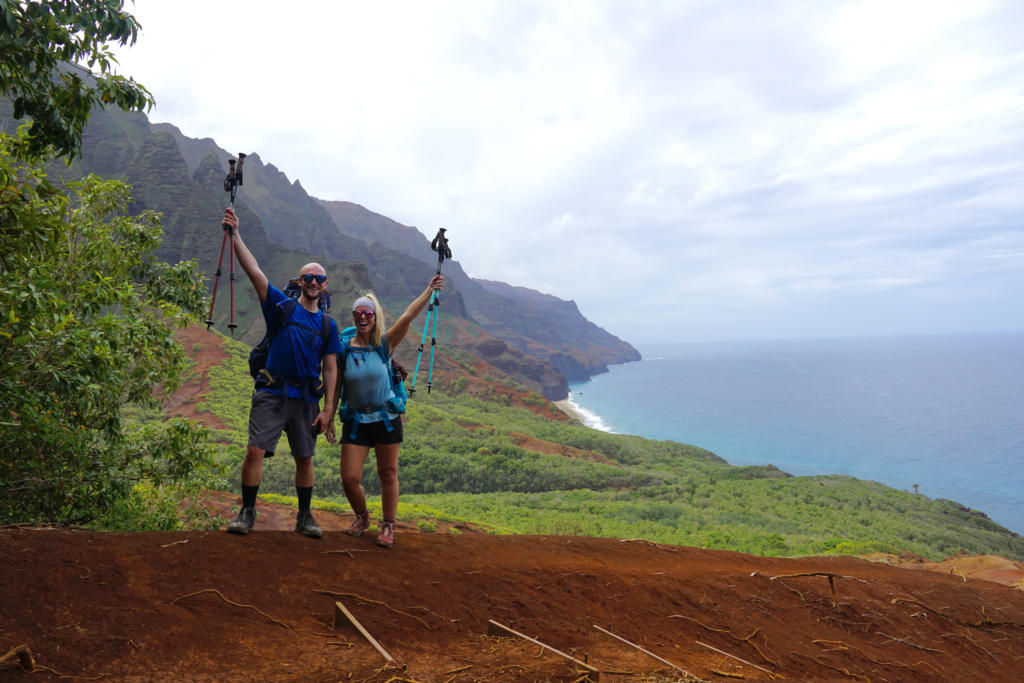
Our Itinerary
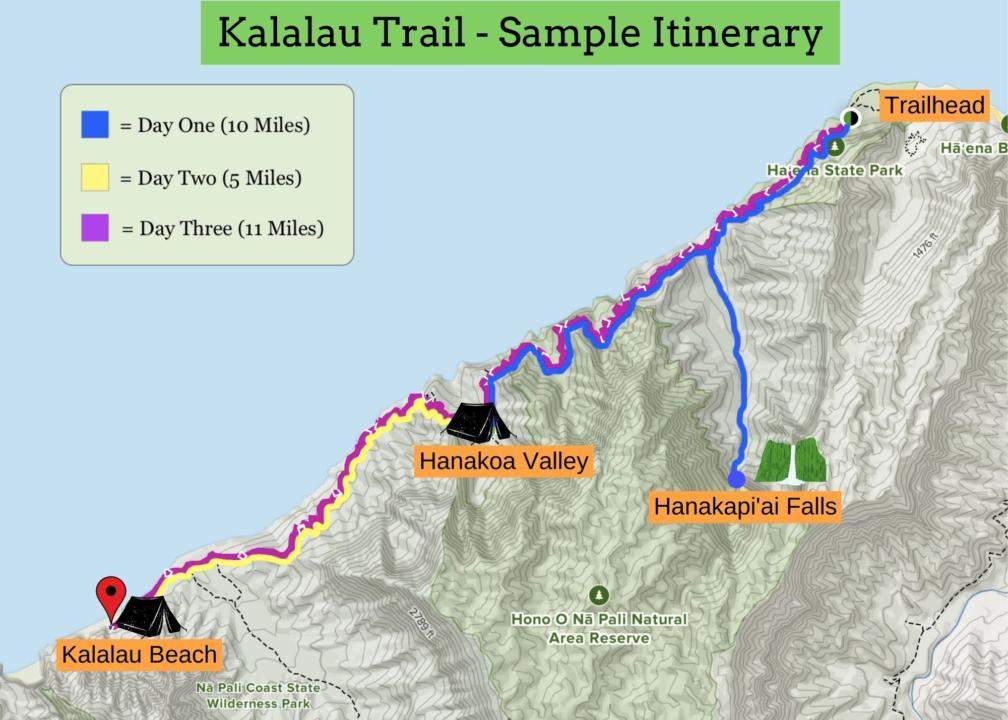
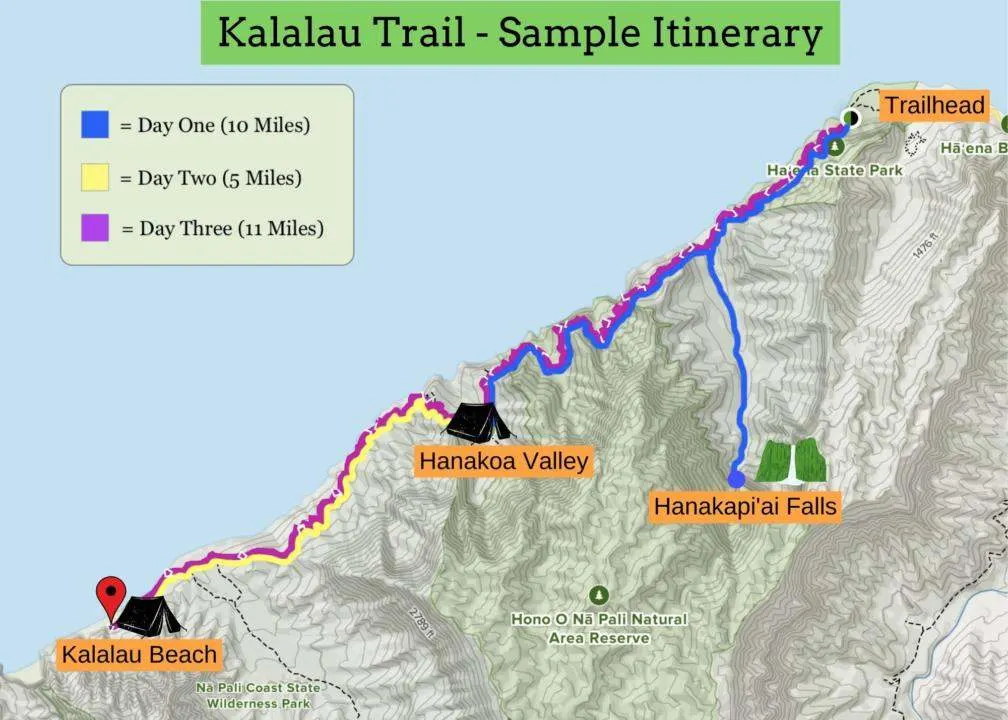
Emily and I completed the Kalalau Trail in Oct 2022 in 2 nights (3 days). Here is the itinerary we followed.
Day One: From trailhead to Hanakoa Valley (Plus Hanakapi’ai Falls) (10 miles)
Day Two: Hiked from Hanakoa Valley to Kalalau Beach (5 miles)
Day Three: Hiked out from Kalalau Beach to trailhead (11 miles)
So our total mileage was probably around 27 miles, when you include the hike to Hanakapi’ai Falls and exploring Kalalalua Beach.
We began early from the trailhead, getting started around 8am. We included the extra 4 miles to see Hanakapi’ai Falls on the first day. So we camped at Hanakoa Valley on the first night to keep the mileage reasonable. We skipped Hanakoa Falls. Then, on the second day, we hiked to Kalalau Beach arriving in the mid-afternoon.

When we arrived at Kalalau beach on the second day we were quite exhausted. When you include the time it took to make camp, filter water, and make dinner, we didn’t have much free time left. And then we hit the trail first thing in the morning to hike back out.
Ultimately, we feel that this itinerary didn’t give us enough time to enjoy Kalalau Beach to the fullest.
So no matter what plan you choose, I would highly recommend that you plan on at least two nights camping at Kalalau Beach. That way you have at least an entire free day to spend at the beach. Trust me, you put in so much effort getting to this special place, you will want a chance to actually enjoy it.
Hanakapi’ai Falls is incredible and worth the detour if you can handle the extra mileage. But if you only booked one or two nights, I would probably skip it to save more time to enjoy/explore Kalalau Beach.
Or you can come back and do Hanakapiai Falls as a day hike (though this still requires day pass entry for Ha’ena State Park).
How Long Does It Take To Hike The Kalalau Trail
Without any detours or long breaks, it takes about 6-8 hours to hike from the trailhead to Kalalau Beach. If you hike slower, or take extended breaks, you could easily get up to 10 hours total time.
Use this information as a guide if you plan your exit from the trail. If you ride the shuttle or arrange a pick-up, you will need to pre-arrange your pick up since there is no service.
Best Time To Hike The Kalalau Trail
Dry Season
The best time to hike the Kalalau Trail is summer from April to October. This is during the dry season.
But keep in mind that the mountains above the Kalalau Trail are one of the wettest places on earth! So the “dry” season could also be called the “not quite as wet” season.
Even in the dry season, it’s not uncommon to have rain. But they are usually fast-moving rain showers, rather than like a full day of constant heavy rain.
Rainy Season
The winter months experience more rainfall, and it’s likely you will encounter some rain on the trail. But consider that Hawaii is known for dramatic microclimates. So while just above you in the mountains it may be raining and cloudy, the coast might be sunny and barely avoiding the rain.
But no matter the time of year, rain will make the trail more slippery/challenging. We find that weather forecasts are almost completely useless for predicting weather in Kauai. It’s almost as if the forecasters just hedge by predicting everyday to be partly-cloudy with 40% chance of rain.
The summer also brings calmer water to the north shore of Kauai. That means conditions will be more favorable to swim in the ocean. Winter swells can make it unsafe to swim at both Kalalau Beach and Hanakapi’ai Beach.
Temperature
The temperature on the NaPali Coast is hot and humid year-round. This is one of the more challenging aspects, at least it was for me. I am used to backpacking in the cool dry mountains of Colorado. But I am not exaggerating when I say that I’ve never sweat more in my life! The entire Kalalau Trail in a full sweat, regardless of shade or clouds.
So prepare for all your gear to be soaked in sweat. Whatever hat or headwear you choose will be equal parts sweatband and sun protection.
Daylight Hours
The amount of daylight also changes throughout the year (albeit not as dramatically as the mainland United States).
The longest days of the year are in July with 13.5 hours of daylight, and the shortest days in December with 10.75 hours. This matters because you need to maximize your daylight hours to make progress on the trail. If you get a late start, you may have barely enough time to make camp and eat dinner before dark. Let alone actually enjoy your surroundings.
On The Kalalau Trail

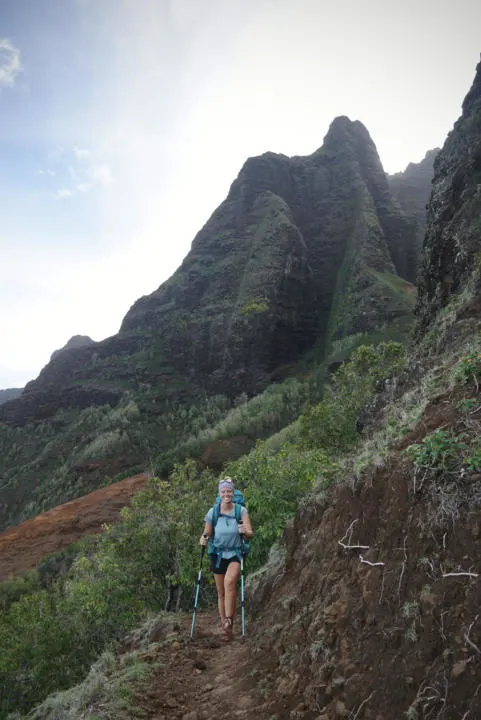
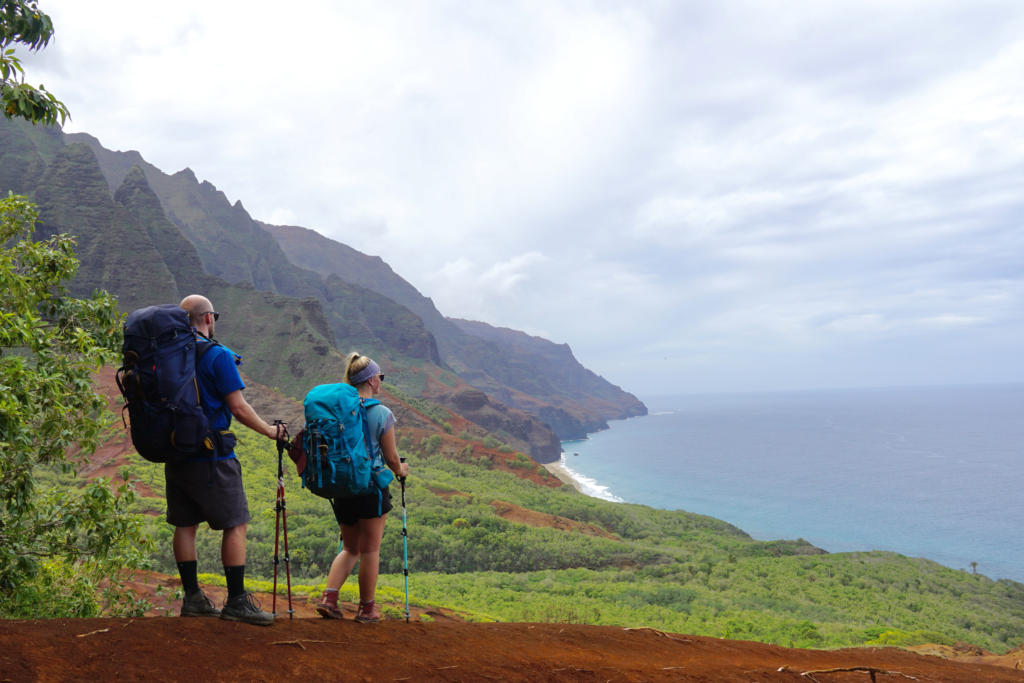
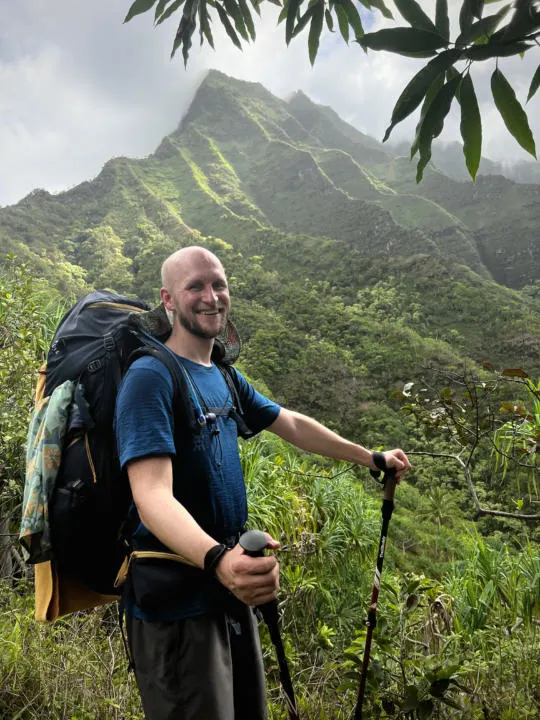
So once you finally hit the trail, here is what to expect. The Kalalau Trail will have you in a constant tug-of-war between struggle and amazement. One second, wondering “why did I decide to do this”, and the next moment thinking “this has to be one of the most beautiful places in the world.”
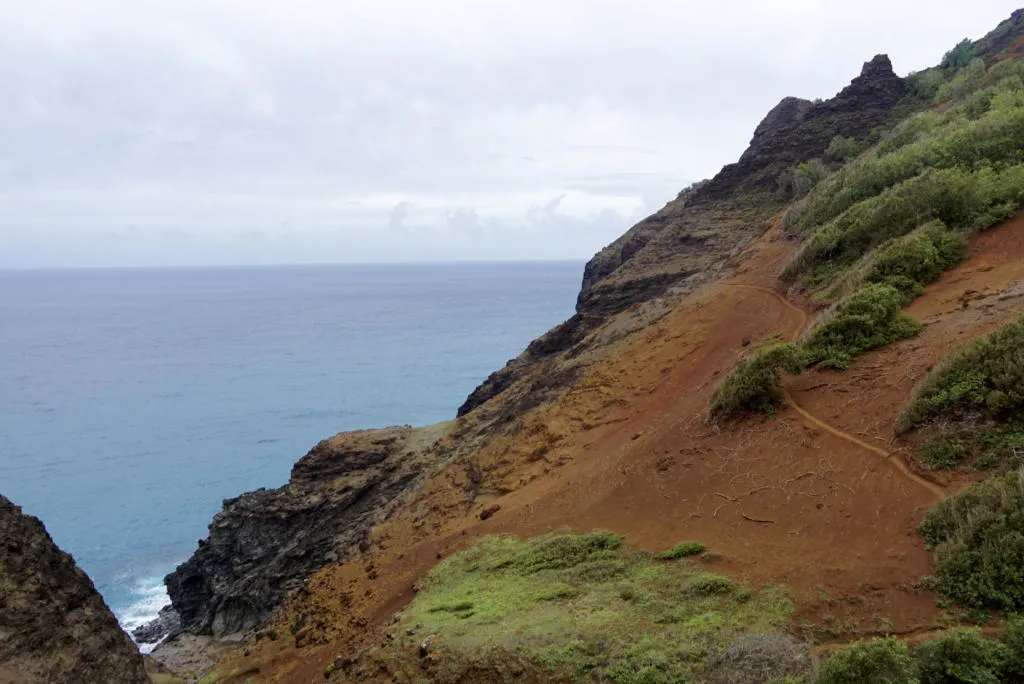
The scenery is capped by jagged green mountains, transitioning to brown and red cliffs butting right up to the ocean. Ahh yes, the ocean, so blue that it demands your attention.
The trail is full of ups and down, emotionally and also literally. And even though the trail starts and ends at sea level, don’t be fooled into thinking it’s an easy hike. We are pretty fit and experienced backpackers, but this was a very challenging hike for us. The trail is almost never flat, with constant elevation gain and loss (6,177 feet).
The trail zigzags in and out of valleys, skirting around the cliffs and mountains that separate them. So much of the trail is carved into steep slopes with many switchbacks. Sometimes you will look back at where you came from and be shocked that a trail even exists in this terrain.
Starting from Ke’e Beach Overflow Parking Lot, you now need to hike 0.3 miles to the actual trailhead.
First Two Miles To Hanakapi’ai Beach


The first two miles of the trail to Hanakapiai Beach are the most well-maintained of the entire route. You will be sharing the trail with lots of other day hikers headed to Hanakapi’ai Beach and Hanakapi’ai Falls.
At the half-mile mark, there is the first amazing view of the Napali Coast. A sight that is sure to get your adrenaline pumping, as you get a taste of what’s to come.
Hanakapi’ai Stream Crossing
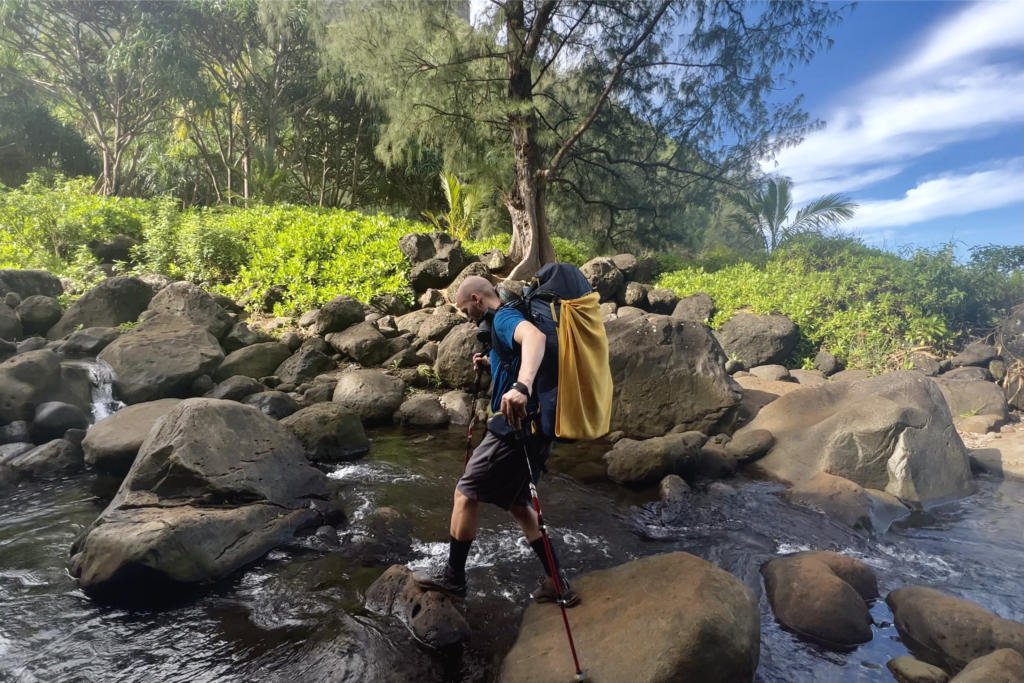

Hanakapi’ai Stream is your first major river crossing. Depending on the water level, you may be able to cross the rocks without getting your feet wet. It’s typically clear and about knee-deep.
However, this area is also prone to flash floods. Be alert for changing river conditions; increased loudness upstream, muddy sediment in the water, and rain storms. DO NOT attempt to cross if it’s flooded. If you are stuck on the other side, just wait until the flood water subsides.
Optional Hanakapi’ai Falls Trail

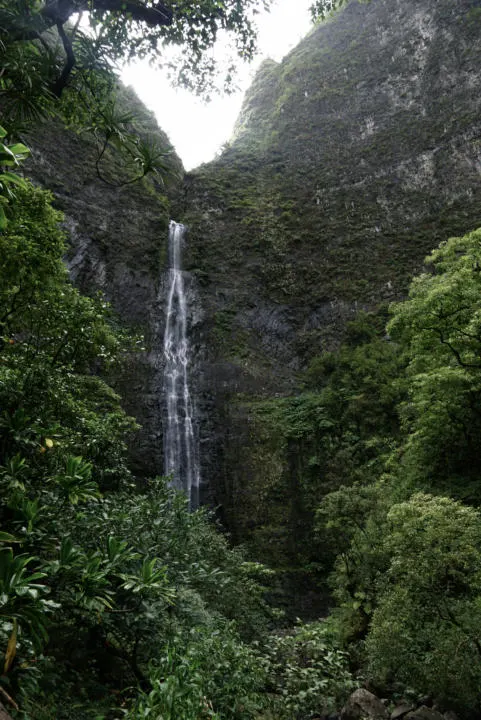
If you decide to hike the optional spur trail to Hanakapi’ai Falls, you will find the trail beginning just on the other side of the stream. The trail is 2 miles each way, thus adding a total of 4 miles.
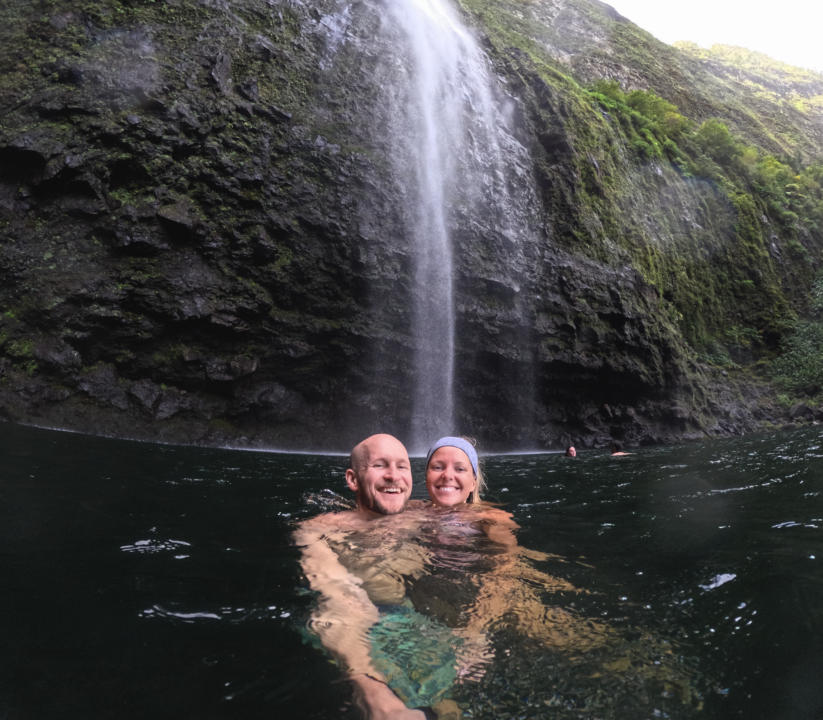
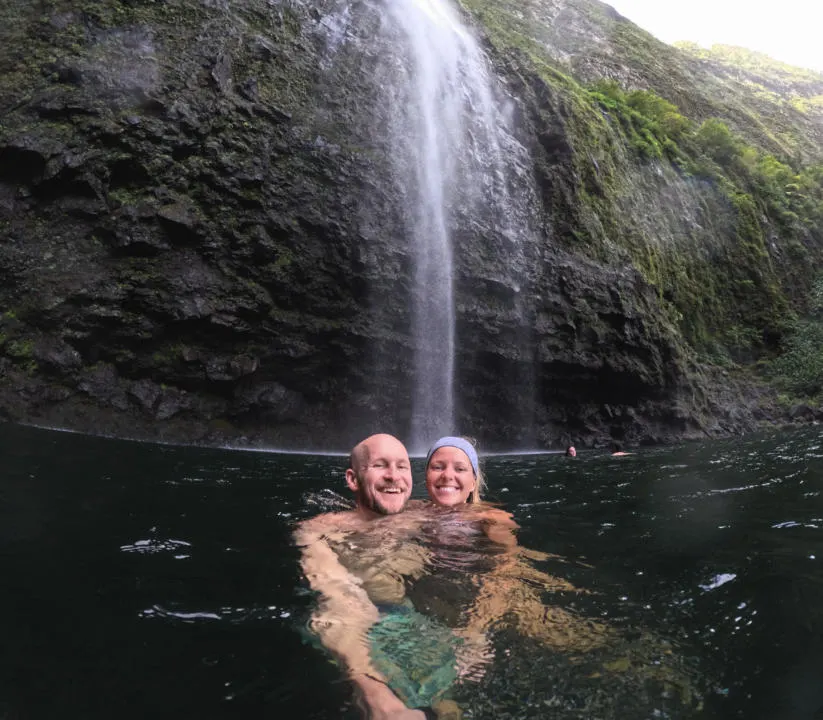
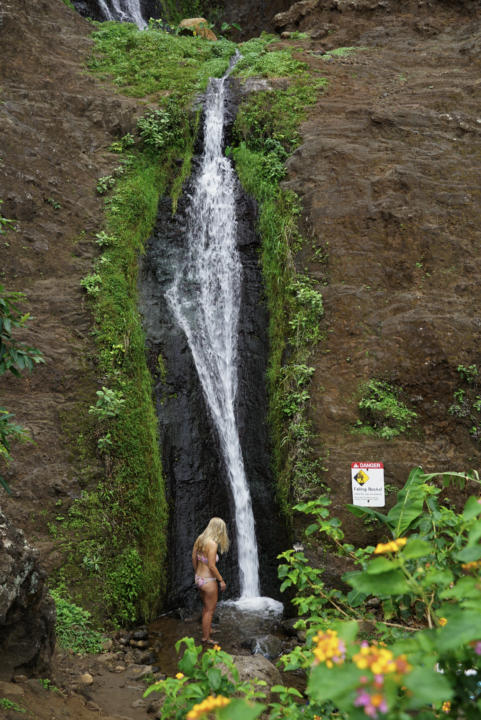
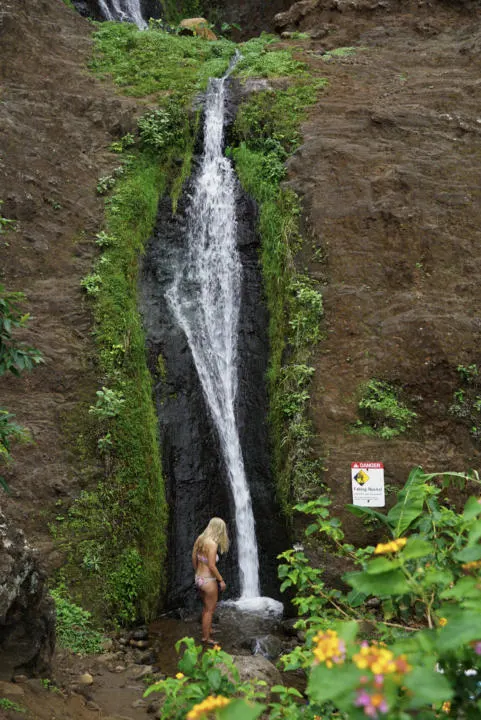
The trail is typically extremely muddy with lots of stream crossings. But the 300-foot waterfall is spectacularly beautiful, and the plunge pool at the bottom is great for a refreshing swim. The water is surprisingly cold but feels amazing after the sweaty hike.
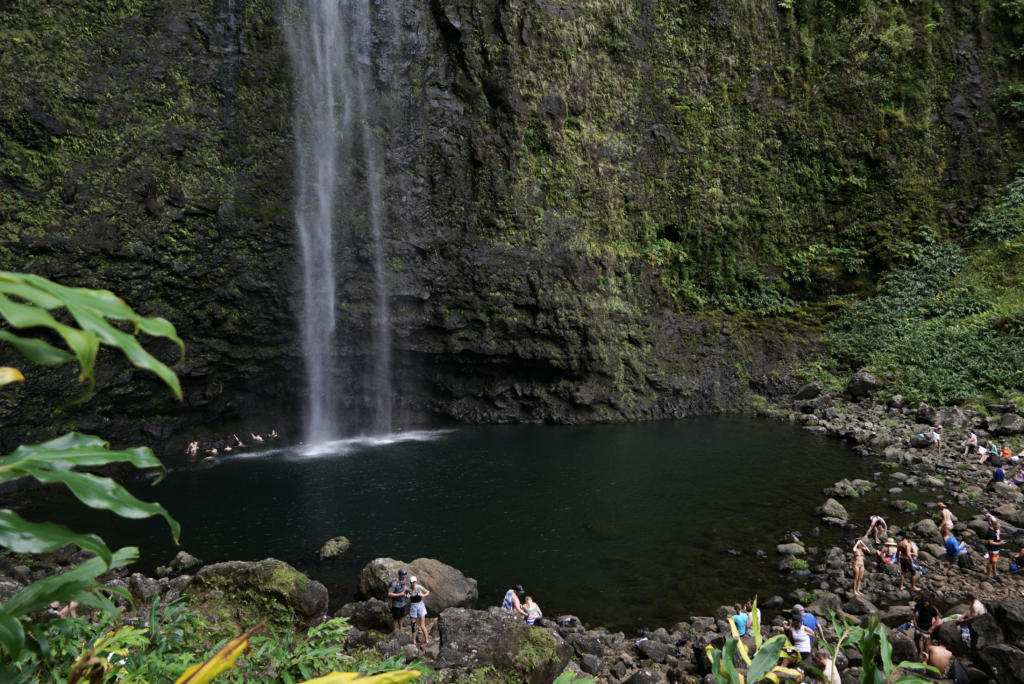

You are likely to encounter many other day hikers sharing this trail and falls area. But luckily the area surrounding the falls and the pool are large enough to accommodate tons of people. It’s best to avoid swimming directly under the falls because sometimes rocks and other debris can come down.
As a backpacker, you will need to decide if you want to carry your entire pack to the falls or stash it somewhere. I would recommend stashing your pack because the trail is not easy with a big pack on.
There is a day-use shelter a few hundred feet past the trail sign for Hanakapi’ai Falls. We stashed our packs there and continued with just water, towels, and camera equipment. We were a little worried about ants, mice, and possible thieves. But no harm was done other than a few ants crawling on our packs.
If you choose to stash your bags, it might be a good idea to bring a small day hiking bag (such as this Matador packable bag), so you can still carry water and any other necessary items.
Next 4 Miles to Hanakoa Valley

Anyone continuing on the trail past the Hanakapi’ai area is required to have an overnight permit. So from this point on, you will only be sharing the trail with other people headed to Kalalau Beach.
The section between Hanakapi’ai and Hanakoa was our least favorite part of the entire trail because it was the most overgrown section. When your trekking poles are constantly catching on things and tripping you up, they become more of a nuisance than a benefit.
This section seems to have endless switchbacks and massive valleys that take forever to cross. And there are very few views of the coast during this section. But don’t worry, the trail becomes more enjoyable!
Hanakoa Valley
When you reach the Hanakoa Valley you will either camp there for the night or continue on to Kalalau Beach. There are no other campsites anywhere along the trail between those two places.
The campsites in Hanakoa Valley are on both sides of the stream. The water flow here is typically quite clear and abundant. There are a couple little pools you could wash yourself in and refill water, but watch out for little crayfish. A fellow hiker told us they pinched someone in their group. Remember to filter or treat all water.
The campsites here are in a heavily shaded area. So just don’t be expecting epic views from your site, it’s mostly just a place to camp for the night.
Optional Spur Trail To Hanakoa Falls
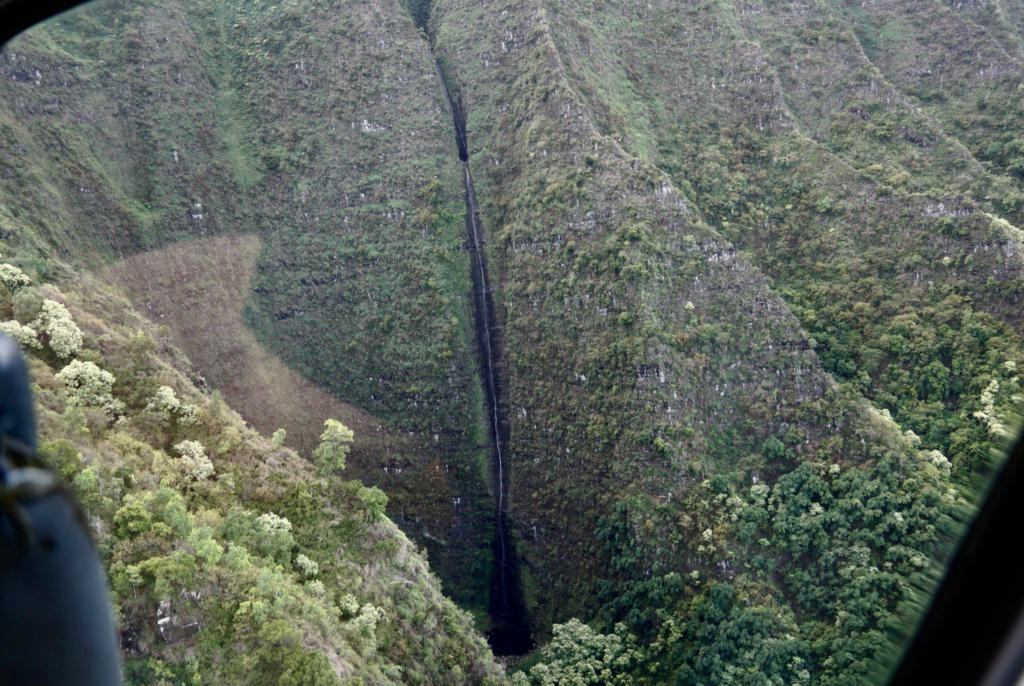
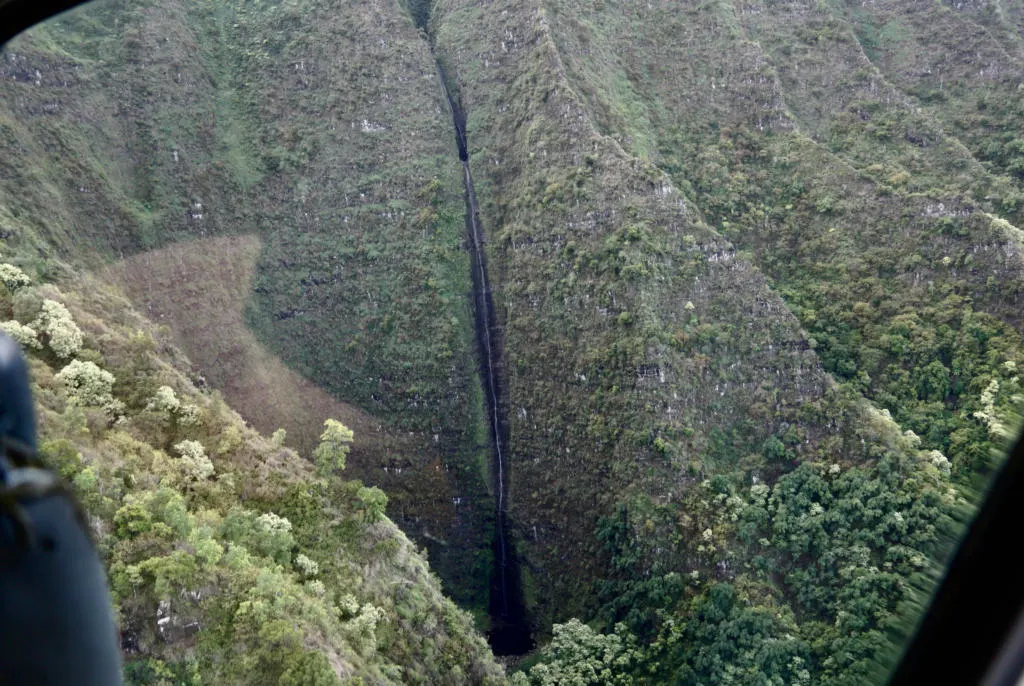
You can hike the optional spur trail to Hanakoa Falls which adds one mile. The falls is technically about 1,000 feet tall! However, you can only see roughly the bottom third from the trail.
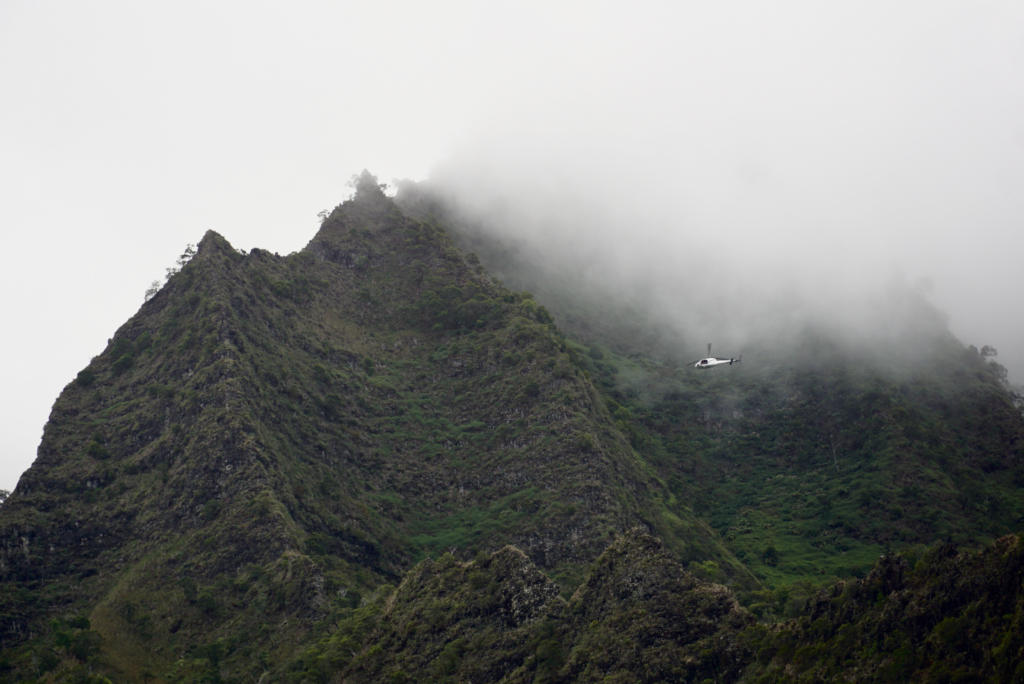
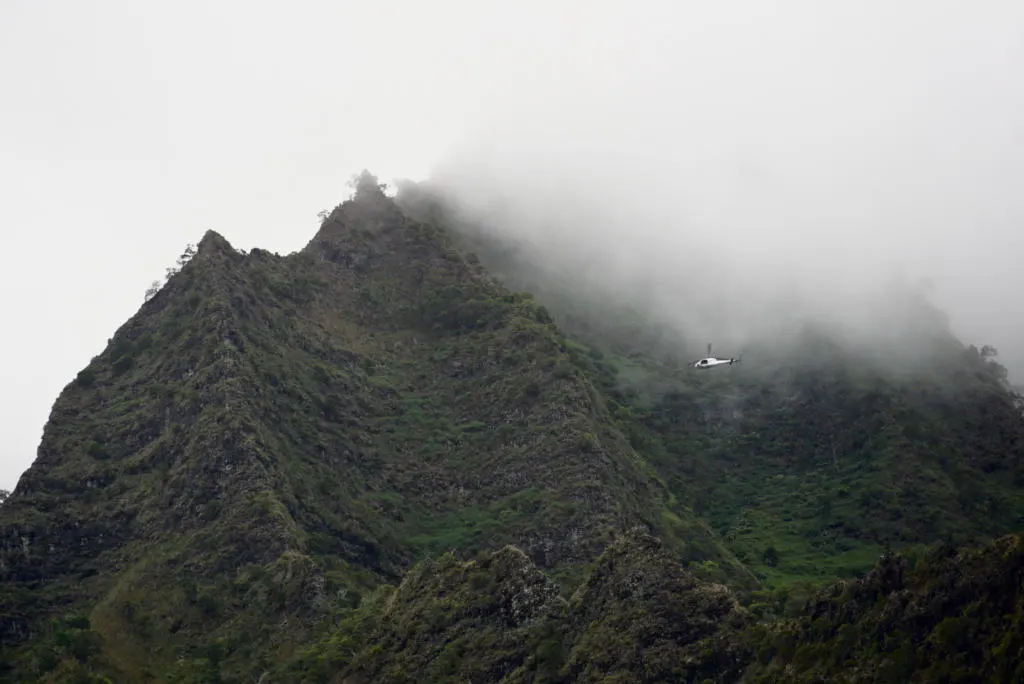
We chose not to hike to Hanakoa Falls. But later that week we took a helicopter tour of Kaua’i and got to see the upper tiers of this waterfall. The view from the helicopter revealed its incredible height, even if the flow was rather weak.
Since many people choose to skip this waterfall, you may have this incredible spot all to yourself. It’s not recommended to swim here because debris coming down the falls is common.
Crawler’s Ledge

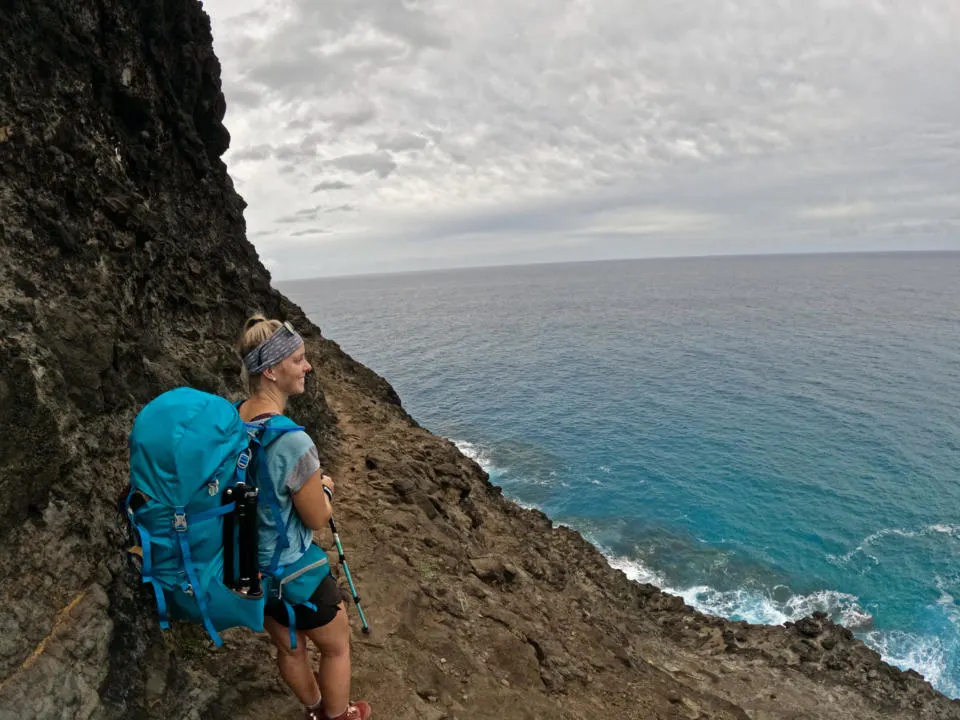
In the next valley after leaving Hanakoa, and just after mile marker 7, you will encounter the infamous Crawler’s Ledge. This section of trail is known for being the most dangerous and requires extreme caution. The trail is cut into a narrow rocky ledge with nothing but sheer rocky faces with a steep drop down to the ocean below. For that reason, the Crawler’s Ledge puts the danger in your face more than any other section of the trail.
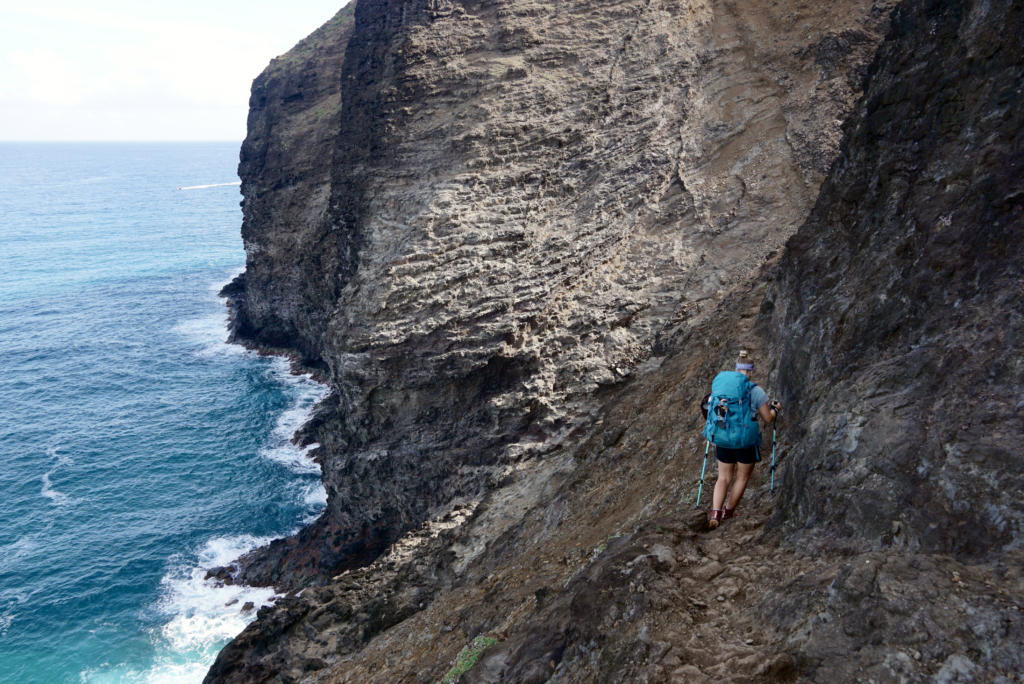
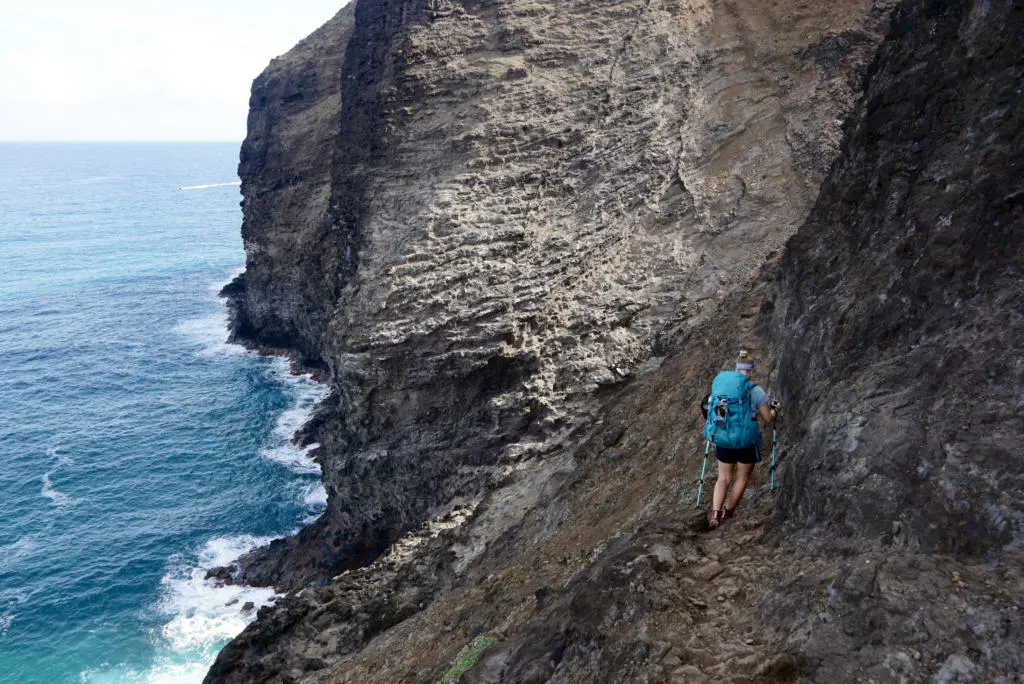
However, we found some later sections of the trail to be even more dangerous, in actuality. There are a few trail sections with loose sand/gravel on steep slopes, that would also be considered a “no-fall-zone”. Places where I was not confident in the traction of each step.

And really, most of the trail has steep edges on the ocean side, not always with the threat of certain death, but still not places you would want to fall.
The crawlers ledge is at least cut into (mostly) solid rock. So I actually was quite confident in my footing the whole time during Crawler’s Ledge.
The Final Push

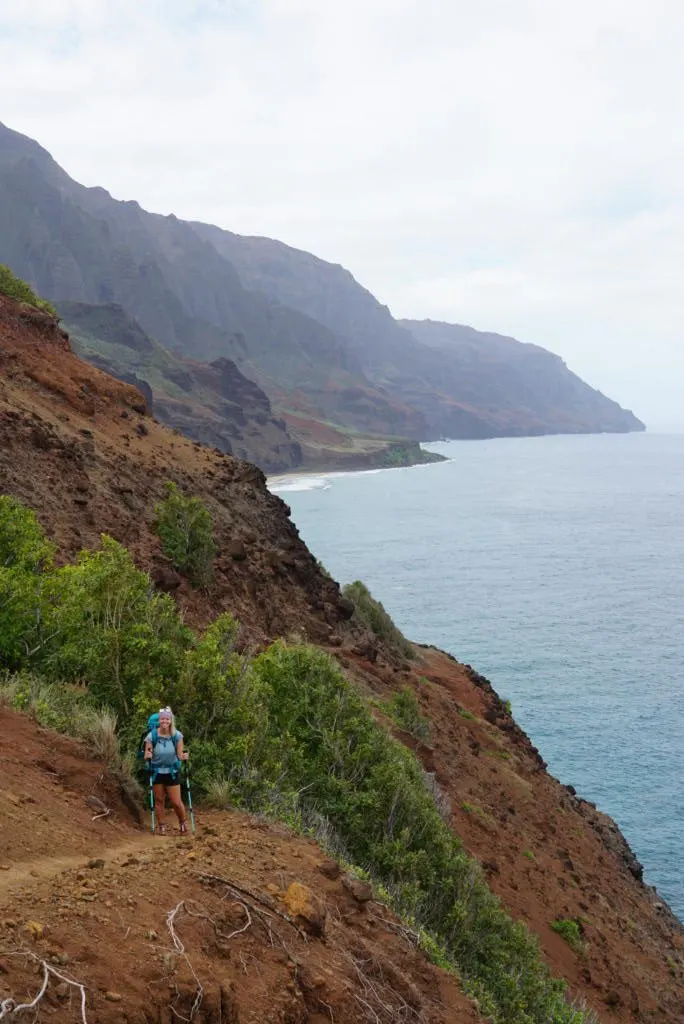
The final three miles before Kalalau Beach was actually my favorite portion of the trail, despite being tired and achy. The narrow trail becomes much drier, with less vegetation, which translates to more epic views!
The valleys also become smaller and faster to traverse, which mentally makes you feel like you are making progress faster. And you start to catch glimpses of Kalalau Beach, giving you that burst of adrenaline to push through.
After passing a red dirt saddle, you turn the corner into Kalalau Valley! And from here you are treated to incredible views of the entire valley. But even better, it’s all downhill from here to Kalalau Beach!

Just before you reach the beach, you have to cross Kalalau Stream. It’s sometimes possible to keep your feet dry by hopping across the rocks. This is also one of the only two options for getting drinking water near Kalalau Beach. And as with most river crossings in Hawaii, watch out for flash floods.
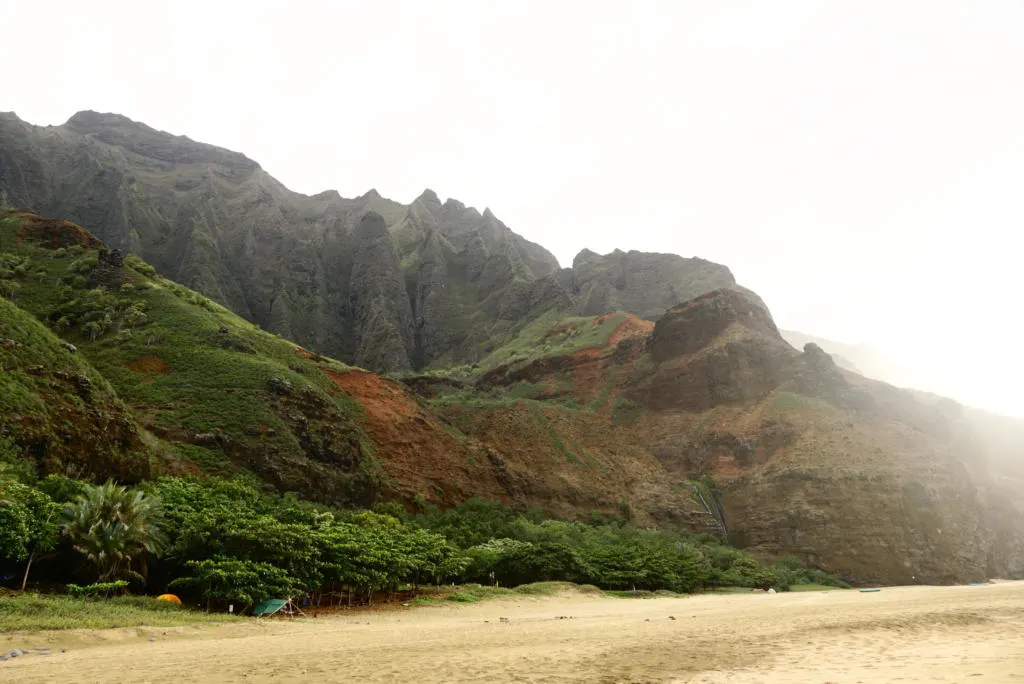
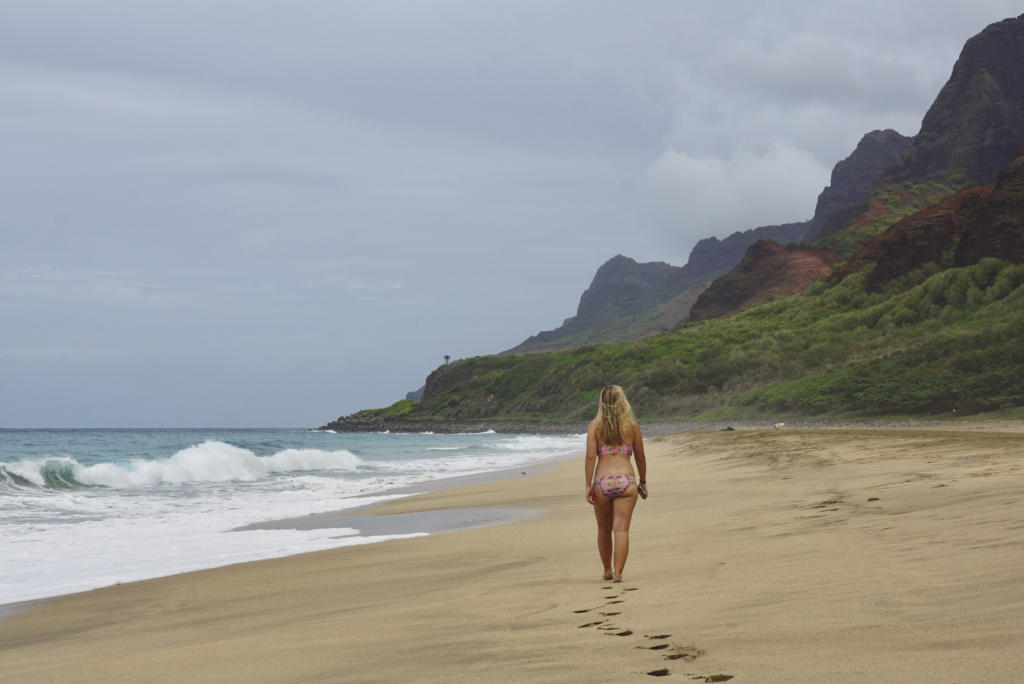
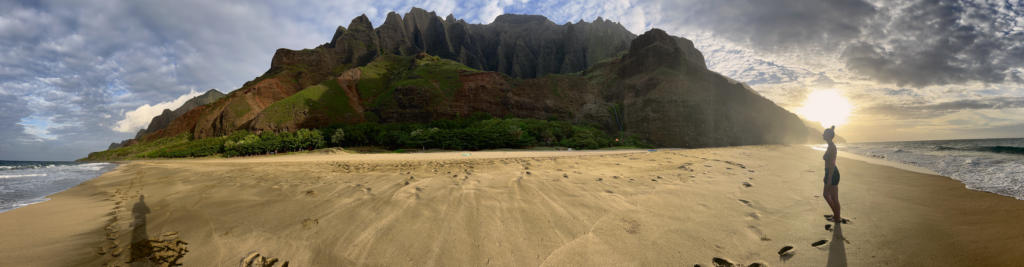
Kalalau Beach

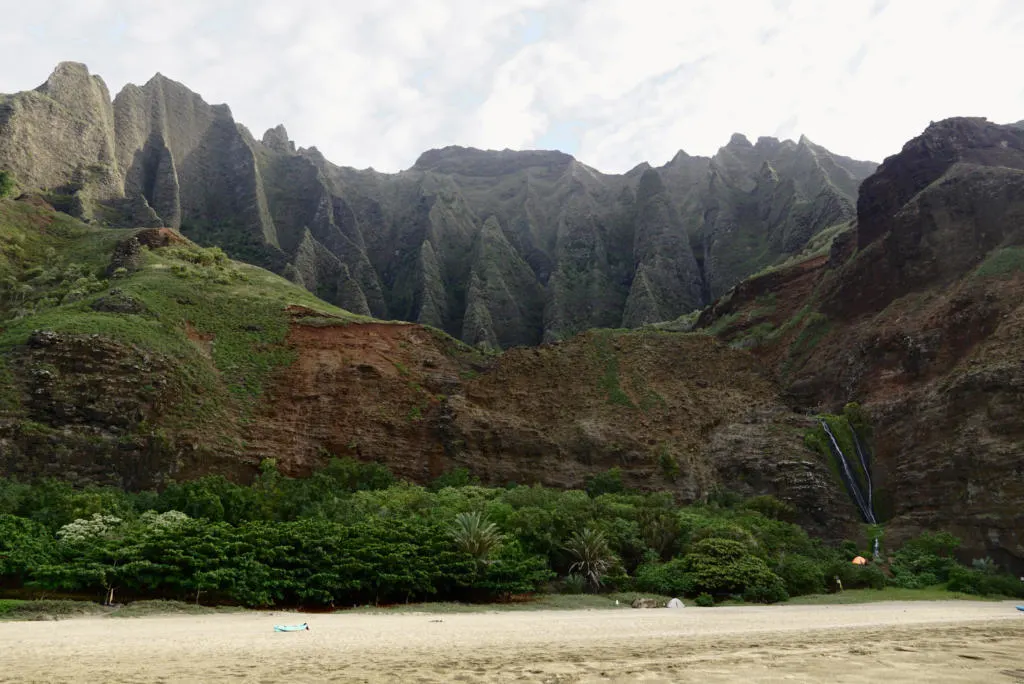
Spending time on Kalalau Beach is certainly the highlight for most people. This massive blonde sand beach is watched over by jagged green mountain peaks. The mountains transition to massive cliffs with patches of red dirt. And if it wasn’t fairy-tale enough, Ho’olea Falls comes down practically right onto the beach.
It is certainly one of the most beautiful places in all the Hawaiian islands.
Part of what makes it so special is that Kalalau Trail offers the only land access to the beach. So except for some kayaking permits given in the summer, it’s the only way to set foot on the beach.
There are no roads, and commercial boats aren’t legally allowed to drop people off. So you really only share the beach with other people who worked as hard as you to get there.

You can swim in the ocean at Kalalau Beach if the conditions are calm enough. Summer tends to be the most calm and safe time to swim. Winter brings big swells and strong currents that can make swimming dangerous. But use extreme caution because there are no lifeguards on duty, and you are far from help.
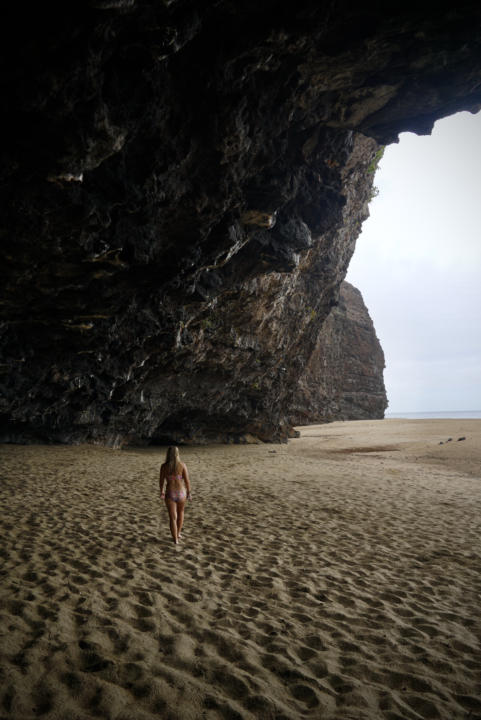
If you walk a little farther down the beach you can explore some massive sea-caves carved into the cliffs. But make sure you don’t hang out near the base of the cliffs. You can literally see the zone where tons of golf to baseball-sized rocks plummet from the cliffs above peppering the beach.

Camping at Kalalau Beach is only allowed on terraces immediately adjacent to the beach or on the sand above the high watermark. You cannot camp along streams, in caves, or anywhere near emergency helipads (they are well-labeled). NO CAMPFIRES ALLOWED. And cooking must be done only on campstoves or portable grills only.
Water can be collected from the Kalalau Stream and from below Hoʻolea Falls. The Kalalau Stream is about 0.4 miles from the beach, so most people collect water from beneath the waterfall for convenience. However, there are signs warning not to spend time under the falls because debris can fall.
Honopu Beach

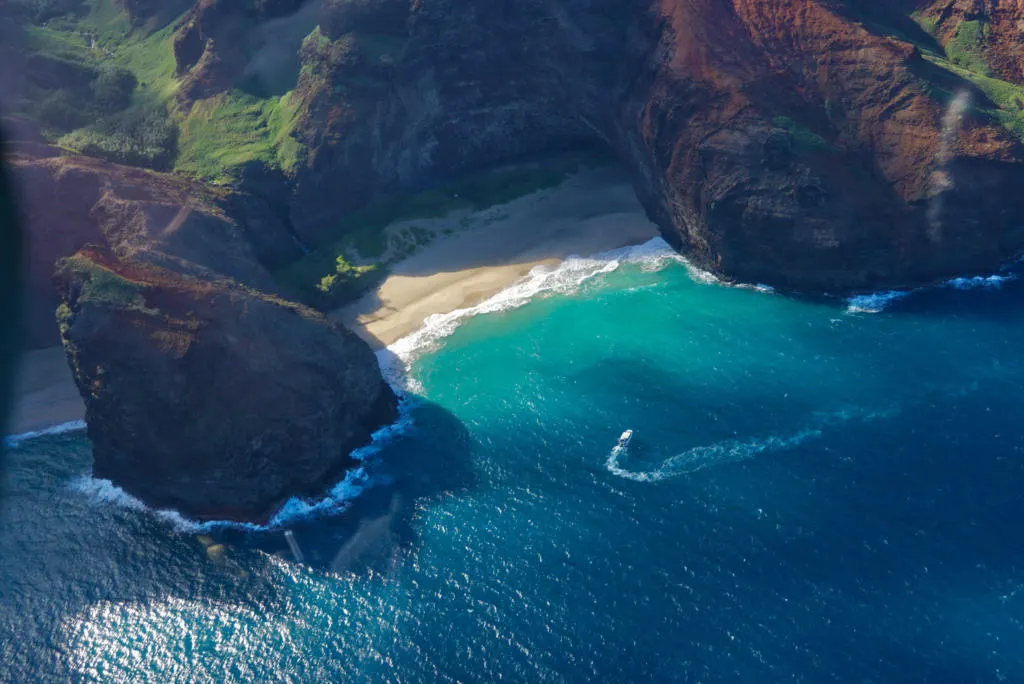
Just south of Kalalau Beach is a smaller Honopu Beach divided into two coves connected by Honopu Arch. However, Honopu Beach is separated from Kalalau by cliffs, so the only way to reach it is by swimming.
Depending on ocean conditions (waves, rip currents, etc) it may be unsafe to make the swim over there. But if the conditions are right (and you have the energy) it is another sacred and beautiful place that very few people will ever set foot on. Summer would be the best time to reach this beach safely.
LEAVE NO TRACE!
Please adhere to the Leave No Trace principles. With one notable exception being the composting toilets for human waste. Be sure to pack out anything you pack in.
It’s entirely up to visitors to keep this place clean for the people who come after you. When you make the decision to hike this trail, you also take on the responsibility to do it the right way. If the wind breaks your tent in half, guess what, you should still carry it out.
This is not a good trail for inexperienced or unprepared backpackers. I’m not saying that to be a gatekeeper, but rather because poor preparation leads to negative impacts on the land, dangerous situations, and an overall bad experience for the visitor.
Bathrooms
The last flushing toilets and running water are located at Ke’e Beach, just before the official trailhead. There’s also an outdoor shower here.
Along the trail, there are composting toilets at Hanakapi’ai Beach, Hanakoa Valley, and Kalalau Beach. Due to the high number of permits, all hikers are required to use composting toilets for solid waste.
There’s no running water in the bathrooms, so bringing hand sanitizer is advisable. Also not a bad habit to always carry your own toilet paper, just in case they run out.
Renting Backpacking Gear Versus Bringing Your Own


One of the main logistical challenges of completing the Kalalau Trail is getting all your backpacking gear to the trailhead. You can bring your own backpacking gear, rent from a company in Kauai, or some combination of the two.
There are several companies that offer backpacking gear rental. A few companies that rent gear in Kauai are Pitch-A-Tent Kauai, Kayak Kauai, Napali Kayak, and Pedal ‘n Paddle.
Two benefits of renting gear are that you don’t have to worry about flying with your equipment, and they will provide you with climate-appropriate camping gear.
For example, we brought our own equipment and our zero-degree sleeping bags are completely overkill for the Kalalau Trail. I could barely tolerate even having one leg under the bag. But again, we weren’t going to buy different sleeping bags just for one trip.
If you bring your own gear you will likely need to check a bag. Flights with Southwest Airlines are a good option because of the two free checked bags. But even if you have to pay for a checked bag, the cost is probably less than the cost of renting gear in Kauai. Plus, you get to use the gear you are already comfortable and familiar with.
What Backpacking Gear To Bring
We have an entire blog post dedicated to what to bring on a backpacking trip. But allow me to highlight some of the key items/decisions for the specific climate and trail conditions on Kalalau.
– Footwear With Good Traction
This should go without saying, but bring footwear with excellent traction. Something with deep lugs that provides good grip on muddy trails. Your life might literally depend on it. (Read our gear review on the Altra Lone Peak RSM)
– Trekking Poles
Trekking Poles are practically a must for this strenuous hiking trail. Poles will help you maintain your balance through slippery trails and places with high-consequence exposure (aka you fall, you die).
And trekking poles can really help take some strain off your leg muscles and joints. When your legs are like jello on the return trip, you will be happy to have the aid of trekking poles.
– Water Filter
Bring a water filter on the Kalalau Trail. All water sources along the trail need to be filtered or treated. And the trail is far too long to carry all the water you need. So be sure to have a plan for safely refilling your water supply. We really like our Platypus Gravityworks Filter because it filters large quantities of water with minimal effort (Full Review Here).
– Sleep System
The standard sleep system for most backpackers is a tent, sleeping pad, and sleeping bag. If you have tent options, a tent with good airflow is recommended. Nights are still quite warm, especially since you likely need to use your rainfly.
If you prefer a hammock setup, you can definitely find suitable trees for your hammock at both Hanakoa and Kalalau. And you might actually benefit from a nice breeze, versus an enclosed tent.
But regardless of tent vs hammock, you should have a rain fly. Especially in the winter (rainy) months.
Sleeping bags that are rated for warm weather are best. That way you can keep your pack as light as possible. We brought our 3-season sleeping bags and barely used them.
– Pack Cover
It’s a good idea to have a pack cover to keep your backpack dry during rain. Even if it’s just a trash bag, you will be much happier with dry gear. A backpack is heavy enough as is. You might be completely overweighted if it gets soaked.
– Pants and Long Sleeves
The weather is rarely cold enough to require more than light layers. But during nights and early mornings, it can get a little cooler. And lighter layers are nice because you can protect yourself from bugs (or sun) without overheating.
– Reef Safe Sunscreen
Be sure to only bring reef-safe sunscreen so you don’t threaten the natural environment.
Luggage Storage
One logistical problem of backpacking in Hawaii is finding a safe place to secure your belongings. It’s likely that you will bring more things to Kauai than just what you will carry on your back along the trail. So, finding a secure luggage storage solution is something worth planning for.
If you rent a car, you can leave your belongings in the car at the trailhead. But it’s not recommended to leave any valuables because vehicle break-ins can happen. If you do leave anything in the car, be sure that it’s out of sight as to not entice thieves.
The most secure option is to pay a company that offers luggage storage. Two companies offering this service are Elite Baggage Storage and Kayak Kauai.
Lastly, you could pay for a hotel room while you are on the trail. But there are very few truly affordable hotels in Kauai. So this method is likely cost-prohibitive for most people.
Conclusion | Kalalau Trail

Backpacking the Kalalau Trail in Kauai is one of the most incredible treks in the world. The scenery along the NaPali Coast offers unparalleled beauty. But the trail is quite challenging, even for fit and experienced backpackers. If you are willing to put in the preparation and effort, it will surely be a lifelong memory and achievement!
If you decide that hiking the Kalalau Trail is not a good fit for you, don’t worry. You can still see the NaPali coast via helicopter tour or boat tour. We went on both types of tour and really enjoyed them. They are two great alternatives for seeing this incredible place without all the blood, sweat, and tears of the trail.
Help Share “The Kalalau Trail” On Pinterest!

Best Hikes in Kauai (Including Epic Viewpoints) - tworoamingsouls
Wednesday 3rd of May 2023
[…] out our detailed post about the Kalalau Trail for everything you need to know about backpacking this epic […]
Hanakapi'ai Falls Trail | Epic Waterfall Hike in Kauai - tworoamingsouls
Saturday 4th of February 2023
[…] The waterfall is a popular detour along the famous Kalalau Trail. That’s how we got experience this amazing waterfall destination. However, backpacking the entire Kalauau Trail requires a separate overnight permit and you can read our guide about preparing for that trail here. […]
Best Way to Explore The Napali Coast in Kauai | Hike, Boat or Helicopter? - tworoamingsouls
Saturday 14th of January 2023
[…] Or (with the correct permit) you can continue on the Kalalau Trail to Kalalau Beach as an extended backpacking trip. This trail is not for the faint of heart as it stretches 11 miles one way on rugged terrain. Plus the hiking trail climbs over 6,000 ft in elevation through the up and downs of the valleys. (read our extensive review about backpacking the Kalalau Trail) […]