One major problem that campervans and RVs face is mold growing under the mattress. Emily and I have personally been greeted by this problem twice in only a year, so we decided to fix the problem once and for all with more drastic measures.
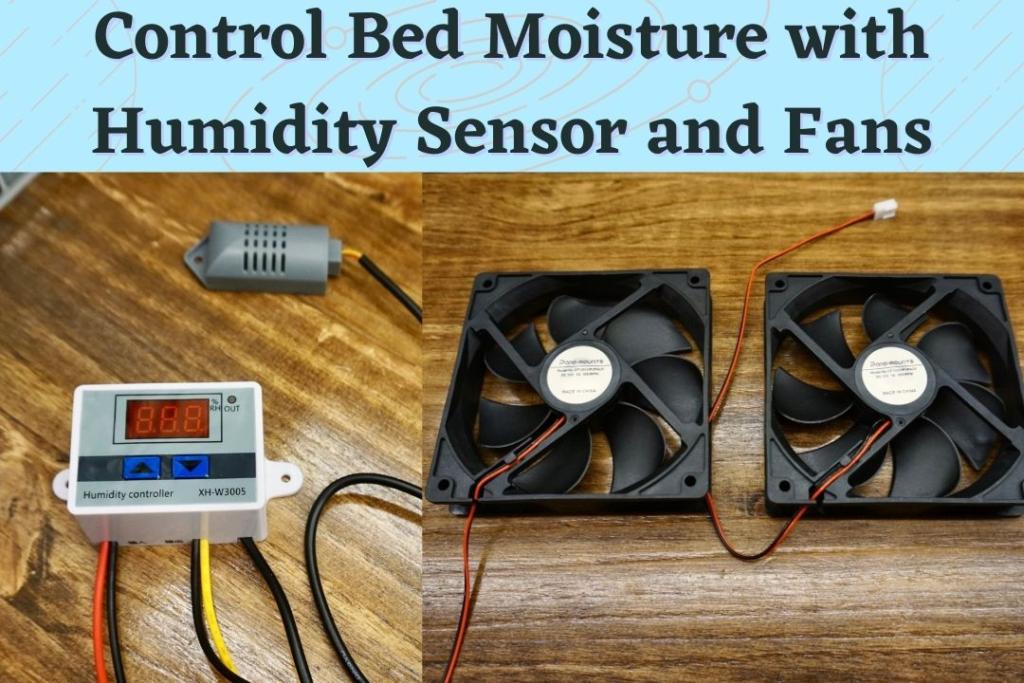
This post describes our solution to install bed fans with humidity sensor. We mounted a pair of fans under our bed platform controlled by a humidity sensor to automatically ventilate our mattress any time the moisture levels get too high.
If you’re feeling helpless in the battle against moisture and mold, we hope this information can help provide a true solution.
This post may contain affiliate links. Disclosure policy.
The Moisture Problem
The problem stems from warm bodies sleeping on an often cold bed platform. Our bed platform is particularly bad because it’s just a solid piece of plywood.
Additionally, our mattress is memory foam which is notoriously un-breathable. Campervan beds are a prime environment for condensation and the accumulation of moisture, and without proper ventilation, you will discover that your mattress and possibly your bed platform have become victims of mold.
This can be a costly problem when you consider the price of a new mattress or replacing your bed platform altogether. Not to mention that living and sleeping in the presence of mold can cause health problems.
So what can be done?
The Solution: Bed Fans With Humidity Sensor
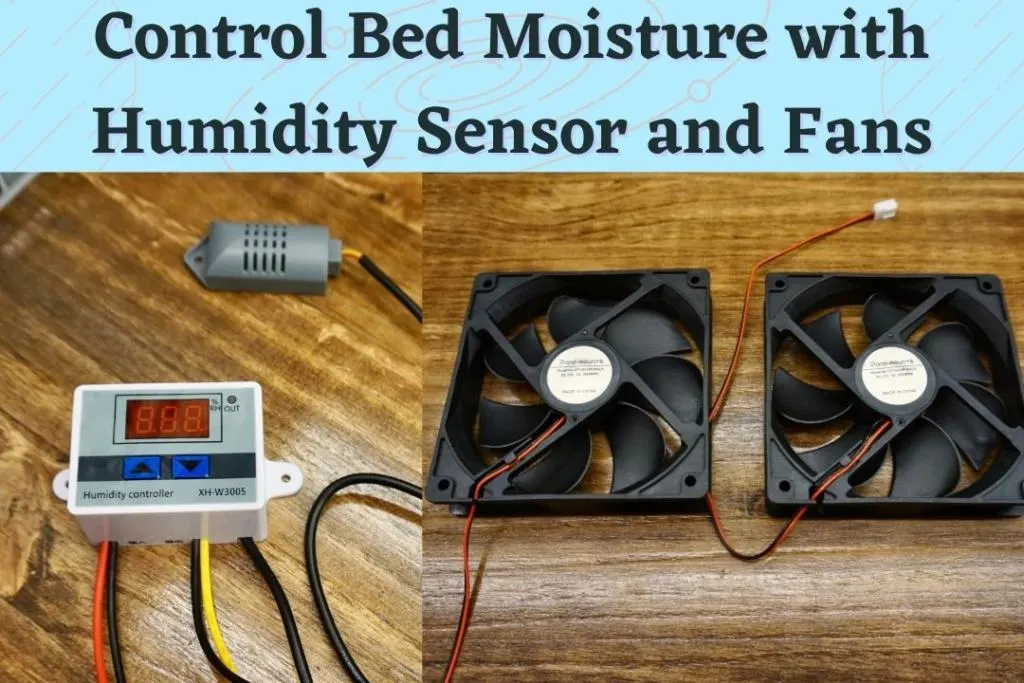
We decided to implement some active air flow under the bed using computer fans. The fans are mounted under our bed frame to help circulate dry air through and around our mattress.

And instead of having a traditional switch, we opted for a humidity sensor that could actively monitor the humidity levels for us. The sensor probe is literally tucked in between the layers of our mattress so that the fans turn on any time the humidity levels are too high.
Perhaps you’re thinking that this system is over-engineered, but given our trouble in the past, we were hoping to fix the problem once and for all. And for only around $20, we figured the humidity sensor was worth it to allow the system to work by itself without being micromanaged.
Other Precautions
Let me back up a second to mention the other precautions that we have taken to combat this problem.
Treat Your Bed Platform
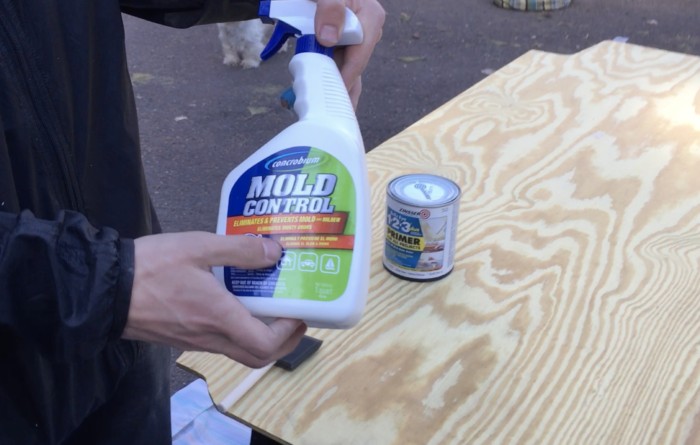

When we built our campervan, we were wise enough to at least treat the wood under our mattress. No matter what style of bed frame you have (solid or slats), you should treat your wood with mold resistant spray and polyurethane, or mold resistant primer if you are going to paint. This will protect the wood from moisture, and help prevent possible mold growths from penetrating the fibers of the wood. And trust us, it’s better to scrape or sand some mold off of the surface than to have to replace the wood entirely.
Get A Humidity Monitor
To keep better track of the humidity inside your campervan or RV it’s not a bad idea to get a humidity monitor. We have this ThermPro digital humidity/temperature monitor and it’s perfect for keeping track of humidity and temperature in our van.
This will help you recognize when humidity levels are getting too high, and give you the opportunity to air out. Take advantage of dry, sunny days to open up doors and windows to air out your living space.
Install “Hypervent” Layer

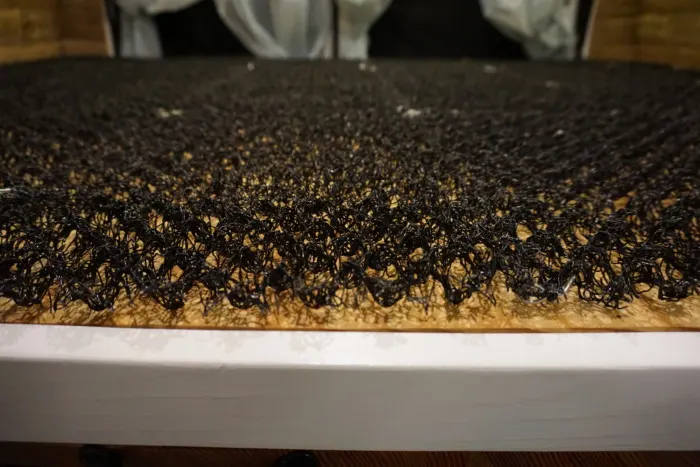
After our initial encounter with mold, our first solution was to install a “hypervent” layer under our mattress. It’s basically plastic mesh that’s shaped like an egg carton. This semi-hollow layer of plastic mesh creates an air gap between our mattress and the solid plywood bed platform.
We hoped that this would be enough to solve the problem. However, it only allows passive airflow, which we learned the hard way was not sufficient. But we still think it is an important piece of the puzzle when it comes to combating moisture build up.


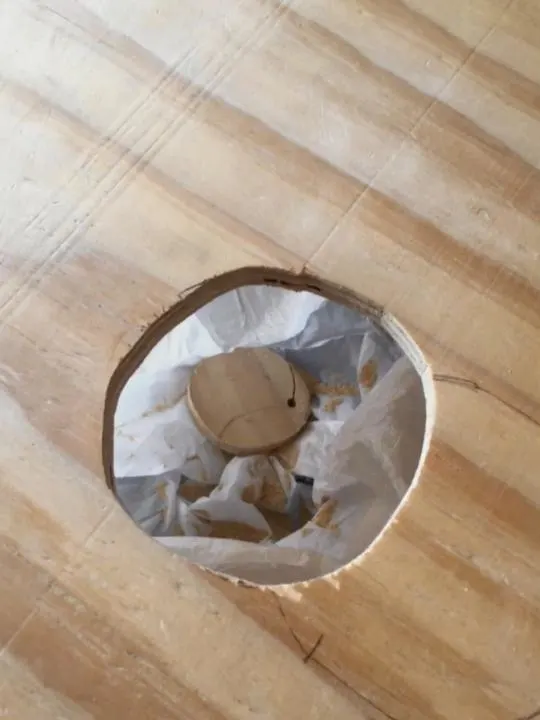
This leads me to our second encounter with mold a couple of months later. Luckily, our mattress was spared this time, but our plywood bed platform was growing large, fuzzy colonies of mold. So with our newly acquired COVID masks, we got to cleaning up the mess. Not fun!
So that’s when we hit the drawing board to figure out a more aggressive solution. Many people suggested drilling a ton of holes in our bed platform to hypothetically improve airflow. But after passive airflow failed once already, we didn’t want to “double-down” on that strategy. And that would open up more possibility of mold penetrating the wood itself.
So that’s when we settled on the bed fans with humidity sensor. We concluded that installing fans to actively circulate air felt like the most logical solution. We discovered a humidity sensor online that could be the perfect pairing with the fans to automatically monitor the moisture levels and turn the fans on and off accordingly.
Supplies
Here’s what you need to install these fans and automatic humidity sensor.

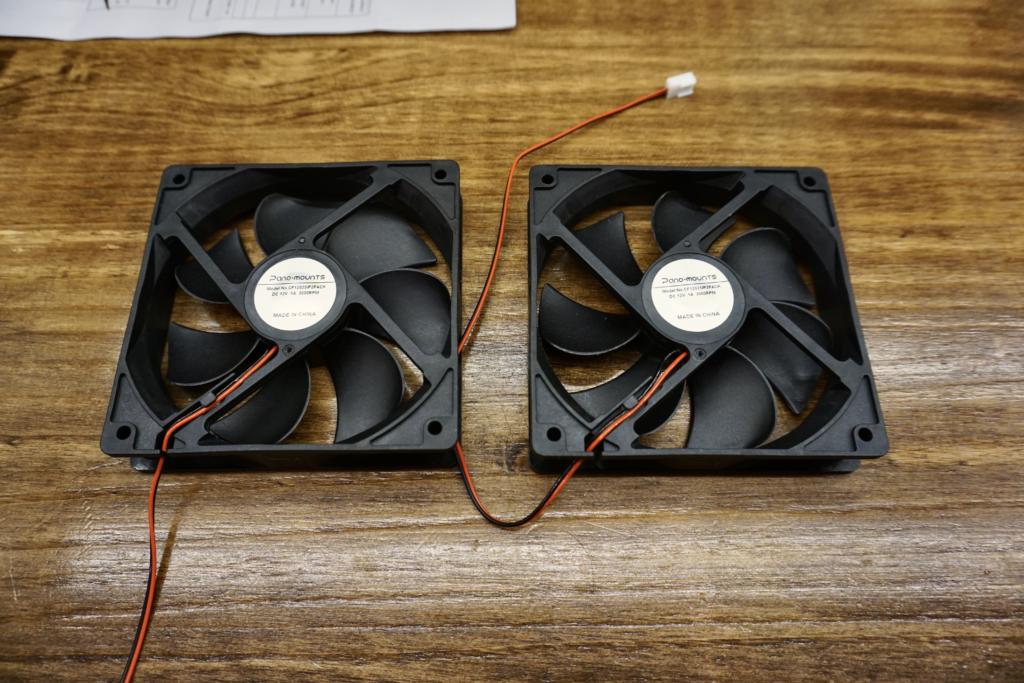
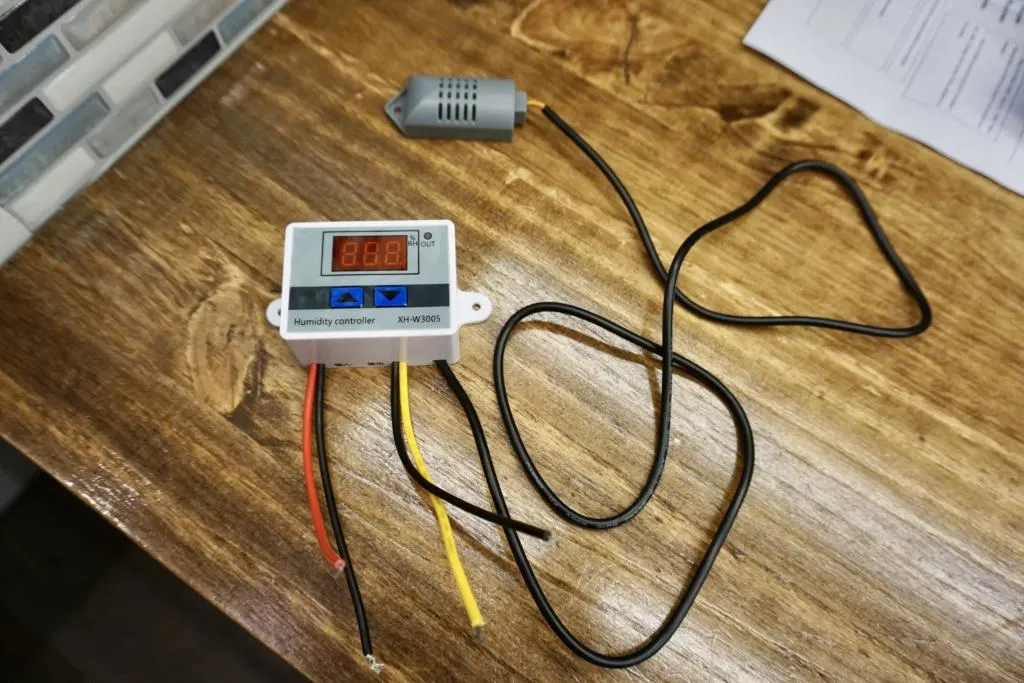
12 Volt Automatic Humidity Sensor – XH-W3005


Red and Black 18 AWG Stranded Copper Wire
(I cannot say for certain that 18 AWG wire is suitable for your specific installation, because of several factors. For most 12-volt power systems in a vehicle the size of a campervan, it’s likely that 18AWG will work. But please double check with this WIRE SIZE CALCULATOR).
Other Supplies and Tools
- Butt Splice Wire Connectors
- Electrical Tape
- Wire Clips
- Electrician’s Multitool Pliers
- Jigsaw
- Powerdrill
Check out our Favorite Tools for Campervans.
Installation
Cut Holes For The Fans
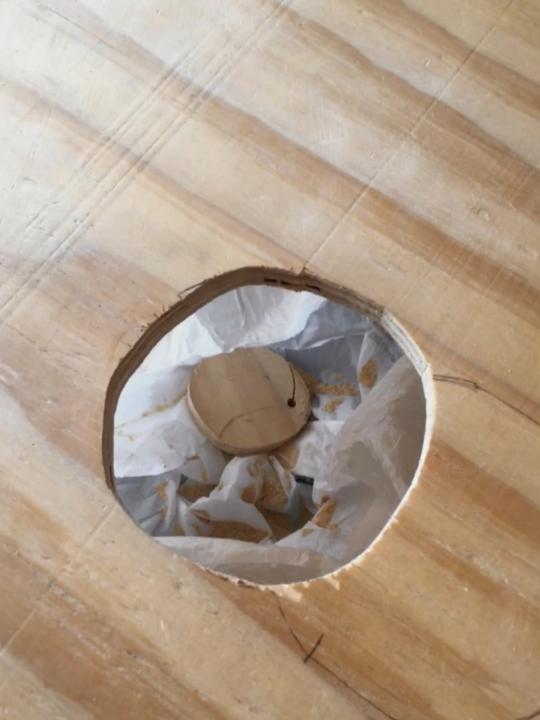
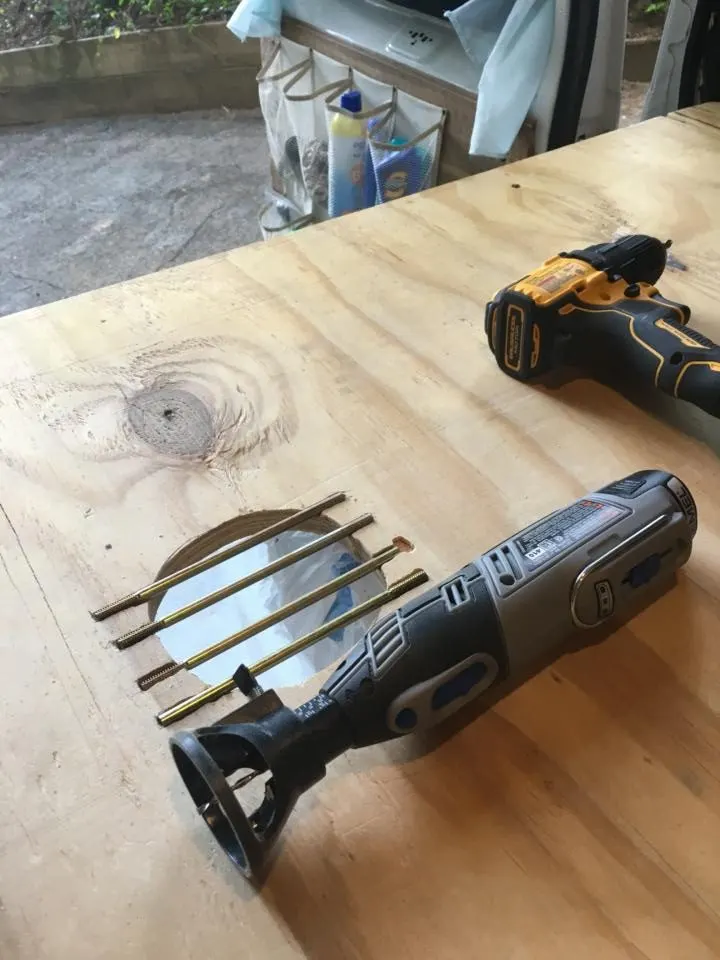
If you have a solid bed platform like us, then the first step is to cut holes for the fans under the bed. (If you have slats, then you may be able to mount them in between slats.)
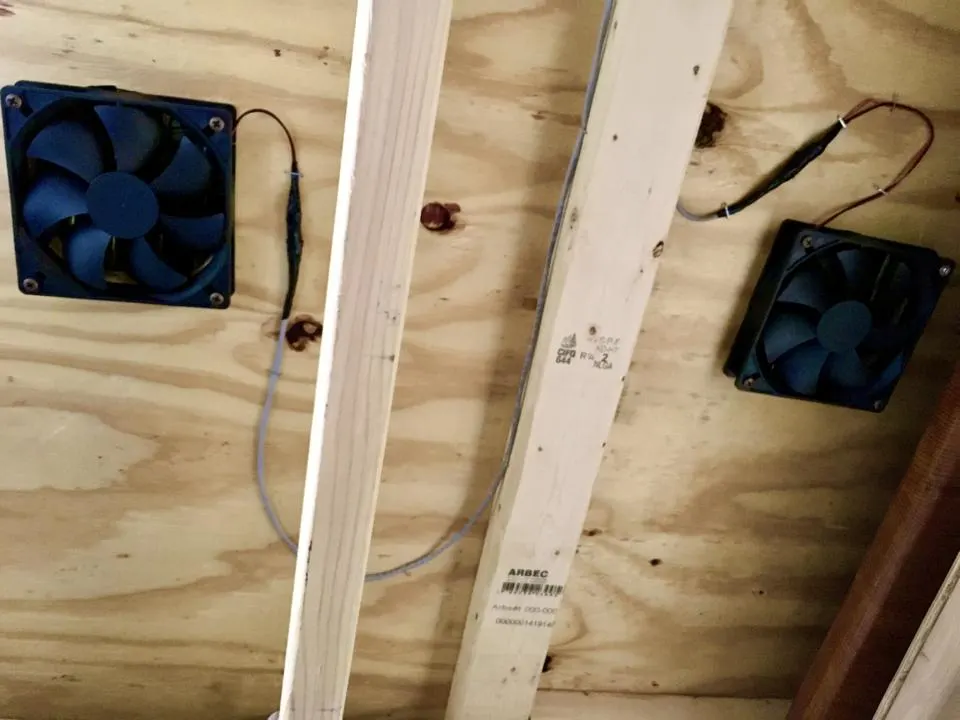
We chose to have two fans, one to go underneath each of us. To mount the fans we cut out circular holes in our plywood bed platform the same size as the fan blades.
First, trace out a couple of circles in pencil using the fans themselves as a stencil. Then drill a hole inside each circle that is large enough to fit a jigsaw blade through. Finish by cutting out each hole with a jigsaw.
Pro Tip: To prevent a huge mess, we recommend taping a garbage bag underneath the hole to catch all the sawdust that falls.
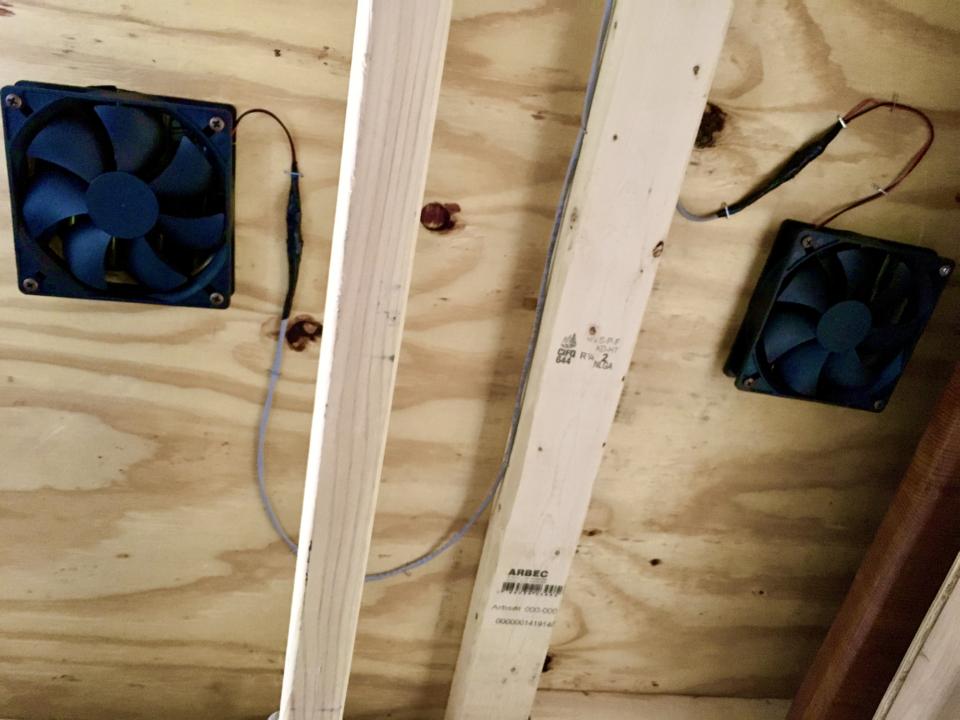
Mount The Fans
The fans have a hole in each corner that we used to mount them with screws (we had to supply our own screws). We mounted the fans so that they would blow air upwards towards our mattress. We decided that this would be the best way to force dry air to circulate in and around the mattress.
Install Cross Beams

To prevent our hypervent from sagging through the holes, we installed a few metal cross beams. We used 8 large bolts to span the gap over the holes (4 each). We used a cordless router to make little notches for the ends of the bolts to sit in. This step isn’t totally necessary, but you may choose to do something similar. Otherwise you could just tape or glue them in place.
Mount Humidity Sensor Display
Find a good place to mount the humidity sensor display module where you can read the display and access the control buttons when needed. And your mounting location also needs to be close enough to the bed that the sensor probe can reach a suitable location.
We chose to mount ours inside a cabinet under the bed so that the LED display wouldn’t project light into our living area. And we drilled a hole through our bed platform that allows the sensor to be passed up into the mattress area.
You also need to supply your own screws for this step.
Wire The Components Together
If you have experience with wiring, this job is relatively straight forward. (If you need to learn more skills about wiring, crimping, etc, then read my post about Wiring.) But here’s a wiring diagram I made to illustrate the basic concept.
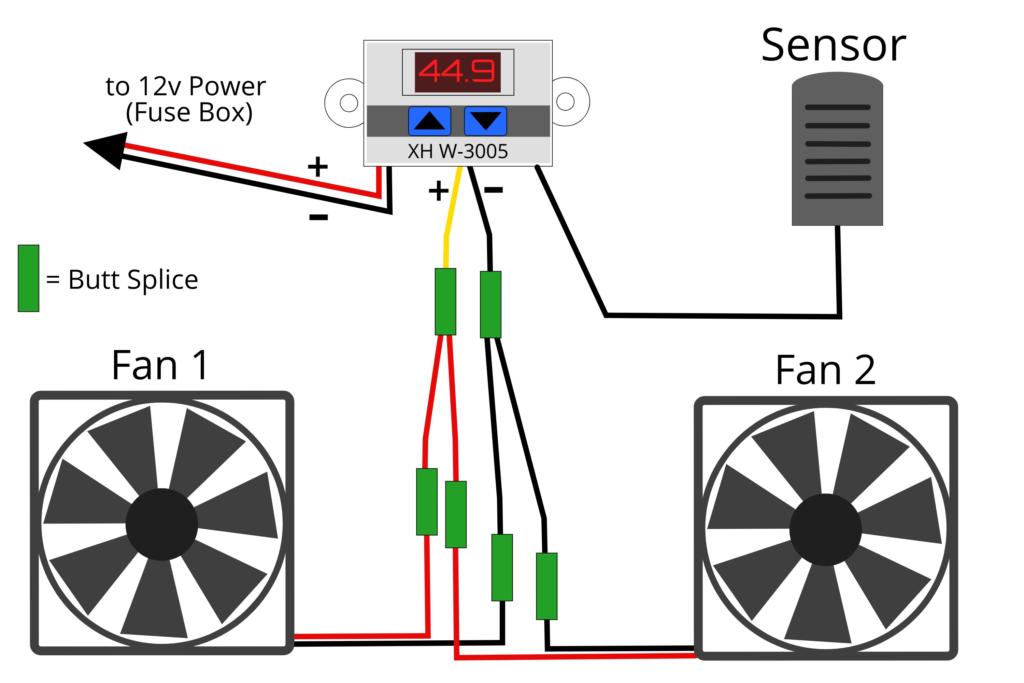

Basically you pass 12-Volt power to the humidity sensor module via the red and black pair of wires. And then you connect your fans to the sensor module via the black and yellow pair of wires. You should either crimp with butt splices or solder the wires that you connect to the module.
You need to cut off the connector that comes attached to the wires of each fan. Once you cut the wires, then you can strip and crimp them into a butt splice.
You should have some plan to secure your wires so that they aren’t just loose. Something like these wire clips will work well to hold your wires in place and out of the way. I used a staple gun, which is absolutely not the proper way to do it. I’m sure many electricians would be shaking their heads at seeing that. So don’t be like me and get some proper wire clips.
Sensor Placement
Then place your sensor somewhere where it can monitor the humidity near the underside of your mattress. Our mattress is two separate layers of foam, so we just tucked the sensor in between the layers.
I should mention that at first, we tried just placing the sensor under our mattress on the plywood platform. But we found this to be ineffective because the air circulation would cause the sensor to cycle on and off too quickly. Having it tucked in the mattress provides a little bit of a buffer to make sure that the mattress itself is dry rather than just the air that’s temporarily moving through.
Setting The Humidity Display Thresholds
Operating the humidity sensor is pretty simple. The left button (up arrow) sets the upper threshold humidity that the system will turn on. The right button (down arrow) sets the lower humidity threshold where the system will shut off when reached. Simply press and hold either button until the display begins flashing, and then use the up or down arrow to change the number.
Generally, keeping relative humidity under 55 is enough to prevent mold. But you can find, an upper and lower threshold that works for you. We usually keep the upper threshold set to 60 and the lower set to between 45-55.
You don’t want to set the thresholds too close together because then your fans will cycle on/off too quickly. And you don’t want to set your lower threshold too low, otherwise, you’ll never reach it and the fans won’t ever turn off. But depending on the humidity of the climate we are in sometimes it requires slight changes.
Win The War Against Bed Mold
We hope that the bed fans with humidity sensor system helps you finally win the war against moisture in your campervan or RV. No more worrying if mold is growing beneath you. The automatic humidity sensor will monitor humidity levels for you, so you can worry about more important things in life.
We have had this system installed for over 6 months and it works as designed. However, it has yet to be tested in winter conditions. I will update how the system performs after a cold winter season.
FAQ:
Are the fans loud? Yes, they are pretty loud, but those living in campervans are probably already accustomed to sleeping with a fan on every night. So it’s not a huge difference.
Does it bother you when the fans turn on and off while you’re sleeping? Sometimes, depending on how deep of sleep we are in.
Could I skip the humidity sensor and just wire the fans to a manual switch? Yes, absolutely. But then it’s your job to know when to turn them on and off.
Save ‘Campervan Bed Ventilation Fans with Humidity Sensor’ For Later


Best Camper Van Mattress Options For Your Van Conversion - tworoamingsouls
Monday 10th of April 2023
[…] used these DIY Hypervents under our mattress, and even stepped up the game and added a humidity sensor under our mattress to run fans when it got too moist. It has seriously been a game changer and we haven’t had any […]
Awesome Camper Van Bed Ideas For Your Van Build - tworoamingsouls
Monday 4th of October 2021
[…] […]
Vanlife: How To Prevent Mold Under Your Mattress | DIY Hypervent - tworoamingsouls
Monday 9th of November 2020
[…] Check out our post: Campervan Bed Ventilation Fans With Humidity Sensor […]