This is Part 2 of my Vanlife Solar Guide which covers everything you need to know about wiring, connectors, crimping, and more. And while this information is catered to van conversions, it can be helpful to anyone learning about wires, connectors, and crimping.
If you want to get familiar with the components of a solar setup, please read Part 1: A Beginner’s Guide to Solar Components. It starts from the beginning.

This post may contain affiliate links. Disclosure policy.
Basics For Wiring, Connectors, Crimping
So once you’ve learned about all the components of a solar setup, it’s time to learn how to connect them. And for beginners wiring can sometimes look like a confusing rat’s nest, especially when there’s tons of wires in a small area.
Wires are the foundation of any electrical system. They allow electricity to flow from one place to another.
But you can’t just plug a wire into a battery, you need some way to connect it. So a variety of connectors and terminals are crimped (joined) onto wires to allow connections between electrical components.
And the final important component is insulation. Anywhere you cut wire to make connections, the exposed metal of the wire and connectors need to be insulated for safety.
But before we jump into learning wires, connectors, and crimping, let’s cover the bare essential tools for any electrical work.
If you want a more user-friendly solution to campervan electrical, check out these plug-and-play options:
Disclaimer: Working with electricity can be very dangerous and even deadly. And while I do have some electrical knowledge from school, I am not an electrician. Always practice proper safety when working with electricity.
The information shared below are my opinions. This post summarizes what I believe to be the best tools, products, and techniques for accomplishing the task. I hope you find it helpful and informative.
Electrical Tools
This is the shortlist of essential tools that will get the job done. They are a good value for beginners who only need them for occasional wiring, connectors, and crimping projects.
If you plan on doing electrical work regularly, it may be worth paying up for more expensive and specialized tools.
Electrician’s Multitool (Cutter/Stripper/Crimper)
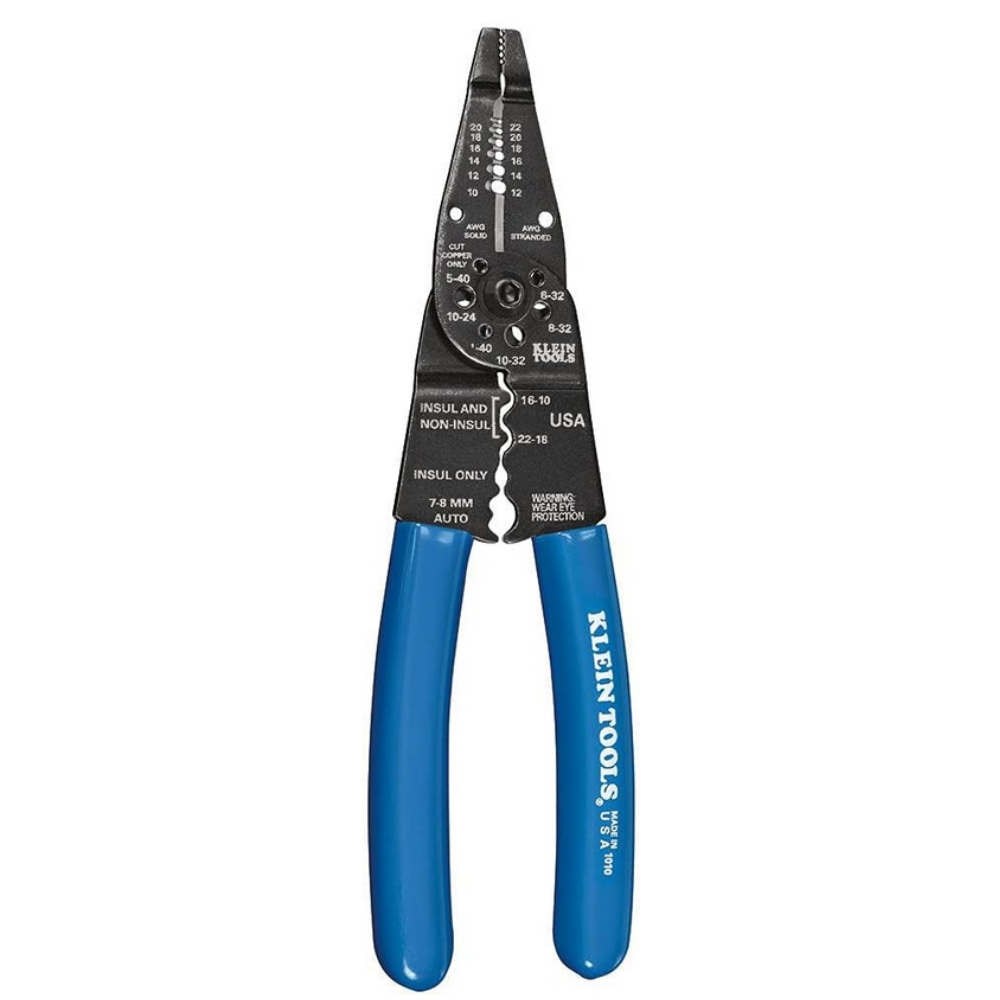

These pliers can handle a wide range of basic electrical tasks, like cutting, stripping, and crimping. However, it is generally limited to smaller wire sizes. This one can cut and strip 10-22AWG wire.
Wire Cutter

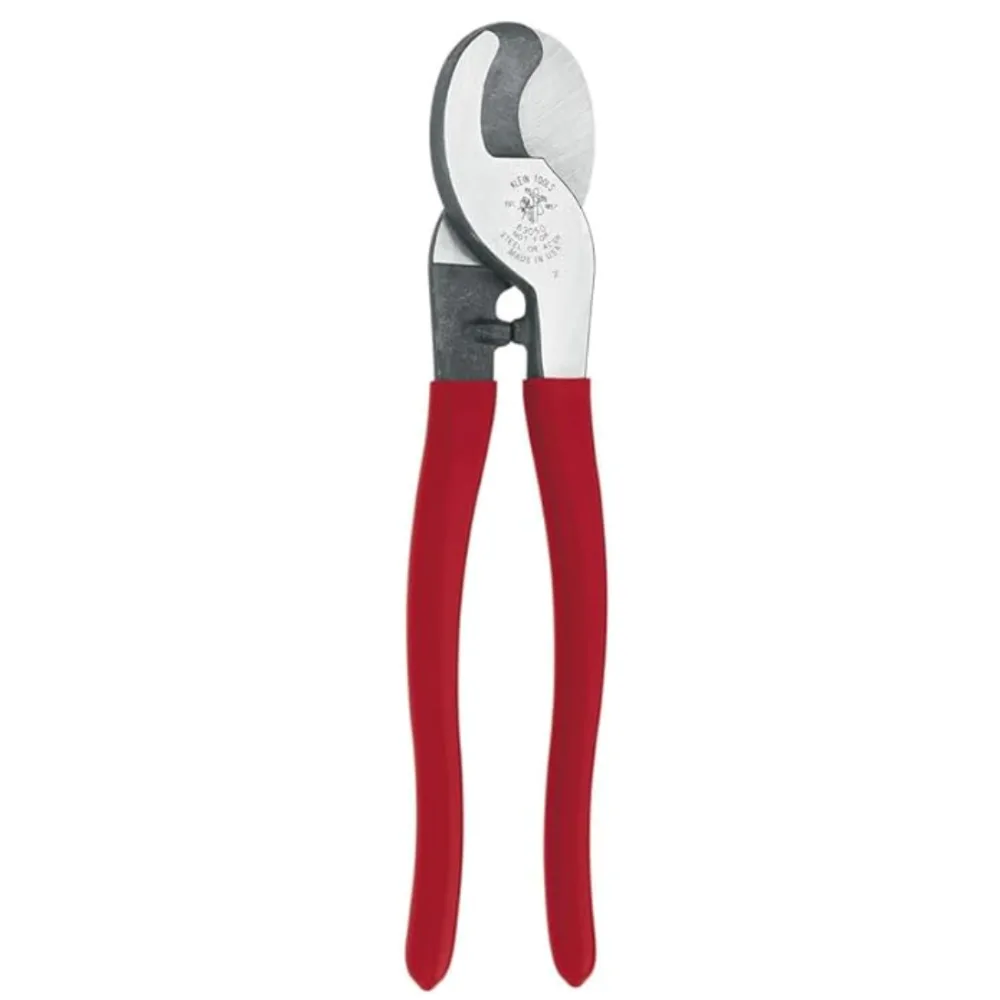
For cutting wires larger than 10AWG, you will need a different tool. This dedicated wire cutter is capable of cutting through thick wire like butter. It is rated for up to 2/0AWG wire, which is plenty for most van solar setups.
Hammer Crimper

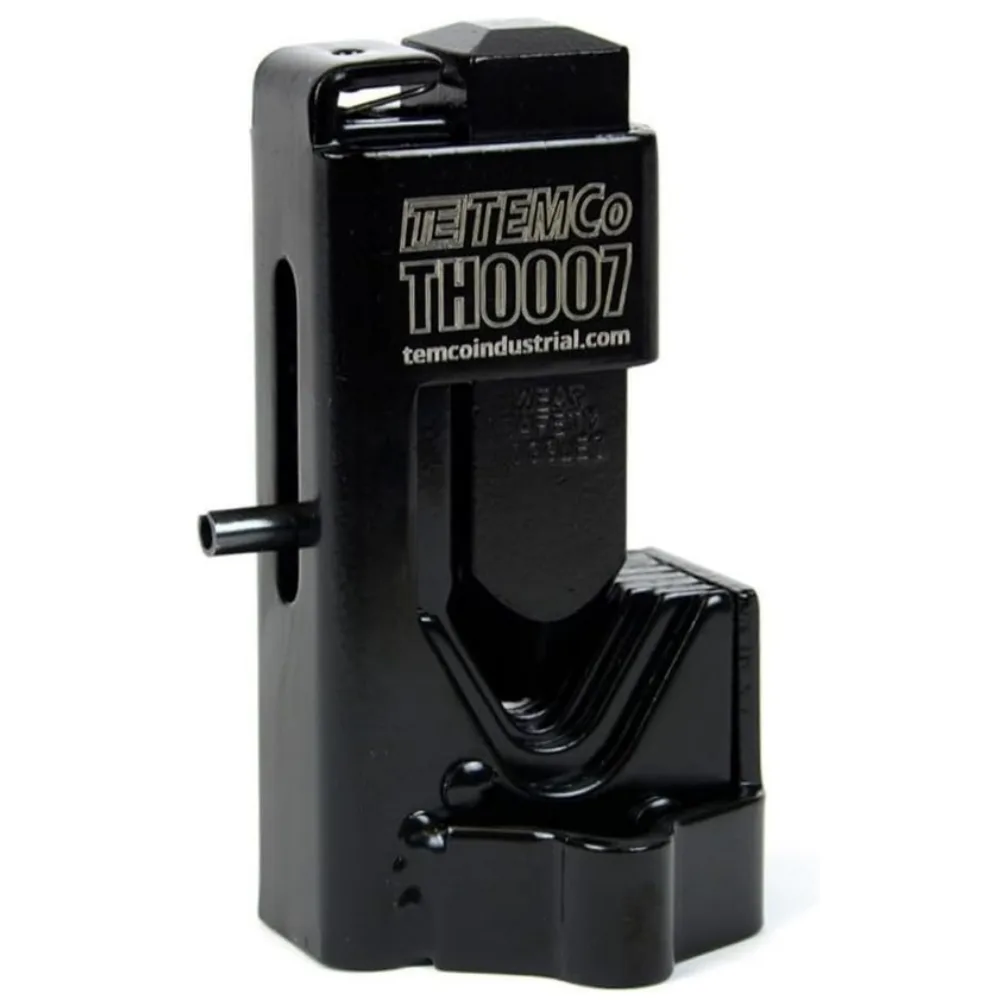
And crimping larger connectors also requires a more heavy-duty crimping tool. This crimper is capable of making safe and secure crimps on any larger wire.
A couple of other things you need, but probably already have…
- Hammer (for the hammer crimper)
- Utility knife or Razor Blade
Choosing Wires
Choosing the right wire for each circuit is a critical step for any safe electrical system.
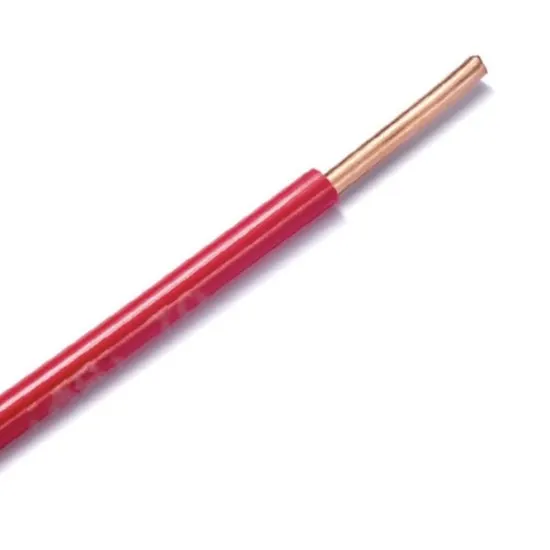
Stranded vs Solid Wire
Stranded wire is made of smaller strands of wire that are spun together to give a wire its thickness.
Solid wire is made of just a single solid wire.
The type of wire to use in a van solar setup is stranded copper wire because it’s more flexible and better for crimping. Solid wire is too rigid for our purposes.


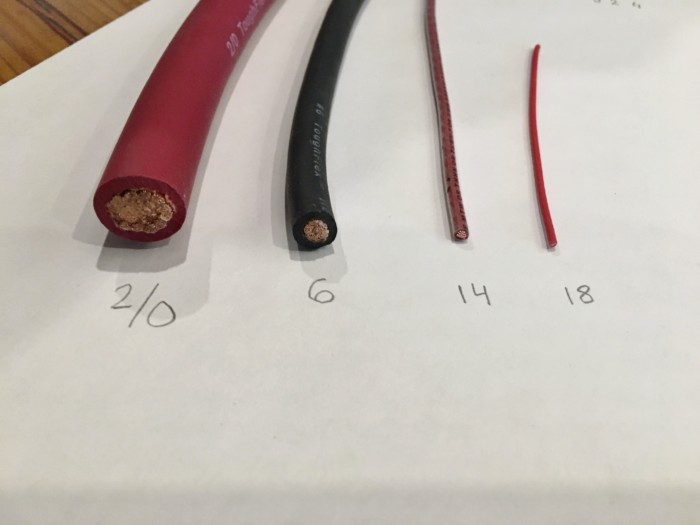
Wire Size (Gauge)
Wire thickness is referred to as the “gauge” of the wire, and is based on the cross-section of the inner conductive metal, in our case copper. Wire gauge DOES NOT include the thickness of the wire’s insulation (outer protective coating).
In the US, the standard measurement is AWG (American Wire Gauge).
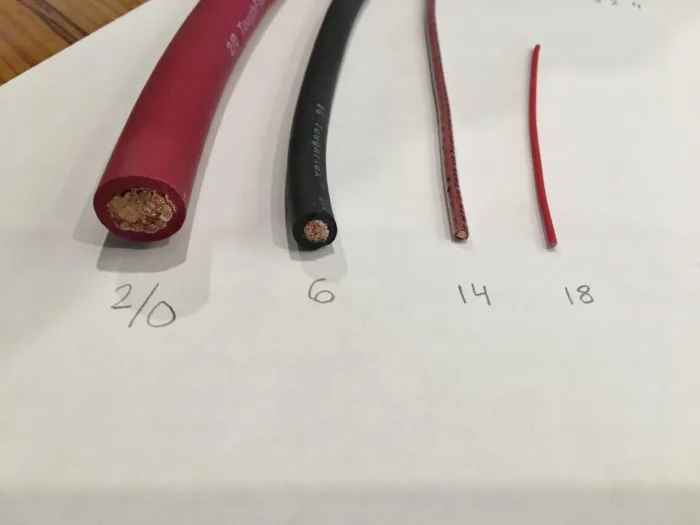
Be aware that the smaller the number, the thicker the wire. So a 6AWG wire is thicker than an 18AWG wire. And once you reach zero, the system switches to read like 1/0, 2/0 and so on.
The “0” is called aught and refers to AWG sizes below 1. So 1/0 AWG is verbally referred to as “one aught”, then “two aught”, and so on.
Wire thickness can also be expressed in metric, where thickness is simply defined by the cross-section in square millimeters (mm2). It’s easy to find charts online for converting between the AWG and metric.
The two main factors for determining the appropriate wire size for any circuit are current and distance. The more electrical current that needs to travel over a wire, the thicker it should be. And the farther a wire must travel, the thicker it should be.
Technically, you can’t have too thick of wire, however, unnecessarily large wires are just a waste of money.
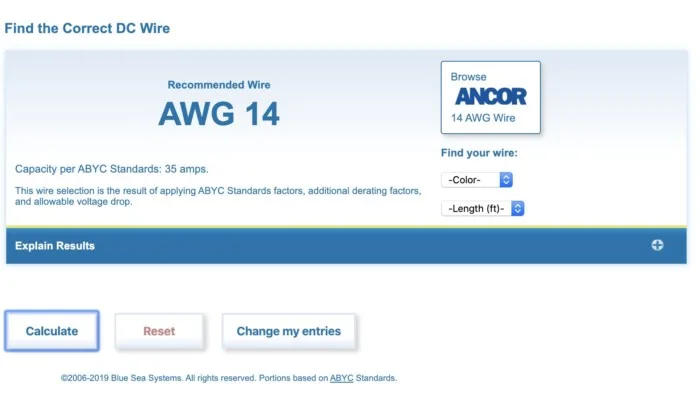
The best resource I have found for choosing a wire size is this calculator by Blue Sea Systems. You simply enter the voltage of your batteries, the max amp draw of whatever device you are wiring, and then the distance.
We multiply the distance by 2 because the wire needs to travel from the power source to the device and then back.
Example: Wiring our Maxxfan
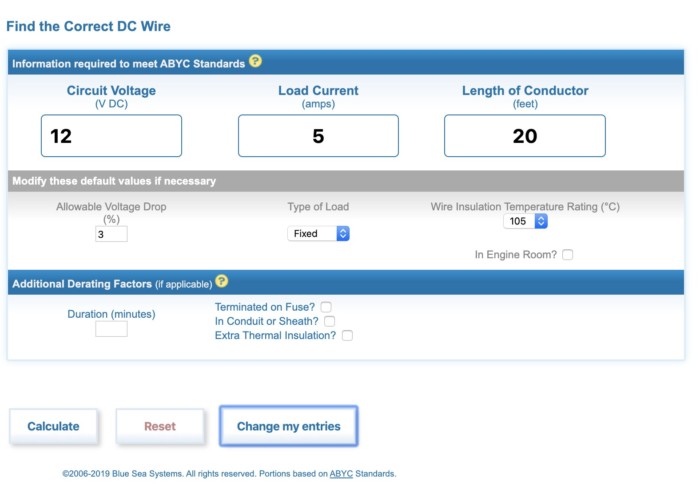
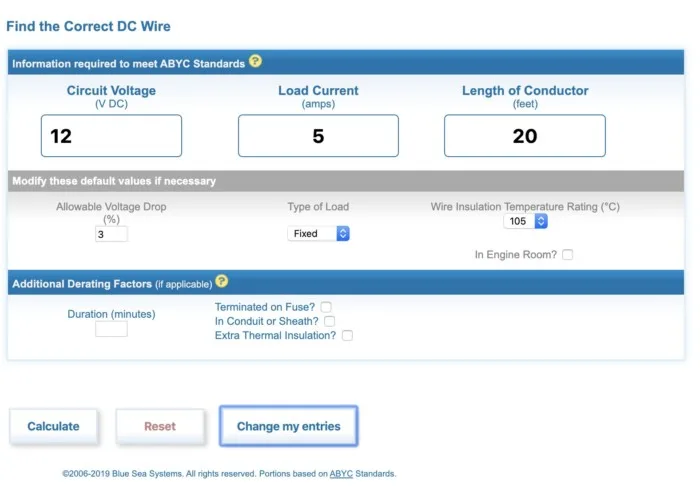
Battery Voltage = 12V (Common for campervan electrical batteries)
Max amp draw of the Maxxfan = 5 amps
Distance = 20ft (10 feet to the fan, and then 10 feet back to the battery)
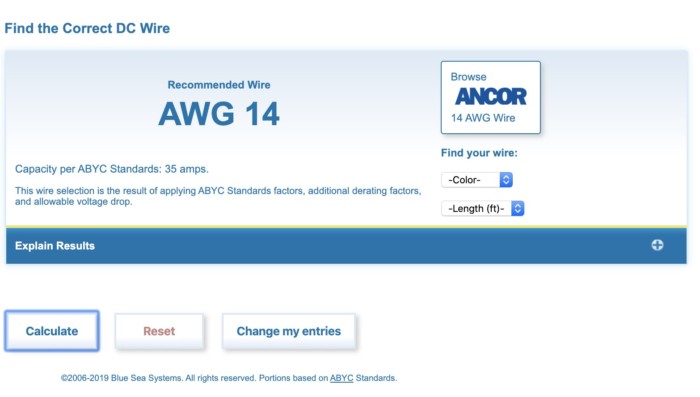
If you enter these numbers into the calculator it outputs 14 AWG. So any wire 14AWG or thicker is safe to use.
Wire Color
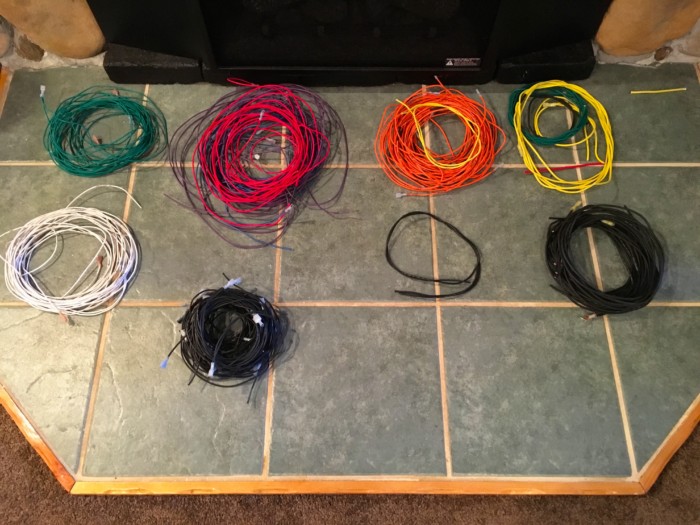

The color of a wire is simply the color of the protective coating that insulates the inner metal wire. You may see it called insulation, sheath, or jacket. It serves to contain electricity within the wire, as well as protect against environmental threats.
The most common convention for choosing wire colors is to use black wire for all negative (-) wires and red wire for all positive (+) wires, but wire can technically come in any color.
A good rule of thumb is to purchase equal amounts of red and black wire in the sizes you need. Because in nearly all circuits each positive red wire, is paired with an equal length of negative black wire.
But just keep in mind that the color of the wire doesn’t actually change anything about its internal properties. If you connect a red wire to a negative battery post, it’s still going to be a negative wire. So it’s up to the user to make sure they actually connect the right color in the right places.
Sometimes you may see something different, like our Maxxfan came with a white and black wire, where the black wire was labeled positive and the white wire was labeled negative.
So just be sure to look for markings on devices that indicate negative (-) and positive (+) or check user manuals if you are unsure.
Buy High-Quality Thick Copper Wire Here (2/0AWG – 8AWG, common Battery and Inverter Connections)
Buy High-Quality Thin Copper Wire Here (10AWG – 18AWG, common for DC loads)
Connectors and Terminals
In order to connect a wire to another wire or to a device/battery, you typically need to attach a connector or terminal of some sort.
You may see the word connector and terminal used interchangeably, but in general, a connector connects two wires together, while a terminal ends a wire and is suitable for one specific application.
The parts of a connector/terminal usually consist of a metal barrel on one side, and some metal connection apparatus on the other side. And they both come in insulated or uninsulated varieties in a wide range of sizes.
Sizing
It is important to choose connectors that fit the wire size you are using. They will have a size range on the package like 12-16AWG, which means that it’s suitable for use with wire sizes 12AWG – 16AWG. And most connectors and terminals are color-coded.
♦ Red = 22-16 AWG
♦ Blue = 16-14 AWG
♦ Yellow = 12-10 AWG
So the barrel of the connector will be sized to fit a certain gauge of wire. But additionally, they may indicate other size specifications for what they connect to, which I explain in detail below.
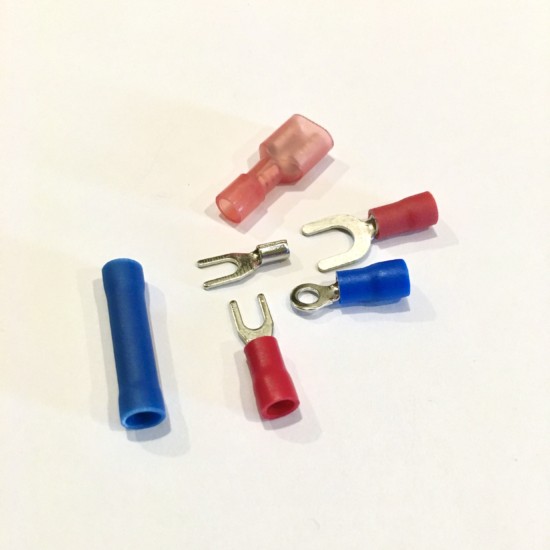
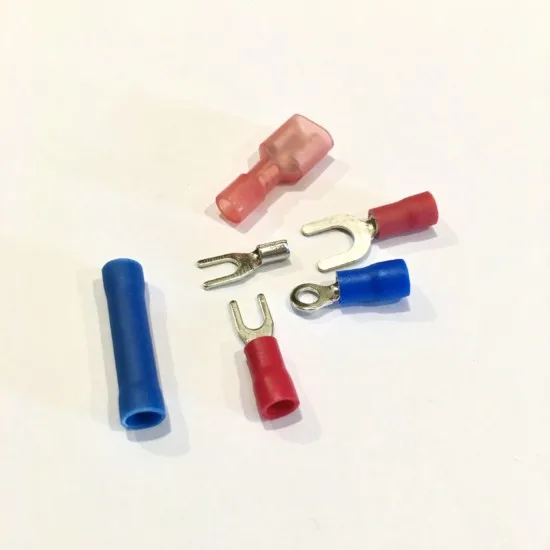
Types
The four most common types of connectors and terminals are called spade, fork, ring, and butt.
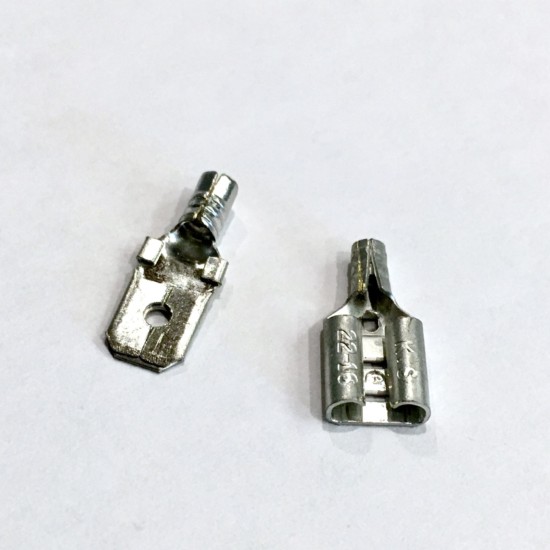
Spade Connectors (Quick Disconnect)
The two types of spade connectors are male and female. The two generally work as a pair to join two wires together.
The male connector has a blade that fits snugly into the female socket. They are sometimes called Male Quick Disconnect and Female Quick Disconnect because once they are crimped, they can be connected and disconnected without any tools.
Here’s an example of male and female spade connectors, both insulated and uninsulated.


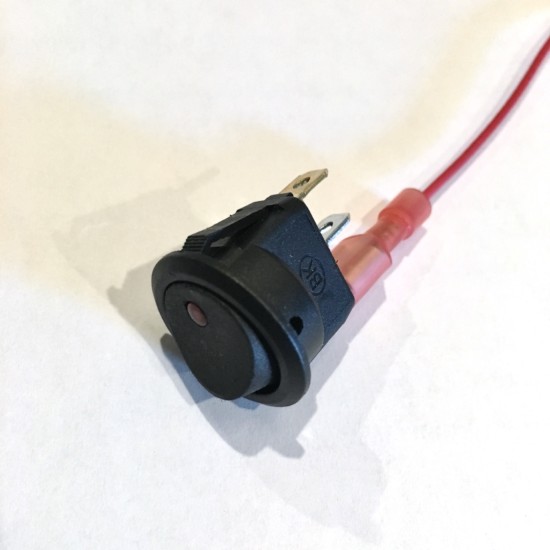
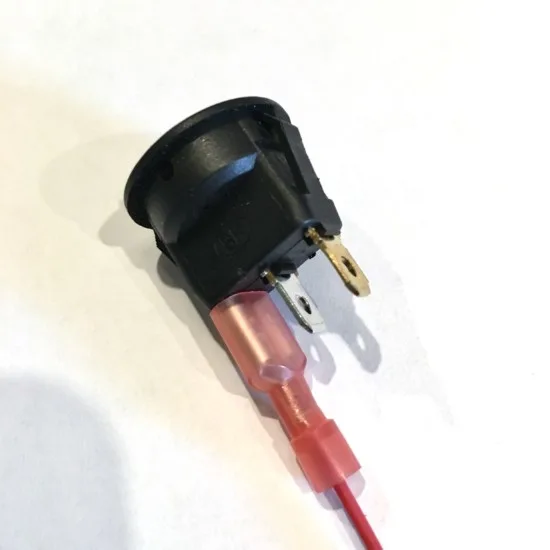
Or sometimes female spade connectors may be used for connecting to devices that have male blades built in, like this 12V switch.


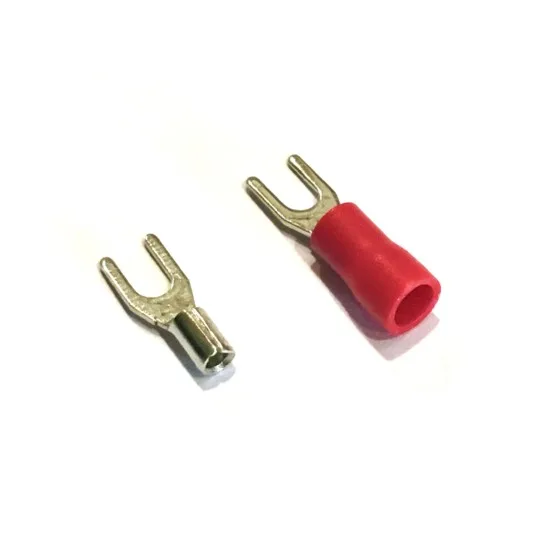
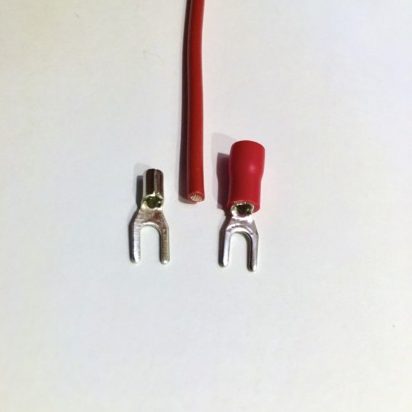
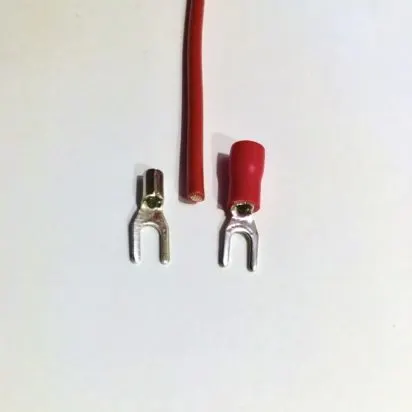
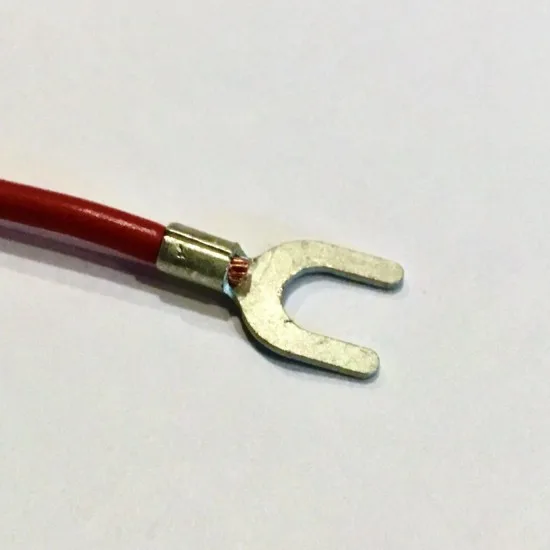
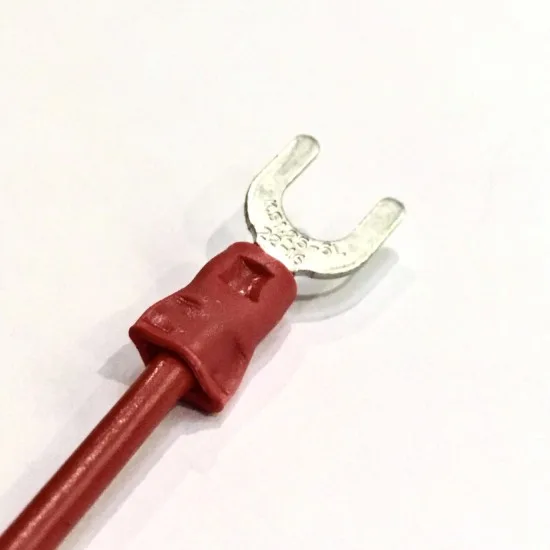
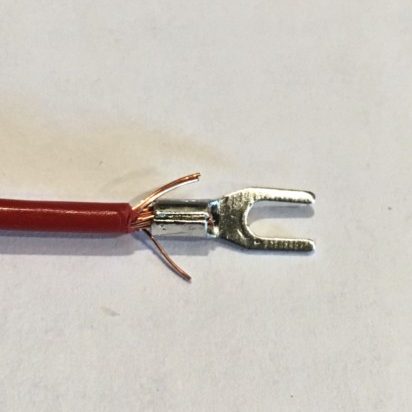
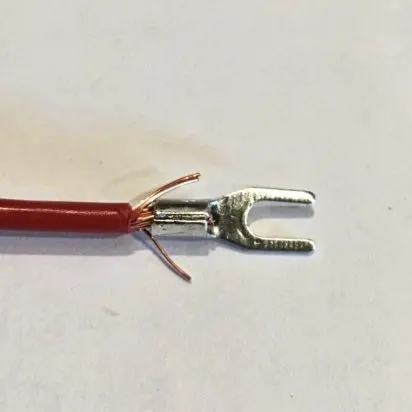
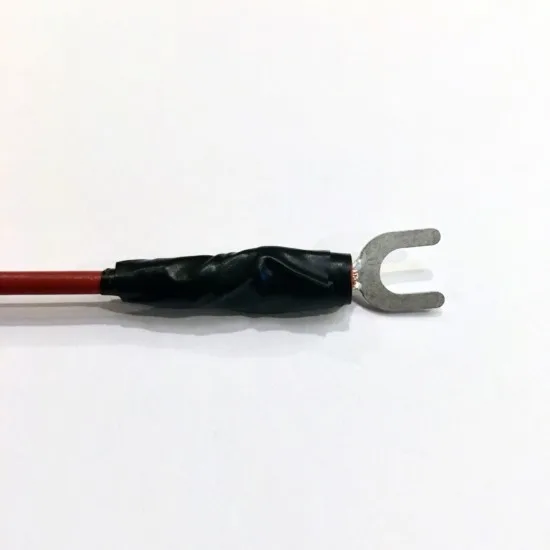
Spade Fork Terminals

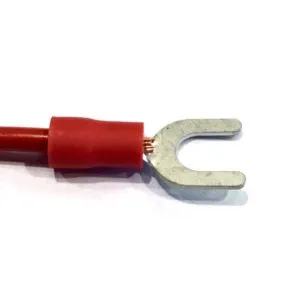
The spade terminal looks like a two-pronged fork, and thus sometimes called a fork terminal or spade fork terminal. They are used for connecting wires to a screw or bolt (sometimes called a stud or post).
The two prongs of the fork straddle the screw, and the head of the screw is tightened down onto the prongs.
Spade fork terminals will not only have size specs for wiring, but also what size stud they connect to. That is, how big the fork part is. (1/4″ stud, 3/8″ stud, etc).
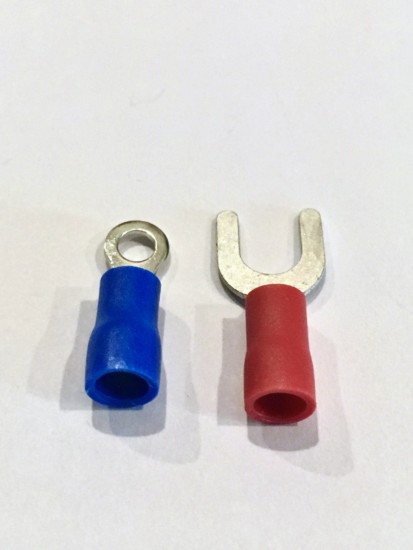
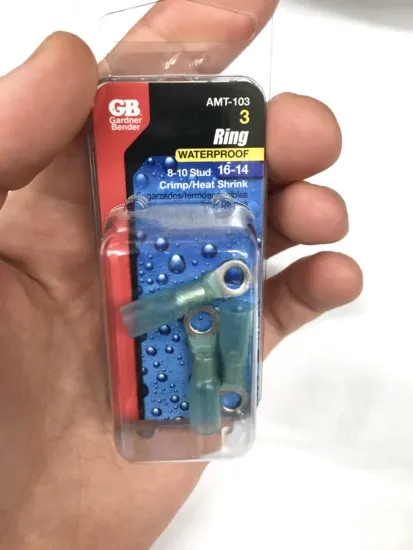
Ring Terminals and Compression Lugs

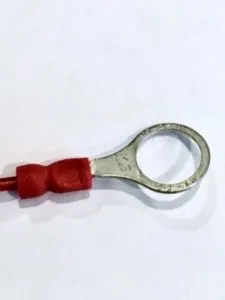
Ring terminals and compression lugs are closely related because they both have a hole in the middle. Like the spade fork, they are used to connect a wire to a screw or bolt.
Ring terminals are generally for smaller wire sizes, approx. 10AWG and smaller.

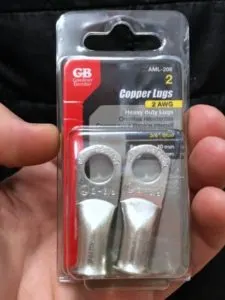
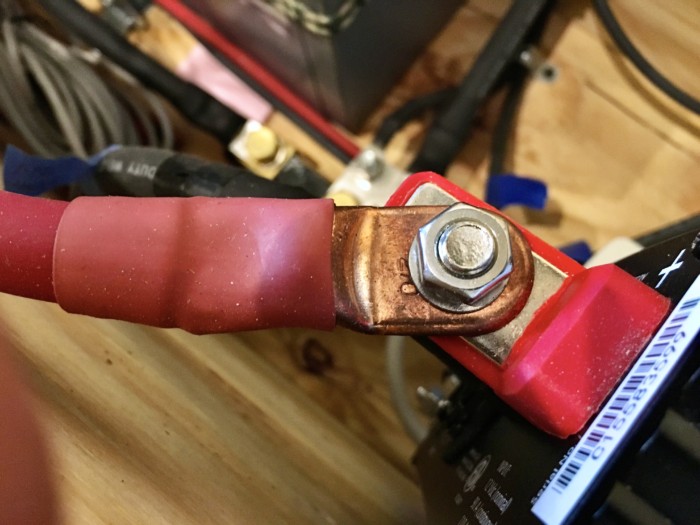
While compression lugs are more robust and suitable for wire sizes 8AWG and larger where more strength and surface area is needed. Compression lugs also usually need to be tightened to a specific torque with a torque wrench to ensure proper connection.
Lugs and Ring Terminals will be sized for a specific wire gauge to fit into the barrel end. But also they will specify how big the hole is for what you’re connecting to. (1/4″ stud, 3/8″ stud, etc.)
So how do you know when to use SPADE vs RING vs COMPRESSION LUG???
For any wires larger than 8AWG use compression lugs because of the extra strength and contact surface area. (like for high current situations like battery connections and inverter connections)
For any wires 10AWG and smaller use ring or spade terminals. This is common for connecting DC loads to a fuse box.
Ring terminals are technically more secure since the screw has to be completely removed in order to remove the connector (but people find them to be a pain). While spade fork terminals are more convenient because the screw only needs to be slightly loosened to slide the spade fork in and out.
I find that spade terminals are plenty secure for smaller wires, and most people choose spades for convenience.
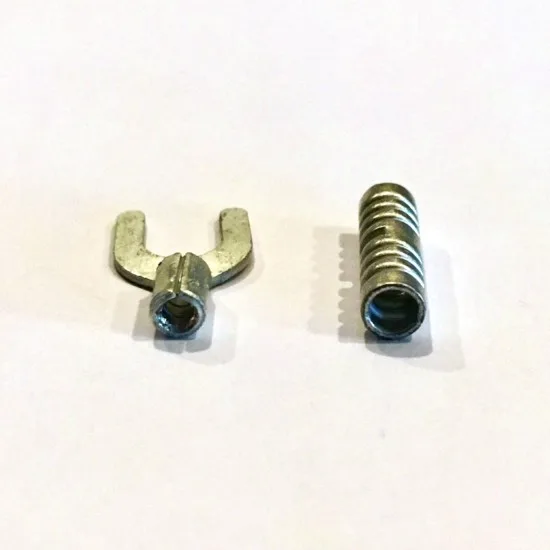
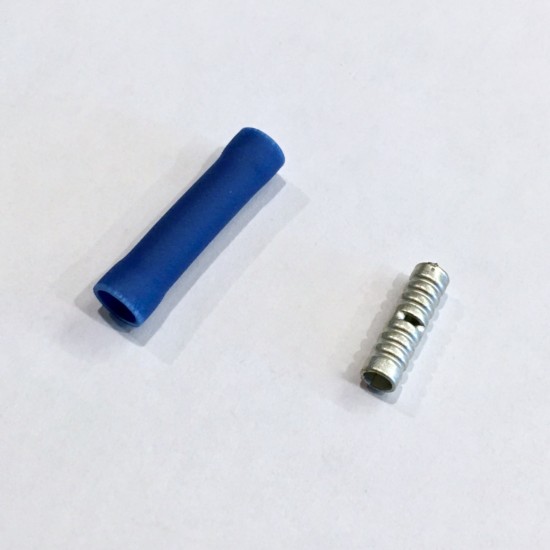
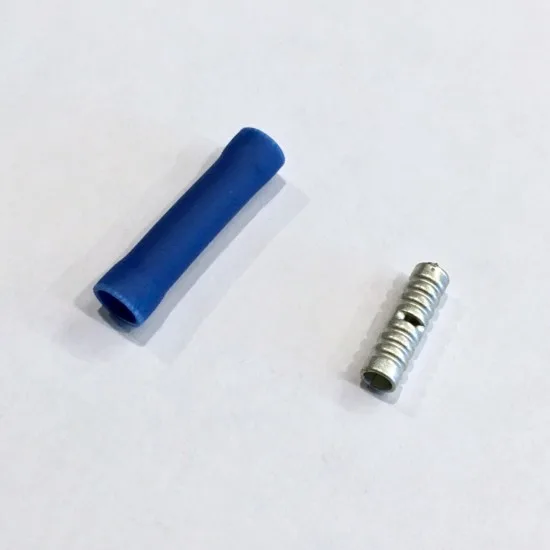
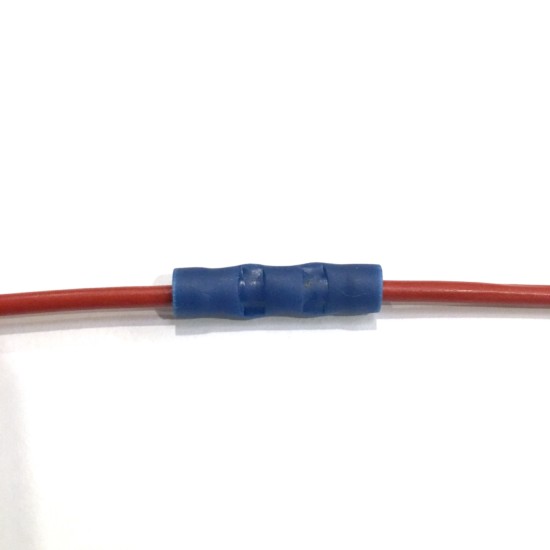
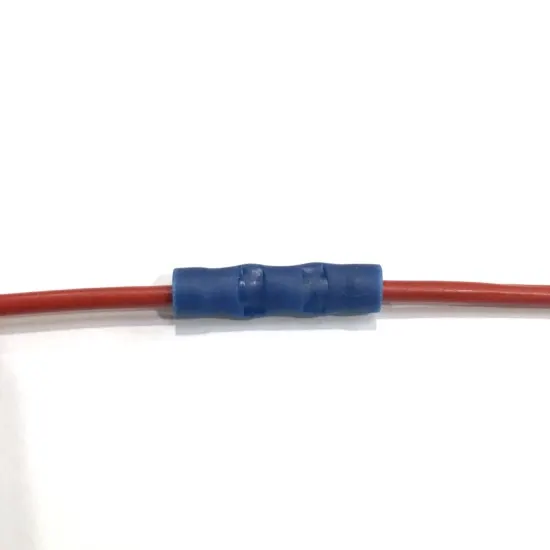
Butt (Splice) Connectors
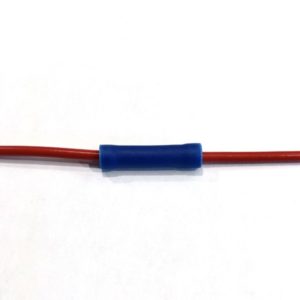
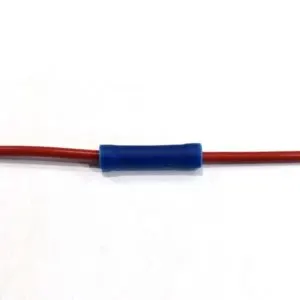
Butt connectors are used to join two wires together. The most common place to use these is to add extra length of wire to a device. For example, lots of devices come with only a couple of inches of wire. So butt splices can be used to add an additional length of wire to reach farther away.
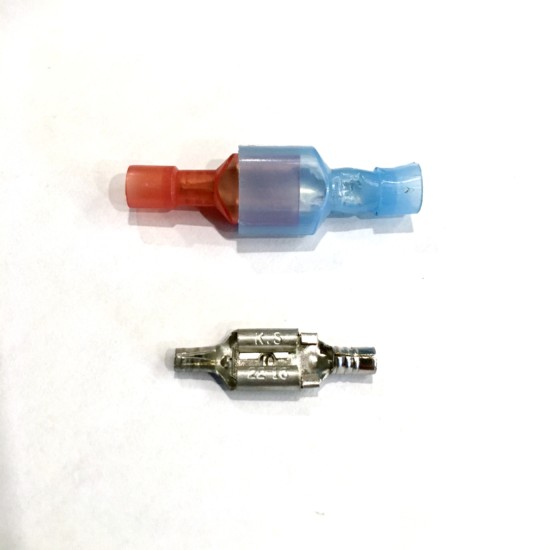
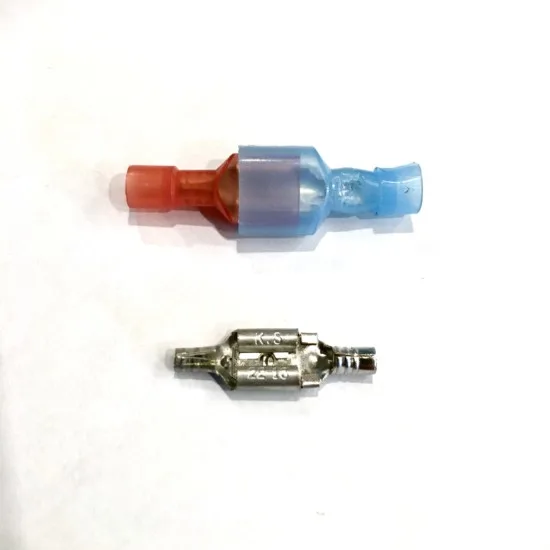
Insulated and Uninsulated

Most connectors and terminals are available in insulated and uninsulated varieties. I always recommend using insulated terminals because they are generally better for beginners.
To be clear, it is widely assumed that you will insulate an uninsulated terminal after installing. It’s pretty rare to leave an uninsulated terminal completely bare and unprotected. So buying connectors that are already insulated saves you a step.
Plastic versus Heat-Shrink Insulation
The two most common types are nylon/plastic and heat shrink. Nylon/plastic are the most common and are crimped at least once on the barrel and sometimes a second time on the cuff of the insulation for additional strain relief.

Heat shrink terminals are crimped only once on the barrel, then the insulation is heated to form a watertight seal around the wire. These are most popular in marine applications where water is often present, so they are usually overkill for a van/RV.

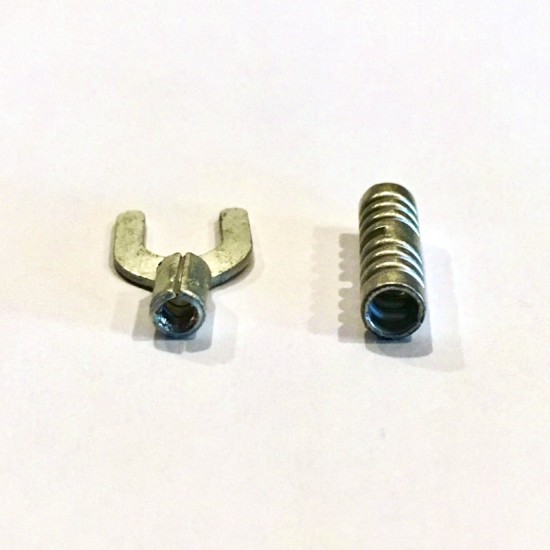
So I recommend using regular plastic insulated terminals. The one caveat, however, is that insulation can obstruct your view of the barrel. Which can lead to improper use.
So be sure to fully understand the underlying parts of the connector. If you are unsure, it’s not a bad idea to cut one open just to see what it looks like inside.
Screw Terminals
Some devices may come with screw terminals. You simply strip off some of the wires’ protective sheath and insert the bare end of the wire into the screw terminal.
Then by turning the screw, it tightens down on the wire to secure it and complete the connection. The most common place to see this in a solar setup is on the charge controller.
Technically, when using stranded wire with a screw terminal you should be adding a ferrule to the end of the wire before inserting it. A ferrule is a metal cylinder that goes around the ends of the wire strands. It ensures that the wire strands remain in one snug unit and don’t splay out too much.
However, I have seen this guideline ignored in many van conversions.
Crimping
Crimping is the act of physically compressing a connector or terminal onto a wire. It is very important to learn proper crimping techniques to avoid dangerous or faulty connections.
Below, I have separated crimping into two categories because the technique is different for small wires versus large wires.
Crimping wire 10AWG Or Smaller
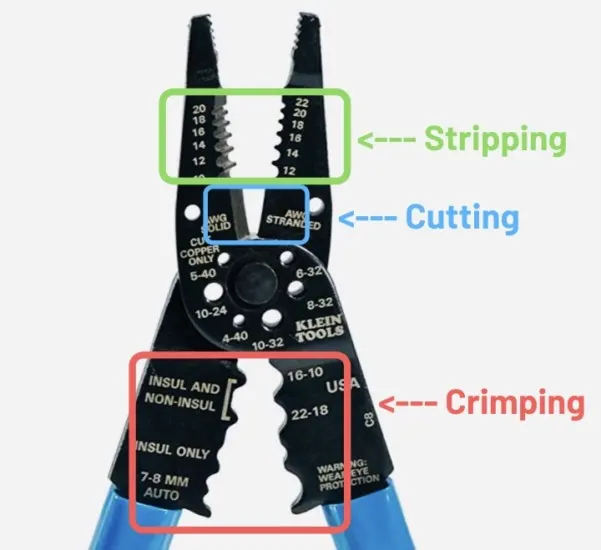
For crimping wire 10AWG and smaller we will use our Electrician’s Multitool (Wire Cutter/Stripper/Crimper). And for example, I used 14AWG stranded copper wire and an insulated spade terminal. I also show what it looks like uninsulated so easier to see what is going on.

Cut the Wire
Measure how far the wire needs to travel (and choose the appropriate wire gauge) and cut it using the cutting section of your pliers. I always add a little extra just in case of mistakes. Then you have a little slack to cut off the mistake and try again.
Strip the Wire
Hold the end of your wire up against the barrel of the connector to get an estimate of how much to strip off. The insulation will usually have a curve that shows you where the barrel ends. (But you can see why it’s sometimes helpful to see the barrel without any insulation.)
Then, using the stripping section of your pliers strip off the insulation at the end of the wire so that it fits in the barrel.
The pliers will have markings that indicate which slot to use for the size wire you have. I am using 14AWG stranded wire, so I reference the right side of the pliers and then use the slot labeled with a 14. (If you had solid wire, you would use the marking on the left side).
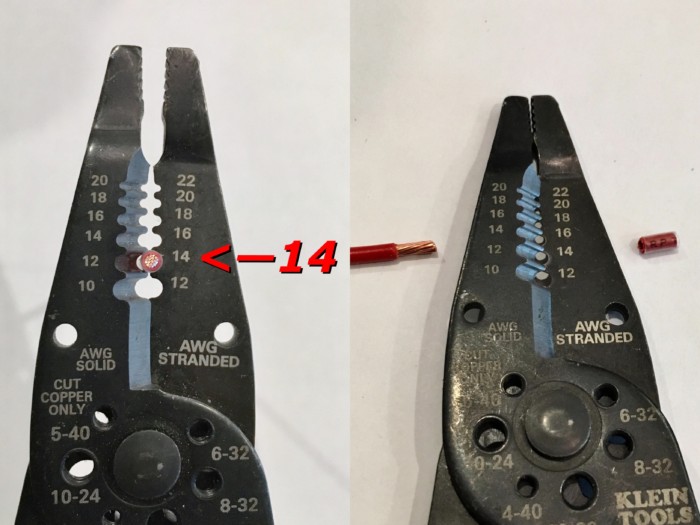
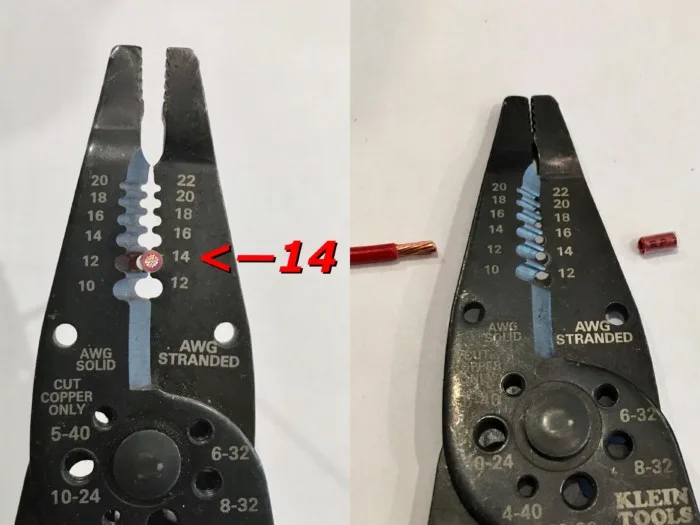
It helps to gently rotate the pliers to fully cut the insulation. Then pull the pliers towards the end of the wire to strip the insulation off.
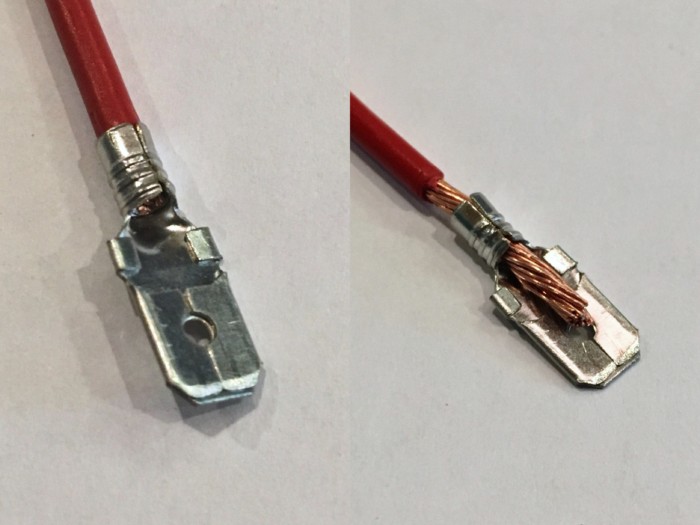
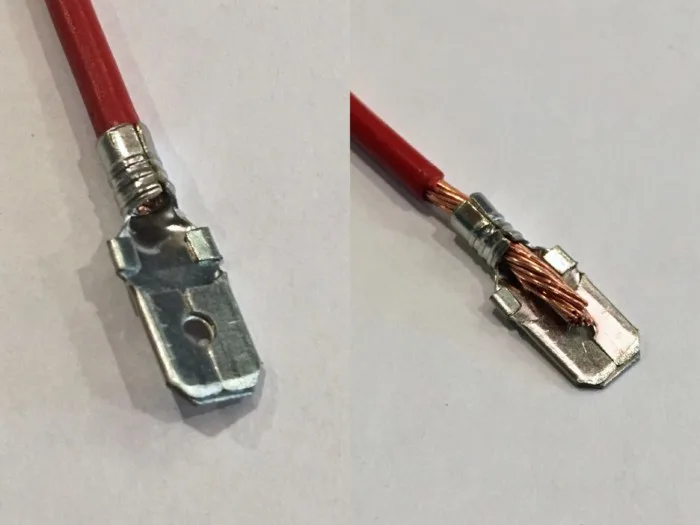
Then check the fit of the wire inside the barrel. You want the bare wire to extend slightly past the end of the barrel, but make sure that the insulation doesn’t go into the barrel. This is what it should look like (I used an uninsulated connector so it’s easier to see).

Crimp the Connector
Then using the crimp section of your pliers, you compress or deform the barrel so that it squeezes the wire. This creates a solid connection between the wire and the metal of the connector allowing electricity to flow uninterrupted.
It’s pretty hard to over-crimp with just normal hand strength, though it is possible. So feel free to give the pliers a firm (but not crazy) two-handed squeeze.
Then give the wire and connector a firm tug to make sure that the wire doesn’t slide out.
Most electrical pliers will have several different crimp locations for different connector sizes and types. Take note of the size rating of the connector (AWG) and whether or not it’s insulated. And the final notable difference is whether it has a split barrel or full barrel.
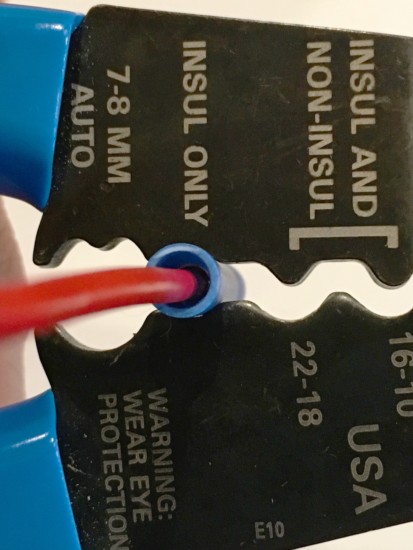
If your barrel is split (not a complete circle), then use the crimp section that has a peak and valley. Line up the valley with the split in the barrel, and then the peak will be lined up with the continuous side of the barrel.
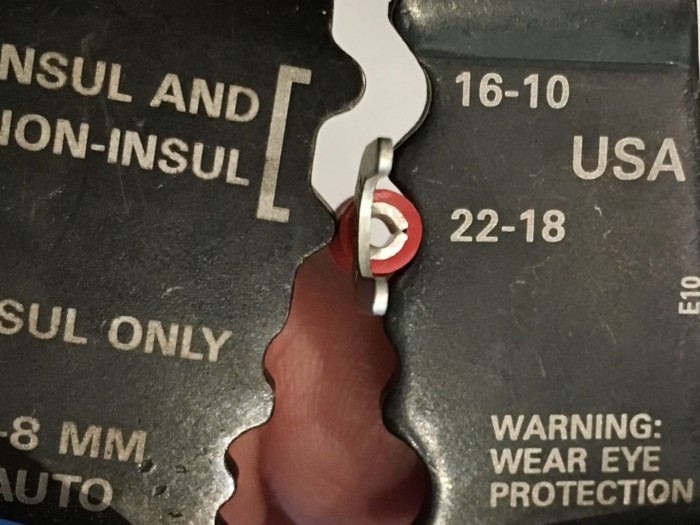

For split barrels, like this 18AWG spade terminal, use the peak/valley section of the crimp section labeled for 22-18AWG. Notice how the split in the barrel is lined up with the valley of the crimper. And the continuous side of the barrel is lined up with the peak of the crimper.
If your barrel is a complete circle, then use the crimp section that is shaped like parentheses ( ).
For example, this insulated butt splice has a barrel that makes a complete circle. So crimp it using the crimp section labeled “Insul. only” for full barrels.

And in the case of a butt splice, be sure to crimp both sides of the barrel (one for each wire).
After you have crimped the barrel onto the wire, it’s customary to crimp the extra plastic insulation around the wire. This provides extra strain relief on the connection.
And don’t forget to test the crimp by giving it a firm tug.

Crimping Wire 8AWG or Larger
The fundamental goal of crimping larger wire is basically the same as smaller wire. However, the tools and techniques are different.
Cut the Wire
Cutting large wire requires a much bigger tool to achieve and clean flat cut. It’s generally best to use a pair of wire cutters that are dedicated for cutting thick wire. And because thicker wire is less flexible and more expensive, it’s normal to cut exactly the length you need.
Definitely a measure twice, cut once kind of situation.
Strip the Wire
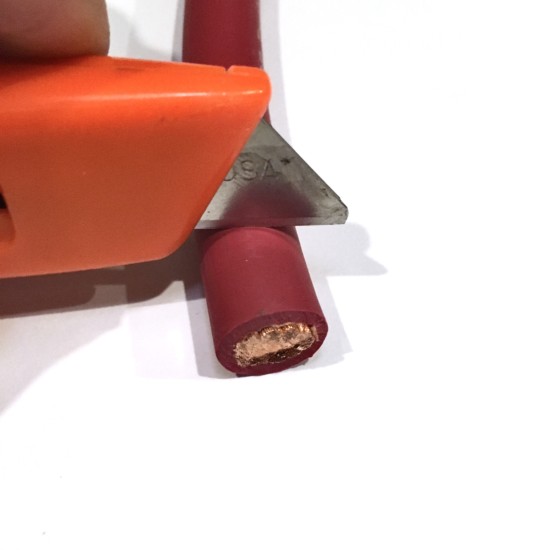

Same idea as stripping smaller wire but it may require a different tool dedicated to stripping large wire. However, the common hacky way to do it is with a utility knife or razor blade. Of course, there is a greater chance for error when stripping wire this way, but it can be done.
Just like before, line up your wire next to the barrel of the connector and mark how much insulation to strip off. Then CAREFULLY cut the insulation by holding the blade against the insulation and rotating the wire.
Once the insulation is nearly cut all the way around, the end can be worked off. Be sure to inspect your wire for any damaged or broken strands.
Crimp the Connector
Crimping heavy-duty connectors like compression lugs and think gauge wire requires special attention to the angle that the connectors are crimped on. Thick wire is too rigid and cannot be twisted easily.
Therefore, your connectors must be crimped in the proper orientation. It’s helpful to mark the orientation that you want on the wire with a marker or tape.
Once you have the proper length and connector orientation, insert the bare end of wire into the barrel of your connector.
Then line up the barrel inside the hammer crimper. Make sure the wire doesn’t slide out while you make several firm pounds with the hammer.
Then inspect and test your crimp by pulling hard on the connection.
Bad Stripping and Crimping
If your stripped section is too short, the crimp may not create a strong or complete connection. If it’s too long, the extra wire will get in the way of the connector and can create a potential for electricity to escape.
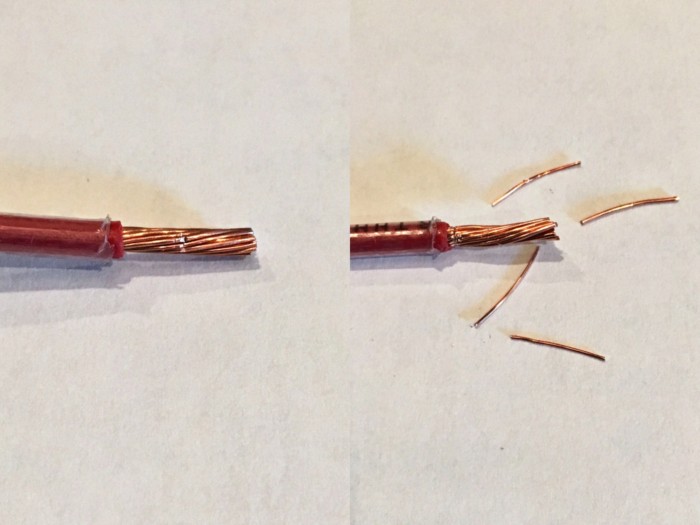
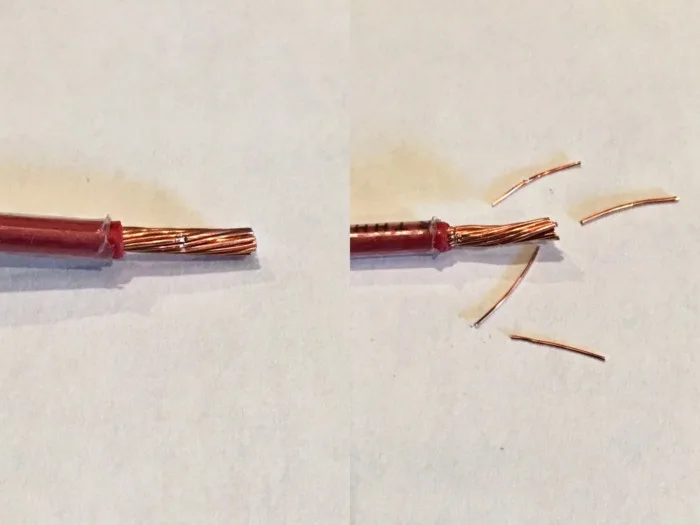
Inspect your wire stripping to ensure that you didn’t damage the wire. Poor wire stripping can be wire strands that have gouges taken out, or strands cut completely off.
These damages will reduce the amount of current that your wire can carry. Anything more than minor scratches should be considered unacceptable. Cut off the end and start again.
Make sure that no strands fray outside the barrel. This reduces the current that your wire can carry and provides ways for electricity to escape its intended circuit.
Do not try to make crimps with regular pliers. They are not capable of deforming the barrel properly.
To Twist or Not To Twist?

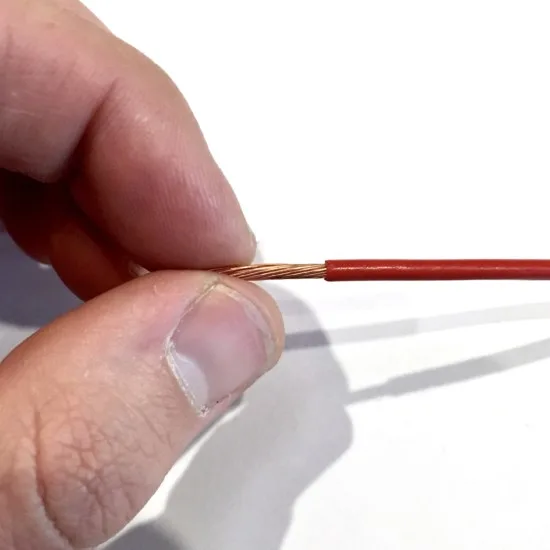
With stranded wire, there is some debate over whether or not to twist the end of the wire after it has been stripped.
The twist is sometimes helpful to keep all the strands together so they don’t fray when inserting into a barrel. However, opponents say that touching the wire with your fingers introduces oils that can lead to corrosion.
My take is that you should avoid twisting the wire if you can get all the strands neatly inside the barrel. But if you can’t, a light twist is permissible because the danger of corrosion isn’t extreme.
Crimping versus Soldering
Another way to join wires is to solder them together (pronounced like sodder). Soldering is a method of melting metal filler (called solder) into the two wire ends where they meet. And then when the solder cools, it becomes solid and fuses the two wires together.
I don’t recommend soldering your connections because it is difficult to learn, and requires more tools/supplies. And even when done properly, it doesn’t provide much advantage over a properly crimped connection. When done poorly, it can actually result in a much more brittle connection.
Insulation
Most wires and connectors are insulated, but what about all the places where your wires are cut and connectors exposed? To protect your connections we use a couple of other insulators.
The two most popular methods for insulating exposed connections are electrical tape and heat-shrink tubing. They protect your connections from damage caused by abrasion, moisture, corrosion, temperature fluctuations, alkalis, and acids.
Covering your connections also ensures that the electricity stays confined within its intended circuit.
Heat-Shrink Tubing
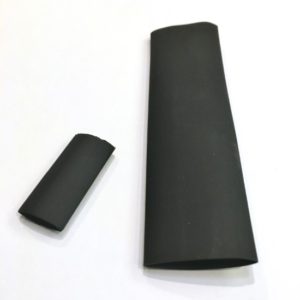
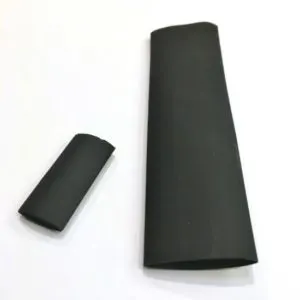
Heat-shrink tubing is a rubber sleeve that has glue on the inside to create an airtight seal with wires and connectors. It’s great for insulating larger connections, like compression lugs used with large gauge wire (8AWG and up).
It’s common to buy red or black heat-shrink tubing to match the wire it’s used with.
The best tool to activate the heat shrink tubing is with a heat gun, but the poor man’s version is to just use a hair dryer (but it takes wayyyy longer).
Tips:
Slide the heat shrink onto the wire BEFORE you crimp on a connector because the heat shrink is usually too small to slide over the connector.
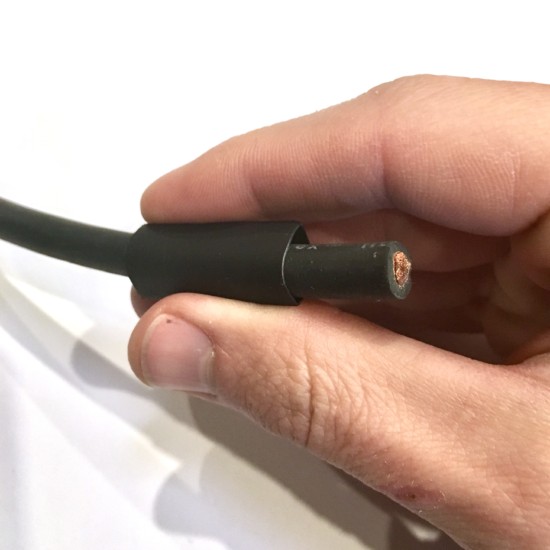
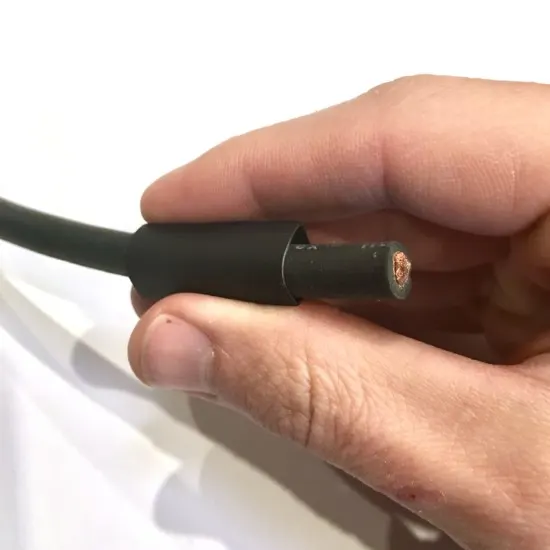
The tubing should extend at least a 1/2″ over the wire’s insulation and the connector, but make sure it doesn’t interfere with the connection point.

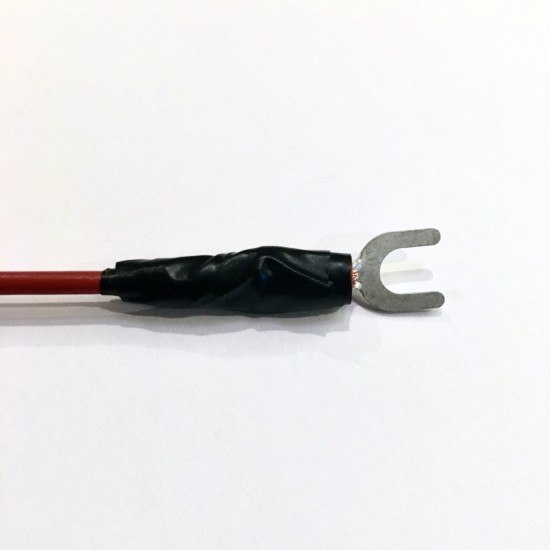
Electrical Tape
And for all smaller wiring connections (10AWG or smaller) to things like lights and vent fans, electrical tape is sufficient.
Tips:
Electrical tape can be ripped by pulling quickly apart, but cutting with scissors leaves cleaner, more sticky ends.
Start the tape at an angle so that it compensates for the difference in circumference between the wire and the connector.
Where To Buy Supplies
We have links to nearly everything in our Vanlife Solar Shop.


Wiring
Determining the proper size of wiring is a key first step. Proper wire size depends on current, distance, and voltage.
Places where lots of current flows, like connecting two batteries together, requires thick gauge wire (1/0, 2/0, etc).
Wiring for small DC loads like fans, lights, efficient 12v fridges, etc are usually wired with between 10-18AWG wires.
Use this Wire Size Calculator to verify wire size.
Buy High-Quality Thick Copper Wire Here (2/0AWG – 8AWG, common Battery and Inverter Connections)
Buy High-Quality Thin Copper Wire Here (10AWG – 18AWG, common for DC loads)
Connectors
Which connectors you need also depends on the devices you are trying to connect.
You can buy a package of assorted connectors for small DC loads, so that you have different connectors on hand for most small connection tasks.
For large wire connections (battery, inverter, shunt, etc) you can buy individual compression lugs in the specific sizes you need. Or buy an assorted package.
Heat Shrink & Electrical Tape
Assorted Heat Shrink Tubing & Heat Gun
This 3M Electrical Tape is simply the best, and still affordable.
Tools
Electrician’s Multitool Pliers
Digital Multimeter – (How To Use A Digital Multimeter)
Takeaway | Wiring, connectors, and Crimping
So while it may seem like a lot of information, each decision can be made with the same template…
What size/type wire is appropriate for the connection?
What size/type of connector/terminal should be used to connect the wire from point A to point B?
What should I use to crimp the wire and connector together?
And what insulation is appropriate to finish the connection?
Then it just comes down to using proper tools and techniques. If you follow the information outlined above, you will be able to make safe and functional electrical connections.
How Much Did Our DIY Camper Van Conversion Cost - tworoamingsouls
Friday 5th of May 2023
[…] are many different sizes of wires and connectors that go into the electrical build out. You will also need an inverter for the devices you have that […]
Campervan Bed Ventilation Fans with Humidity Sensor - tworoamingsouls
Tuesday 4th of April 2023
[…] straight forward. (If you need to learn more skills about wiring, crimping, etc, then read my post about Wiring.) But here’s a wiring diagram I made to illustrate the basic […]
Campervan Sink Plumbing With Water Filtration System - tworoamingsouls
Tuesday 4th of April 2023
[…] […]
Vanlife Solar: Beginner's Guide to Solar Components - tworoamingsouls
Tuesday 22nd of March 2022
[…] Part 2: Guide To Wiring, Connectors, and Crimping […]
Vanlife Electrical WITHOUT SOLAR - tworoamingsouls
Friday 18th of March 2022
[…] One common way to power an inverter is by connecting it to your house battery. These are typically installed near your house battery, but outlets or extension cords can be wired around the living area of your van for convenience. Wiring an inverter this way does require decent knowledge and skills of electrical. If you want to learn the basics, check out my post: Wiring, Connectors, and Crimping. […]