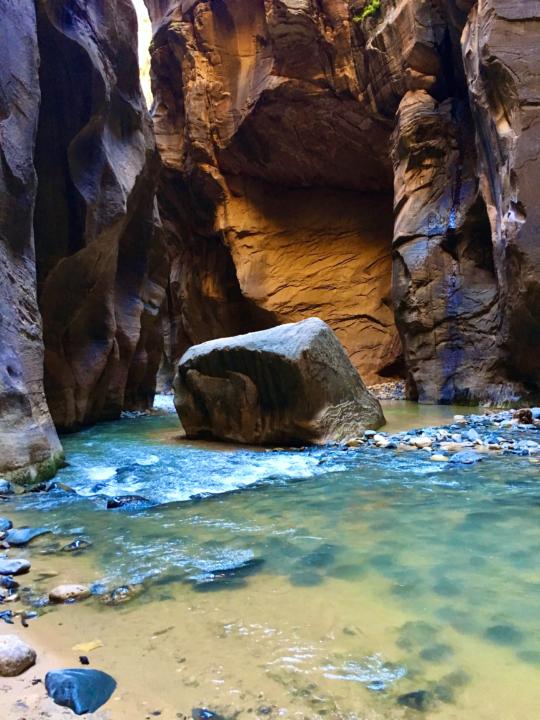

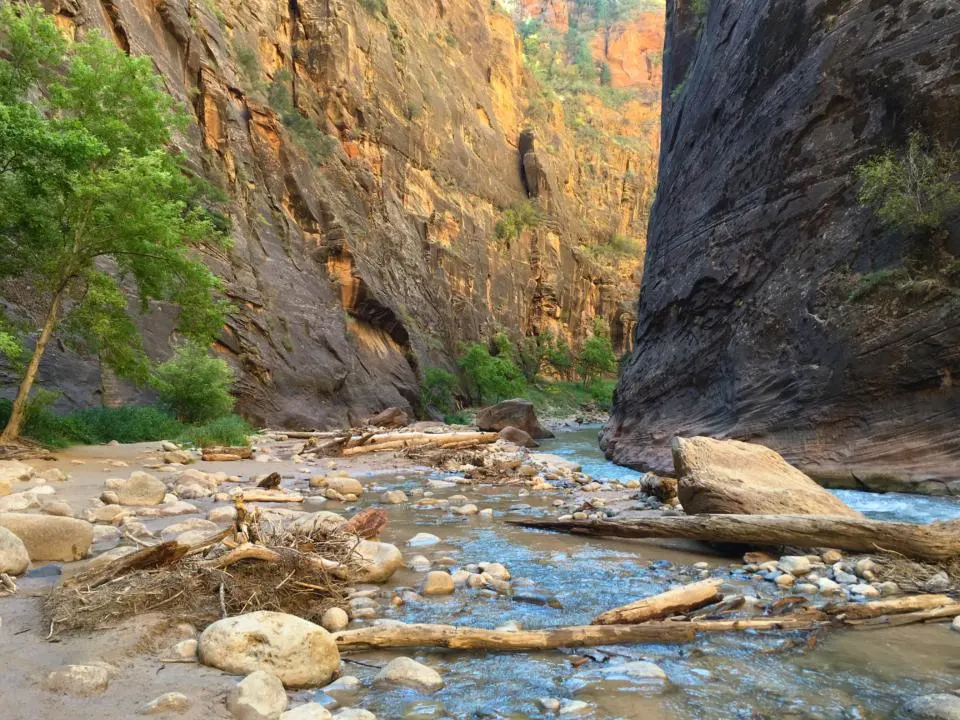
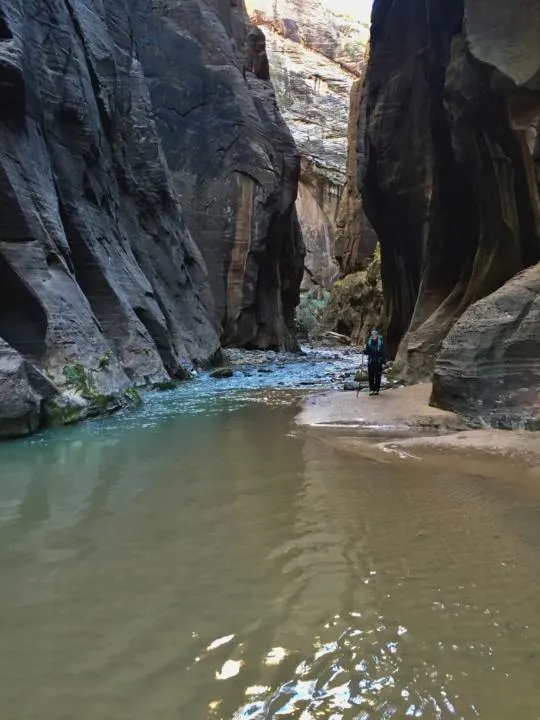
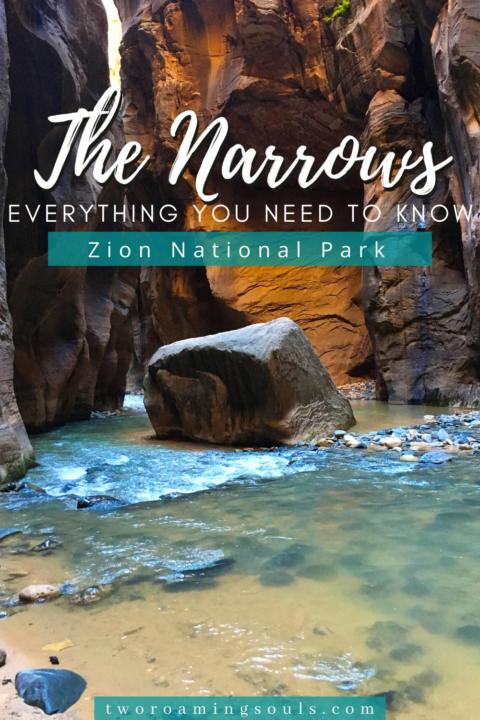
The Zion Narrows Hike is a spectacular canyon hike in Zion National Park. It is the narrowest section of Zion Canyon, with some sections that are a thousand feet tall but only 20 feet wide.
The Virgin River flows through the canyon, covering most of the canyon floor. You spend the majority of the time hiking in the river since there are very few trail sections. And depending on the time of year, the water can be anywhere from ankle to waist deep.
So preparing to hike The Narrows requires some unique preparation. The two ways to hike The Narrows are top-down point-to-point, or bottom-up as an out-and-back hike.
Top-Down Zion Narrows Hike
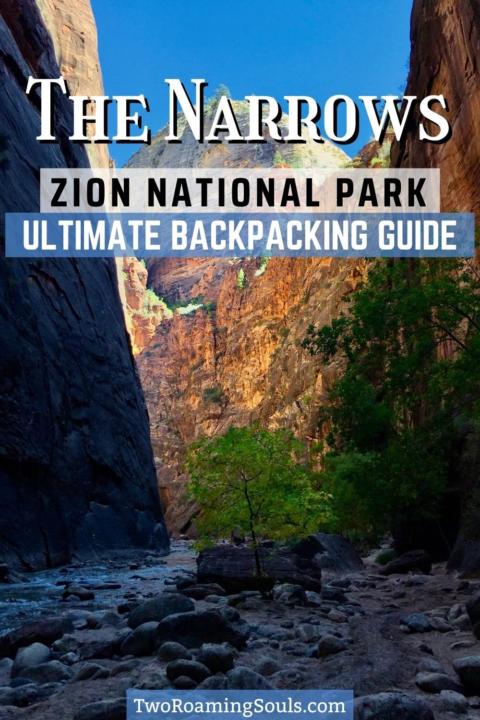
The Zion Narrows can be hiked as a 16-mile (26km) top-down hike (permit required) from Chamberlain Ranch to finish at the Temple of Sinawava (last bus stop on the park bus service).
Jake and I completed the top-down hike as an overnight backpacking trip on October 12-13th, 2016. While you can complete the top down as a day trip, I would not recommend it. You will feel incredibly rushed, and not to mention exhausted.
Bottom-Up Zion Narrows Hike
You can also hike The Narrows bottom-up without a permit, from the Temple of Sinawava. This will be an out-and-back hike. The first mile is a paved, wheelchair-accessible path that allows anyone to experience the first mile of the canyon. After the first mile you will have to walk right in the river. Expect cold, fast-flowing water and slippery rocks. The farthest you can go from bottom-up is “Big Springs” (a natural spring that emerges from the side of the canyon). The round-trip to Big Springs and back is 9.4 miles (15km).
If you only have time for the bottom-up hike, you should absolutely still check it out. However, I would urge you to make time for the top-down backpacking trip. It makes for an unforgettable adventure that will challenge and amaze you. This hike has many unique dangers and challenges, but with adequate preparation, you can conquer The Narrows safely and enjoyably. I’ve devoted the rest of this post to describing the logistics of the top-down overnight trip.

Permits For The Zion Narrows Hike

The first thing to know about hiking top-down is you will need a wilderness permit from the NPS. For dayhikers (not recommended) you still need to get a permit. You can apply for the “daily lottery” which technically means you can apply 2 days in advance. Or try the advanced lottery. Lastly, there is the option to get a walk-in permit, which can be obtained from the visitor center.
For overnight backpacking, you need to get a backpacking permit here. When you secure a backpacking permit, you will choose your campsite from the 12 available sites. You can reserve a permit up to 3 months in advance or hope to receive a walk-in permit if you didn’t plan your trip in advance.
We failed to secure a permit ahead of time and were forced to try for a walk-in permit. The walk-in permits are only for reserving one day in advance but are not always available. If you are able to secure one, you will need to be ready to go on 24 hours notice. We planned to have 4-5 days at Zion to give us enough time to do The Narrows if we didn’t get a permit on day one.
On our first full day there, we went to the visitor center about 7:30am (30 minutes before they open). There were other people already waiting in line, but luckily they were hoping for different permits. I’m not sure how many permits are saved for walk-ins, but I wouldn’t count on getting them your first try.
Reserve A Shuttle To The Trailhead

IMMEDIATELY after you get your permit, you should schedule your shuttle to the trailhead. Right after we got our permits we started calling around to the various shuttle companies. The first company was fully booked, but we managed to reserve two spots with Zion Adventure Company.
We paid $42 per person, which is a bit expensive for a camping trip, but I would do it again in a heartbeat. Our driver, Felicia, was really friendly and informative. The 6:15am bus was sold out, so we had to get the 9:30am bus which wasn’t ideal (but doable) as you want to have plenty of time to reach your campsite. I would aim for the earliest shuttle you can.
If you have multiple cars in your party you could shuttle yourselves, but honestly, it’s about an hour and a half drive to the trailhead from the visitor center along mostly dirt road. When you finish the hike, I doubt you would want to do the 3 hours of driving to retrieve your shuttle car.
Renting Gear For The Zion Narrows Hike

Next, you will need to make sure that you have the right type of gear for an overnight backpacking trip. Aside from the standard backpacking equipment, there are some unique pieces of gear that are highly recommended for The Narrows. The three most critical items are neoprene socks, river shoes, and a sturdy walking stick.
The shade of the canyon and the cold river makes this hike significantly colder than the rest of the park. On an 80 degree summer day, it could be below 60 degrees in some sections of The Narrows. And, you will be ankle to knee deep in the river for almost 70% of the hike so trust me you will want to rent gear.
We rented from Zion Outfitters which is located near the visitor center, but there are other companies offering the same gear. We rented neoprene socks, river shoes, and walking sticks. The special neoprene socks will keep your feet warmer than any normal hiking socks. They function like a wetsuit, so your feet will get very soggy, but at least they will be warm.
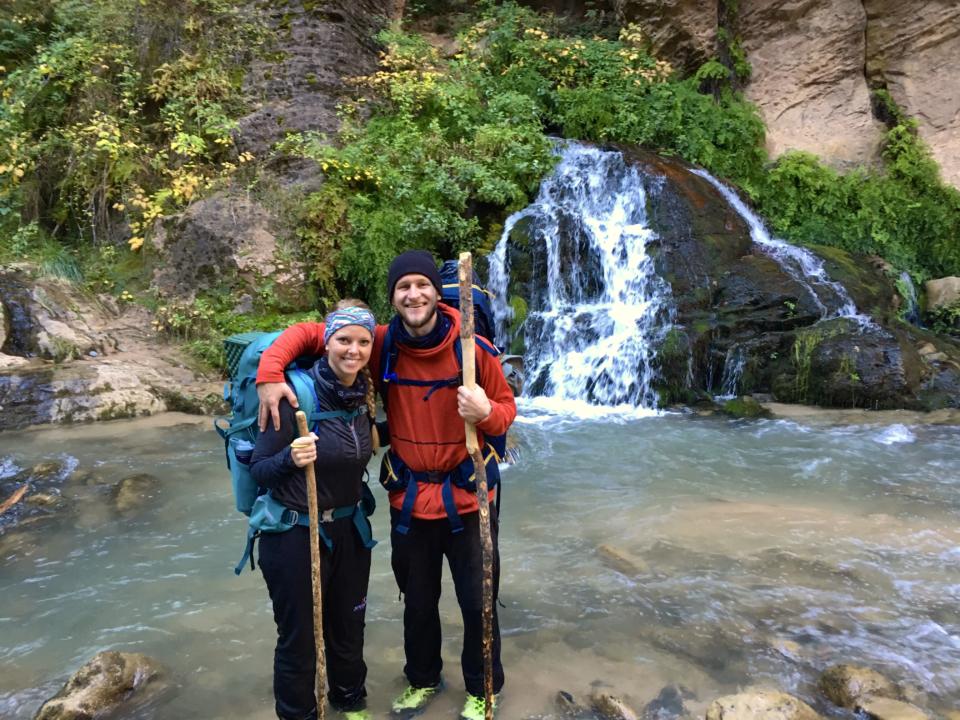

The shoes we rented are specially designed for having traction on slippery rocks. And your walking stick will function is extremely important for helping keep your balance in fast-moving water and slippery rocks. You can also bring your own walking stick. Jake used one he found in the woods near our apartment. You want a sturdy stick about shoulder height so you can spread your hands far apart. Trekking poles are not recommended because they aren’t sturdy enough to be useful in the river.
They also rent out pants or dry suits depending on the weather, but unless you go during the winter or spring you probably won’t need either. But don’t wear cotton pants, you want something like fleece or wool because they maintain their warmth properties even when wet.
Additional Tips For Packing For The Zion Narrows Hike

You will want to pack as light as possible, but bring lots of layers because the canyon is cool even on hot summer days. We didn’t get wet past our hips, but the water level changes throughout the year, so it’s a good idea to ask a park ranger what depth of water to expect during your hike.
I highly recommend each person to bring a dry bag, ziploc bags and a trash bag. If you should happen to slip and fall in the river, you want to know that your sleeping bag, equipment, and change of clothes are dry. You could be in a lot of trouble if you have to spend the night without dry equipment/clothes.
You can put smaller items that you want easily accessible like phone, camera, and snacks in ziploc bags. Depending on the water levels, you can also construct a trash bag to fit around your pack to try and protect it from any water soaking it if you have to go past your waist or have to lift it over your head.
You also need a way to secure your food at night from mice and other critters. We personally alway backpack with a bear canister, because it works for everything from Grizzly bears to little mice. We personally have the Bear Vault 450 and love it. It’s really effective, easy to use, and doubles as a seat.
The other thing you will need is a water filter. It’s not really wise or realistic to carry all the water you will need, especially if you plan to use water for cooking dinner. Our go-to water filter is the Platypus GravityWorks 2-liter filter system.
Starting The Zion Narrows Hike
There are drop-toilets at the trailhead so you can relieve yourself one last time before departing. Even though we told you to prepare for a cold river hike in a shady canyon, the first mile or so is an actual dry trail that follows the river through rolling cow fields.
We started from Chamberlain Ranch wearing pants and long sleeve top layers. After 5 minutes of hiking in sunny and 75 degrees, we were way too hot! We both shed down to t-shirts, and kept going with pants on, but were still uncomfortably warm. If you are too hot at the trailhead, you will burn up before reaching the coolness of the canyon. Obviously, this will depend on the weather and the time of day you start. But you can usually plan on being warm at the beginning and then adding layers as you descend into the canyon.
You will come to your first river crossing after a mile or so. Then begins this game of crossing the river versus just walking right in it. The trail will continue to cross the river back and forth, and you can waste time trying to follow these little sections of trail along the riverbank, but it’s usually best to just commit to the river.


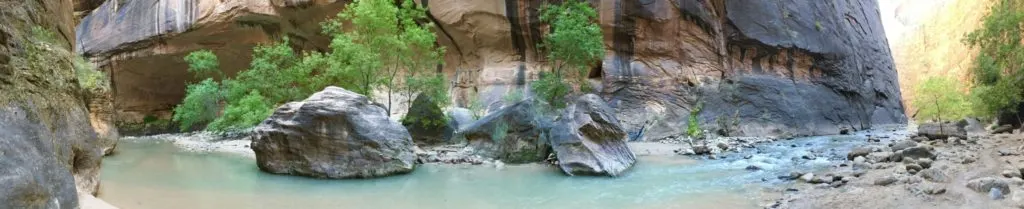
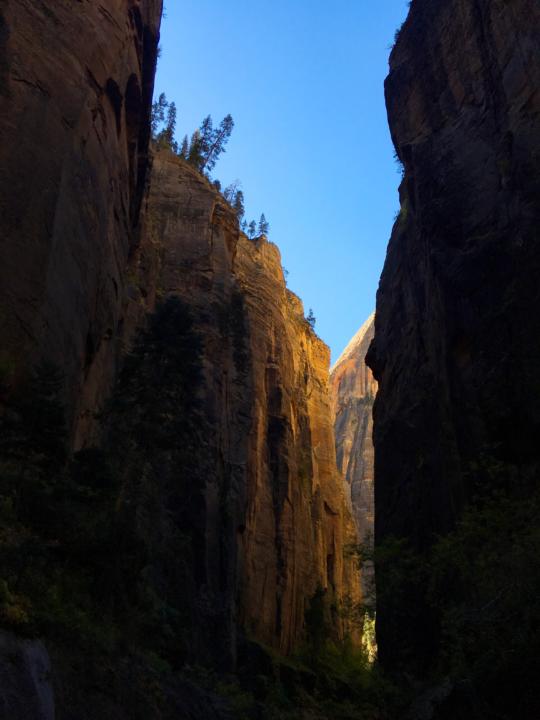
It’s really cool watching the terrain transform from rolling cow fields into a tighter and tighter canyon. Around every turn, the canyon gets a little narrower and a little taller. It’s like the beauty of The Narrows slowly reveals itself to you at the meandering pace of the water flowing beneath your feet.
In October, the flow of water on day one was not very strong, and at only ankle deep or so, I wasn’t worried about being knocked down. At this point, you want to be adding layers as needed. So it’s smart to keep your extra layers at the top of your dry bag, so they are easily accessible.
Water Temperature In The Narrows
The water was around 50 degrees mid-October. Check out this website to see the water temperatures and flow for the time of year you are visiting.
Campsites At The Zion Narrows
There are 12 different campsites that can accommodate groups of 2-12 people. You choose your campsite when booking your permit. Campsite 1 is the first one you come across and 12 is the last. As you get deeper into the canyon you will start to see heavier flow and encounter knee deep or so water. This is about the time you will start to see the campsites, so be on the lookout for a post with your number on it.
This is the part where getting the 9:30am shuttle wasn’t ideal as we had just enough time to change into dry clothes, set up camp and make dinner before it got dark. It took up about 6 1/2 hours to get to our campsite. We got campsite 8 since we were walk-ins. I would recommend getting campsite 7-12 as it breaks the hike up pretty evenly.
Check out all the different campsites here (there are some designated only for large groups).
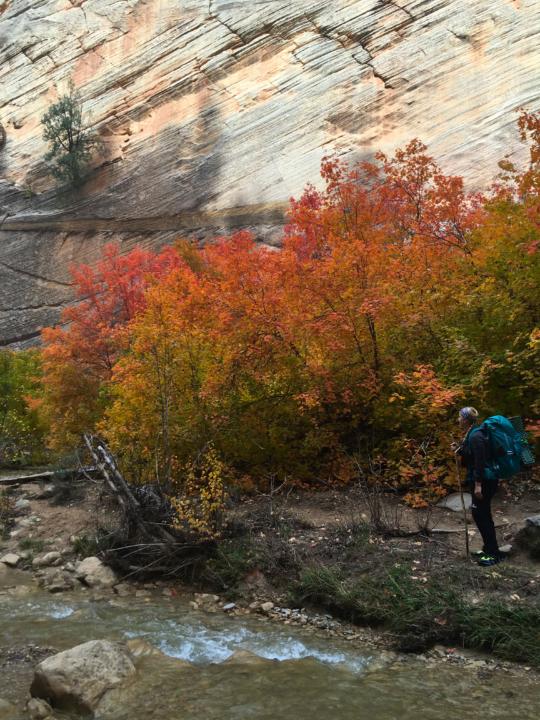
You will want to bring lightweight sandals or shoes to dry out your feet and walk around the campsite. It might be worth hanging any wet top layers out to dry. But don’t bother trying to dry out your shoes or socks because you’ll be getting right back into the river in the morning.
Nighttime in The Narrows
It did get chilly at night, probably in the low 40’s; but was definitely bearable. If anything, we brought more layers than needed, which I think is a good thing. But you definitely should have a warm sleeping bag that’s rated for the temperature expected at night.
You also need to set up a critter-hang for your food in a tree to keep away from little rodents. You should also put anything scented in your critter hang, like toothpaste, chapstick, sunscreen, etc. Or we highly recommend a bear canister, because it takes the hassle out of securing your food from critters.
Going To The Bathroom In The Zion Narrows
The National Park Service instructs hikers to pee in the flow of water so it can get carried in the current. If you pee up on the sand, water might not reach that area for months and can become very smelly. And by peeing on the sand you are really just delaying the inevitable.
(For this reason, plus the cow fields upstream, you really need a water filter)
For number two, they provide you with a sanitary bag at the visitor center to do your business. You must carry the sanitary bag out of the canyon in your pack and dispose of it when you get back to the Temple Of Sinawava.
Day 2: Hiking Out Of The Narrows

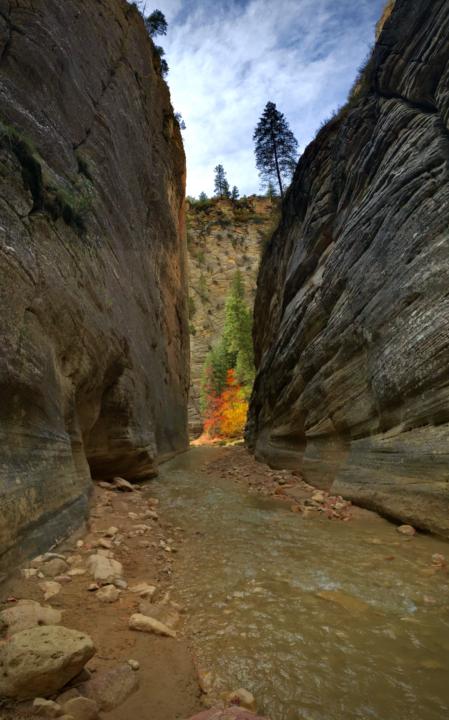
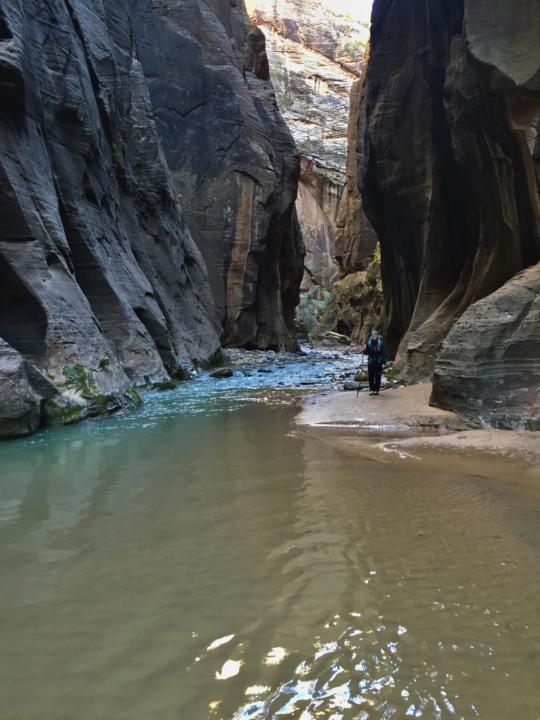
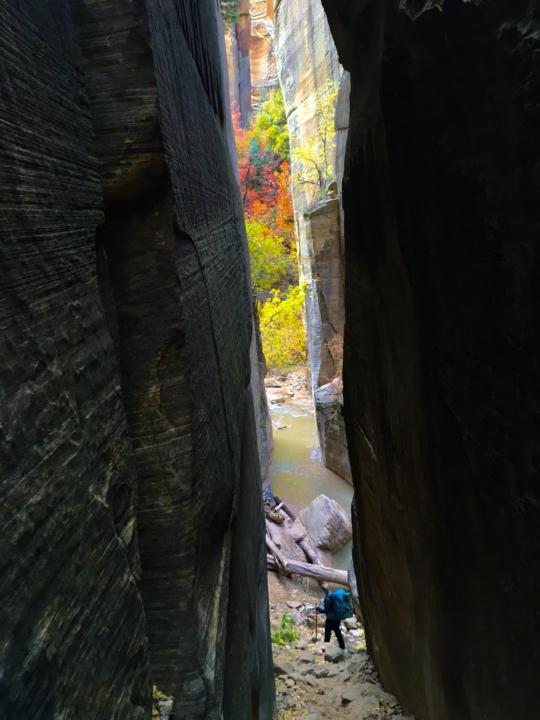
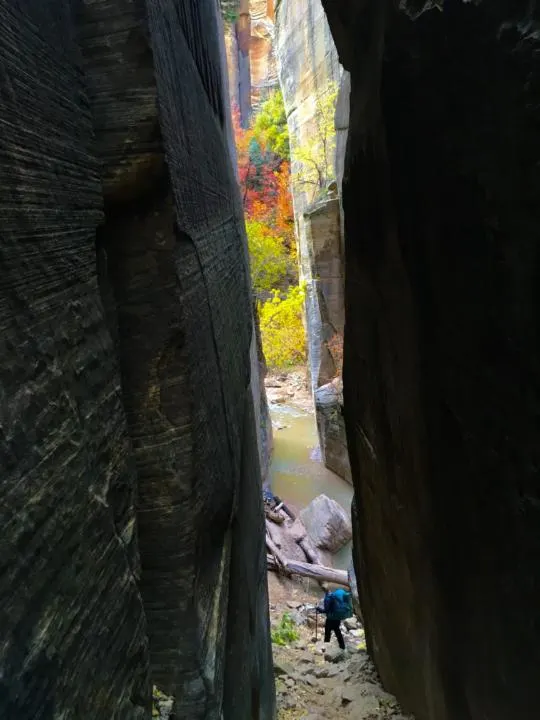
The hike on day 2 starts out more intense as you are in the river right from the very first step. And the flow becomes stronger starting at around the campsites. But this is definitely the most spectacular portion of the hike because it includes the tallest, narrowest parts of the canyon.
We were told that we would encounter water that was waist deep and that we would have to carry our packs overhead, but we never really had water go much above our knees. You will also encounter a lot of people towards the end that hiked up from the bottom-up to see Big Springs which is a beautiful natural spring located right after campsite 12. From campsite 8 to the Temple of Sinawava (end of the hike) took us 5 ½ hours.


Homestretch
When you finally reach the Temple of Sinawava, it’s a good time to change back into your other sandals or shoes. Your feet will be extremely soggy, and it feels good to let them air out. There is a bathroom located at this stop, so you can relieve yourself and change into dry clothes.
The Zion Canyon Shuttle (free) picks up at the Temple of Sinawava (last stop of the shuttle) and will take you back to the visitor center. We rented our gear from the shop closest to the visitor center, so we walked over and returned our gear then. Then there’s another shuttle that took us from the visitor center to Zion Adventure Company. (This part of your trip may vary based on where you rent gear and leave your car before starting the trip).
WARNINGS! For The Zion Narrows Hike
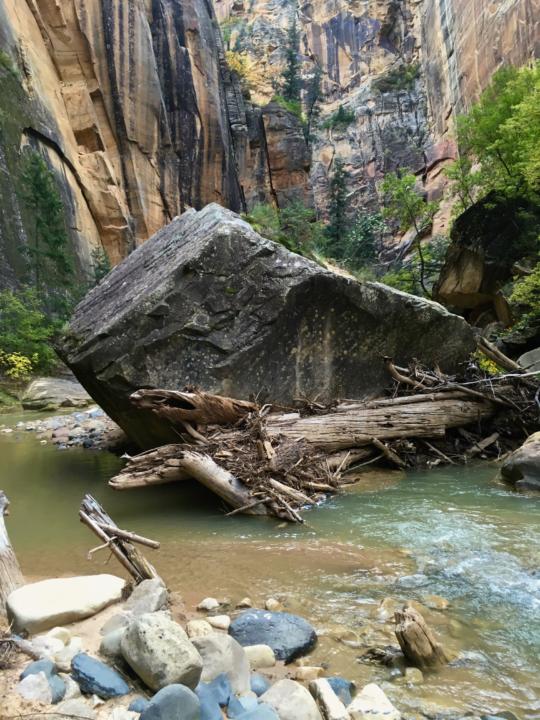
Flash floods are a serious and ever-present danger! You will see many trees and debris lodged into places you wouldn’t have thought possible. Check the weather and make sure there is no chance of a flash flood happening. You can check with the visitor center for more information. It’s a good idea to take note of the rare higher ground areas in case a flash flood were to occur.
Our Video From Hiking The Narrows
Takeaway | Hiking The Zion Narrows
Hiking The Narrows at Zion National Park is very unique adventure. It takes much more preparation than your average backpacking trip, but the rewards are simply incredible. The massive canyon walls have captured the minds of people for centuries. Take a ton of pictures and videos as you will want to re-live this hike over and over again for years! Speak to the park rangers at the visitor center to be prepared for current conditions. Pack light, but with enough layers to keep you warm throughout the hike day and night. Have a blast because this hike is one of the best in the world.
Help Share ‘Hiking The Narrows’ On Pinterest!


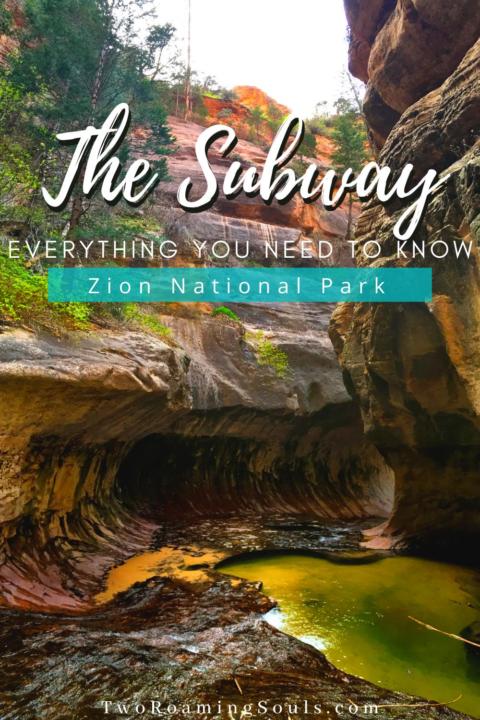
For another world-class canyon hike at Zion National Park, check out:
Everything You Need To Know About The Subway

Best Portable Toilet Options For Vanlife & Camping in 2023 - tworoamingsouls
Monday 10th of April 2023
[…] you can’t get at least 200 feet away from a water source (such as in a canyon like The Narrows in Zion), there are often special rules. The most common rules are for #1, pee right into the water source […]
Top 12 Best Hikes In Utah | Ultimate Guide - tworoamingsouls
Thursday 6th of April 2023
[…] For more details on this best hike in Utah check out our post: Hiking The Narrows At Zion National Park | Ultimate Guide […]
Best Slot Canyons In Utah | Ultimate Hiker's Guide - tworoamingsouls
Friday 22nd of October 2021
[…] Check out our post, Hiking The Narrows | Everything You Need To know […]
Angel's Landing VS Observation Point | Which Hike Is Better - tworoamingsouls
Saturday 27th of March 2021
[…] […]
Epic Day Trip Through Snow Canyon State Park - tworoamingsouls
Saturday 9th of January 2021
[…] […]