The Subway is one of the most unique hikes Jake and I have ever been on. You are in complete solitude as you adventure through tall canyon walls, meander across the Left Fork of North Creek until you reach the subway-like walls. You are in for a real treat on this hike! This is becoming a super popular hike so you will want to plan ahead on this one! Here we break down everything you need to know about The Subway at Zion National Park (Bottom-Up).
This post may contain affiliate links. Disclosure policy.
Permits For The Subway:

First thing you should know is the Subway requires a permit in order to hike from the top-down or bottom-up.
Jake and I were super lucky with our permit and got walk-in permits the day before hiking. But chances of a walk-in permit these days is very unlikely.
The Advance Lottery For The Subway:
When applying for a permit for The Subway Hike, there is an advanced lottery system. You can apply for the permit 3 months prior to your trip date. The cost to enter into the lottery is $5.
All applicants are selected at random and notified if they received a permit via email. If someone who received a permit is unable to go then there ticket is put back into Calendar Reservations.
You can apply for a permit on the National Park Service Website.
Calendar Reservations For The Subway Hike:
Calendar Reservations are the permit process after the tickets go through the lottery system. You can apply for the calendar reservations up to 3 months before your trip. Calendar reservations are for those who were chosen in the lottery but no longer available to go on those dates, or if not enough applicants applied.
So if you didn’t get lucky with the lottery be sure to keep an eye out on the calendar reservations to see if new tickets become available.
You can apply for a permit on the National Park Service Website.
Last-minute Drawing/ Walk-in Permits:
Last-minute drawings for The Subway Permits are done 7-2 days before the hike date. These tickets are from anyone who received tickets from either the lottery or calendar reservations but were unable to commit to the trip.
Therefore, getting a last-minute permit is unlikely, but still, a great option if you were unable to snag a permit. During un-busy times, you might be able to get a walk-in permit the day before or the day of for The Subway Hike.
You can apply for a permit on the National Park Service Website.

Choosing Between Top-Down & Bottom-up:
There are two ways to access The Subway hike: Top-Down and Bottom-up.
Bottom-Up:
We went from the bottom-up which is an out-and-back hike. The length of the hike is 9 miles round trip. The Bottom-Up hike starts at Left Fork Trailhead which is located outside of Zion National Park on Kolob Terrace Road. The reason we suggest this route is because it is the easier route. Because it is out and back, you park your car at the trailhead and will end the hike back at your car.
Top-Down:
The top to bottom hike is a point-to-point hike that is 9.5 miles and requires repelling. You locate this trail at Wildcat Canyon Trailhead also on Kolob Terrace Road. If you have experience repelling then this is a great choice for you.
Canyoneering Guide For The Subway Top-Down:
If you don’t have experience repelling there are guided tours you can join with experienced guides. If you are interested in a guided tour check into Zion Rock Guides.
Shuttles For The Subway Top-Down:
Because this hike is a point-to-point hike, you will need to hitch-hike or shuttle from one trailhead to the next. Some shuttle companies to look into are: Zion Adventures or Zion Guru.
Both routes for The Subway Hike are sure to impress! Jake and I have only done the bottom-up hike, so we will be mostly discussing those details.
Beginning of The Subway hike:

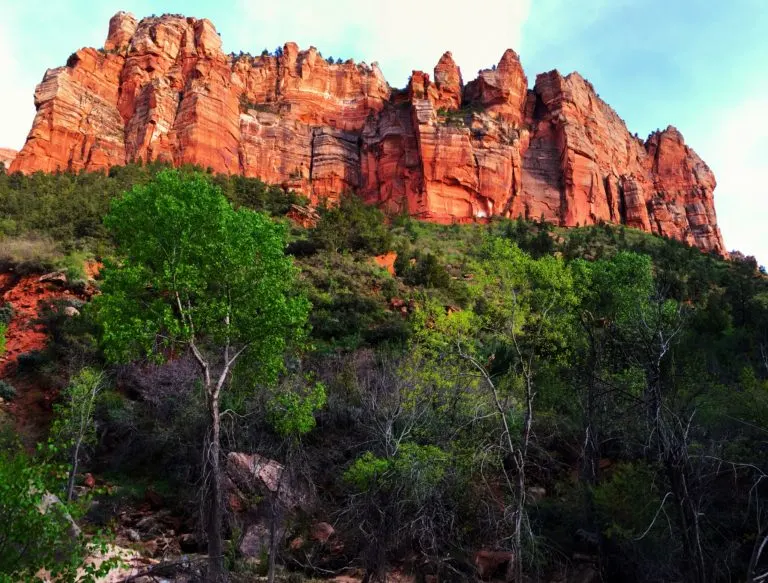
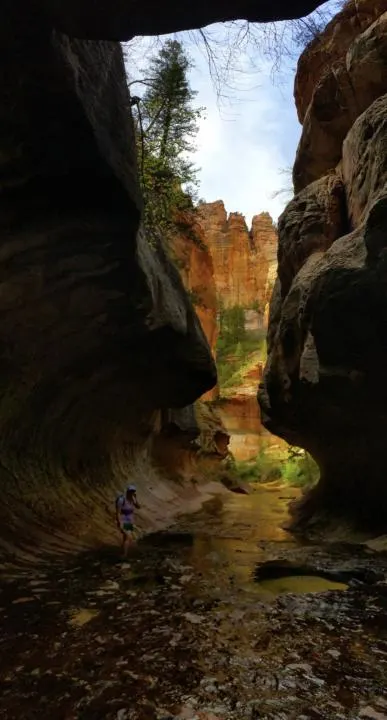
Shortly after starting from Left Fork trailhead you reach a very steep slope down to the river. The footing is loose sand and rock and you will most likely have to scramble. Once you reach the river, you should take a picture of some landmarks so that you don’t miss the trail on your way back. Everything can start to look pretty similar and you don’t want to scramble up the wrong way.
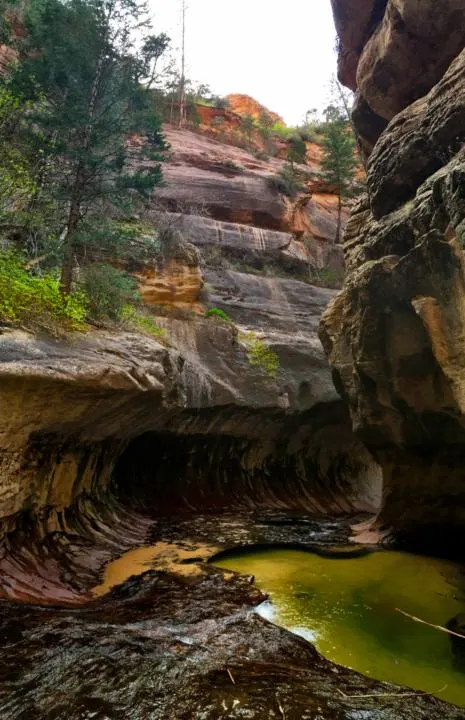
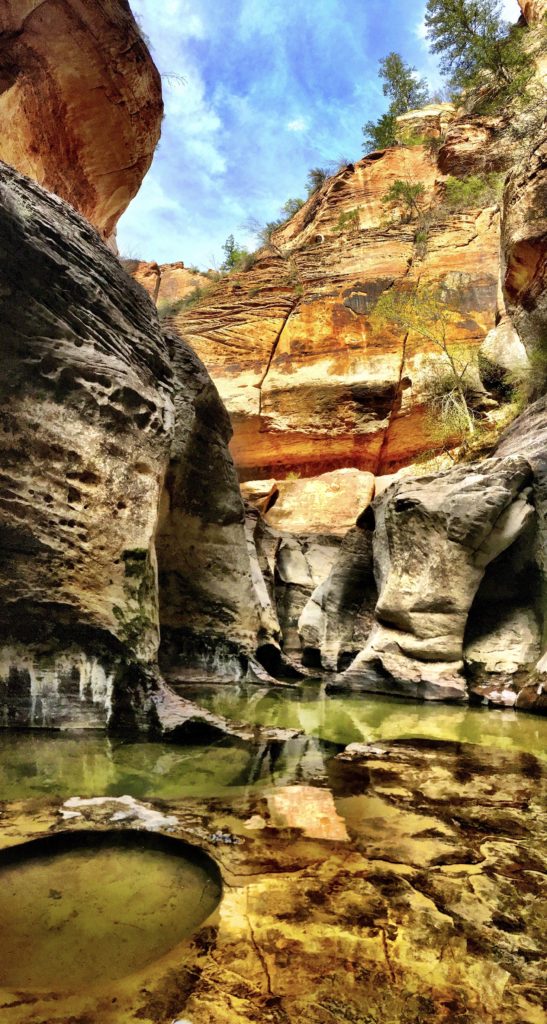
The trail meanders alongside the river for a half-mile or so before your first creek-crossing. The canyon narrows as you make your way up towards the subway. We managed to make it almost the whole way just jumping across rocks and logs which can add a little bit of time (but our feet were comfortable and dry).
Some people just walk through the water, but it can be up to waist deep in some spots. And be aware that sand will probably get in your shoes and with soaking feet you increase the risk for blisters. It depends on how you want to do the hike, but Jake and I didn’t think it added much time. We packed an extra pair of footwear which I talk about later.
Reptiles At The Subway:
If you are anything like me, I am not into the sightings of most reptiles. Along this hike we did have a few snake sightings. Zion only has one type of venomous snake, but I don’t believe we saw one of them. Give them plenty of space; if you leave them alone they will leave you alone. Protect yourself by being mindful of places snakes might be lurking. You will also see many lizards running around, which are much less scary to me!
At the Subway:

Just before you reach the subway, the canyon becomes much narrower. At this point we decided to switch to our Chaco Sandals so that we could keep our shoes dry for the hike back (you could also go barefoot, but be extremely careful of hazards. You are a long way from medical attention).
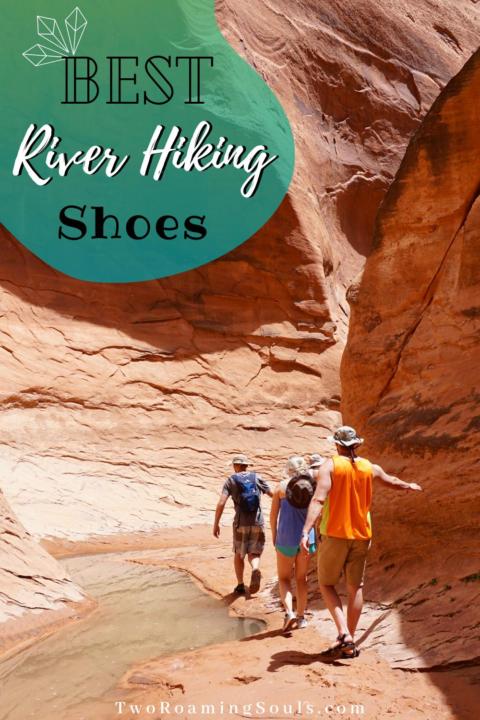

For a guide to find the best river hiking shoes, check out our post: Best River Hiking Shoes
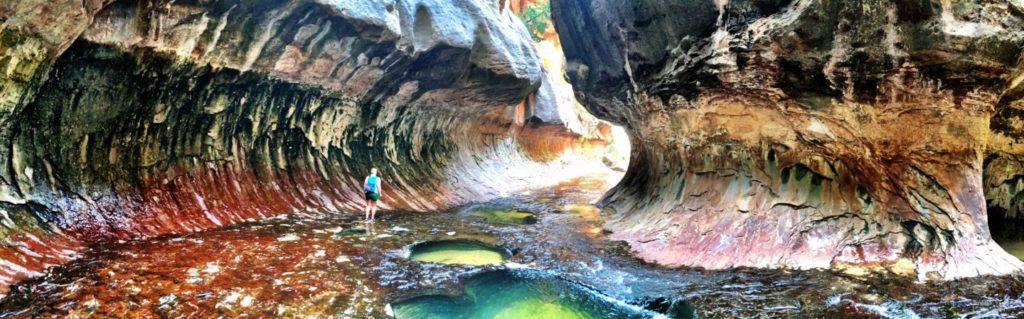
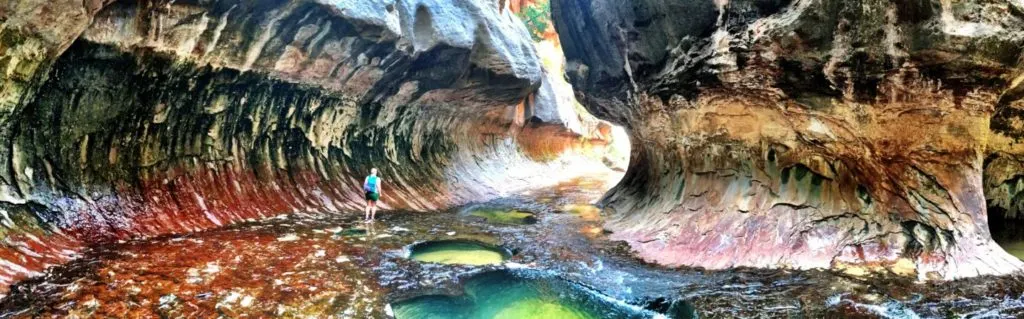
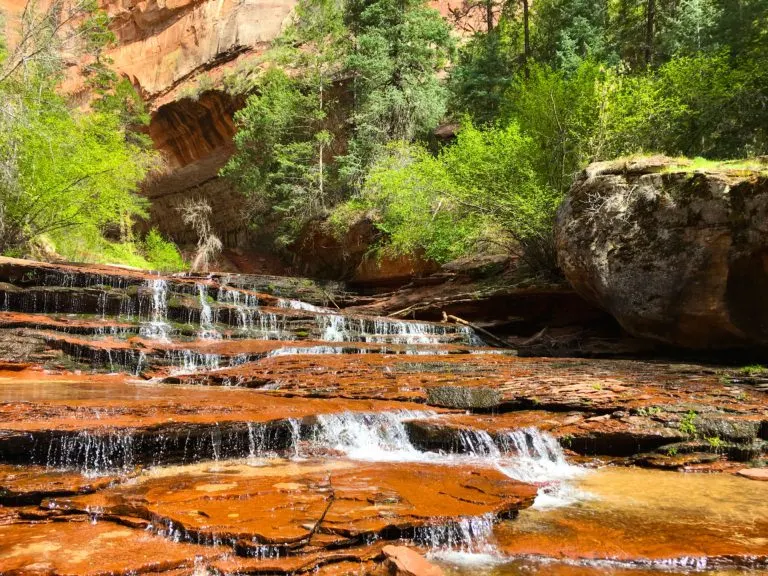
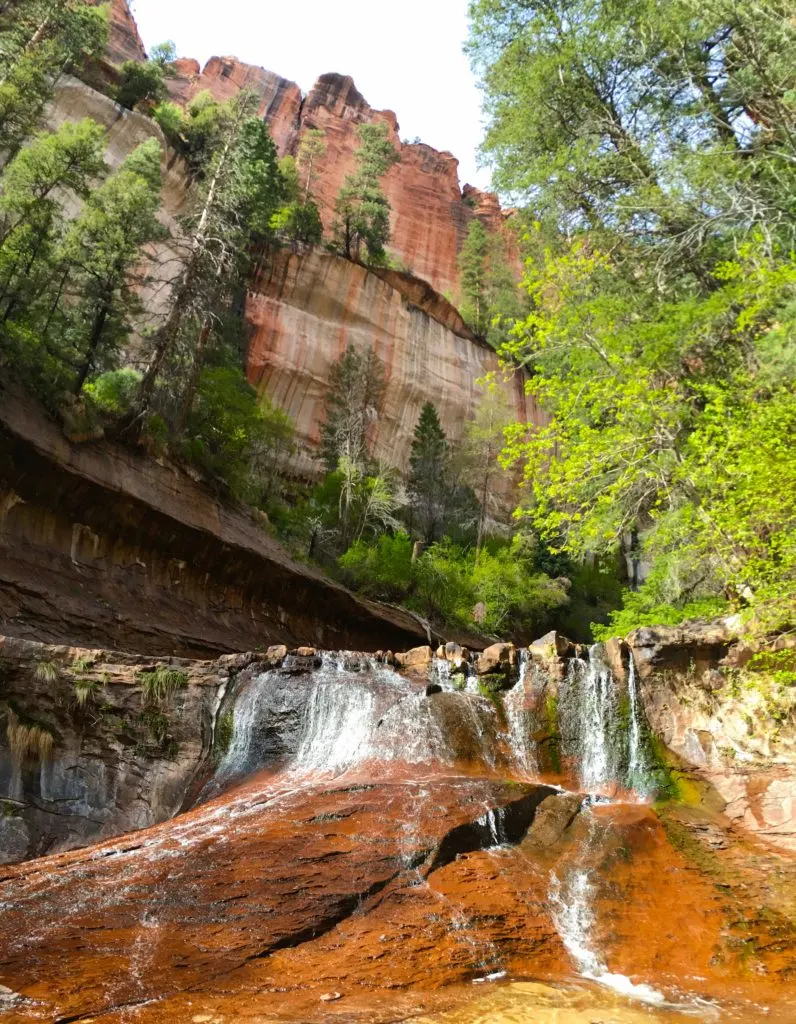
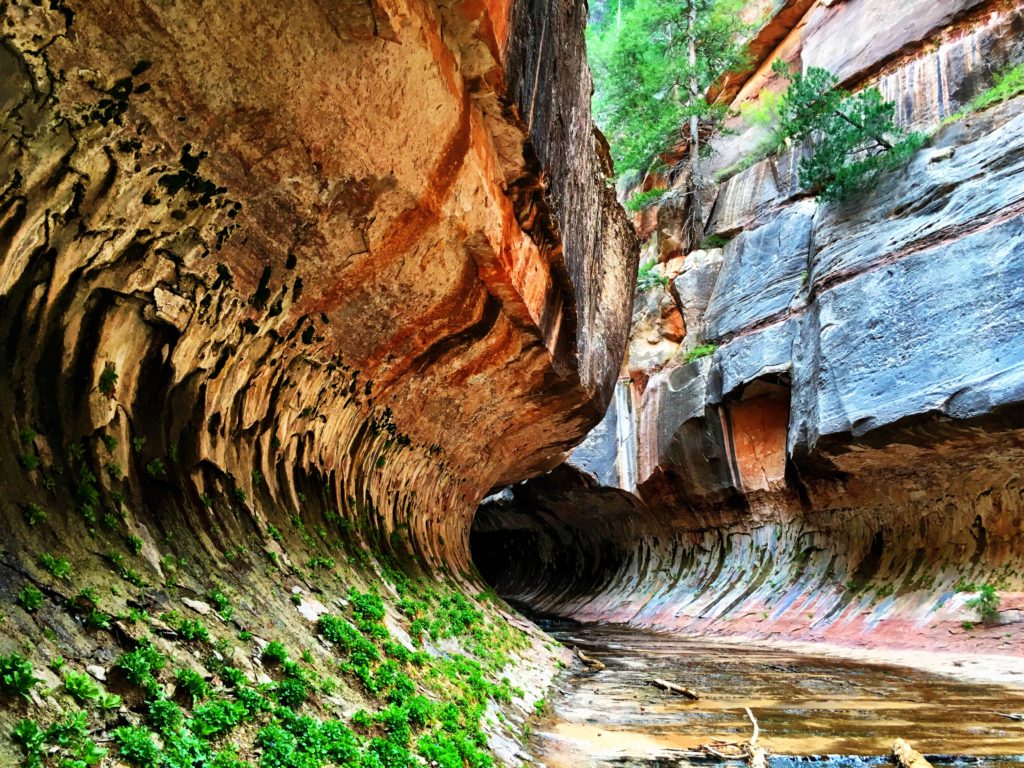
At the opening there are little waterfalls that look like beautiful red staircases. And the canyon walls start to resemble the subway-like walls. At this point, you know you must be getting close, and around each bend you hope to reach the subway.
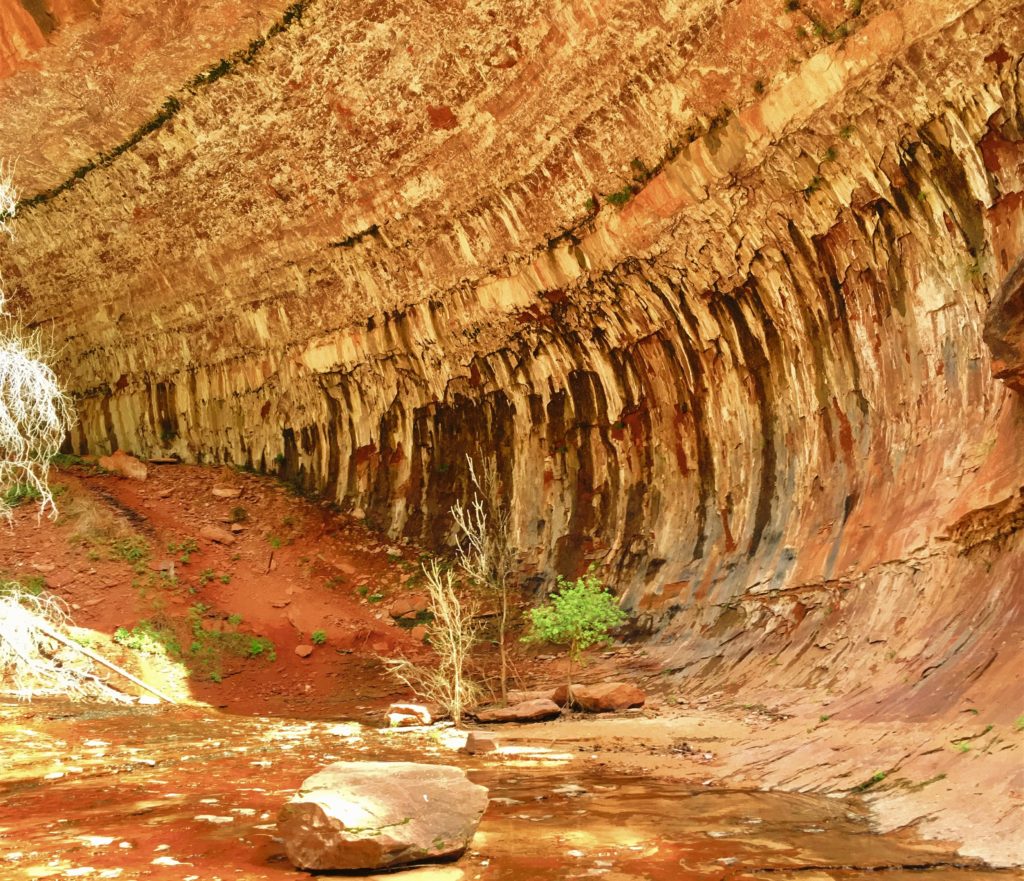

Finally, you turn a corner to the right and see an iconic view. It’s breathtaking! As you walk deeper into the subway, you encounter these odd pools carved into the rock, and you will be amazed!
I highly suggest taking a swim in the pools; they are very cold but refreshing! You don’t want to get all the way there and say you didn’t swim in the subway!
You can continue deeper in as the canyon corners to the left. You reach a point where it’s only about an arms width wide. From this point, swimming/wading is mandatory if you want to continue. It gets pretty spooky in the dark cold little pools, but our curiosity pushed us to go as far as we could.

Eventually, you reach a waterfall on the left, about 10 feet tall. This is the part where people doing the hike from top-down would be repelling. (AKA the end of the line for bottom-uppers).
We saw maybe 5 other groups along the hike, but surprisingly didn’t encounter any other people while we explored the subway. This really added to the magic of it all and allowed us to really get lost in the moment (plus we didn’t have to cater our photos because of other people).


What Time Is Best To Hike The Subway?
We didn’t want to go in the middle of the day because we thought it was going to be super hot. We left for the hike around 2pm but didn’t get back till 8pm when the sun was setting. If we spent 10 extra minutes along the hike we would of had to use our headlamps to climb up the scramble at the end.
Our plan didn’t leave any margin for error, which is generally a bad idea when exploring the backcountry. I would suggest going early morning or mid-morning because then you can enjoy this amazing hike at whatever pace you want.
If you get too hot, you can cool off by plopping in the river, or soaking a hat/bandana/neck buff in the cold water.

What Clothes Should You Bring:
We packed another pair of lightweight shoes/sandals to wear when we got to the opening of the subway to walk through the water. We also swam in our shorts that we hiked in and didn’t have a change of clothes which can cause chaffing on the way back. So you might want to bring extra clothes or quick dry clothes to avoid chafing or discomfort.
Also, the subway itself is extremely shaded, and with the cold water you can expect what feels like a 20F degree drop in temperature. So even though most of our hike was spent in in 75F+ weather, the part where we were exploring the pools around the subway felt like 55F.
Difficulty:

This hike requires some pretty steep scrambling at the beginning (and end). And we encountered several rocky bottlenecks that require the strength to pull yourself over some obstacles.
Also, use footwear with good traction because much of the hike is wet or sandy. People’s wet shoes pick up sand, and then deposit on top of really smooth rocks, creating a serious hazard. Check out our post: Best River Hiking Shoes to find the right pair for you!
The hardest part of the hike is climbing the scramble at the beginning and end of the hike which is 400 ft elevation change. Other than that there is 600 feet of gradual elevation change along the hike that you barely even notice.

Takeaway | The Subway:
The Subway is a hike you won’t want to miss if you are in Zion National Park! The hike can be a challenge meandering across the creek, but the adventure is well worth the trek. Honestly, Jake and I have never seen anything like it, so you are sure to have your mind blown.
Take lots of photos and videos because you will want to live this hike over again. You will be hiking through water so a dry bag and ziploc bags are a good idea to keep valuables dry. Enjoy the hike!
Things to pack:
(Links to our favorite items)
For a more in-depth guide on what to pack, check out our post: 8 Essentials For Your Hiking Pack
- Day pack
- Dry-bag/Ziploc baggies
- Water Bladder (bring enough water for the whole hike or water filter)
- Snacks
- Headlamp
- Sunscreen
- Hat
- Camera
- GoPro
- Extra pair of lightweight shoes
- Quick Dry clothes or change of clothes
- Small first aid kit


Top 12 Best Hikes In Utah | Ultimate Guide - tworoamingsouls
Thursday 6th of April 2023
[…] Everything You Need To Know About The Subway At Zion NP (Bottom-Up) […]
Best River Hiking Shoes - tworoamingsouls
Tuesday 4th of April 2023
[…] […]
The Wave Hike in Arizona (Permits, Lottery, & Tips) - tworoamingsouls
Tuesday 21st of March 2023
[…] National Park (Observation Point, Angels Landing, The Subway, The Narrows, […]
Top 5 Things To Do In Page, AZ - tworoamingsouls
Thursday 9th of March 2023
[…] United States. There is so much to do within this park, but some of our favorites are The Narrows, The Subway and Observation […]
Angel's Landing VS Observation Point | Which Hike Is Better - tworoamingsouls
Saturday 27th of March 2021
[…] […]