
Interested in taking long exposure photos with an iPhone? You know the ones I’m talking about. Where a waterfall or river looks like a smooth blur, or where car headlights are blurred into streaks of red and white light. The technique for shooting photos like this is called long exposure. It is the process of extending the period of time that light enters your lens. A typical photo is just a fraction of a second, but a long exposure extends a single photo over several seconds. The final image is a sort of averaging of many images that results in some awesome effects.
This post may contain affiliate links. Disclosure policy.

I have had more success using this technique for water than light trails because the iPhone camera isn’t particularly good in low-light settings. So I will mostly be discussing the daytime application of long exposure. To achieve this method with an iPhone you only need a few things.
Things You Need
- An app called Camera+ ($3) gives your phone the ability to take long exposures.
- Some kind of tripod or mount to keep your phone absolutely still. (No, your super steady hands won’t cut it.) I use a JOBY GripTight GorillaPod Stand (~$25). I have managed to improvise a mount with rocks, sticks, or whatever else I have on hand. But nothing beats the convenience of a legit tripod.
- (Not required) but it’s good to have a portable charger. Nothing drains your phone battery faster than long exposures, I promise. I’ve watched over %10 battery life disappear in a matter of seconds!
- (Not required) Headphones with volume controls built into the wire (explanation below)
Setup
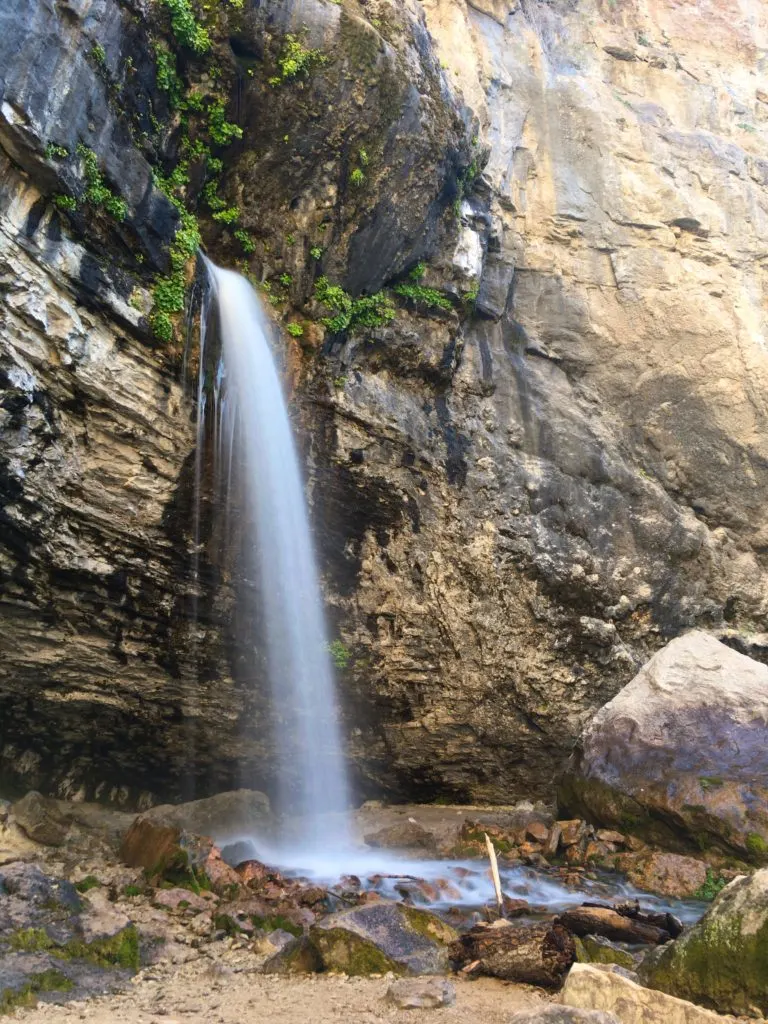
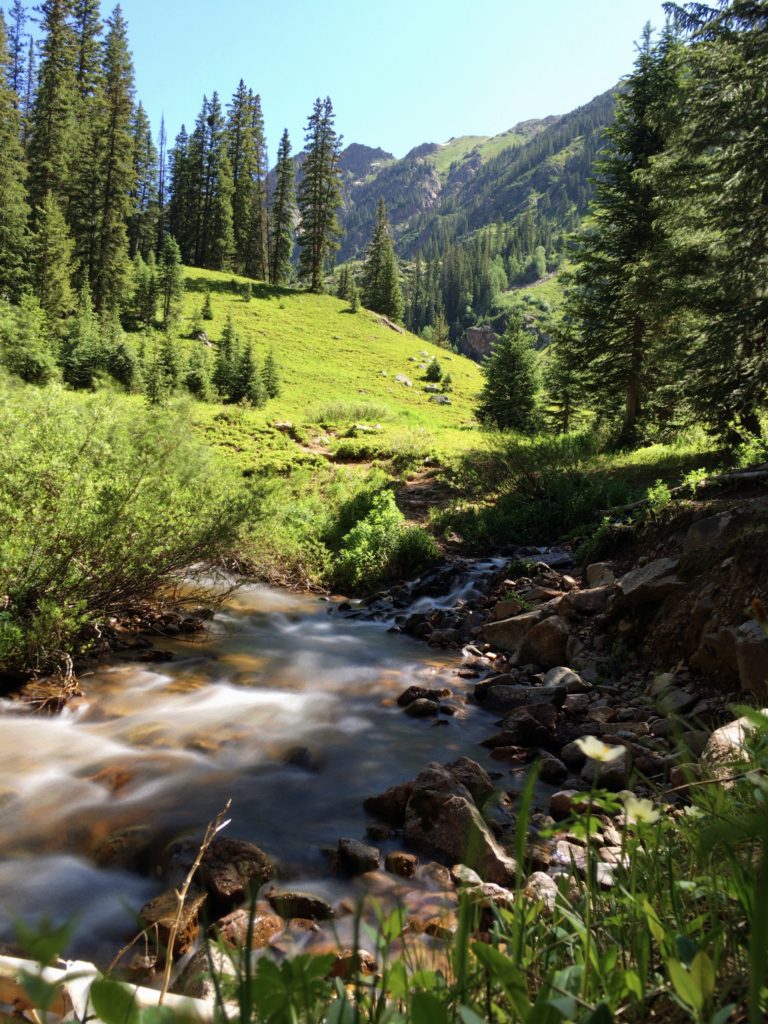
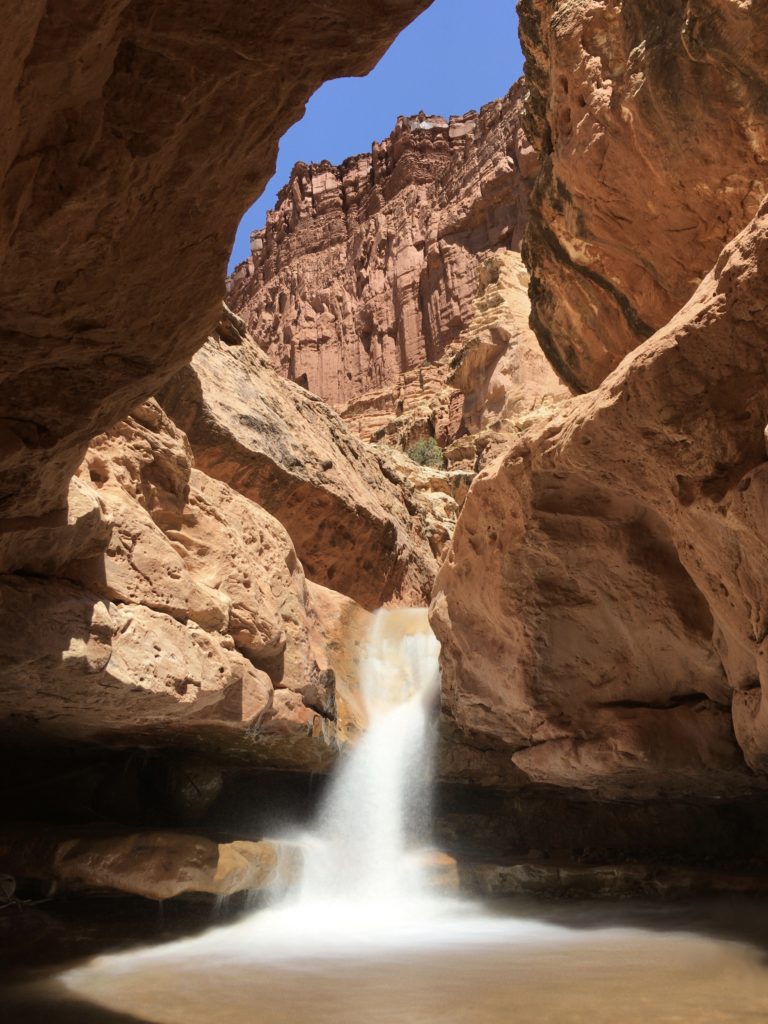
First, secure your phone to your tripod. Next, find a place to put the tripod, where it can remain completely still. One of the limitations of a small tripod is that unless you can find something to put it on, you usually are limited to just putting it on the ground. The photo above is a prime example, there was nothing but small rocks and smooth canyon walls.
Also be very careful if your phone is near water, which it often has to be to get these shots. Once you’ve found a stable tripod location and covered your basics for setting up a photo, it’s time to change your settings.
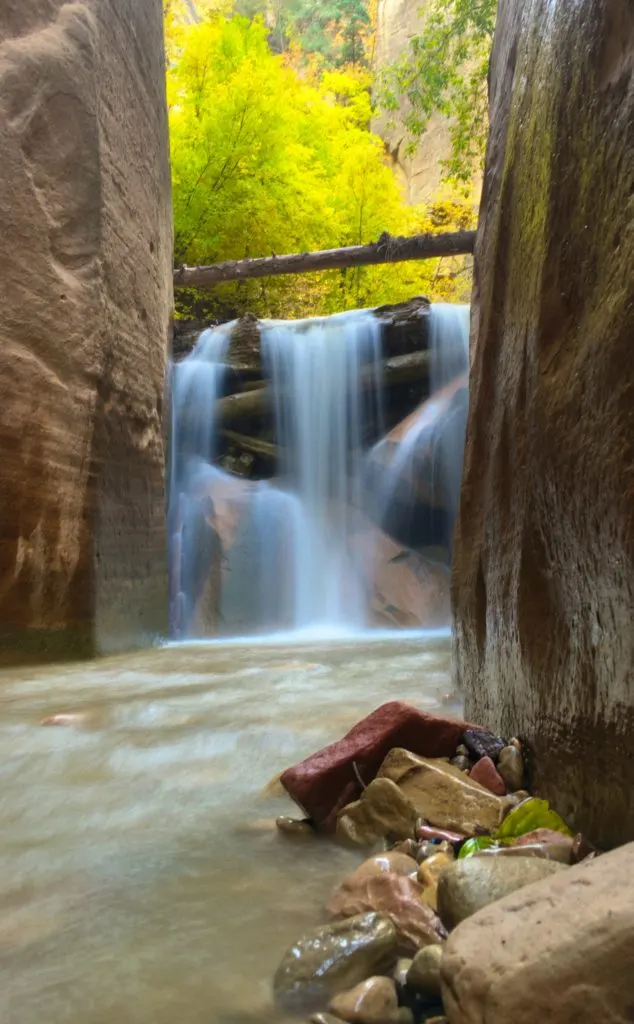
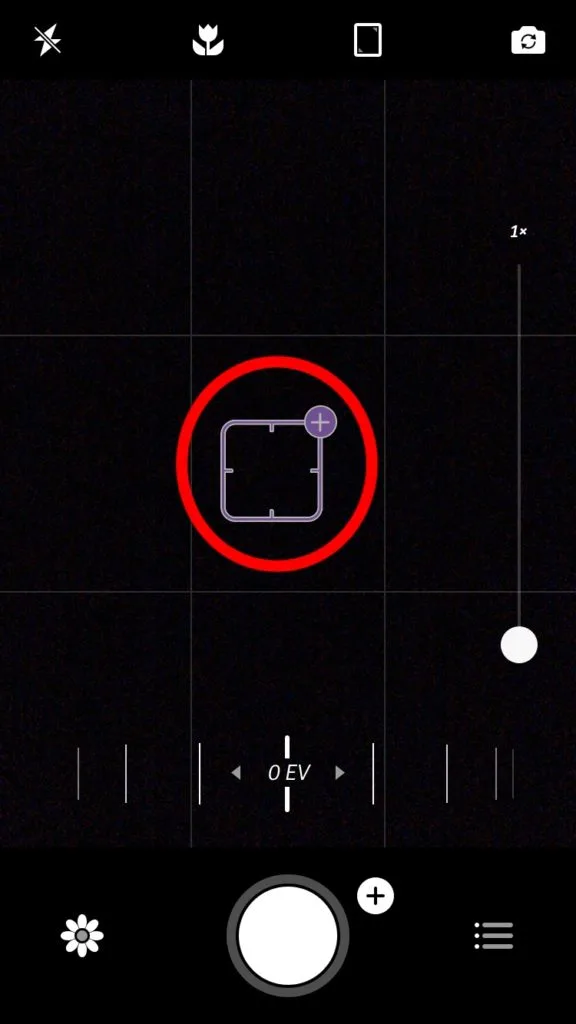
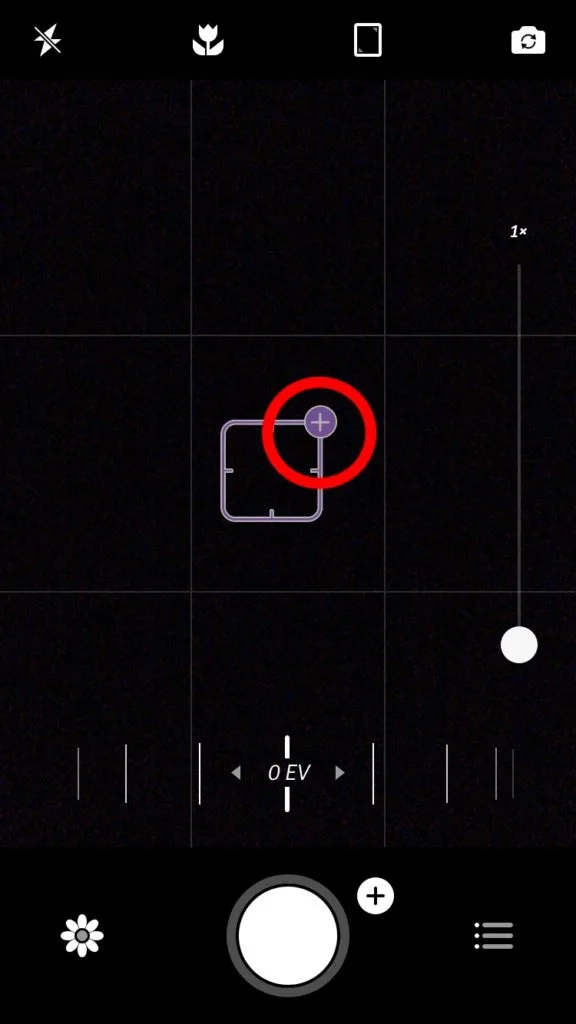
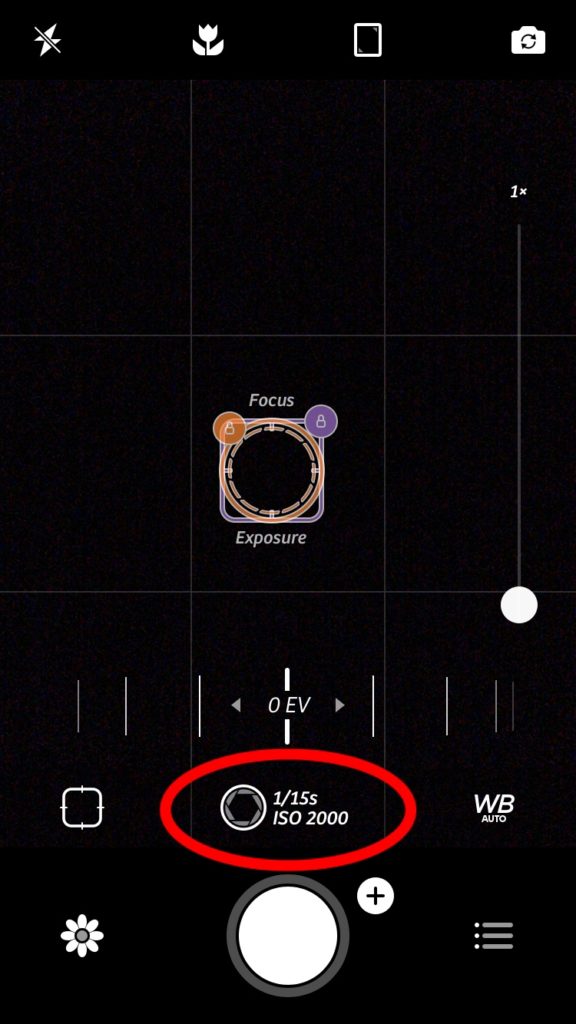
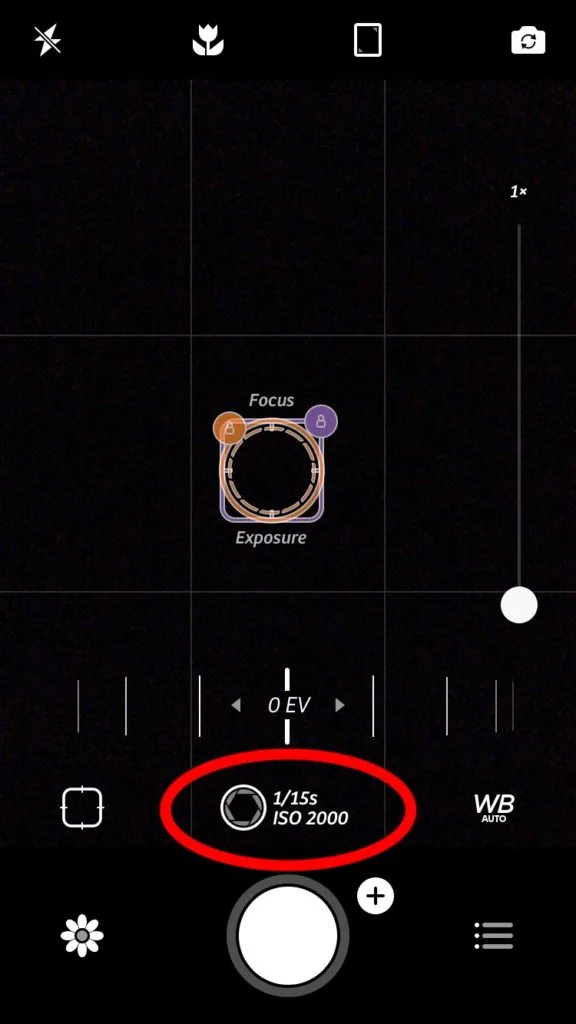
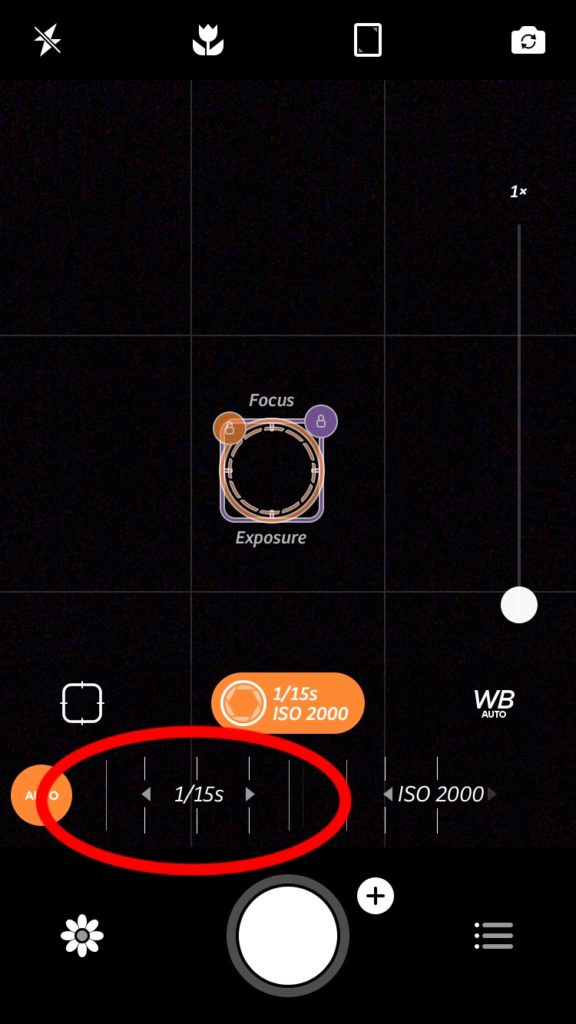
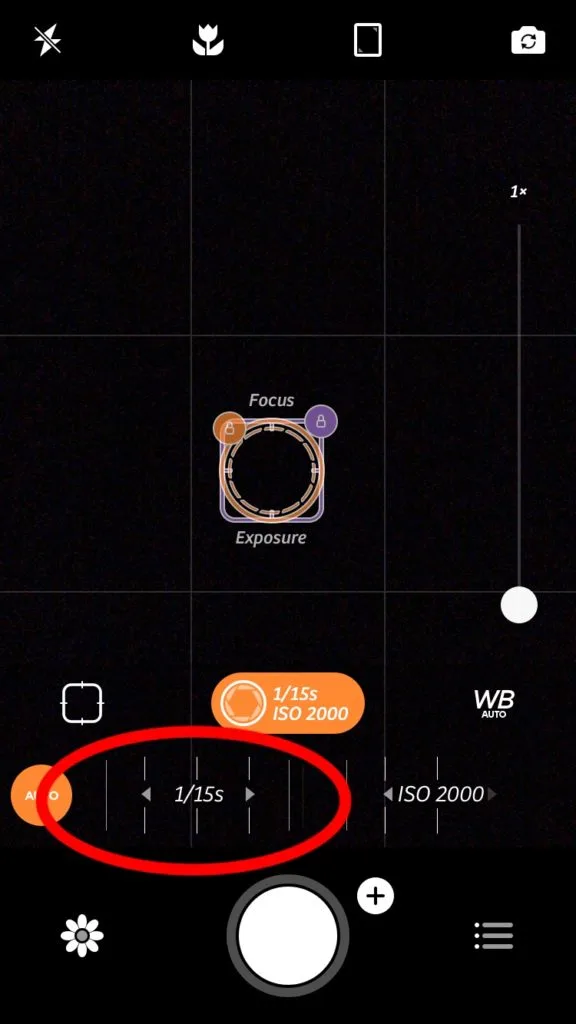
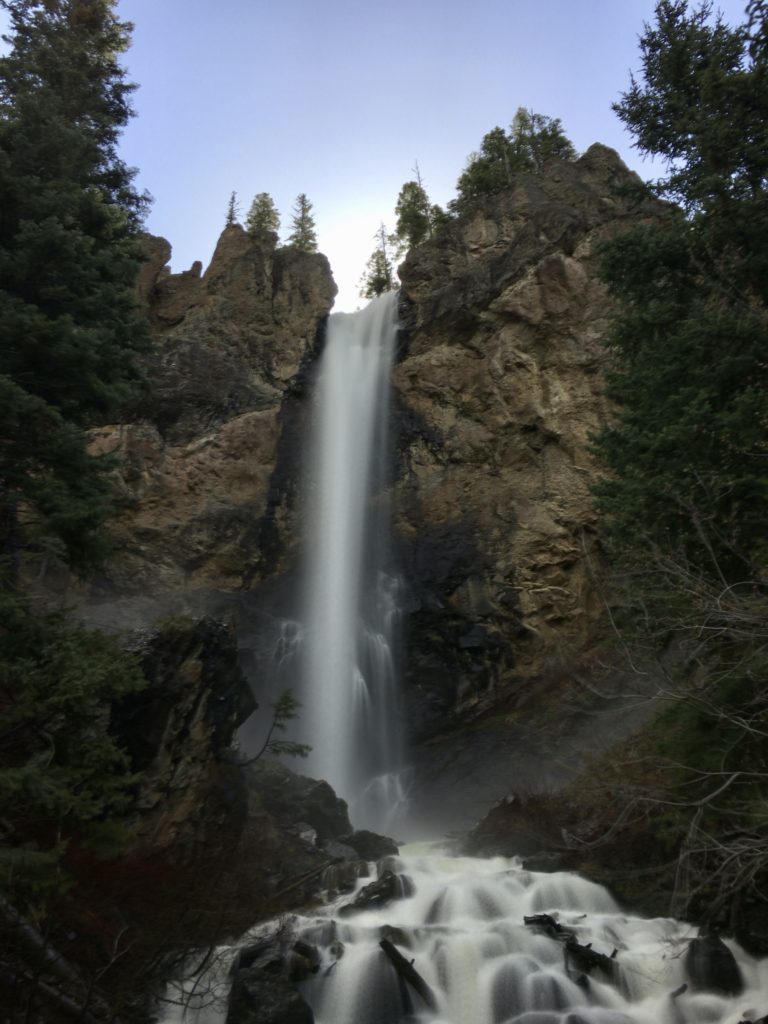
To allow long exposure you need to open up the advanced controls (pictures below). First, tap the screen once so that the manual-focus icon (purple square) pops up. Tap the plus sign in the upper right corner of the purple square. This will open up the advanced controls. Now tap the icon for shutter speed and ISO settings. This will open up a sliders control for each. Adjust the shutter speed slider (on the left). I find that a good shutter speed for waterfall photos is between 1 and 5 seconds, but feel free to experiment. A general rule is that the less water flow, the longer exposure time you need.


Now you’re finally ready to shoot. But unfortunately you can’t just press the shutter normally. Your touch will inevitably shake the phone and make your photo blurry. There are two good solutions to this problem.
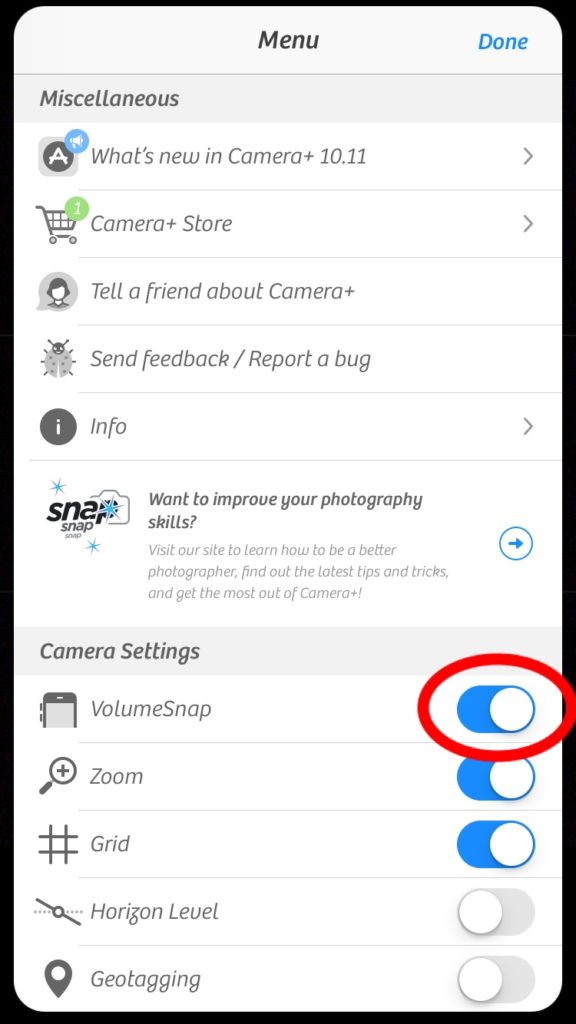
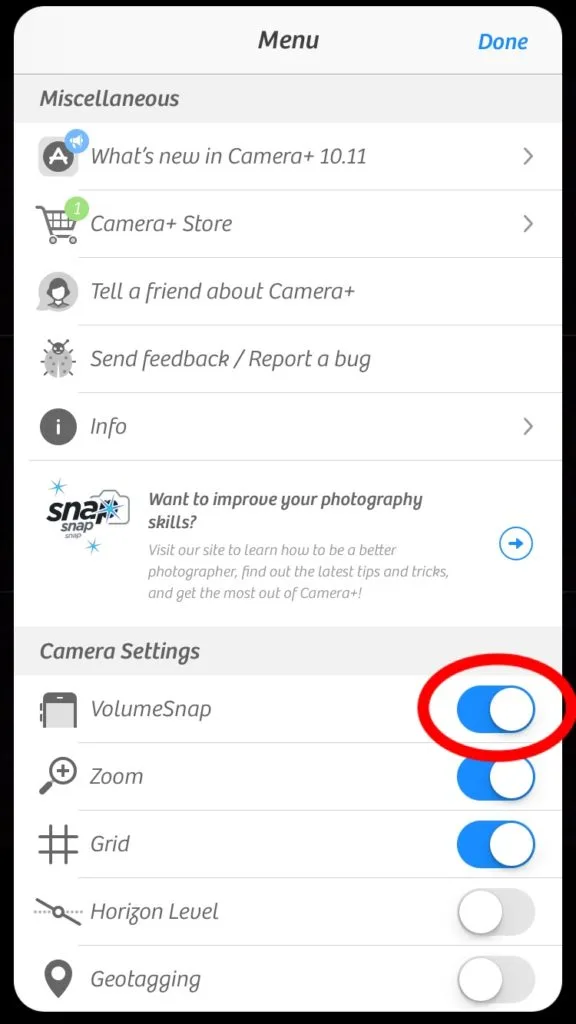
One method is to use a pair of headphones with volume controls built into the wires. (Make sure you have VolumeSnap enabled! It’s in the settings menu, which is the icon in the bottom right of the camera window). Simply press the volume up or down on the headphone controls to take a picture. Be careful not to tug on the wires!


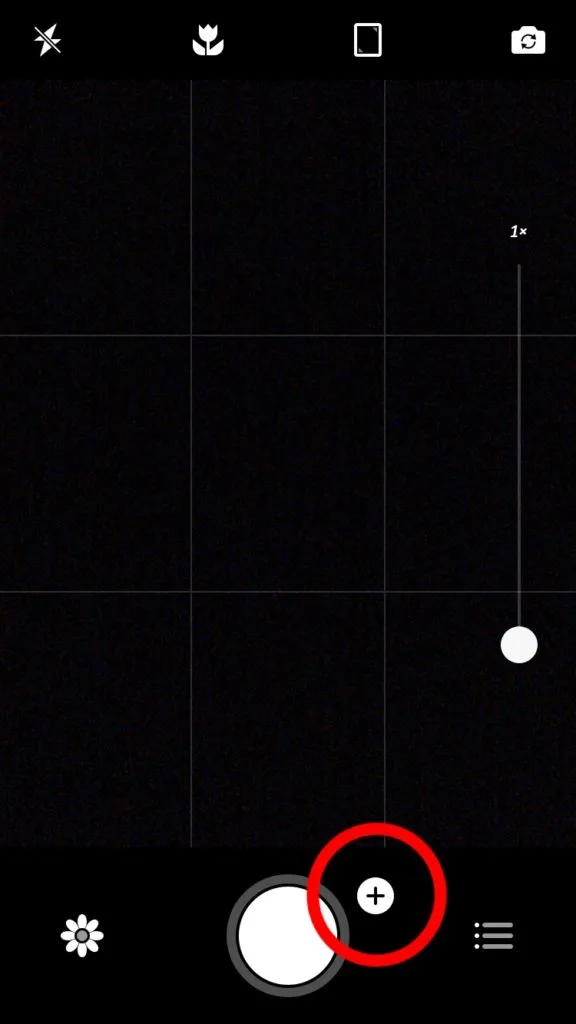
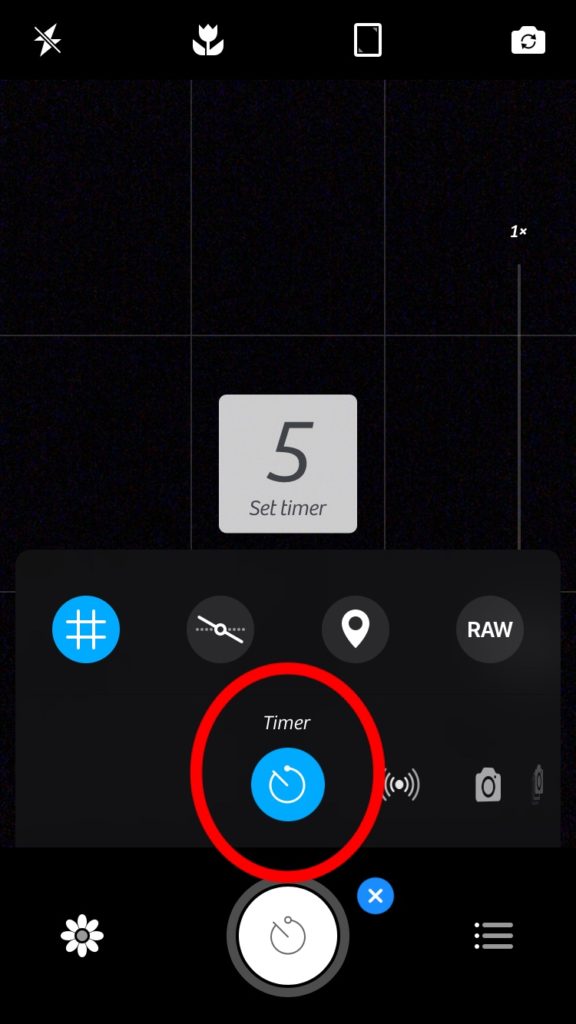
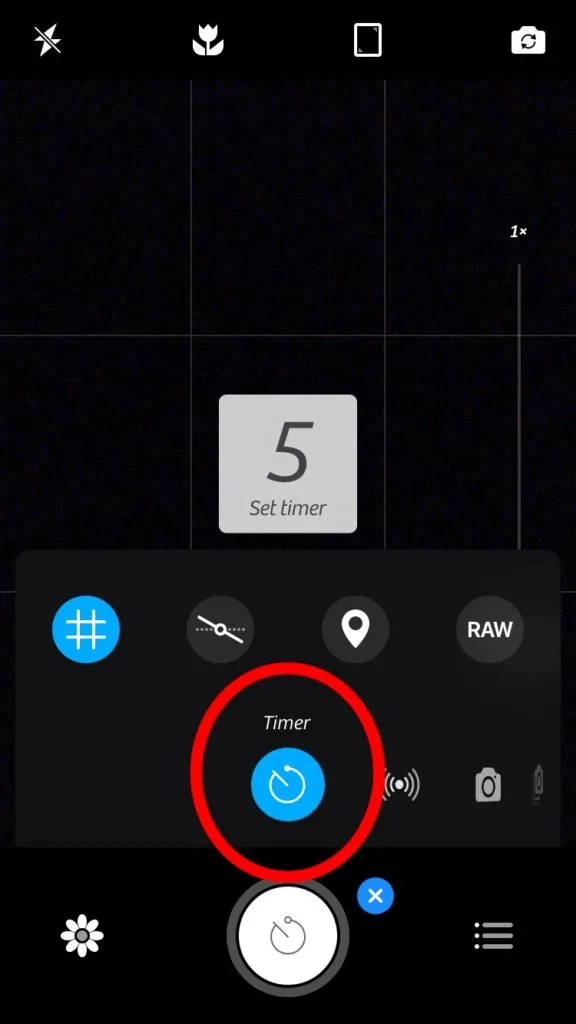
The other way to solve this is using the timer delay. On Camera+ it is located right next to the shutter button. Tap the small plus sign next to the shutter and it will bring up a sliding menu. Scroll to the far left of the bottom row and tap the timer function. The number of seconds your timer is set for will appear in the middle of the screen. Tap the number to change between 5, 15, and 30 seconds(I usually just use 5 seconds). Now when you press the shutter, your phone will have a few seconds to stop shaking from your touch.

Shooting
Whichever method you choose, the key is to keep the phone completely still while the exposure takes place. I usually take a few photos at different shutter speeds between 1 and 5 seconds. Then compare and pick the best one later.
I was thrilled when Camera+ introduced this technology. It has allowed me to take some really awesome photos that were previously unattainable on a smartphone. Please share any cool photos you get using this technique!
I have tried to use long exposure for light trails and other nighttime applications, but with underwhelming results. If you have found success taking nighttime long exposures on a smartphone, please share your wisdom!
Also, check out my other post about tips for taking the best outdoor photos on an iPhone.


Kanarra Creek - tworoamingsouls
Wednesday 31st of March 2021
[…] Check out our post: How To Shoot Long Exposure Photographs With An Iphone […]