Insulating your campervan is a key step in most van conversions. And it’s one of the very first steps in the process. So if you are in the process of converting, you need to make a decision about how to insulate. There is plenty of debate about what types of insulation and methods are the best for vans. Enough debate that it actually can make your decision more difficult. This post aims to provide simple guidelines to help you decide how to insulate your campervan.
The most important thing I hope you take from this guide is that it’s not one-size-fits-all when it comes to campervan insulation. So while it might be tempting to just copy someone else, you should really consider what your needs are.
But wait, isn’t more insulation always better than less?
No, not necessarily. If you mostly keep your van in hot climates, then too much insulation will make it harder to cool off your van at night for sleeping.
Additionally, camper vans are small spaces, so every inch of insulation takes away an inch of living space.
And lastly, you may have budget constraints that inform your decision. It will typically cost between $200-800 to fully insulate a campervan, depending on the size of the van and the materials used. I try to break down the price for each type of insulation. But I’m weary of making recommendations strictly based on that because prices do fluctuate over time.
The purpose of insulation is to basically slow the transfer of heat. Typically people think of insulation as retaining warmth when it’s cold outside. But it also will slow the heat from getting into your van on a hot day. But remember, insulation only SLOWS the transfer of heat. Eventually, the cold or heat will catch up to you.
Without a heater or air conditioner, the transfer of heat always wins in the long run.
Also, if you plan to use heat or AC often, then insulation will help retain that hot or cold air. The better your insulation, the more efficient your use of heat or AC will be.
This post may contain affiliate links. Disclosure policy.
The Science Behind Heat Transfer
There are three types of heat transfer; conduction, radiation, and convection.
Conduction is when heat transfers through solid objects that are in physical contact. Like when the outside metal of your van heats up and you can feel that heat transferring to the metal ribs inside your van.
Radiation is when heat transfers through electromagnetic waves without a medium. Like on a winter day how you can feel the warmth of the sun on your skin, even if the air molecules around you haven’t actually been heated up. Or like the warming effect you get when sunlight shines through your windows.
Convection is when heat transfers through the physical movement of a liquid or gas. Like when the warm air in your van rises to the ceiling, forcing colder air to sink to the floor.
Understanding these three terms helps you understand how to counter or harness these effects when insulating your campervan.
Conductive heating is the primary type of heat transfer we are combatting by insulating a campervan. Insulation will help retain heat when it’s cold out and will keep the heat out when it’s hot.
Radiant heat can be countered with a reflective material (like Reflectix or EZ Cool) to reflect the radiant heat back away from your van.
But this only works in the windows and with a sufficient air gap. THIS IS VERY IMPORTANT. If a product claims a certain R-value based on reflecting radiant heat, you will only achieve that R-value if you have the required air gap (usually at least ¾”). If you have a foil-faced insulation installed directly touching another surface, then heat will pass through conduction and any claimed performance against radiant heat will be lost.
Convection is always present inside a campervan in the form of warm air rising. Adding extra insulation to your ceiling can help retain warm air where it’s most likely to escape.
And conversely, it’s why most campervan conversions opt for little to no insulation under the flooring. The floor is the best place to save interior height, with the least impact on insulation performance.
Insulating A Campervan For Your Specific Climate
Depending on where you plan to travel or live in your campervan, you may decide to insulate differently. Obviously, many campervans are designed for travel, so you may experience a wide variety of climates. But where you spend the most time may influence how you choose to insulate.
Here’s a quick and easy flow chart to help you decide how to insulate your campervan. Remember…..Conductive = think traditional insulation like soft fluffy materials or foam. Radiant = think shiny materials that reflect the sun’s rays.
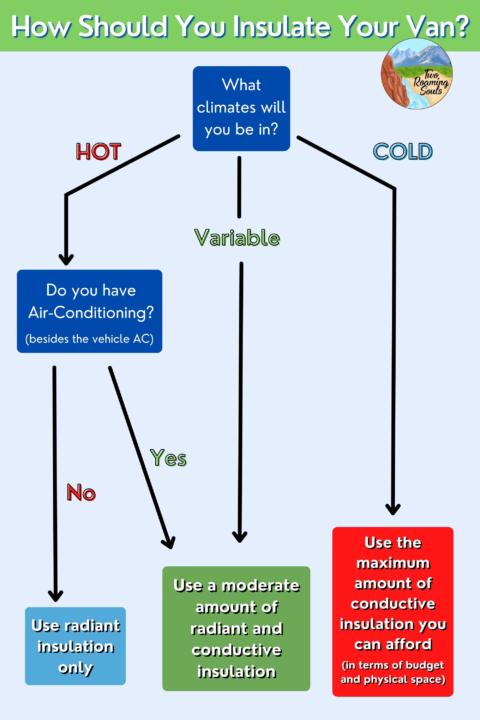

The flow chart is intentionally oversimplified, so keep reading to learn about the nuances of insulating a campervan.
Moisture And Moisture Barriers
Moisture is a big consideration when planning insulation for a campervan.
A person living inside a metal box is going to create moisture. And if your campervan design gives no thought to controlling moisture, then you are likely to experience moisture problems, like mold, mildew, and rust. The more humid the climate, the more concerned you need to be about moisture.
Whenever you have a large temperature variance, there is the potential for condensation. For example, when the cold air outside your van meets the warm air inside your van (or vice versa on a hot day). You cannot stop moisture entirely, so it’s best instead to think about how to manage moisture.
That basically means choosing insulation that handles moisture well and/or prevents air from getting trapped between your insulation and your van’s metal walls.
There are several popular house insulations like fiberglass, rock wool, and recycled denim that are not good for vans because they don’t manage moisture well. But don’t worry, this post only includes insulation types that are generally good at managing moisture.
It’s tempting to borrow the idea of a moisture barrier (or vapor barrier) from traditional house construction. A moisture (or vapor) barrier is a waterproof layer that is meant to keep moisture out of your insulation. But with a van’s shape being so irregular, it’s nearly impossible to create a perfect vapor barrier. Thus, it may have the opposite effect of trapping moisture in, instead of keeping it out. For this reason, there is general consensus that moisture barriers are not a good idea for insulating a campervan.
Really the only recommended van insulation that creates a good moisture barrier is spray foam.
But it’s not a separate moisture barrier, but rather the foam itself that creates the moisture barrier. That is because it doesn’t absorb water and adheres directly to your van’s metal. So when applied correctly spray foam should prevent any air (and accompanying moisture) from getting between the insulation and the walls.
The other approach is to choose insulations that are moisture permeable. With the idea being that moisture can travel through your insulation and not get trapped against the van.
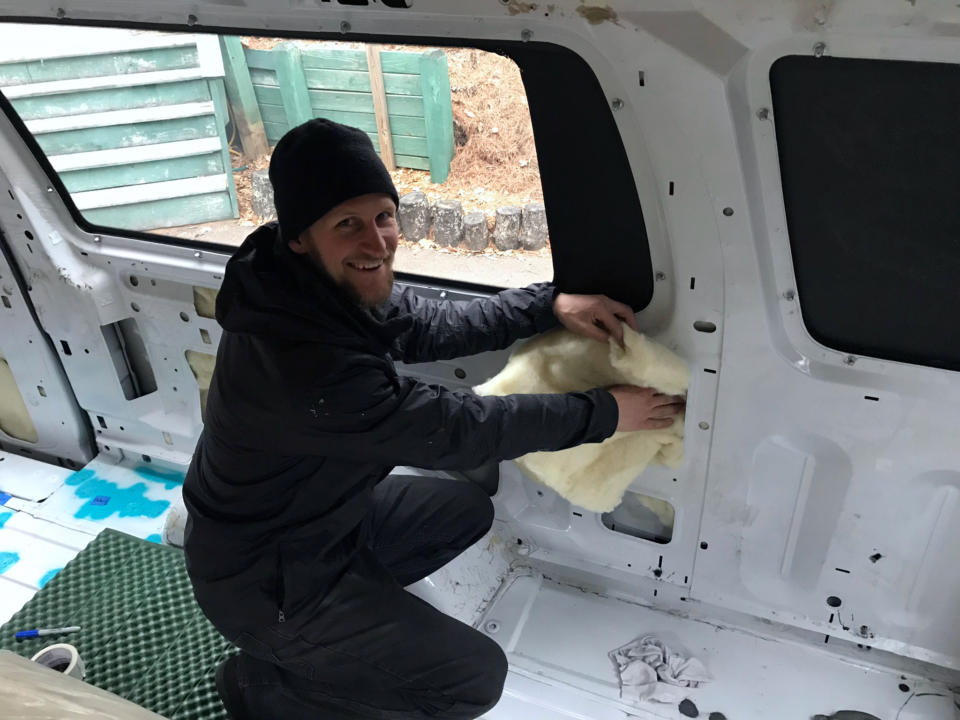
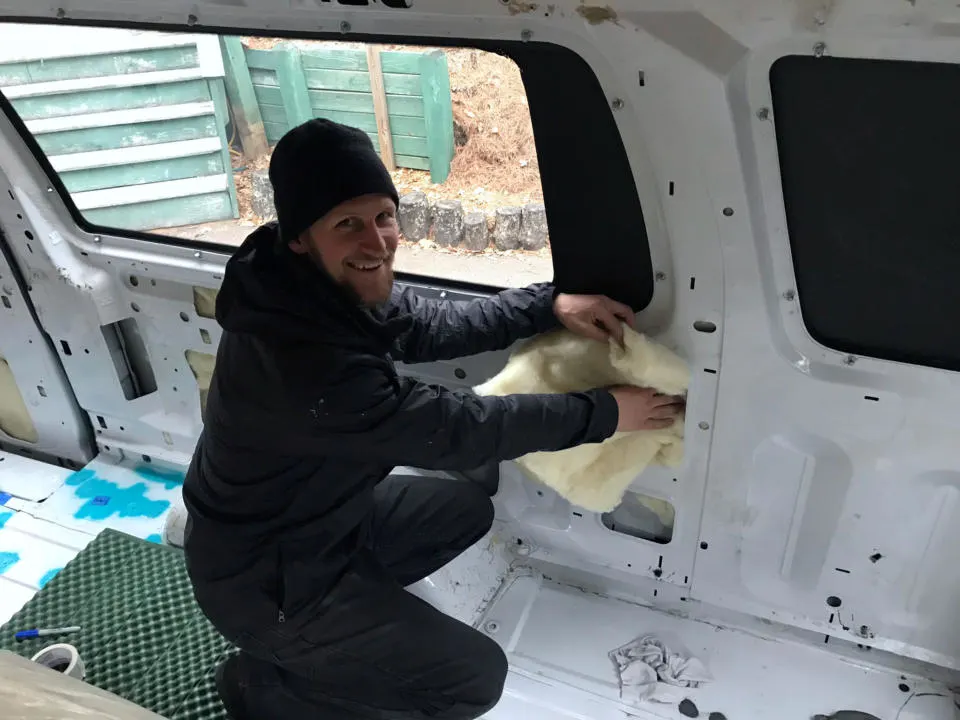
Things like sheep wool, hemp wool, and Thinsulate can manage moisture in this way. Sheep wool and Hemp wool can absorb moisture without losing their thermal properties, and dry out when conditions become drier. The moisture is temporarily contained within the fibers of the insulation and thus doesn’t create external condensation. They are both naturally resistant to mold and mildew.
3M Thinsulate fibers don’t absorb moisture at all, but do allow moisture to pass through and dry out.
R-Value: Measure of Thermal Resistance
Insulation is often categorized by R-Value, a measure of the material’s thermal resistance, or basically, how well it holds warmth.
R-value is a standardized system for measuring a material’s thermal conductivity (its physical ability to resist heat transfer).
R-value is given ‘by inch”, meaning that you need an inch of thickness to achieve that R-value from a given material. And you can roughly multiply the R-value by the thickness in inches to determine the total R-value.
R-value has even more importance in campervans where space for insulation is limited. If you decide to add two inch thick insulation on both walls, then that’s 4″ inches of interior space lost. And when your total interior width is only around 70″, then every inch counts.
It may make the difference between whether or not you can fit your bed sideways across the van. Or whether or not you can stand up inside your campervan. (Read: What vans are tall enough for standing)
However, it’s important to keep in mind that R-Value is only achieved under near-perfect circumstances or laboratory conditions. The doors, windows, and awkward curves of a campervan are obvious weak points that make it basically impossible to achieve the advertised R-Value of your materials.
Thermal Bridging | Insulating A Campervan
A thermal bridge is a weak point in your insulation that allow heat transfer. Most commonly in a campervan, it’s caused by poor insulators (like metal or wooden ribs) on the inside of the van’s structure. You typically fill in insulation between the ribs but leave the ribs uncovered so that you can attach your walls and furniture to them.
Or insulating the floor with any compressible insulation requires load-bearing framing (pictured below). These breaks in your insulation create weak spots in your insulation strategy.
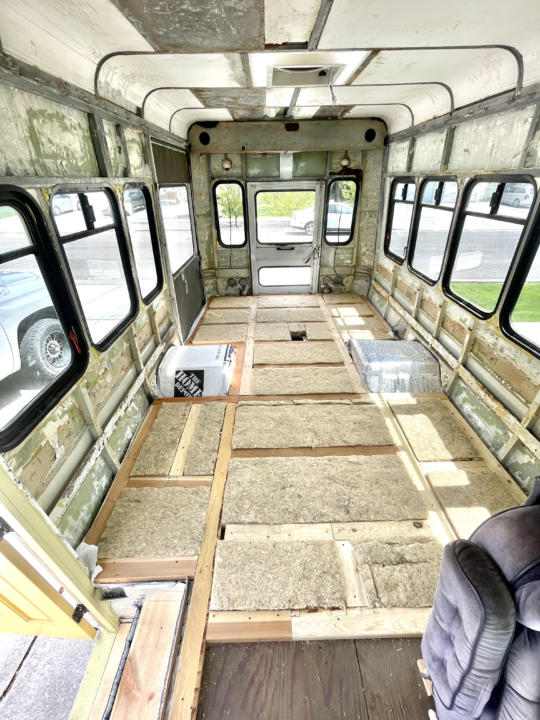

Photo By: @DestinationAltered
Metal and wood are bad insulators, and easily allow conductive heat or cold to transfer through them. So despite your insulation’s great R-value, heat or cold will find ways around it through any thermal bridging you have.
The graphic below illustrates how heat or cold can circumvent your insulation through areas with higher conductivity, such as metal or wooden framing.
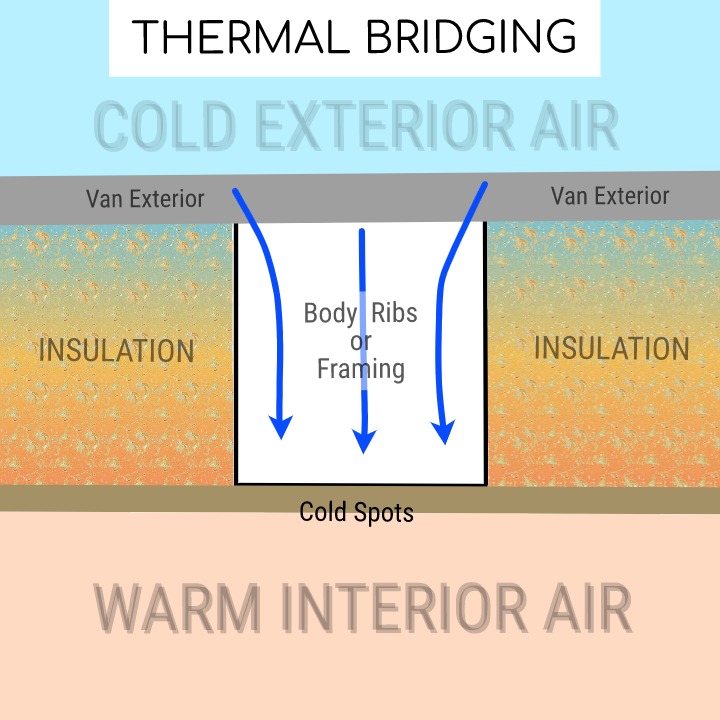

In a perfect world, you would have nothing but insulation on every inch of your van’s interior. But the issue is that insulation is a weak material for mounting parts of your van conversion. You need more solid materials showing, like wood or metal, for which to attach things.
So it’s in your best interest to limit the amount of thermal bridging you have when insulating a campervan. Thermal bridging is something to be aware of and try to mitigate, but it’s impossible to eliminate all of it.
Off-Gassing, VOCs, & Sensitivity
The other topic that surrounds the discussion about insulation types is their chemical makeup. Many types of insulation are made from materials that off-gas chemicals or VOCs (volatile organic compounds). Foam insulations, in particular, may have chemicals that slowly leach out over time, known as “thermal drift”.
Ultimately, what most people care about is whether or not they are safe to have in your home. But finding an answer is a little tricky and varies depending on who you ask. The manufacturers of foam insulation products are much more likely to declare their products as completely safe, or at least below the threshold for concern.
But many health-conscious builders are skeptical of those claims.
But if there is any reason to be concerned, then why do people choose potentially dangerous insulations to begin with? Well, they are often cheaper and offer really high R-Value.
And the other common refrain is “you wouldn’t want to live with potentially hazardous chemicals in such a small space, like a van”. But most van conversions have vent fans that run constantly, so in my view a campervan has much better air exchange than a traditional home. And also all the time spent driving also provides a chance for air exchange.
So while the conversation about the dangers of chemicals in insulation is worth having, I don’t think the concern surrounding campervan insulation is more profound than traditional buildings. I find it challenging to uncover the truth. So you will have to decide what your own budget and risk tolerance is.
The Best Products For Insulating A Campervan
Let’s look at the best types of insulation for campervans. I made this helpful spreadsheet to effectively compare the different types of insulation.
The spreadsheet, of course, has the R-Value for each insulation, but strictly looking at R-value doesn’t tell the whole story.
I think that the most helpful column is the “cost to achieve R-5”. This automatically calculates the cost to achieve one square foot of R-5. It’s color-coded with a spectrum from red to green (green being the best bang for your buck). I think this is a great way to visualize the true value of each type of insulation.
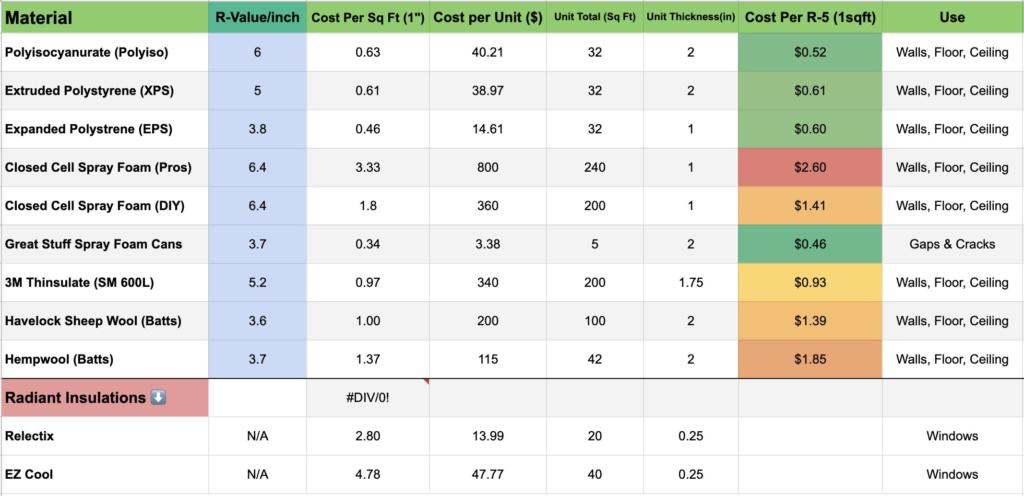

I know it’s practically impossible to read on a small screen. So if you prefer to look at the actual spreadsheet, here’s the link.
But keep in mind that the pricing may change over time. This chart has pricing from January 2022.
If you want to update your own pricing, once in Google Sheets, click “File” -> “Make A Copy”. And then you can update your own copy to reflect the most up-to-date pricing you find. The spreadsheet will automatically re-calculate the “Cost to achieve R-5” with your new pricing info.
Let’s jump into a description of each type of insulation as well as their strengths and weaknesses. I only include the best types of camper van insulation.
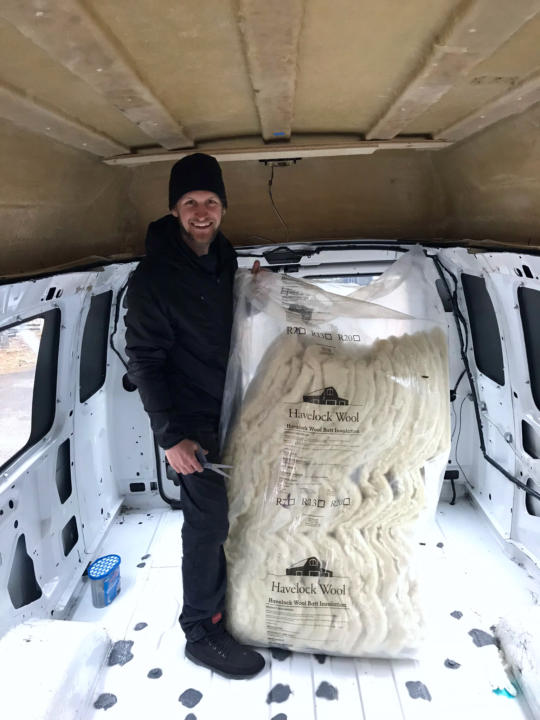
Sheep’s Wool

- R-Value Per Inch: 3.6
- Recommended Use: Walls, Ceiling
- Where To Buy: Havelockwool.com
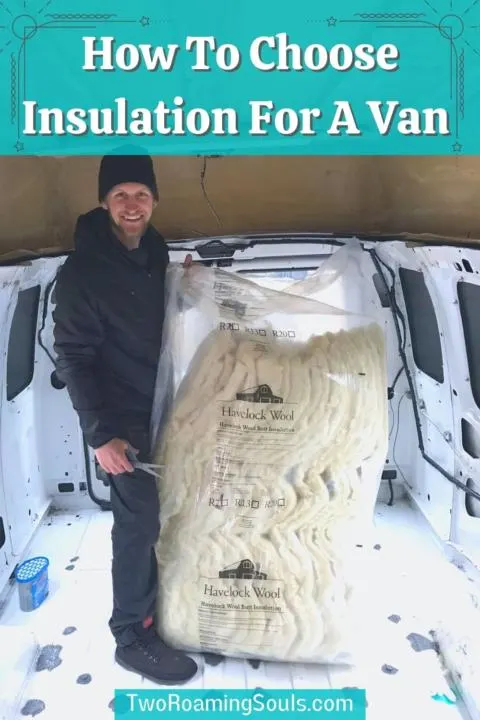
Sheep wool is probably the best all-natural product for insulating a campervan conversion. And the most popular seller is Havelock Wool.
Sheep Wool as an insulator has a respectable R-value, manages moisture well, fire resistance, pest resistant, non-toxic, eco-friendly, and easy to work with. It also absorbs VOCs from the air, so it can actually improve air quality.
Installing sheep wool is very easy and safe, requiring only a pair of scissors. Though cutting does release lots of small airborne wool fibers, so some people may still prefer a mask.
The 2″ batting is very versatile. It can cover large areas as is, or be cut into the shapes needed to fill awkward cavities. It can also be separated down the middle to create 1″ thick batting, or doubled up to create thicker coverage.
For walls and ceiling, you can temporarily hold it in place with string or painter’s tape. Just until your walls and ceiling are completed.
Sheep wool does not support weight, so you must add framing if you want to use it to insulate the floor.
Pros
- Eco-Friendly
- Manages Moisture
- Versatile
Cons
- Expensive Shipping
- Can compress over time
- Doesn’t support weight
3M Thinsulate (SM 600L)

Thinsulate is a synthetic thermal and acoustic insulation comprised of polyethylene fibers. The SM 600L Thinsulate is the best one with a high 5.2 R-Value. It’s a superb product for insulating a campervan.
Just be aware that not all Thinsulate is the same. There are several other varieties with lower R-value around 3.7.
Thinsulate doesn’t absorb moisture but allows it to pass through so it won’t get trapped against the walls. It is non-toxic and doesn’t off-gas.
It’s quite easy to work with, requiring just a pair of scissors to cut the batts to the sizes needed. It’s typically installed by using 3m spray adhesive and cutting to the shapes needed.
It comes compressed in a roll, but expands up to 1.75 inches thick. When hung vertically it can expand up to 2 inches thick.
3M Thinsulate does not support weight, so you must add framing if you want to use it to insulate the floor.
Pros
- Great R-Value
- Doesn’t absorb moisture
- Versatile
- Easy to work with
Cons
- Expensive
- Can compress over time
- Doesn’t support weight
Closed-Cell Spray Foam
- R-Value Per Inch: 6.4
- Recommended Use: Everywhere
- Where To Buy: Local Professional Installers, Home Depot
Spray foam has the highest R-value on this list at 6.4 per inch, and it absorbs no water.
However, to truly do an entire van with spray foam, I highly suggest you get it done by a professional installer. They will have the proper equipment to do the entire van quickly and thoroughly.
The cost of a professional spray foam job is very expensive (usually $700-$1500) so that price makes it a tough choice for the budget-conscious. But if you can afford it, there are many van owners who are happy to have someone else do the work.
When installed correctly, spray foam adheres directly to your van’s metal, thus removing all air. For this reason, a professional spray job should be ideal for preventing moisture from getting between your insulation and the exterior metal.
They also make professional spray foam kits that you can buy. But for the price of the kit, plus the PPE you need, and the labor, it’s probably worth spending the extra to have the pros do it for you. You eliminate the chance of user error and transfer the labor onto someone else.
There are a couple common complaints about spray foam.
First, you need to prep your van for spraying, which includes taping or wrapping anything you don’t want to get covered in foam. And after you may need to do lots of trimming in areas where the foam expands beyond its bounds.
And lastly, sometimes spray foam can cause some warping of the van’s metal. But it’s rare.
Spray foam also has some off-gassing over time, especially if incorrectly mixed. But the level of concern is up for debate. You will likely get two different answers if you ask a spray foam installer, versus an eco-conscious builder.
Pros
- Highest R-Value
- True vapor barrier
- Comprehensive coverage
Cons
- Very Expensive
- Off-gassing
- Must prep van for spraying
- Trimming after
Spray Foam Cans
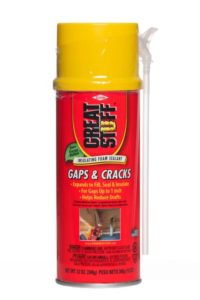
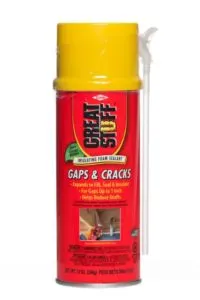
- R-Value Per Inch: 3.7
- Recommended Use: Gaps, Cracks, or Adhesive
- Where To Buy: HomeDepot, Lowes, etc.
The other type of spray foam you may be familiar with is the small cans like Great Stuff sold at most hardware stores.
It would take tons of individual cans to do an entire van this way. And you will probably have lots of trimming to do in places where the foam expands too far. So for those reasons only recommend cans of spray foam as a supplementary insulation method.
However, the Great Stuff Gaps and Cracks is good for filling in awkward little spaces that are hard to insulate. But be careful not to spray in the door and window mechanisms because it can mess up their functionality.
It can also be used as an adhesive for installing other types of insulation. For example, you can use it as an adhesive to mount foam board insulation.
However, using Great Stuff to fill in various cavities in the van can have its shortfalls. The foam needs moisture and air to cure, so foam sprayed into cavities might not receive ample air and moisture to cure properly.
For example, the Great Stuff foam is supposed to cure in 8 hours. But more than 24 hours after spraying, we were drilling some holes in the metal, and discovered spray foam oozing out of the hole. Clearly, the curing did not occur properly in the more enclosed cavities.
This is concerning for the off-gassing that may occur from improperly cured foam. And also for possibly not achieving the advertised R-value.
Pros
- Fills awkward spaces
- Doesn’t absorb moisture
- Affordable
Cons
- Messy
- Not good for large areas
- Off-gassing
- Trimming after
Polyiso Foam Board (Polyisocyanurate)

- R-Value Per Inch: 6
- Recommended Use: Walls, Ceiling, Floors
- Where To Buy: HomeDepot, Lowes, etc.
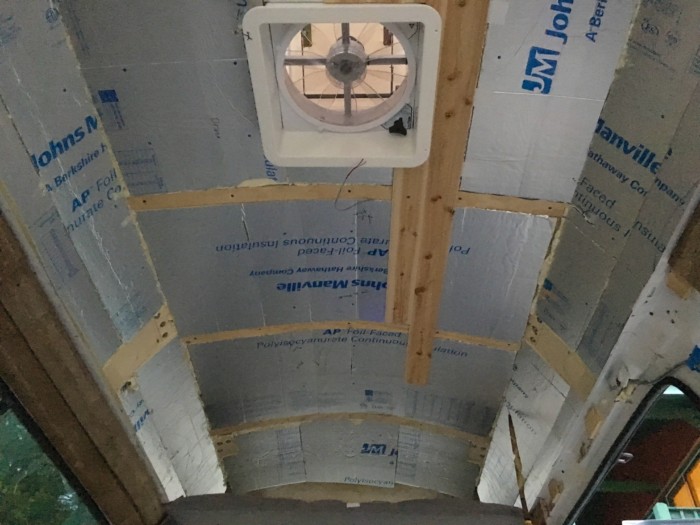
Polyiso Foam Boards are a very popular product for insulating a campervan. Besides Spray Foam, it has the highest R-value of anything on this list.
Polyiso is sold in 4’x8’ sheets, just like plywood. And its rigidity can be a positive or a negative. For large flat areas, it’s very easy to just slap a foam board on and be done with it.
But the rigidity of polyiso boards becomes a negative with all the curves and awkward spaces in a van. For areas with a minor curvature, you can cut slits in the foam board to somewhat follow the curves (like the van roof seen above). But some awkward spaces may prove nearly impossible to insulate with foam board.
A popular way to install foam board is to use cans of spray foam as an adhesive. You can cover the back of the foam board with spray foam and push it into place. For the walls and ceiling, you need to use stilts to hold the foam boards in place while the spray foam cures.
The only problem I see with this method is that if/when the spray foam doesn’t completely fill in behind, you will have air trapped between your foam board and the van. Any moisture in the air could result in mold, mildew, and rust. But I honestly can’t say how much of a concern this should be.
Polyiso Foam Boards have high compressive strength and can be used underneath flooring without framing.
Also, the foil faces on polyiso can serve as a radiant barrier, but only when installed with a sufficient air gap. Most campervans can’t spare the space to achieve that air gap. And I also don’t recommend an air gap because it provides a place to trap moisture between the wall and the insulation. So the radiant properties of polyiso are nearly useless for vans.
Also, polyiso can lose r-value over time as off-gassing occurs.
And there is some research suggesting that some brands of polyiso lose R-value as the temperature decreases. But there is active debate about this as it pertains to different brands over time.
Pros
- Great R-value
- Affordable
- Doesn’t absorb water
- Can support weight
Cons
- Rigid
- Off-gassing
- Can trap moisture
- Can lose R-value
- Can squeak
XPS Foam Board (Extruded Polystyrene)
- R-Value Per Inch: 5
- Recommended Use: Walls, Ceiling, Flooring
- Where To Buy: HomeDepot, Lowes, etc.
XPS foam board is readily available and has pretty good insulating properties. But it’s barely cheaper than Polyiso, has lower R-value, and uses ozone-damaging HFCs in manufacturing (hydro fluorocarbons). Though the new Foamular NGX XPS product claims a 90% reduction in the blowing agents global warming potential (GWP). But Polyiso blowing agents have zero Ozone Depletion Potential and “virtually” no GWP. So whenever available Polyiso is almost always a better choice in terms of environmental impact.
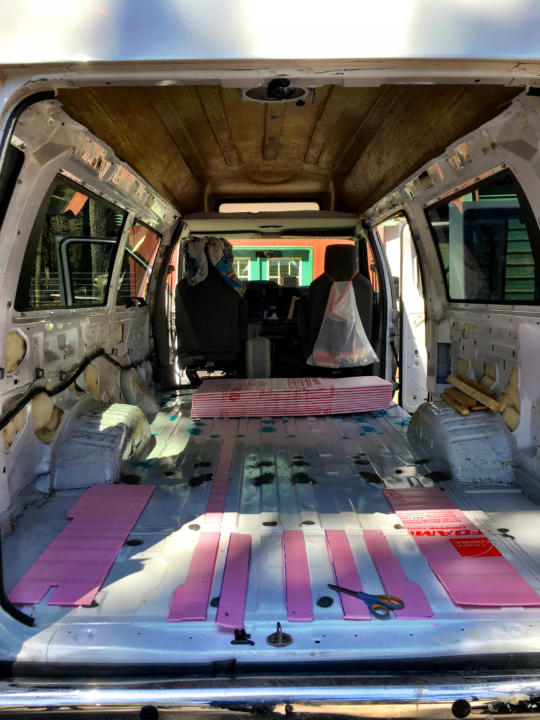
XPS loses R-value over the years as off-gassing occurs, and there is some debate on its waterproof……ness (Source).
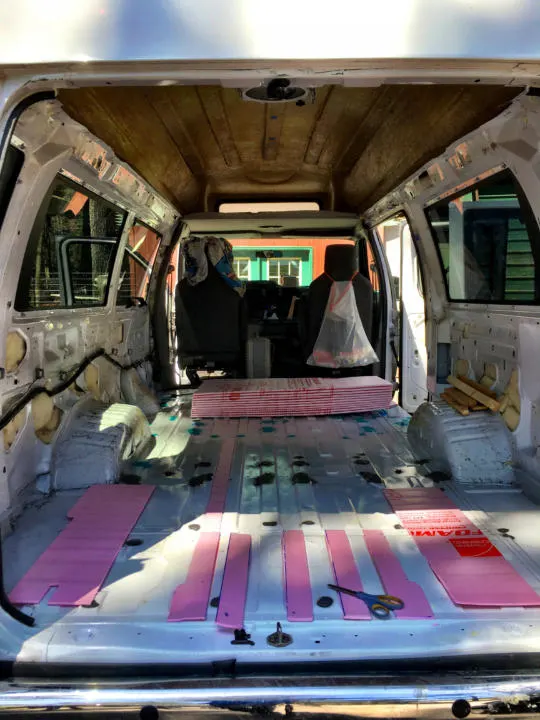
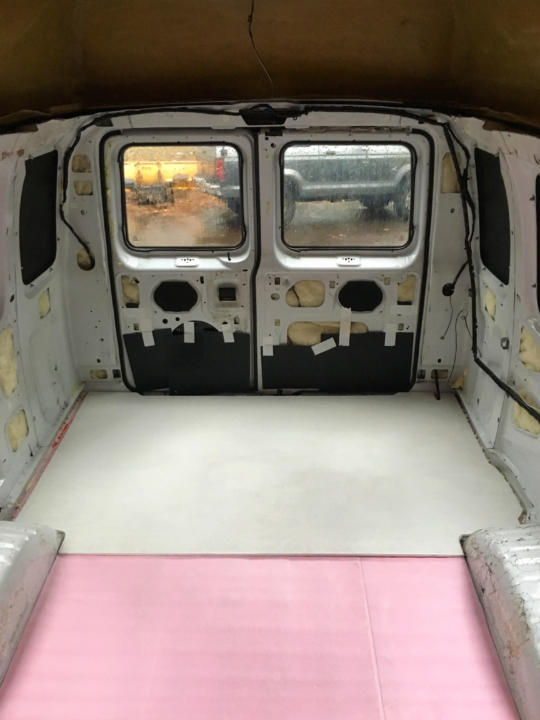
The only benefit is that XPS is available in ¼” thickness, whereas Polyiso is not. We used it for our flooring to fill in the 1/4″ deep grooves in the van floor. And then we laid down a full layer of XPS over the top of that. We couldn’t sacrifice much headroom in our van. So this was our compromise to get some insulation in the floor, but only lose 1/4″ of interior height to insulation.
XPS Foam Boards have high compressive strength and can be used underneath flooring without framing.

Pros
- Affordable
- Decent R-value
- Can support weight
Cons
- Not the best value
- Contributes HFCs to atmosphere
- Can lose R-value
- Can squeak
EPS Foam Board (Expanded Polystyrene)
- R-Value Per Inch: 3.9
- Recommended Use: Walls, Ceiling, Flooring
- Where To Buy: HomeDepot, Lowes, etc.
Expanded polystyrene is basically the typical styrofoam that we are familiar with. It’s different from Polyiso and XPS because it contains air instead of blowing agent gasses. For this reason, it has a lower initial R-value than the other two foam board types. But because it doesn’t off-gas, it doesn’t lose R-value over time. So, at least in initial “price per r-value”, it’s not the best bang for your buck compared to Polyiso or XPS.
And since campervan conversions typically don’t last as long as a traditional home, most people aim for the highest possible initial r-value. But in the long-run EPS is still a good value for insulating a campervan.
It can support weight and be used to insulate flooring without framing. But it has the same challenges of other foam boards when it comes to fitting curves and awkward spaces.
It can absorb some water in between the beads, but it has the ability to dry out.
Installation can be messy because cutting it causes some beads to break loose.
Pros
- Affordable
- Decent R-value
- Can support weight
- Doesn’t lose R-value
Cons
- Least R-value of the foam boards
- Can absorb water
- Not the best value foam board
- Can squeak
Hemp Wool
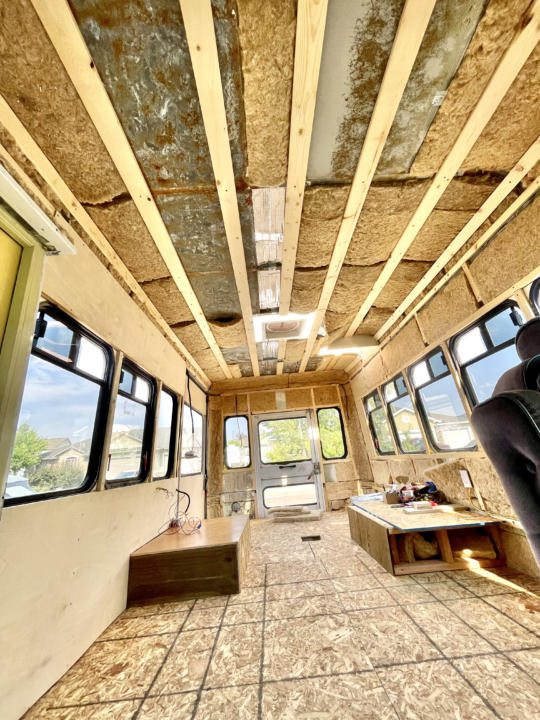

Photo By: @DestinationAltered
- R-Value Per Inch: 3.7
- Recommended Use: Walls, Ceiling, Floor
- Where To Buy: Hempitecture.com
Hemp Wool, made by Hempitecture, is a great eco-friendly and vegan insulation. It has R-value on par with sheep’s wool and EPS. It’s non-toxic, biodegradable, and manages moisture well.
Hemp Wool comes in batts from 2 inches thick up to 7.5 inches thick. It is made up of 92% hemp fiber held together by 8% textile fiber binder. Hemp is a rapidly-renewable crop that sequesters carbon.
The major strike against Hemp Wool is that it has a Class-E fire resistance rating (which is about the lowest possible rating). But they do plan on incorporating a flame retardant beginning in 2022.
Hemp wool is expensive if you need to pay for shipping. Insulation is such a large item that it costs a lot to ship it. But if you live close to one of their shipping facilities you can pick it up in person and save nearly half. Their three pick-up locations are Woods Cross, UT; Knoxville, TN, and Asbestos, Quebec (unfortunate name for a town, I know).
For more info about Hemp Wool, check out the FAQ.
Pros
- Eco-Friendly
- Manages Moisture
- Vegan
- Non-toxic
Cons
- Expensive Shipping
- Not Fire Resistant
- Can compress over time
- Doesn’t support weight
EZ Cool
- R-Value Per Inch: N/A
- Recommended Use: Window Covers
- Where to Buy: Amazon.com
Low E/EZ Cool is a closed-cell foam with aluminum foil faces. The closed-cell foam resists compression. Low E EZ Cool is slightly better than Reflectix because the closed-cell foam center has more r-value than the bubble-wrap.
However, EZ Cool is more rigid, so it can make it a little harder to find space to store your window covers when not in use.
Pros
- Reflects radiant heat
- Closed-cell foam center
Cons
- Bad conductive insulation
- Requires air gap
- Difficult to find in stores
Reflectix


- R-Value Per Inch: N/A
- Recommended Use: Window Covers
- Where to Buy: Amazon.com
Reflectix is bubble wrap with aluminum foil faces. It’s a popular product to use to make window covers. The foil faces reflect radiant heat trying to enter through your windows.
It can easily fold or roll up for storage. We used Reflectix for our first van build, but will probably pivot to EZ Cool for our next van because of the closed-cell foam.
Pros
- Reflects radiant heat
- Easy to find in hardware stores and online
Cons
- Bad conductive insulation
- Requires air gap
DIY Window Covers
How to make your own DIY window covers…..
First measure how much square footage of windows you have. Then purchase enough Reflectix or EZ Cool to cover them. (Add some extra for margins, mistakes, or waste).
Then trace out your windows onto paper or cardboard templates. Add a 1 inch margin around each template. This will help your window covers sit on the raised window frame and create some air gap. Then and transfer the shapes to your Reflectix or EZ Cool and cut with scissors or a utility knife.
Optional: You can use things like 3M Thinsulate, Sheep’s Wool, or Hemp Wool as extra r-value in your window covers. Cut the same shapes as the previous step with batt insulation.
Then cut out the templates one more time on fabric. You can use fun & colorful fabric or go with black fabric if you want to have reversible stealth window covers.
Next, place magnets around the perimeter of your window covers. It may be helpful to use tape or glue to hold them in place until you sew them in place on the last step.
And finally, sew all three layers together, Reflectix or EZ Cool, optional insulation in the middle, and fabric on the other side. Sew the magnets into place as you go around.
Conclusion | Insulating A Campervan
So, let’s revisit the insulation data spreadsheet with a little more context on each type of insulation.
The obvious thing that sticks out is that Great Stuff spray foam cans are the cheapest cost to achieve R-5. But as I noted, cans of spray foam are not a great way to insulate large areas of your campervan. So while it’s quite affordable, it’s really only best used as a fill-in, rather than a complete insulation strategy.
The Sheep Wool & Hemp Wool pricing includes shipping costs because they typically can’t be bought locally. The shipping costs for both of these are quite high due to their size. The rest of the items don’t include shipping because they can be sourced locally or purchased with free shipping. This greatly skews the numbers for Hempwool and Sheep Wool. However, I think it accurately reflects the true cost of going that route. If you can pick either wool up in person, they become very appealing options.
The cost of a professional spray foam job varies from $700-$2500, so those stats can fluctuate greatly depending on the cost of the professional spray job. But without a doubt, it’s the most expensive route because it includes someone else’s labor in the price.
Our Final Thoughts | Insulating A Campervan
Here are our top picks for insulating a campervan based on your goals:
Best Overall Insulation: 3M Thinsulate
3M Thinsulate is now our top pick for insulating a campervan. The newer SM 600L Thinsulate has a really impressive 5.2 R-value, and the price has come down considerably over the last few years.
It’s non-toxic, easy to work with, fire/pest resistant, deadens sound, and manages moisture well.
The main drawback with Thinsulate is that its plastic fibers are not necessarily renewable.
Best Eco-Friendly Insulation: Havelock Sheep Wool
Havelock Sheep Wool is our top pick for eco-friendly insulation. It doesn’t have the best R-value (3.6), but it has many other desirable qualities.
Just like Thinsulate, its non-toxic, easy to work with, fire/pest resistant, deadens sound, and manages moisture well. But better than Thinsulate, Sheep Wool is truly renewable and sustainable.
And Sheep Wool can actually improve air quality by filtering and irreversibly binding to VOCs like formaldehyde.
Best Vegan & Eco-Friendly Insulation: Hemp Wool
Hemp Wool takes it a step further leading the way as the best Vegan and Eco-Friendly insulation for campervans. It is rapidly renewable and sequesters carbon. It has an R-value of 3.7, nearly identical to Sheep Wool.
Just like Thinsulate and Sheep Wool, it’s non-toxic, easy to work with, pest resistant, deadens sound, and manages moisture well.
However, I will like Hemp Wool a lot more when/if they can incorporate a flame retardant in the future. Currently, it still seems like a liability with the poor Class-E fire rating.
Absolute Highest R-Value: Closed-Cell Spray Foam
If you must have the absolute highest R-Value, then closed-cell spray foam still comes out on top with an impressive 6.4 R-Value. It’s the only insulation that effectively creates a vapor barrier. Closed-cell spray foam has great sound deadening properties, and it actually adds rigidity to your campervan. But it’s also going to be the most expensive method, especially when you choose a professional installer.
Best Value On A Budget: Polyiso Foam Boards
Polyisocyanurate Foam Boards are still our top pick for best value on a budget. They are quite affordable and carry a high R-value. The main challenge with foam boards is fitting them into awkward spaces and along curves.
We hope you find this guide for best insulation for a campervan conversion useful and you can insulate your van with the best product that suits your camper van needs!
Insulation Is Not Everything!
As I mentioned in the beginning, campervan insulation is only one aspect of van climate control. And depending on your situations you may decide to have very insulation, or none at all.
But besides insulation, there are other important steps to making your camper van comfortable to live in.
You need to plan campervan ventilation with roof vent fans and windows.
And for extreme temperatures (hot or cold) you really should invest in a heater or air conditioner.
Otherwise, you will ultimately be at the mercy of the climate. Which many vanlifers deal with by traveling with the seasons, going north in the summer and south in the winter. But here’s our honest take on the reality of the “snowbird lifestyle” in the US.
Help Share This ‘Campervan Insulation Guide’ On Pinterest!


Campervan Ventilation | Ultimate Airflow Guide - tworoamingsouls
Tuesday 4th of April 2023
[…] air circulation is only one part of the equation. Proper insulation and window shades are also important for controlling the temperature inside your […]
Van Conversion Build Order | Step By Step Guide - tworoamingsouls
Monday 23rd of January 2023
[…] I will try to summarize the basics really quickly here, but you should read our entire post dedicated to campervan insulation. […]
How Much Did Our Camper Van Conversion Cost (DIY Cost Analysis Breakdown) - tworoamingsouls
Monday 5th of December 2022
[…] foam boards into awkward holes wasn’t going to work well. So after thoroughly researching different types of insulation we decided to go with sheep’s […]
What Vans Can You Stand Up In? Vanlife Guide - tworoamingsouls
Wednesday 22nd of June 2022
[…] converted van will typically use up about 2-4 inches of interior height for flooring, ceiling, and insulation. So to properly stand up in your finished van, you should plan for about 3-6 inches of […]