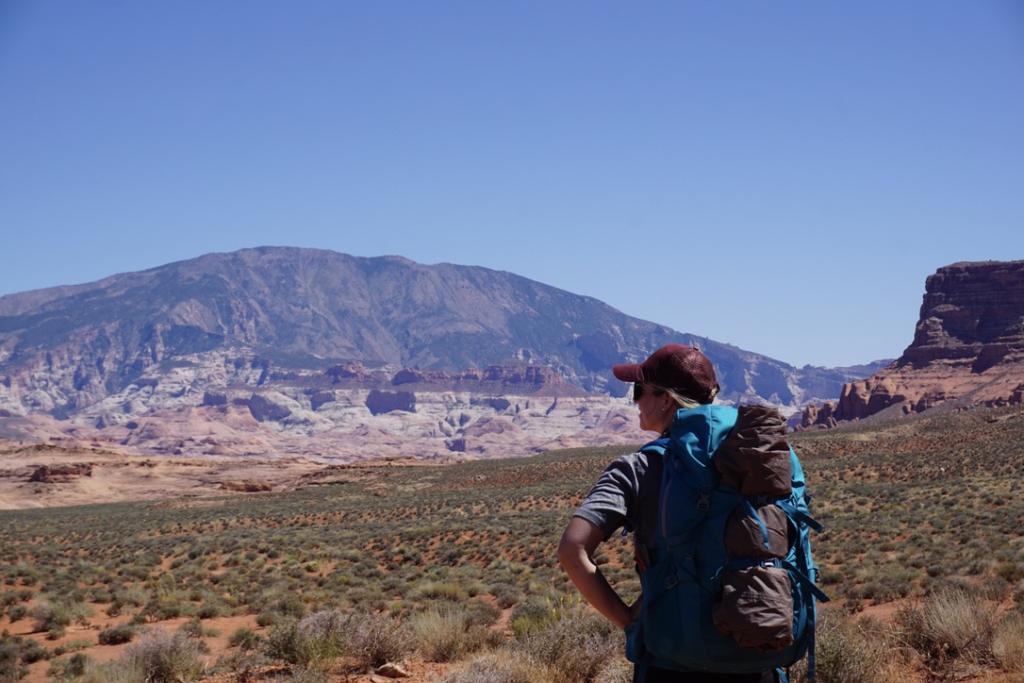
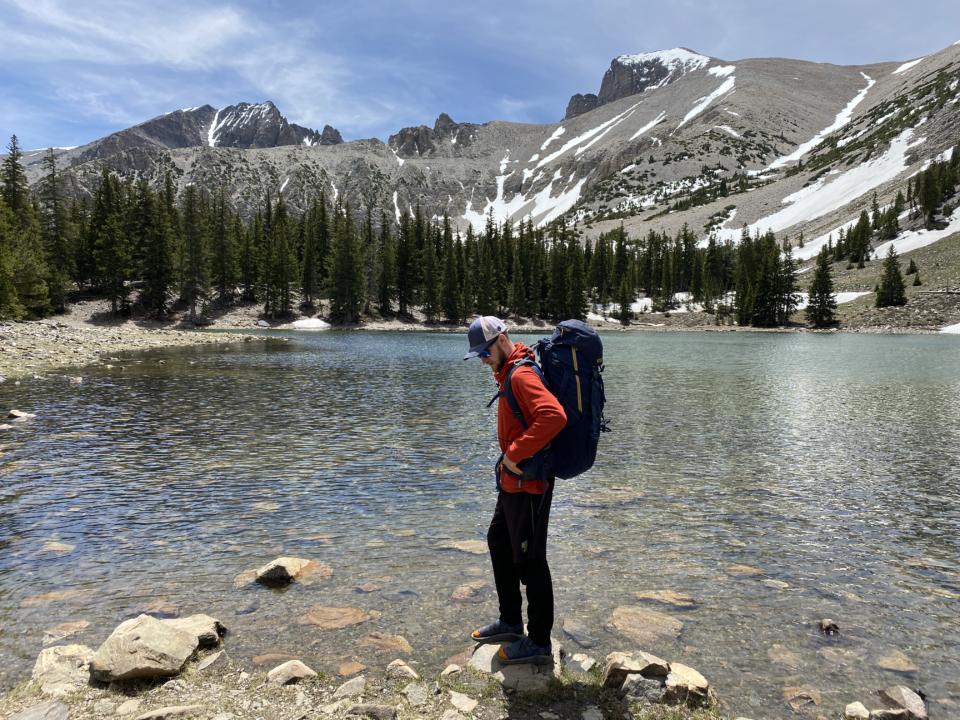
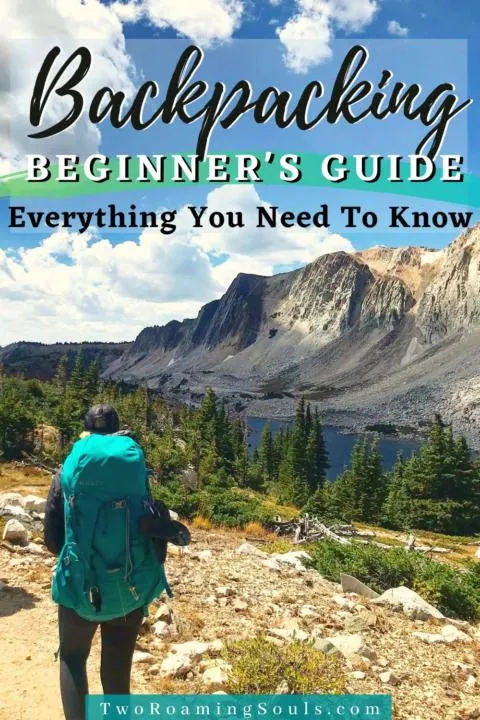
When Jake and I first starting out backpacking, we didn’t have much knowledge of what to buy, what to wear, etc.
We both luckily worked for Vail Resorts at the time, so we got “pro deals” on outdoor gear (which is outdoor gear heavily discounted). We started buying everything and anything to get us deep into the backcountry.
But if we were to start all over again, we would follow a few tips and things we learned along the way.


I remember my first backpacking trip. It was down to the Gunnison River at Black Canyon National Park. It was a short hike, but the elevation climb was NO JOKE. And we carried the most rediculous set of items.
We were so sore after that hike. It felt like we were doing the stair climber at the gym for hours. And this is where I knew I needed to make some changes to my backpacking setup. So if you follow this beginner’s guide to backpacking, it will set you up for success right from the start.
This post may contain affiliate links. Disclosure policy.
Pack Light:

For my first backpacking trip I had a FULL backpack, and I have a multi-day pack (55L). I brought several changes of clothes, all our water, hair brush, deodorant, toothpaste, etc. I had everything as if I was going on a luxurious overnight trip at a hotel.
But what I learned quickly is that there are much lighter ways to carry the bare essentials.
Ditch the things you can just do when you get back in the morning. Live on the wild side, brush your new dreads out later and freshen up with some hygiene wipes at the car! Or if you are traveling with a partner, share some of the items (such as toothpaste). More details about packing light, listed below.
Every little bit counts, and this is more true than you might think!
If you start adding in little things, they can really add up quickly. Such as adding in a chapstick, sunscreen, wanting to bring a few hygiene wipes to clean up with later, extra socks, etc. The real key is “less is more!”
So if the item is something you can live without for the duration of your trip, then leave it behind!
Find A Balance:
In order to enjoy backpacking you will have to find a balance between pack weight and comfort. And the balance that you choose should be personal to you. Some people are happy to carry a little extra weight on their back, if it means they can bring a more comfy sleeping pad. While others might put a premium of having mostly ultralight gear, but sacrifice a little comfort at camp.
And most people will settle on some combination of lightweight gear and personal comforts. Every ounce you save with your tent is more weight that you can devote to a warmer sleeping bag (or a flask of whiskey).
So if you strike a balance between lightweight/ultralight gear where it makes sense and splurge on some things that will make backpacking much more enjoyable, then it can make a world of a difference. Therefore in this beginners guide to backpacking, we will go over where we think it is important to cut weight and others items where you might be able to splurge on the extra weight.
Clothing:

Choose clothing that can do it all! Especially when going on a multi-day hike, it’s best if you have gear that can be worn for multiple days without making you cringe when putting it back on. Like I said before, I used to bring a whole change of clothes when going on just an overnight backpacking trip, but it was so unnecessary.
Oftentimes you might be hiking up to a lake or along a river where you can take a dip if you got a little too sweaty or the trail was muddy.
Also the clothing you choose will depend on the weather. If you are going on a backpacking trip during summer, then you will need less clothes then if you are hiking in late fall or early spring. But do note that your body temperature will rise while hiking, especially because you will be carrying extra weight. And if you get cold at camp, you will most likely have a sleeping bag that can keep you warm! Therefore it can be easy to overestimate how much clothing you might need to bring.
Also for females, I will usually bring a change of underwear, but I’ll wear the same sports bra, shirt and shorts/leggings for the duration of the hike. After all, you are getting rugged out in the backcountry, so you don’t have to worry about winning a beauty contest!
If the weather has a chance of rain, we often times will pack along our rain jackets. It can also act as another layer if it gets cold!
Our Favorite Backpacking Clothes:
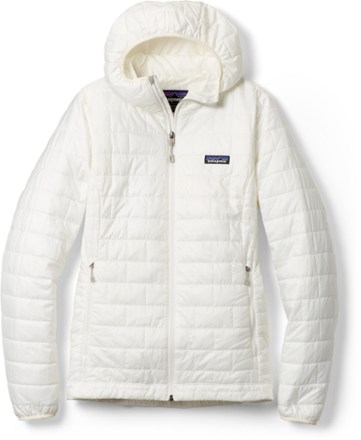
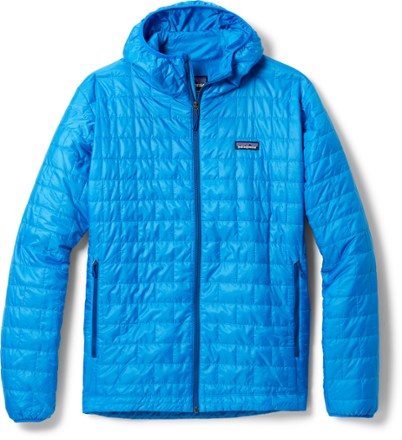
Nano-puff Jacket:
Our nano puff jackets come with us on every backpacking trip. Night time can get a little chilly, and nano-puff jackets are a lifesaver. They pack down small, yet pack a lot of warmth, making it a perfect item to have along on a backpacking trip.
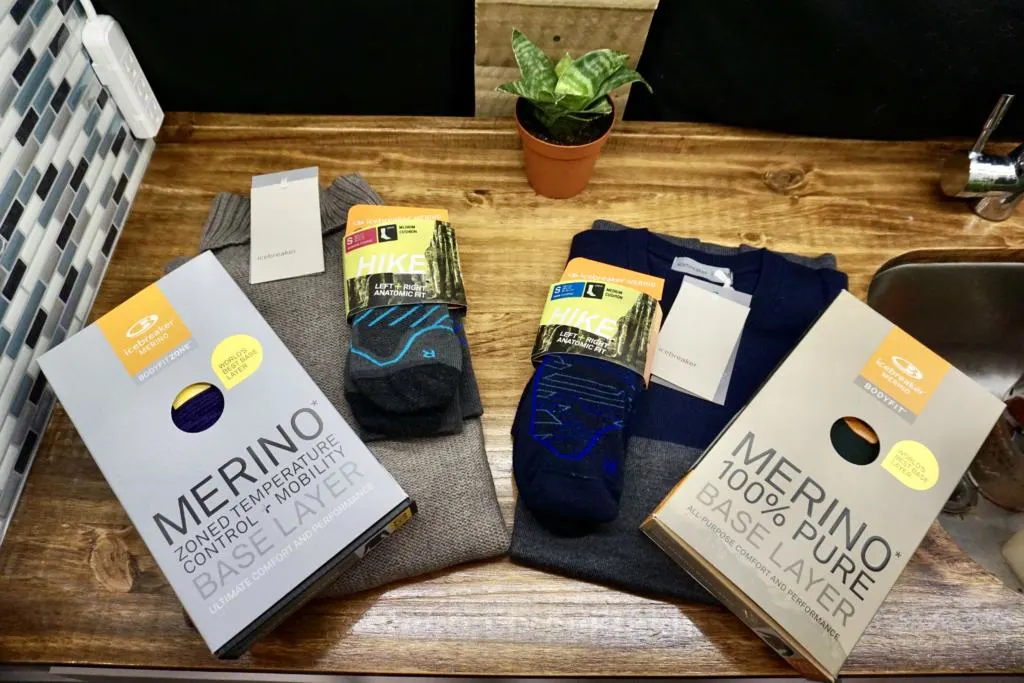
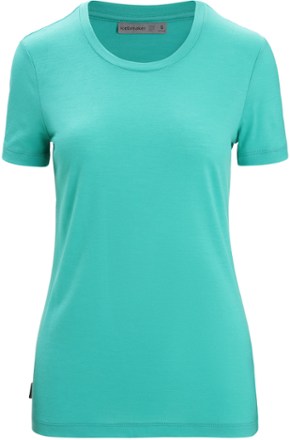
Merino-wool Shirt:
Merino wool is proven to wick sweat, be breathable, and is odor resistant. Having a merino wool layer is the best layer because you can wear it multiple days without it getting unreasonably smelly or gross.

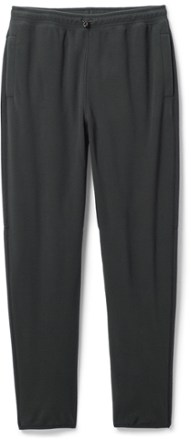
Baselayer:
We both like to bring a legging baselayer for when it gets chilly at night. We both have the fleece lined Patagonia sweatpants. They are the perfect layer to keep you warm all night long!

Hiking Pants/Shorts:
Hiking pants just aren’t my style, but they are very practical. Therefore if you can rock a pair of hiking pants that can act as both pants and shorts, then those are the perfect item to wear on a backpacking trip. But Jake and I just judge the weather and usually commit to either shorts or pants for the duration of the hike.
You will usually find me in a pair of leggings and Jake in a pair of shorts.
Merino-wool socks:
Same as a merino wool upper layer, merino wool socks are the best option for hiking socks. It might not seem like it, but not having to bring an extra pair of socks can help bring the weight down a little.
Smartwool PhD Outdoor Light Crew Socks – Women’s | REI Co-op
Smartwool PhD Outdoor Light Crew Socks | REI Co-op
Ultralight Gear:

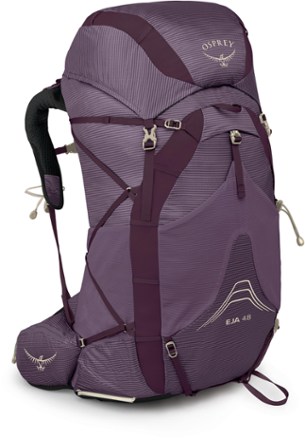
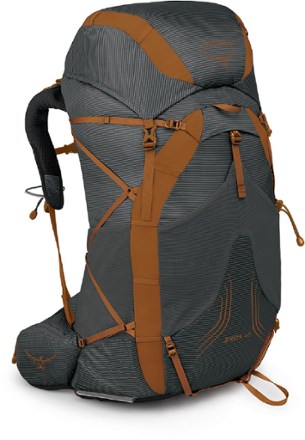
Backpack:
Obviously one of the most important pieces of equipment on the beginners guide to backpacking is a backpack. And we highly suggest choosing your backpack wisely. Ask yourself these questions to decide what type of backpack you should look for.
Will you be an avid backpacker or just go a couple times?
Will you be going on overnight backpacking trips or multi-day trips?
When choosing a backpack, there are three things you will want to pay attention to: fit, size, and weight.
Fit:
It’s important to get a backpack that fits your body. You won’t be comfortable in a backpack that doesn’t fit you. It’s best to go shopping in person to have a knowledgable salesperson find packs that are a good fit for you. And most companies are getting better at designing packs specifically for women.
Size (volume):
Size depends on if you plan to do overnight trips or multi-day trips. If you only plan to do overnight trips, aim for a bag a little smaller in size (30L to 50L). But if you plan to do some multi-day backpacking trips then a 50L or larger is the size you should aim for.
Weight:
Our advice is to try and get a pack that is both durable and lightweight. Jake and I both have Kelty Catalysts 65L and 55L. We both feel our packs are a little heavy on their own, weighing in at over 4 pounds when empty. However, they are built with durable materials and packed with convenient design features.
There are some quality backpacking bags on the market that weigh about 2 lbs when empty. These are some backpacks we have our eye on for our next backpacking packs!
If you see yourself only going on a few backpacking trips per year then maybe choose a backpack that fits into your budget and less about weight. But if you want to have comfort and budget isn’t an issue, consider finding a backpack that is both lightweight, durable and fits your body type best!
Or for those obsessed with having the most ultralight gear, check out the Hyperlite pack. It’s incredibly light but sacrifices durability and some “bells and whistles”.
Our Top Pick’s For Lightweight Backpacks
Tent/Hammock:
Tent:
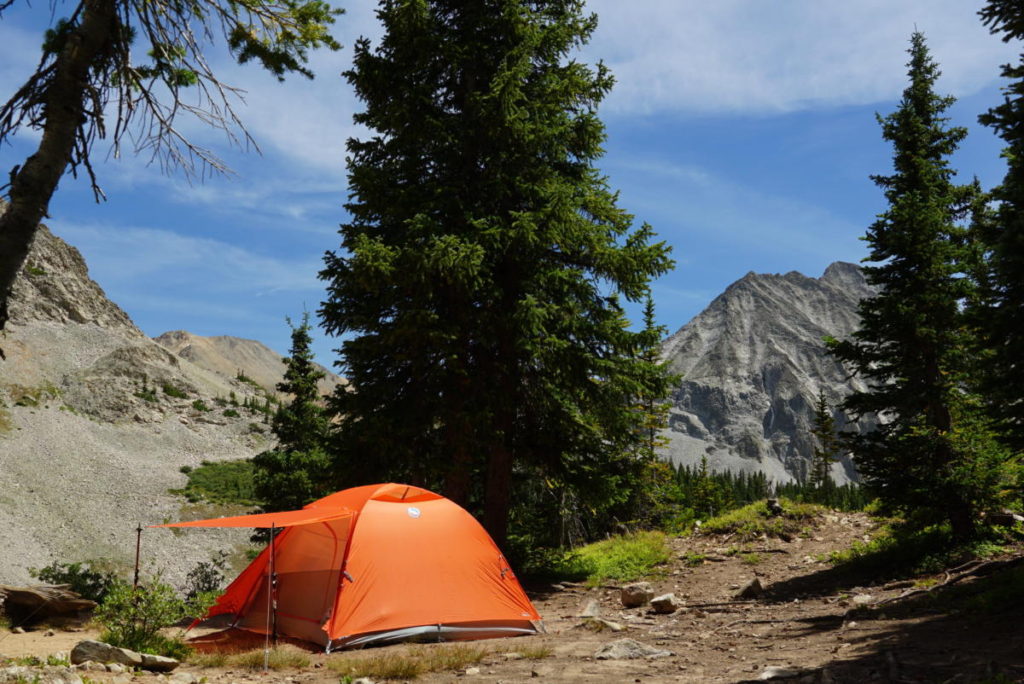

Tent choice is very important when backpacking. A tent will most likely be one of the heaviest items in your pack. Therefore, if you are just getting started on your backpacking adventures, choose a lightweight tent.
But you will want a tent that is durable and can withstand any elements thrown your way. So if you just go and pick the cheapest and lightest tent on Amazon, you might get to your destination and realize a 10mph gust of wind might take your tent to the great unknown.
So we highly suggest picking a tent that is known to be durable, lightweight and has reviews proving it is a high quality product. You want to make sure the rain cover can withstand a rainstorm or the zippers will open/shut easily for easy access in and out of your tent.
But, if you already own a tent and it is light enough to bring along on adventures, then you might not need to splurge on a true “lightweight backpacking tent”. Jake and I have used our car-camping tent (Kelty Trailridge 3: 6lbs) on numerous backpacking trips. It is a bit heavier than we would like, but good enough that it serves us fine for both situations.
But if you are looking for a high quality tent that will take your backpacking adventures to the next level, then our favorite lightweight tent is the Big Agnes Copper Spur UL3. It’s high on our list of items we plan to buy in the near future!
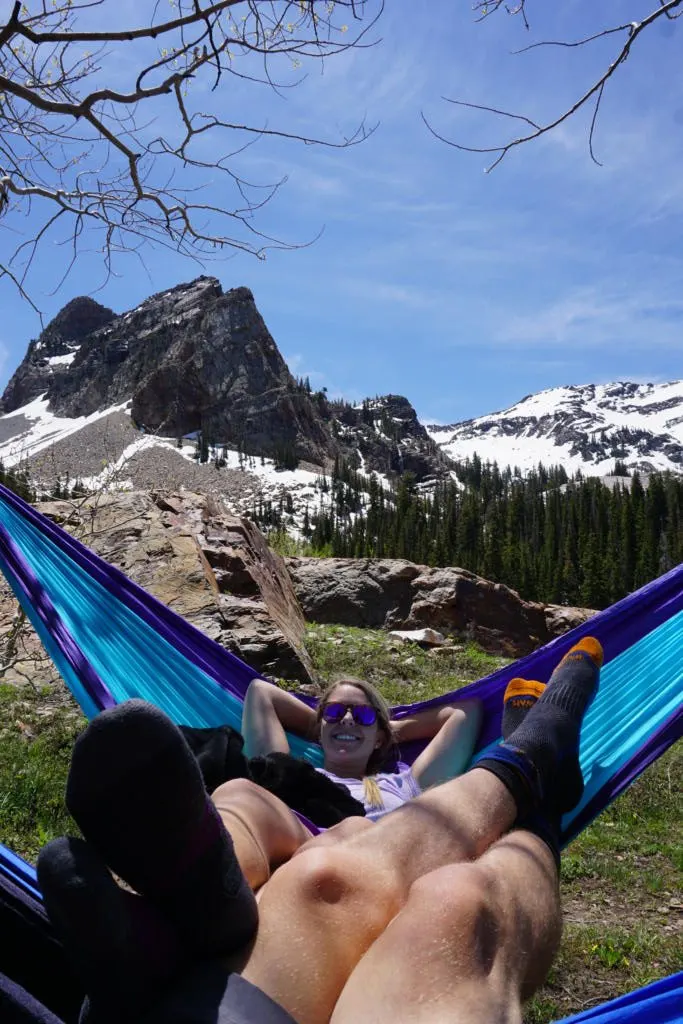
Hammock:
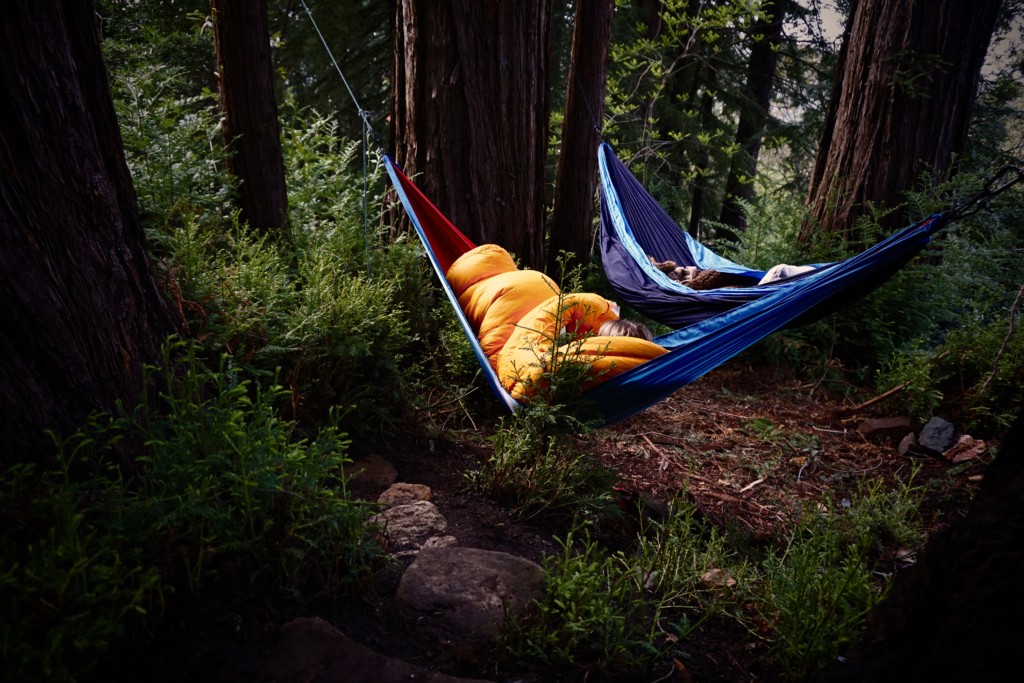

There is a large community of people switching to hammock camping which can save you tons of space and weight in your hiking pack. And some people love the comfort of hammocking compared to sleeping on the ground. Here are the key differences betweeen hammock camping and tent camping.
A hammock is much lighter than a tent, but you may choose to add in some other items to improve you comfort/protection/warmth. For example; rain fly, bug net, and underquilt may be necessary items depending on your location. So the weight savings may not be as good as it initially appears.
Just be sure to research the area you are camping. Will there be tons of bugs? Is it going to rain? Are there plenty of trees?

Personally, Jake and I prefer a tent because we love to have our little home on the trail where we can sleep side by side protected from the elements and critters.
But if the place we are backpacking to has good trees for hammocking, then we might bring along our hammocks too! Because there is nothing better then hiking to your destination and being able to put your feet up to enjoy the view! To us, the extra weight on our backs, is worth the comfort we gain from relaxing in our hammocks.
Sleep Gear:
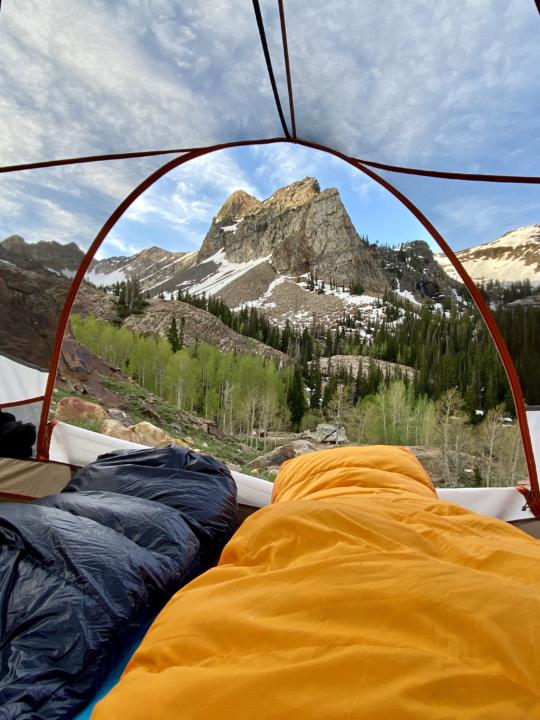

Sleeping Bag:
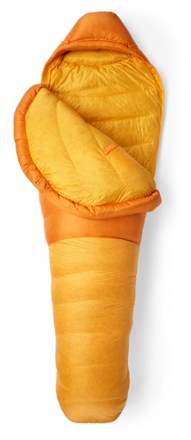
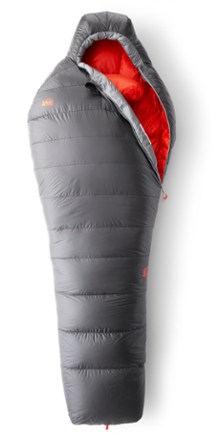
When it comes to sleeping bag choice, there are TONS of great options. You can go with an ultralight bag that compacts small and weighs next to nothing.
But, a sleeping bag is one department I did not want to sacrifice. I get cold very easily, so I have a bag that is rated for 0 degrees and doesn’t pack down very small. But that is one area I was willing to sacrifice.
But Jake has the REI Magma 10 and it is a quality bag that is lightweight and packs down small. And it’s rated for temperatures as low as 10 degrees.
If you sleep warm or don’t have a sleeping bag yet, then I HIGHLY suggest getting an ultralight bag. It will be well worth the money!

If you are looking for the right sleeping bag choice for you, check out our post:
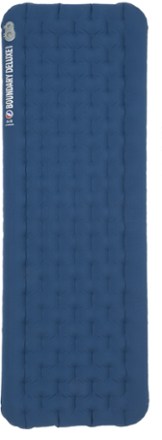
Sleeping Pad:
Sleeping pad is another item that is hard to sacrifice on, because a good night’s sleep is important. There are many great ultra-light options our there that pack down small and don’t add much extra weight to your pack. Jake and I both agree that the air pads are most comfortable. The only downside is the small chance they pop and you have to sleep on the ground.
But, we both love our Big Agnes air pads. If you are on a budget, consider a foam sleeping pad. not quite as comfortable, but basically zero set-up time and indestructible.
Pillow:
One easy way to cut weight is to not bring a pillow. For years I used to just use a stuff sack with some clothes stuffed inside.
But now that I cut down the amount of clothes I bring, I now carry an ultralight pillow. Which can also double as a seat cushion when you are just chilling around camp. Check out Great Backpacking Pillow Options.
Hydration

On our first backpacking trip Jake and I carried all the water we needed with us, which is one of the heaviest things in a pack.
So we each had our 2 liter hydration bladders full and an extra gallon each for our hike back up. That’s over 12lbs of water each!
But we were hiking down to a river, so if we only had a filter, then we could have cut tons of extra weight in our pack.
And even if you are going backpacking for one day, there are inexpensive ways to get fresh drinking water. But, if you do plan to backpack many times, there are some really great options to get filtered water.
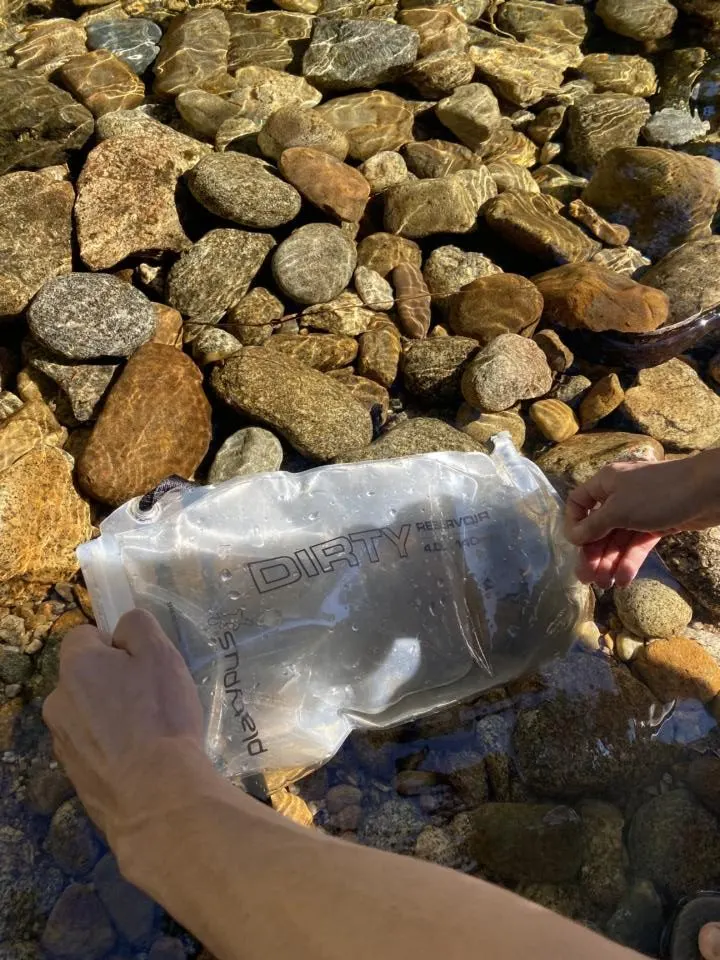
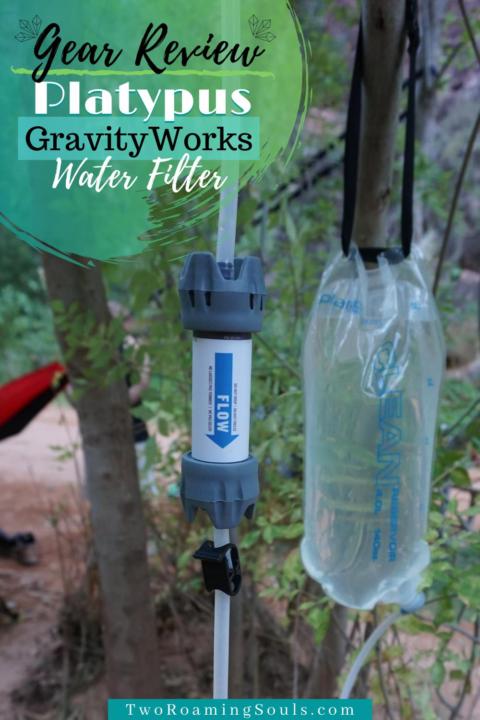
Water Filter:
There are multiple ways to find safe drinking water while out in the backcountry; high tech gravity flow filters, straws you can stick right into the water source, and even lightweight tablets that make it safe to drink. And a couple options are relatively inexpensive if you don’t plan to backpack often.
Our favorite filter is the Platypus Gravity Works. You simply fill the “dirty bag” with the water from a river, lake, pond, etc, and set it up in a tree. Then you place the clean bag lower so gravity can do all the work! You can have safe drinking water in less than 5 minutes.
For more information on the Platypus Gravity Works Filter, check out Jake’s full review.

Other great water filter options:


- Potable Aqua Iodine Tablets
- Sawyer Squeeze Water Filter System
- Larq Water Bottle
- LifeStraw Water Filter
No Water Source:
Sometimes when going on a backpacking adventure there is no water source where you can filter water from. Therefore you will need to carry all your water for drinking and cooking with you.
This will make your pack extra heavy and where having ultralight gear in other departments a godsend! But make sure you pack at least a gallon per person per day and extra water for cooking any food.
When we go on overnight backpacking trips like this we usually have our water bladders full and carry an extra gallon with us in our packs.
Water Bladder:
Another important item on the beginners guide to backpacking is a water bladder. You definitely don’t need a water bladder, but Jake and I have found it so much easier to stay hydrated if you have easy access to water.
A water bladder sits in your pack and the straw comes right over your should, so anytime you are thirsty you just have to turn the knob to get some H2O.
A bonus we’ve learned is to put our hydration bladders in the fridge the night before setting out on a long backpacking adventure. We also add ice right before so we have nice refreshing water for the first few hours of our adventure!
Bear/Wildlife Safety

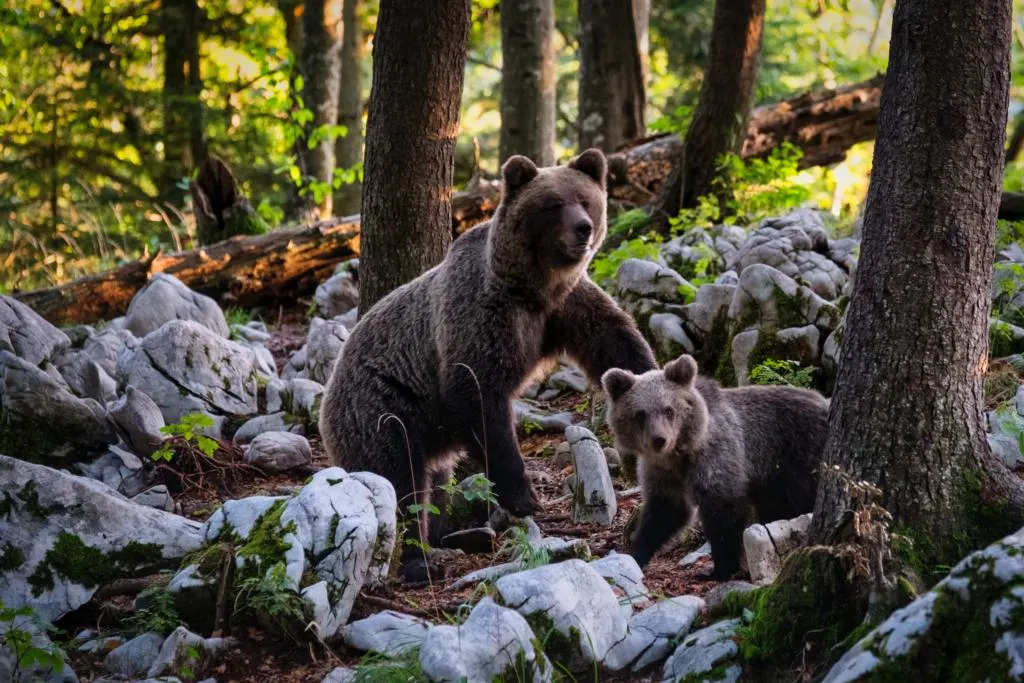
It’s important to be Bear Aware when hiking in the backcountry. It’s important to not feed wildlife and to keep them wild. Therefore, if you are hiking where there might be bears, then you will need to carry some additional items. And unfortunately that adds weight to your pack, but trust me, for safety reasons, it’s mandatory!
Don’t sneak up on wildlife. Always make noise when hiking. If you are hiking alone (which isn’t suggested), consider wearing a bell.
If you ever encounter a bear, talk to it in a low voice to let it know you are human. Most of the time it won’t bother you, but if it does start to come your way have your bear spray ready (if you have some). Continue to talk to it in a low tone and move to higher ground to make yourself look larger. Also, keep your pack on if you have one.
We have an entire post dedicated bear safety tips and strategies.
Bear Spray:

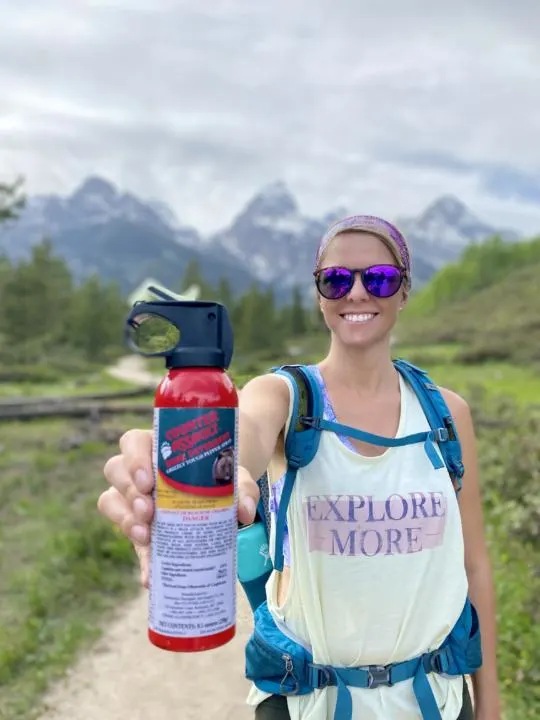
Bear spray is important to carry when you will be hiking in bear country, and especially important in grizzly bear country.
Bear spray can reach up to 32ft with 7 seconds of spray time. Always try to avoid bears without confrontation by giving them ample space. But if confrontation becomes imminent then bear spray can deter the bear long enough for you to get away.
Bear Canister:

You also need to have a way to protect your food from bears (and other critters) at night. This also includes anything scented (like sunscreen, chapstick, face wipes, etc).
If there are provided bear lockers, those are always the prefered method for storing food and scented items. But in any location without provided bear storage, you need another method.
Jake and I personally prefer a bear canister because we don’t have to bother with setting up a bear hang. Bear Canisters are by far the most accepted and recommended type of food storage.
And in some areas, like certain National Parks, bear canisters are still the only acceptable method.
The only negative to bear canisters is the weight compared to the other methods.
Put food and ALL scented items in the bear canister at night and place it at least 100 yards (downwind) from your campsite. Keep it away from cliffs or steep inclines where a curious bear could accidentally roll your canister far away.
If a bear finds the canister, it has been proven that a bear can’t easily open the canister. Or they may not even try if they remember previous failed attempts.
Bear Resistant Bag
But another popular option is a bear bag. This Ursack has been proven to be bear resistant enough.
But both options are good options to keep your scented items away from camp.
Once bears find out that human food is easier to find, they will forcefully continue looking for it, making it unsafe for other humans.
If bears get their hands on some human food, then it could possibly result in their dealth. Therefore, it is important to keep bears and all other wildlife WILD!
Don’t Hike Alone:
One important rule of hiking in bear country is to not hike alone. Try to go with a friend or a family member. It can be much easier to sneak up on a bear if you are not making much noise.
In area’s with short line-of-sight be sure to make noise by talking, singing, clapping, or wearing a bell. But if you do find yourself hiking alone, be sure to notify someone of where you are going and when you should be back.
Other wildlife:
Most other wildlife will keep their distance if you keep yours.
But it’s important to not feed any type of wildlife (that includes those cute little chipmunks)! Feeding wildlife creates bad habits and they will continue to want more becoming a nuisance for other hikers.
Emergency Kit:
Accidents can happen while out in the backcountry, so it’s best to be prepared if you can!
First Aid Kit:
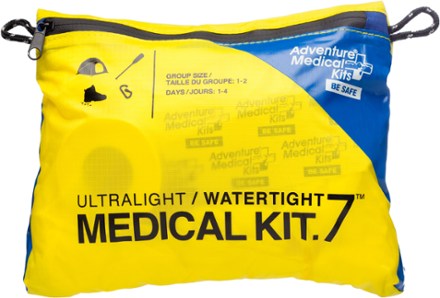
When Jake and I go backpacking, we always make sure one of us has a first aid kit. It should contain adhesive bandages, sterile alcohol wipes, antibiotic ointment, gauze, medical/athletic tape, pain relief medicine and an emergency blanket.
Some other optional items are Imodium pills, tweezers or pocket knife. Either pick up a medical kit or make your own, but it should always travel with you on a backpacking trips!
Paper Map/GPS:
If you are going on a backpacking trip that is deep in the backcountry, it is a good idea to have a paper map and compass or GPS tracker.
Jake and I also use AllTrails App GPS very often, but you need to be sure you have a way to keep your phone charged if you aree relying on this method.
But if you plan to go on a multi-day trip or somewhere the path isn’t clear make sure you have a map that can help you find your way in case of an emergency.
Bathroom Essentials:
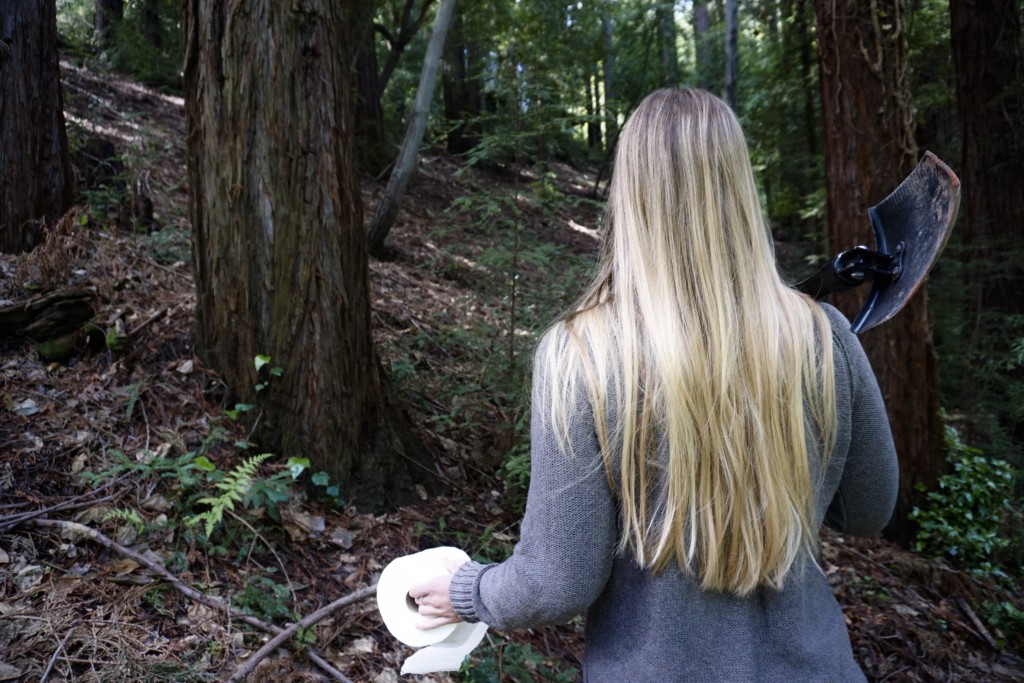
When on a backpacking adventure for the first time, it is normal to be intimidated to go #2. But if you follow these simple rules, you can go #2 with one of the best views of your life!
- Find a spot at least 200 feet away from water, campsites and hiking trails.
- Dig a hole at least 6 inches deep.
- Do your business
- Fill in the hole
- Local regulations will indicate whether to bury or pack out used TP
For complete instructions: Read our Leave No Trace Guide.
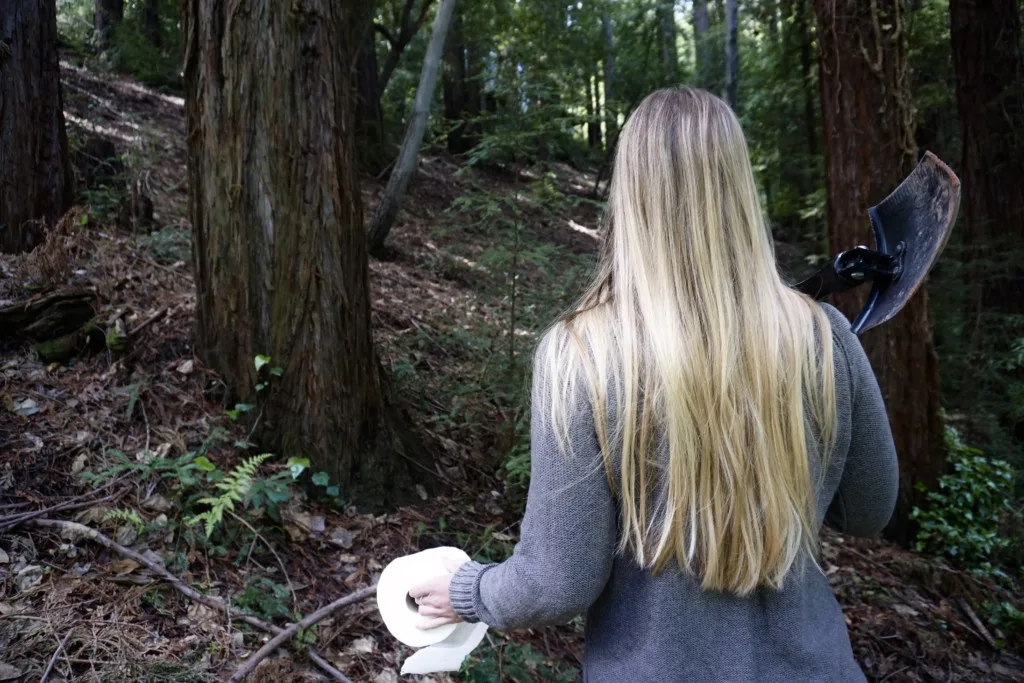
Backcountry Shovel:
Something we always pack along on our backpacking trips is a lightweight shovel. It just makes the deed much easier, instead of having to find a stick or something to dig a hole with.
But if you are in need of cutting weight somewhere in your pack, this is something that can be left behind.
Toilet Paper:
And don’t forget TP! Another helpful tip is to wad up your tp so it is ready for use. I like to keep a stash of TP in a ziplock baggy, so it can’t get wet.
It’s also a good idea to have another baggy for used TP.
What Food Do You Need For A Backpacking Trip
Can’t forget one of the most important items on a backpacking trip: FOOD!
It’s important to bring along high caloric food, so it provides you with enough energy to keep you on the trail. If you are going on a long backpacking trip, then you are most likely burning a lot of calories and therefore you will need to replenish them.
Foods with high caloric density are the best because they pack the most energy into the smallest amount of weight.
Snacks:
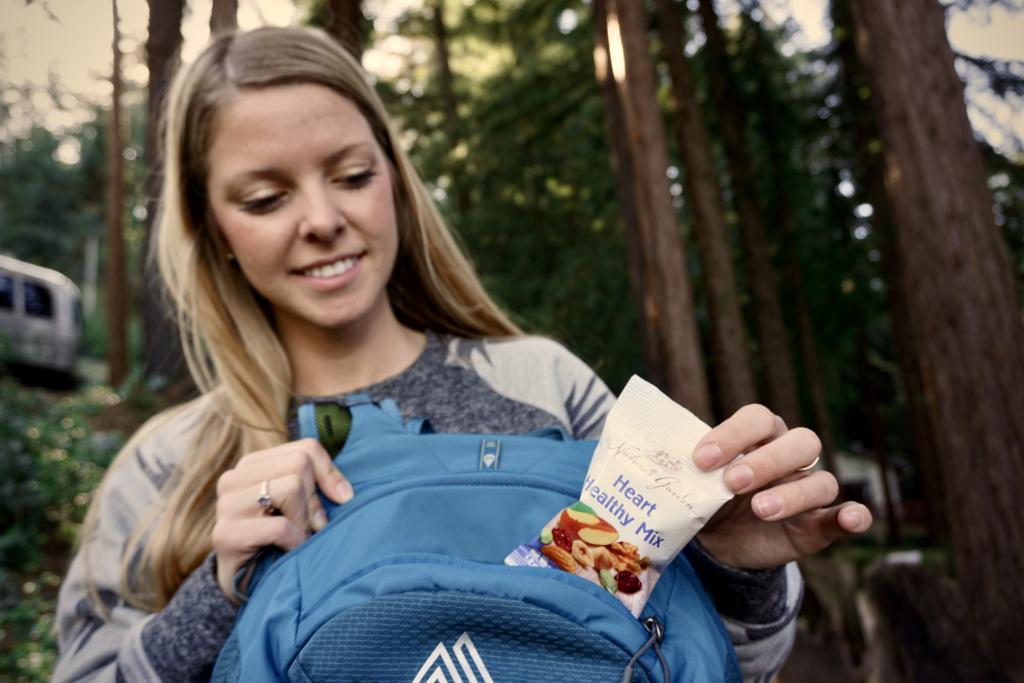
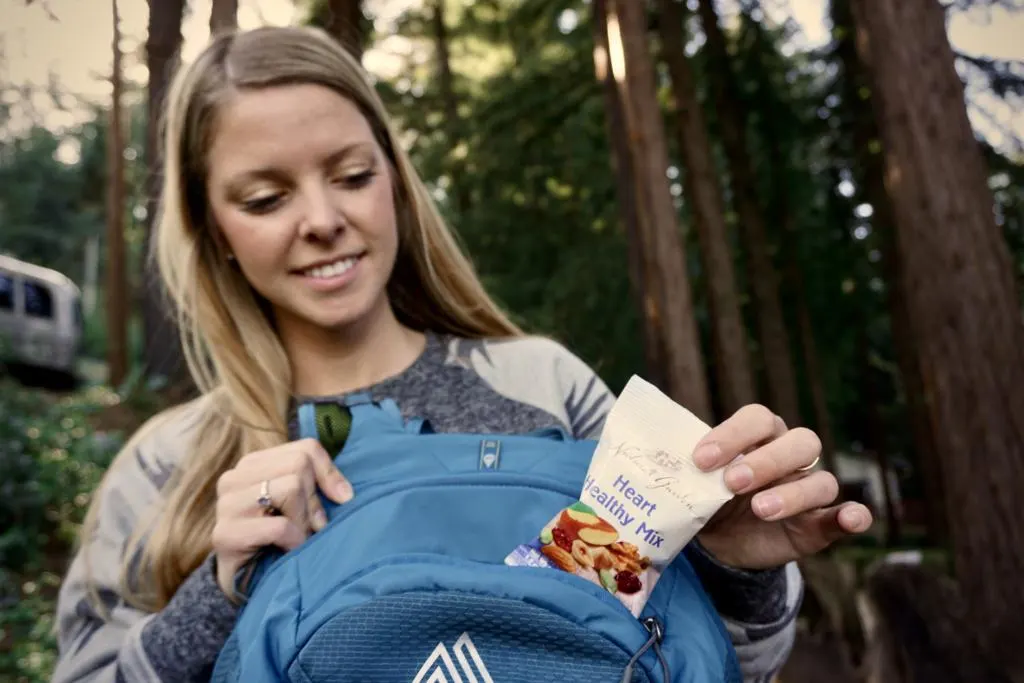
Taking a snack break along a long backpacking trip is one of my favorite parts! There are so many great snack options for hiking and backpacking. Some of our favorite high-calorie snacks are trail mix, protein bars, beef jerky, etc. Be sure to plan ahead and bring enough snacks for your whole trip!
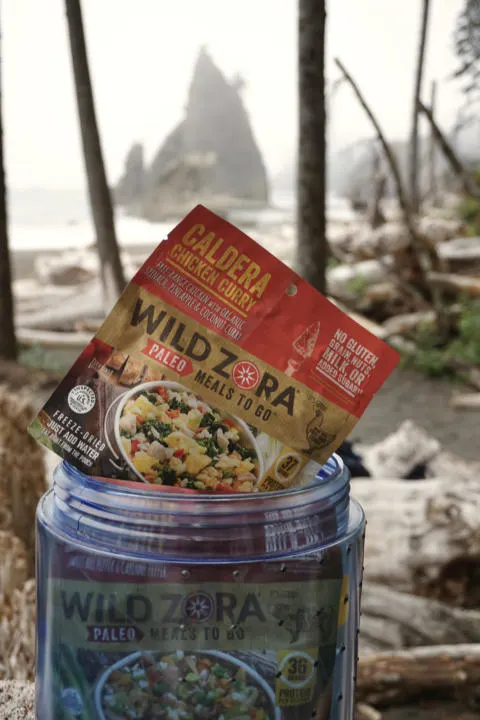
Breakfast/Lunch/Dinners:
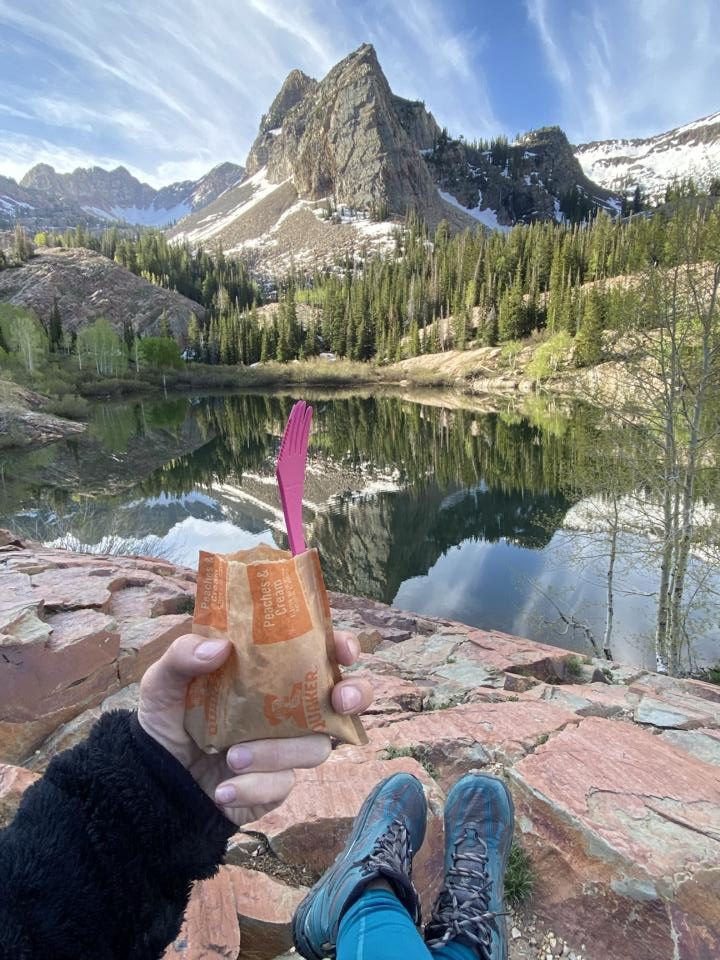

There are meals designed for the backcountry to make it supper and easy to fuel up. Our personal favorite backpacking meals are Peak Refuel (especially their Chicken Pesto Pasta). Check out our in-depth guide for a breakdown of the best backpacking meals.
There is also the option to cut cost and just grab a inexpensive rice side from the grocery store. But most of these meals require hot water to cook, so you will most likely need a backpacking stove.
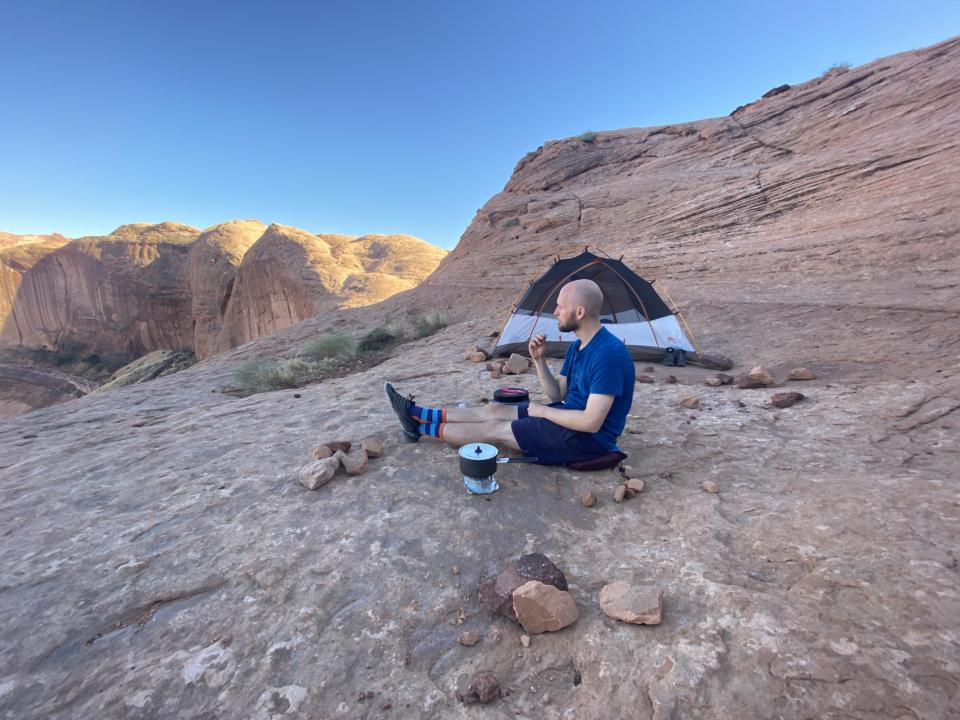
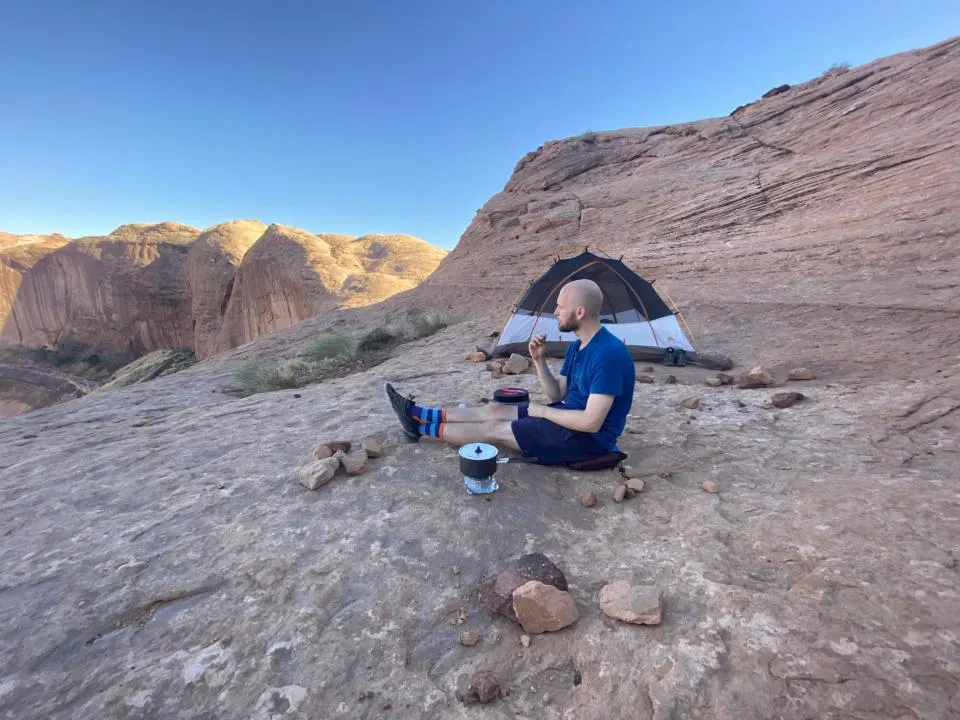
Backpacking Stoves:
One of the best things while backpacking is having a nice hot meal for dinner. Which includes having to carry a stove with you in your backpack.
Or some ultralight backpackers even skip the stove and cold soak their meals, but Jake and I find that method to be a little too spartan.
Listed below is our top 3 favorite backpacking stoves on the market.
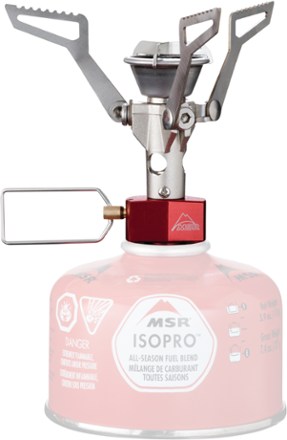
The MSR Pocket Rocket 2 is just about the smallest and lightest backpacking stove available. It is extremely popular among the ultralight backpacking community because it packs down small enough to fit in the palm of your hand. But the compromise is durability and price.
The MSR Pocket Rocket 2 has an adjustable flame so you can cook on simmer or crank it up to a rapid boil. It uses disposable fuel canisters.

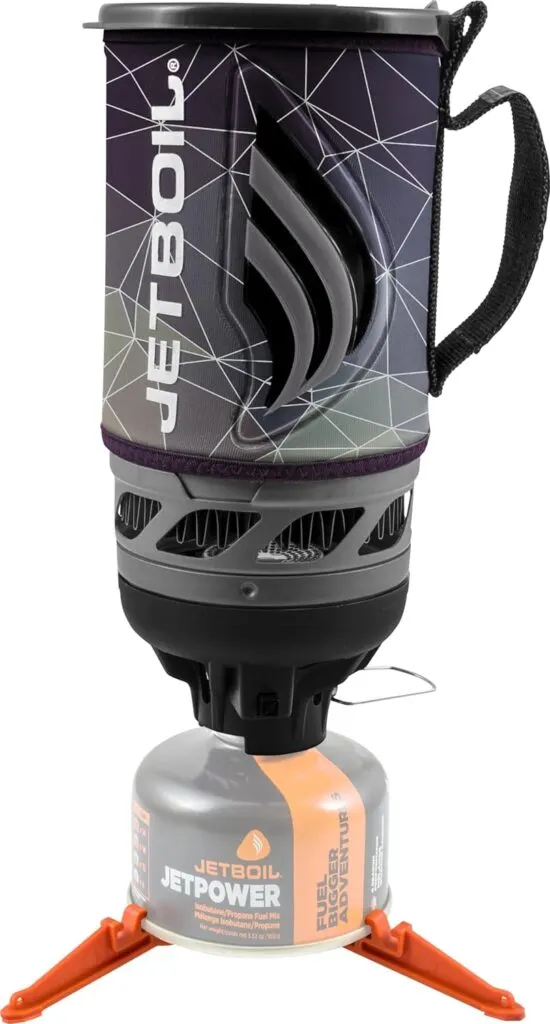
The other most popular backpacking stove is the Jetboil Flash Cooking System. It comes with its own pot and insulated sleeve. It boils water faster than anything else in the average time of 3 minutes and 20 seconds.
The jetboil starts via push button, making it easy to get water started boiling quickly. But if you want to use other pots and pans with it, you need an extra attachment.
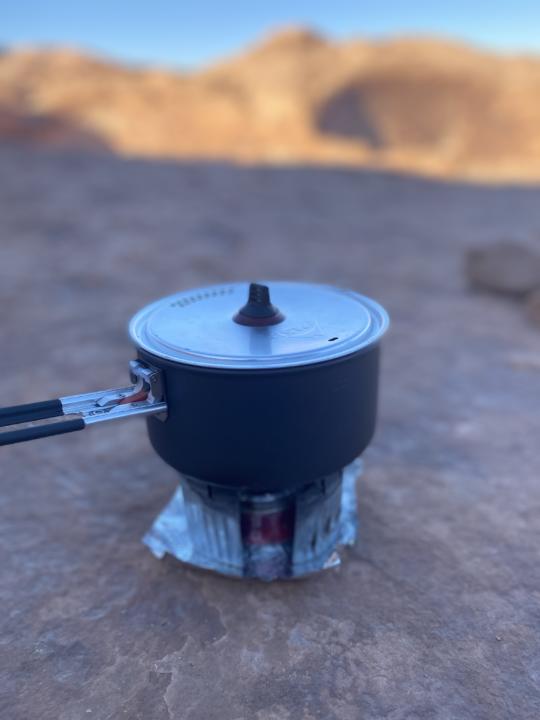

Or if you are “ballin on a budget”, consider making your own backcountry stove. Jake made an alcohol stove with some stuff that was laying around the house. It’s one of the absolute lightest campstoves you can carry. Check out this video if you are interested in creating your own alcohol campstove.
But do note that alcohol stoves are banned in certain parts of California.

For other great backpacking camp stoves check out our post:
Borrow or Rent Gear:
If you don’t see yourself doing much backpacking in the future or want to try out some equipment to see what you like best, then maybe consider renting your gear from a friend or rental company.
It can help you save money or give you the option to see if backpacking is for you.
There are some quality companies that rent gear to adventurers like you such as Xscape Pod, Outdoors Geek, and REI Rentals.

Now it’s time to get packing for your next backpacking adventure. Use our
Ultimate Backpacking Checklist
for all the backpacking essentials!
Takeaway: Beginners Guide To Backpacking

Backpacking is one of the best ways to explore nature. It allows you to travel further away from the crowds get better in touch with nature. And there is something so gratifying about living with only the items you carry on your back.
If you follow this beginners guide to backpacking, then you will be set up well for any backpacking trip. Try to find a balance of gear that keeps your pack weight light, but still keeps you comfortable and happy.
Even experienced backpackers are constantly fine-tuning their set-up to find a perfect balance.
Happy backpacking!
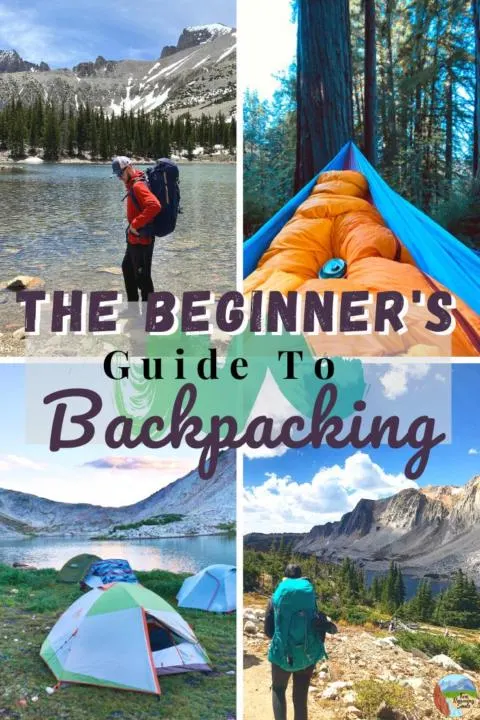
Save ‘The Beginner’s Guide To Backpacking’ For Later


What Backpacking Gear Do I Need? | Ultimate Backpacking Checklist - tworoamingsouls
Monday 3rd of April 2023
[…] Beginner’s Guide To Backpacking […]