This is a step-by-step guide that will teach you how to install your own campervan water system with water filtration and electric pump. Plumbing was one of the most challenging parts of our van build. We dealt with a lot of frustration when things just wouldn’t connect properly.
There are so many different sizes of tubing, connectors, fitting, products, etc. After dozens of hours, multiple days and many returns later, I found our perfect campervan water system setup with a water filtration system.
This guide will simplify the process by linking to the exact products that work together and showing you how to connect them. You can save yourself the hassle and frustration by following our step-by-step guide.
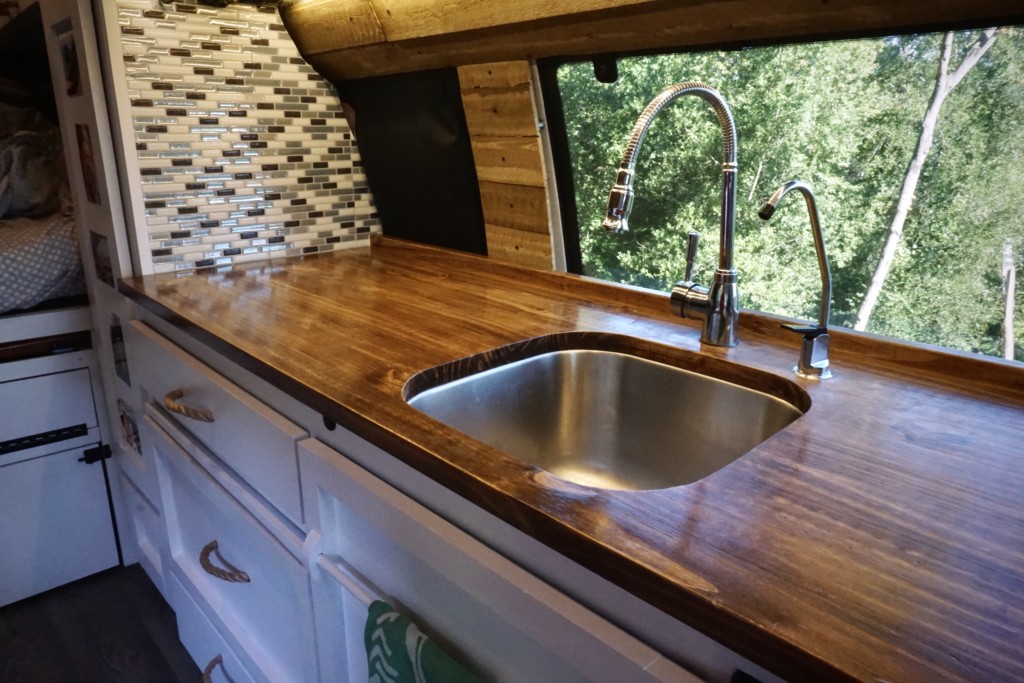

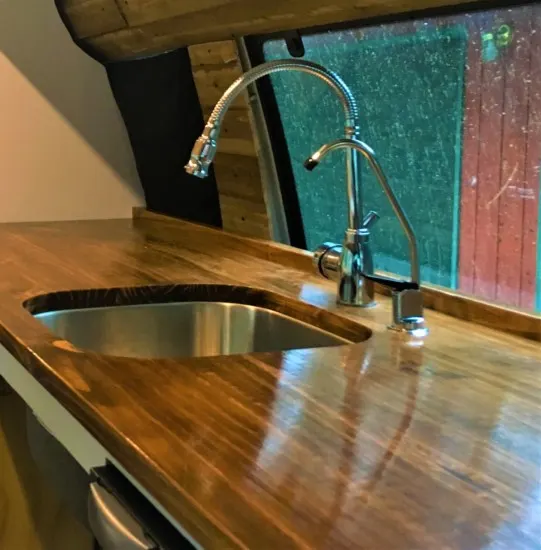
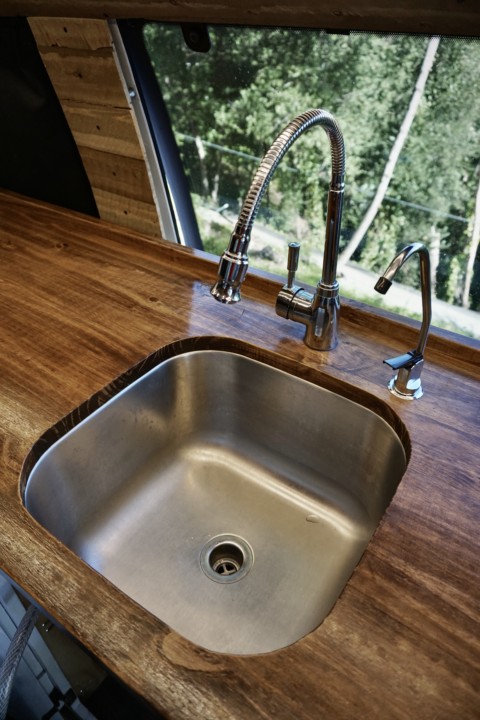
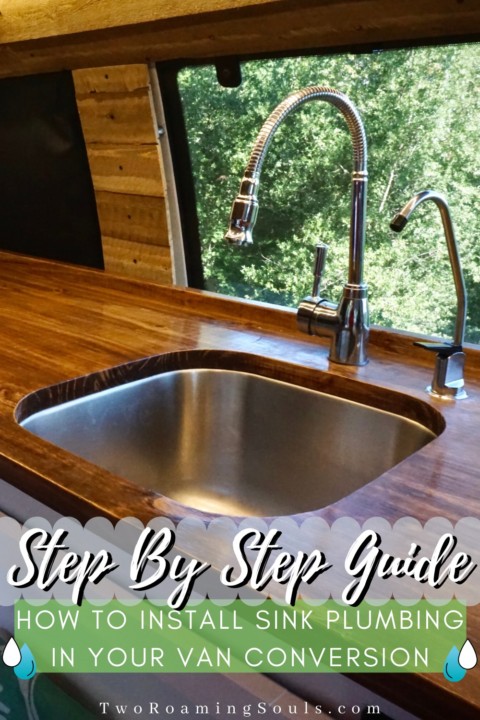
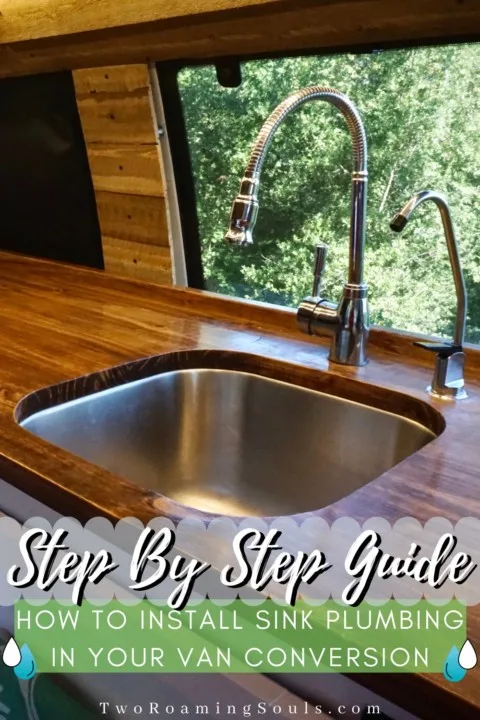
Our campervan plumbing includes a flexible chrome-finish faucet for washing dishes and a second faucet strictly for filtered water.
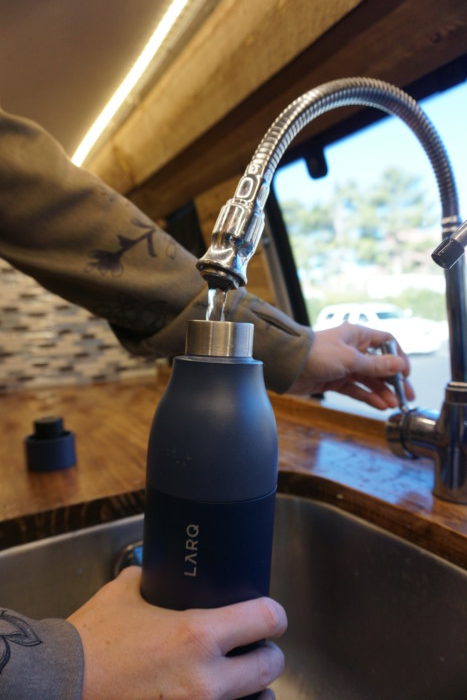
The addition of a water filtration system means that we don’t have to worry as much about where we get our water from. Honestly, the drinking water from our filtered faucet tastes as good as anything.
Both faucets are powered by a 12-volt water pump. And our plastic water tanks are easy to carry and refill. The design is a perfect balance of cost, simplicity, look, and function.
In this post, I am going to take you step by step to show you which products to buy and how to connect them.
This post may contain affiliate links. Disclosure policy.
Vocabulary For A Campervan Water System:
- ID: Inside Diameter of a tube or pipe
- OD: Outside Diameter of a tube or pipe
- MIP: Male Iron Pipe (threads on a pipe)
Tools Needed For A Campervan Water System:
- 2 Adjustable wrenches
- Power Drill
- Hole Drill Bits
Products Needed For A Campervan Water System:
For this guide, I will include a list of all the items we used for our campervan sink plumbing with a water filtration system. For the best step by step guide we suggest these items, but feel free to interchange the sinks, and faucets. Just note that the plumbing might not match our exact guide below. And some of the fittings and connectors may need to change if you alter the products used.
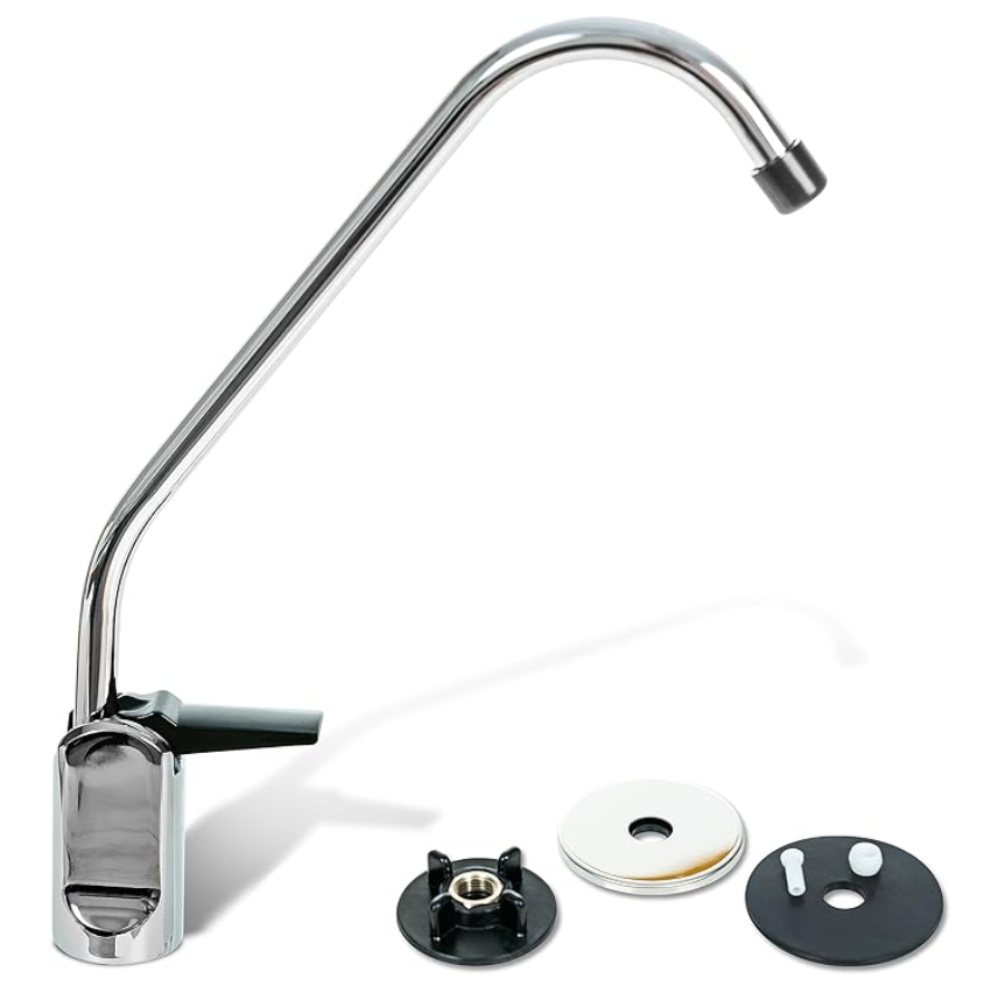
Chrome Pull Down Single Handle Kitchen Sink Faucet
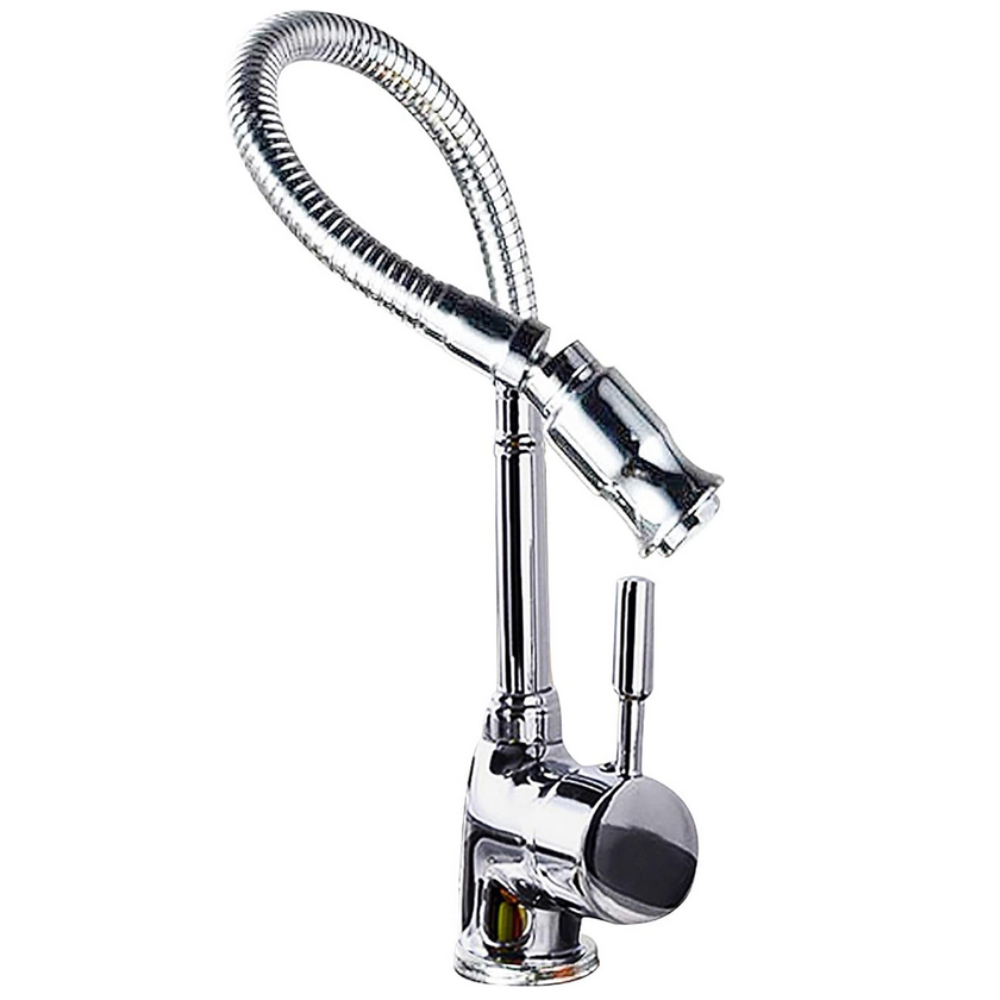
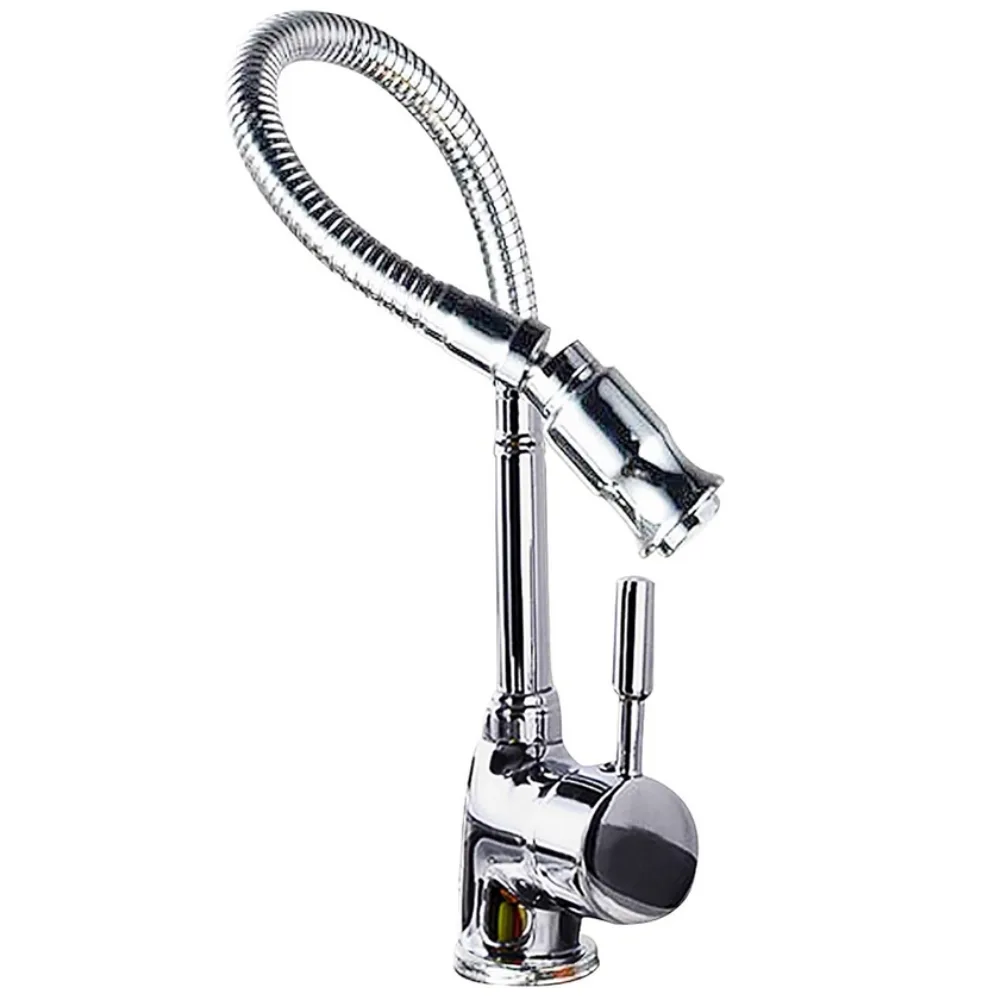
We went with the Chrome Pull Down Single Handle Kitchen Sink Faucet for our primary faucet. We chose this one because it looked sharp for a fraction of the price of other faucets.
The one downside, is that you need to plug the hot water input (I will show you how), unless you decide to include a water heater. But our step by step guide is for cold water installation only.
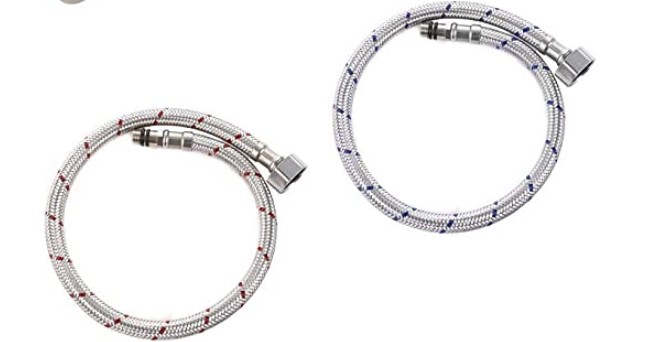
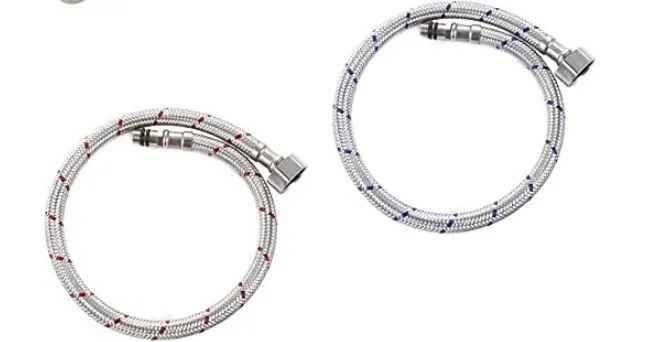
Two braided tubes are included in the purchase of this faucet.
Ronaqua Reverse Osmosis Water Filter Faucet
One thing I needed to have in the van was a water filter. It gives us peace of mind, no matter where we fill up our water. And instead of filtering all of the water for dishes, cleaning, etc, we decided to add an additional water filter faucet for drinking water.
The Aquaboon Water Filter Purifier Faucet is the faucet we decided on and are very happy with the purchase. It was easy to install and now our water filters last much longer.
Kingston Brass Gourmetier Undermount Single Bowl Bar Sink
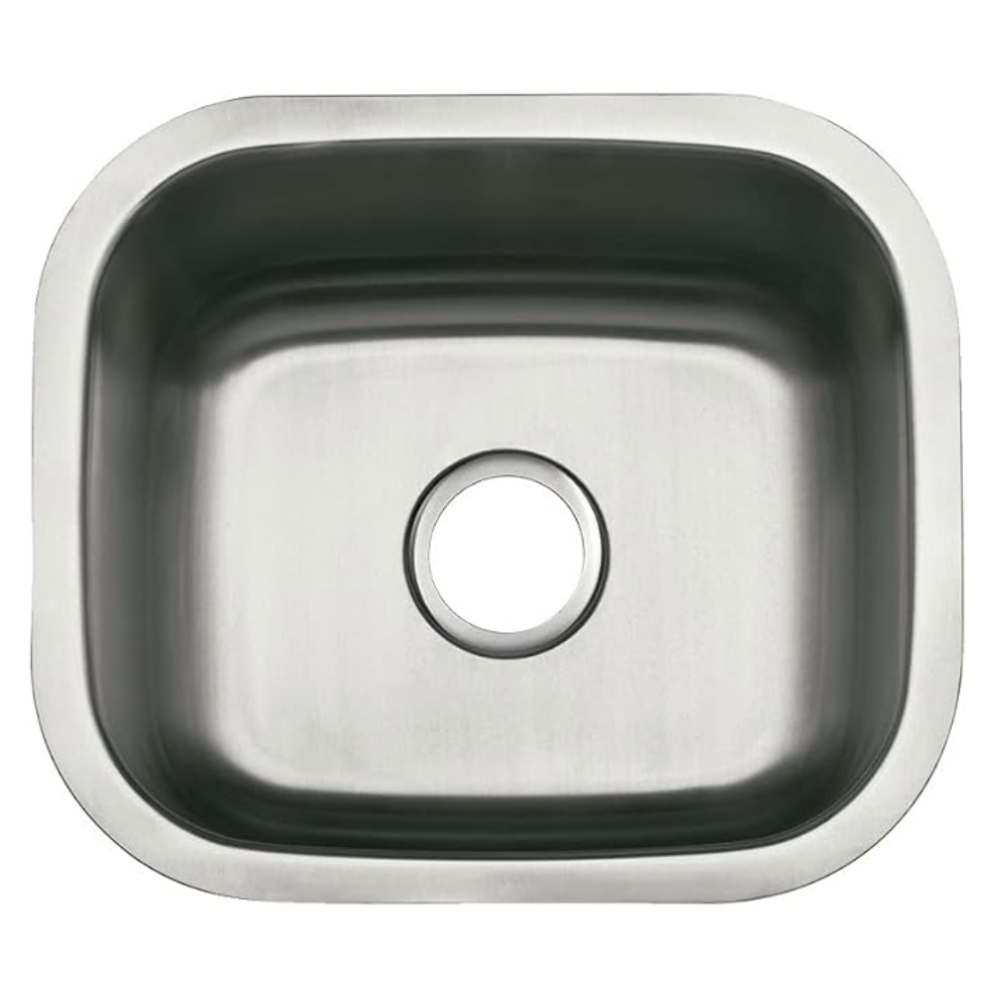
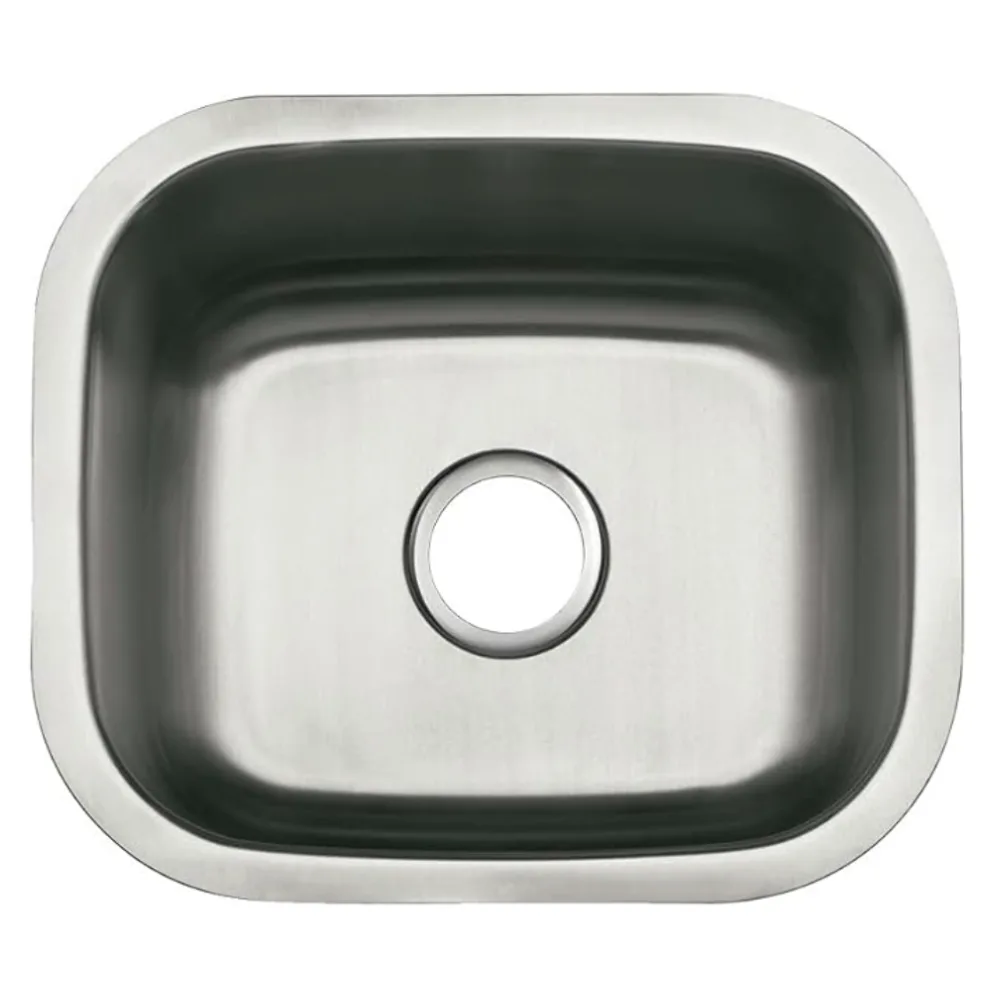
The Kingston Brass Gourmetier Undermount Single Bowl Bar Sink is our sink bowl and it’s perfect for our needs. We wanted a sink that would be deep and wide enough to actually wash dishes in (and occasionally my hair). It was also important to have stainless steel because it’s so resilient and cleans up nicely, even after weeks of use.
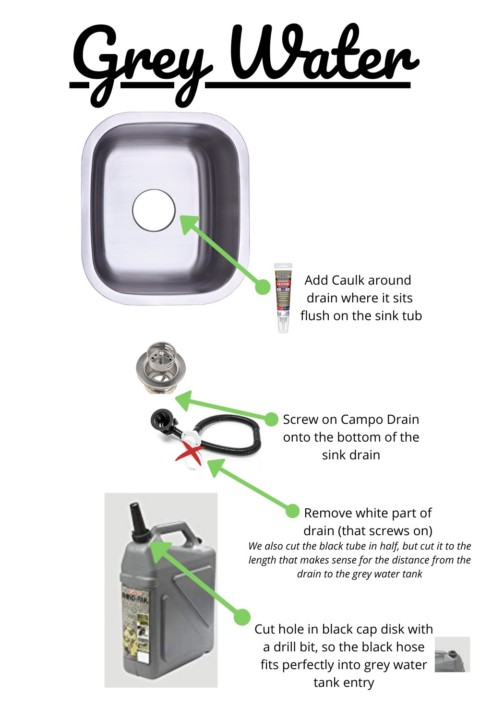
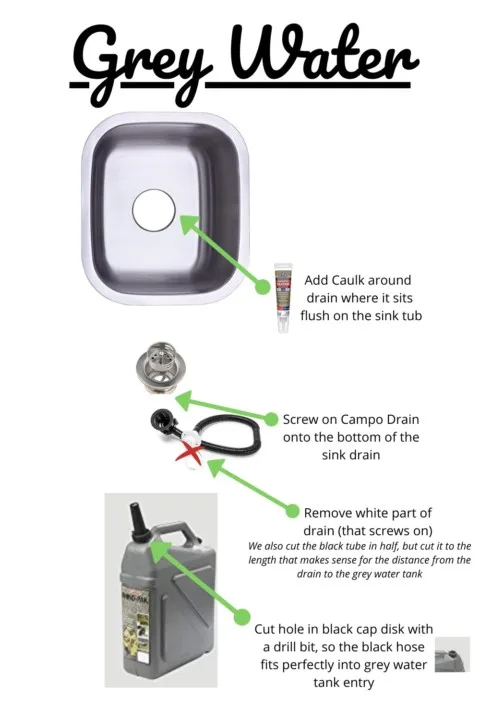
Stainless Steel Keeney Bar Sink Strainer


The Stainless Steel Keeney Bar Sink Strainer fit’s perfectly with our sink and drain. This is definitely one purchase you should include if you decide to go with our same sink and drain, because everything actually aligns. The installation was easy and seamless!
Camco Flexible Camper Drain
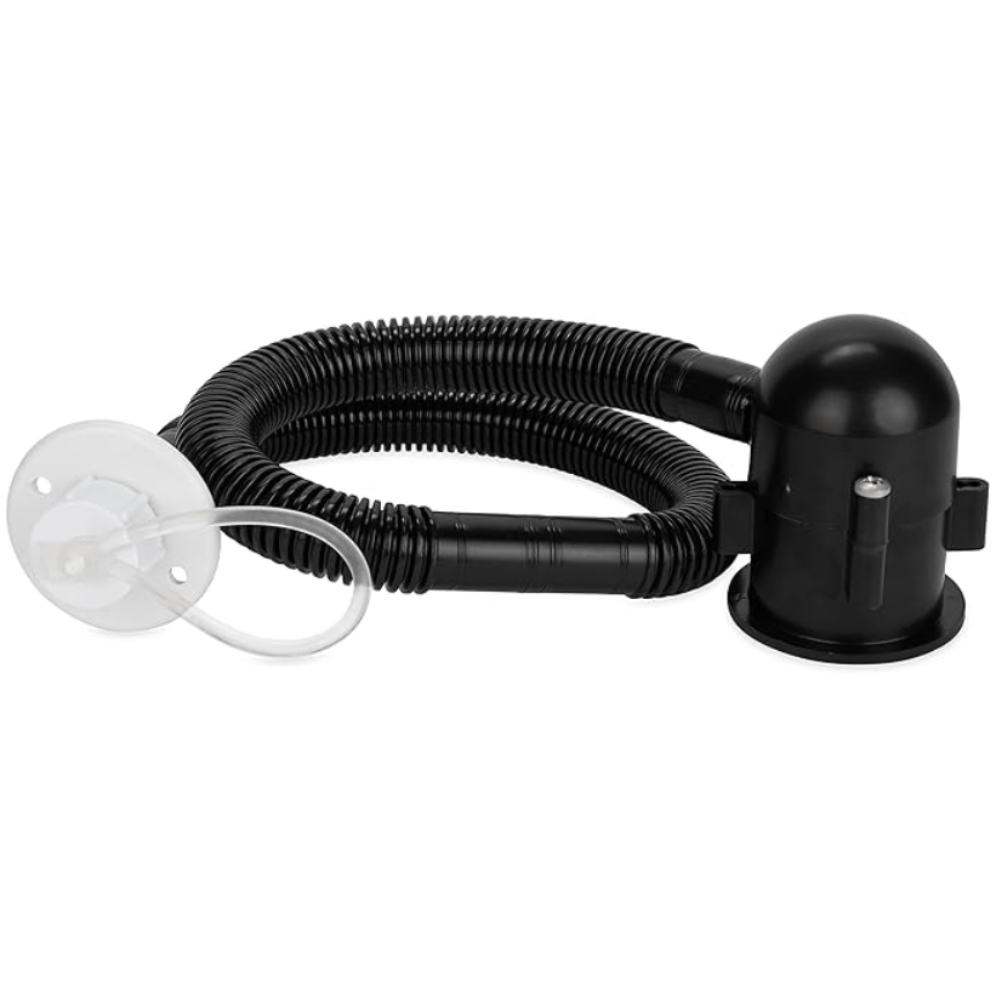
Our obvious choice for a drain was the Camco Flexible Camper Drain. It’s rust proof and screws on perfectly to our drain.
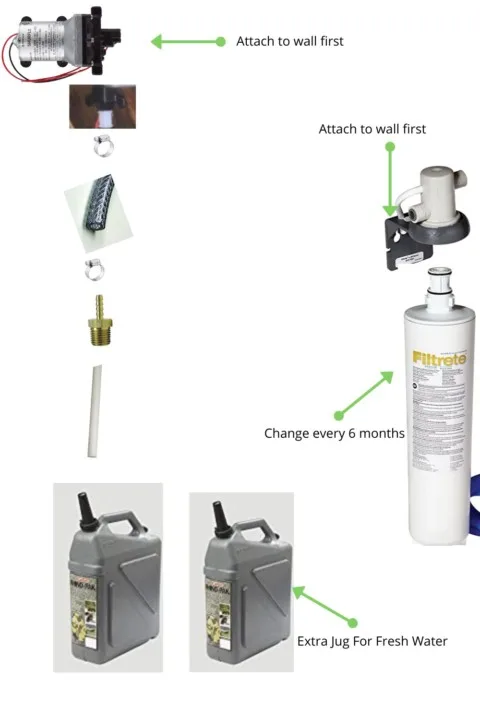
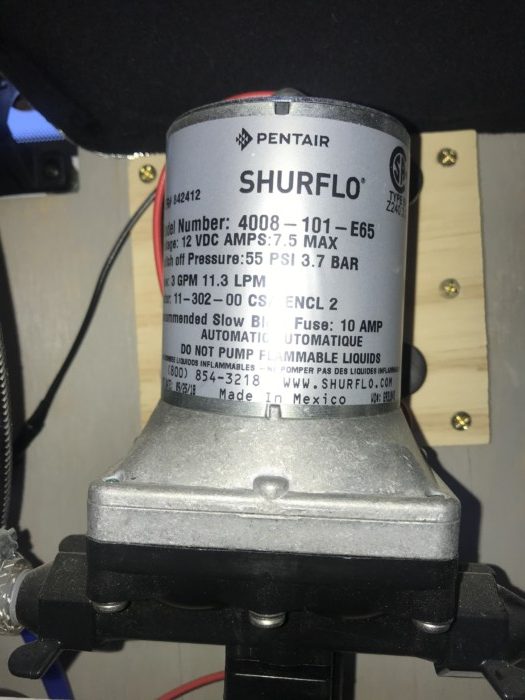
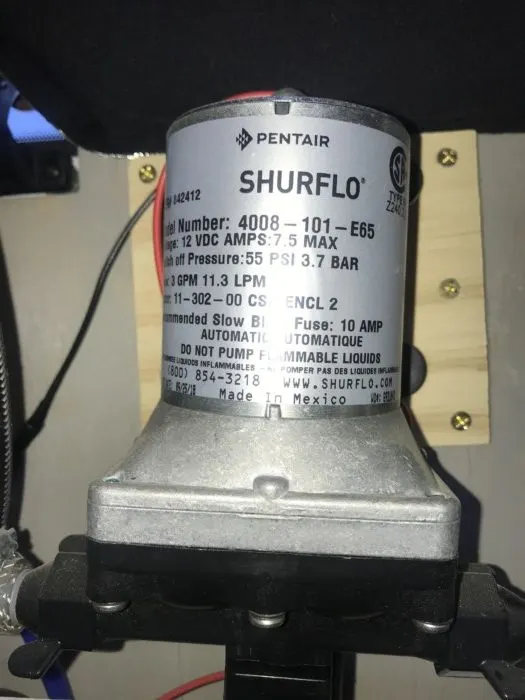
Shurflo Water Pump
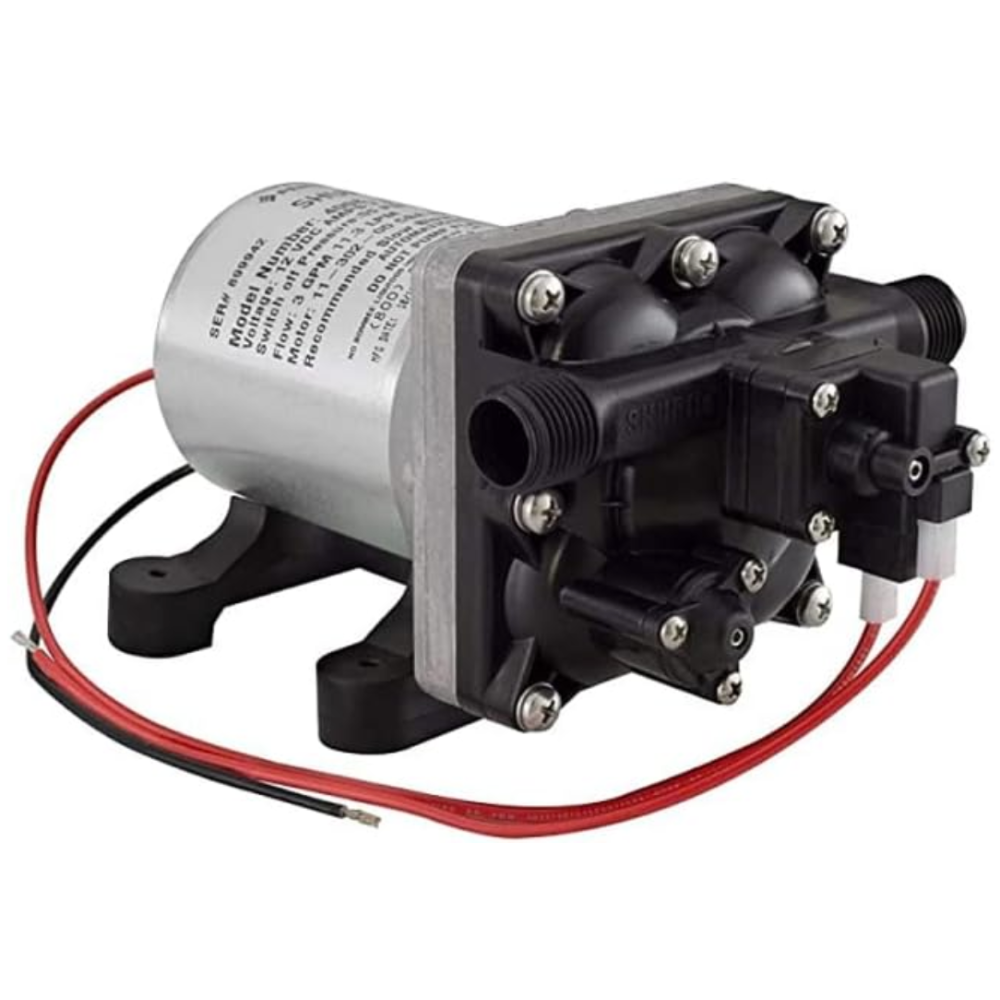

After much research, we decided to go with the Shurflo RV Water Pump. The pump was probably the most expensive part of the build, but after looking into foot pumps and hand pumps, this seemed to be in the same price point. And we have more than enough electricity to run it.
After 8+ months living in the van, the pump still works great! You can pair this with an accumulator and strainer to make the pump much quieter and to strain any debris out, but the add on’s were about the same price as the pump.
Therefore we decided if the pump brakes due to debris, it might be worth it to clean it out ourselves or purchase a new one. Also the noise of the pump doesn’t really bother us, because we only use it during the day when noise isn’t an issue.
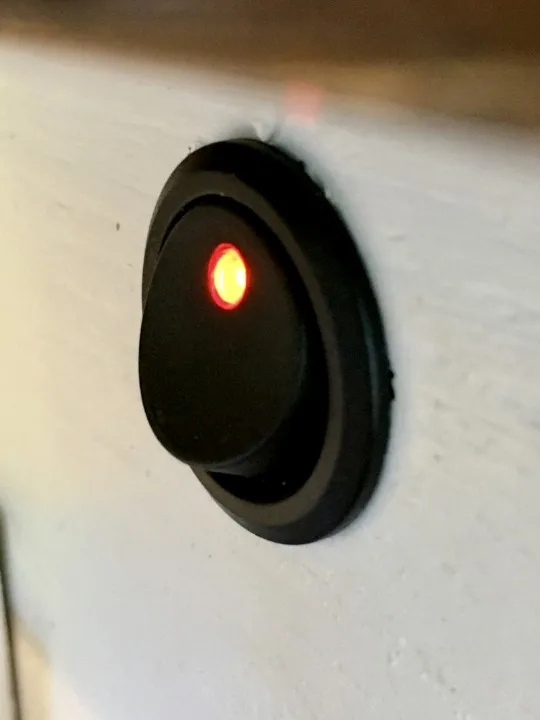
12V Switch
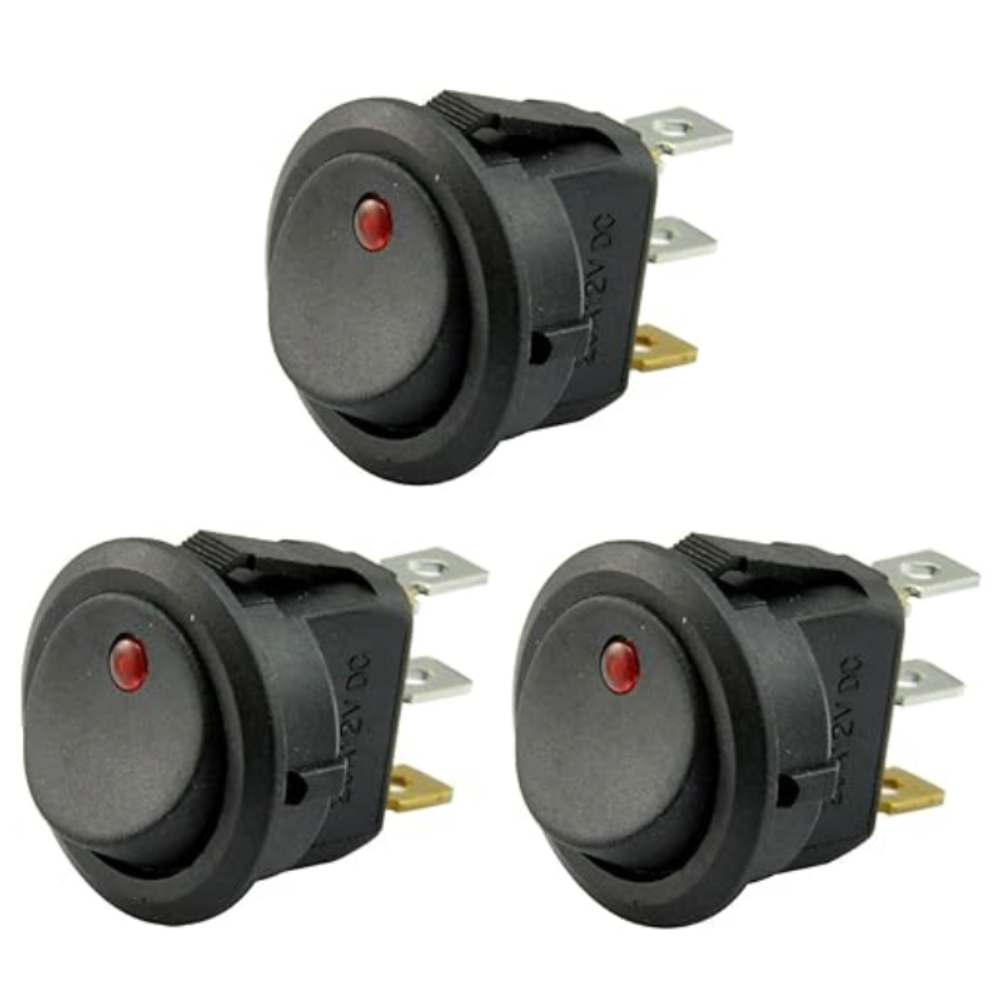
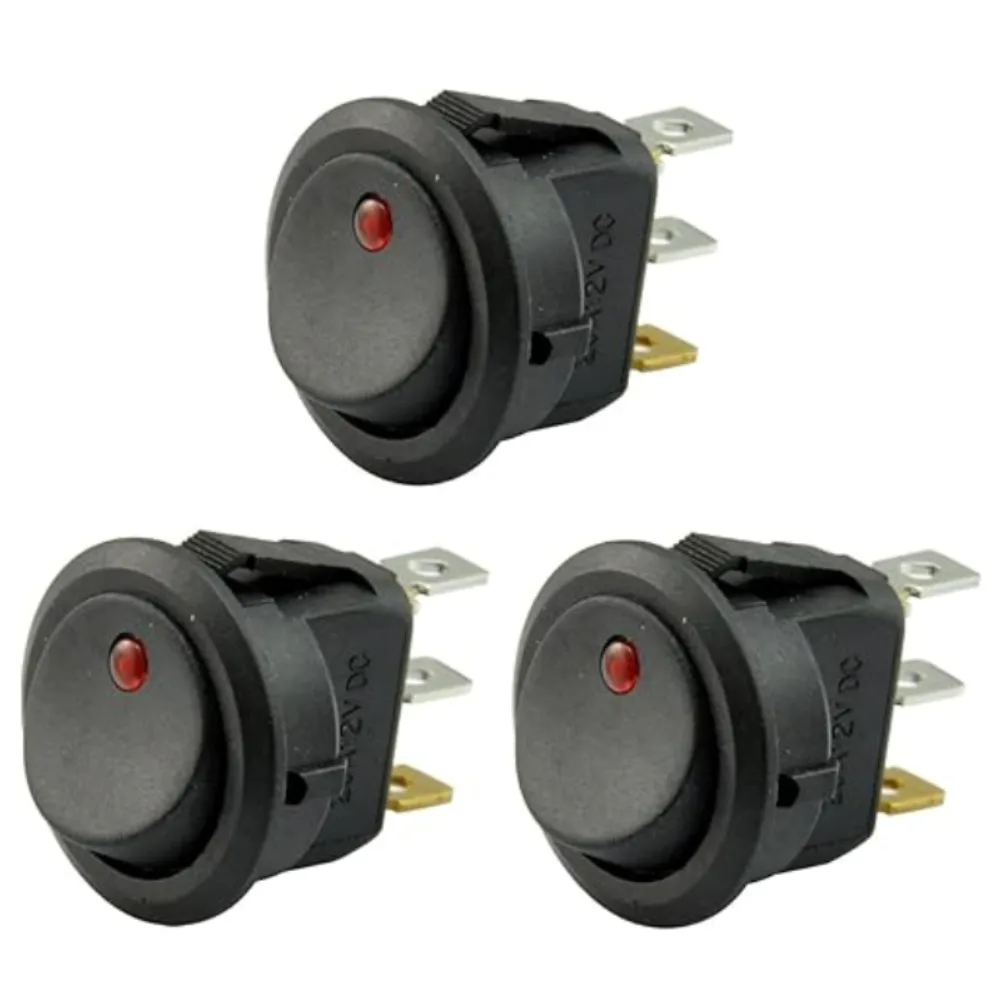
The pump is not meant to be on 24/7, so be sure to wire in a switch so you can turn it on and off. We used these little 12 volt toggle switches for many appliances in our van and they work great.
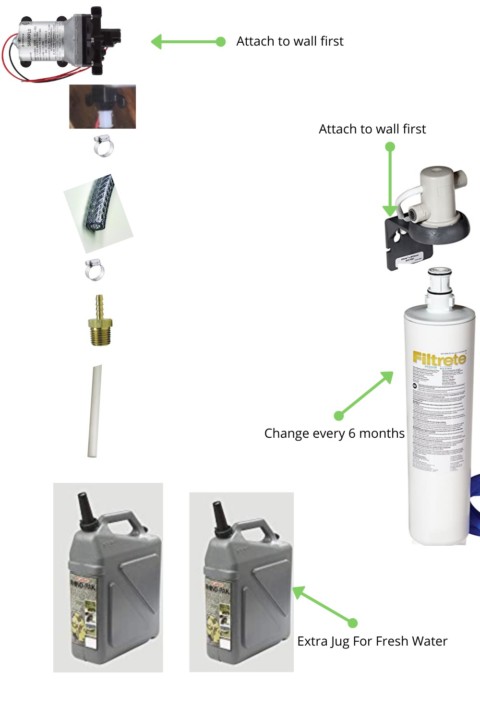
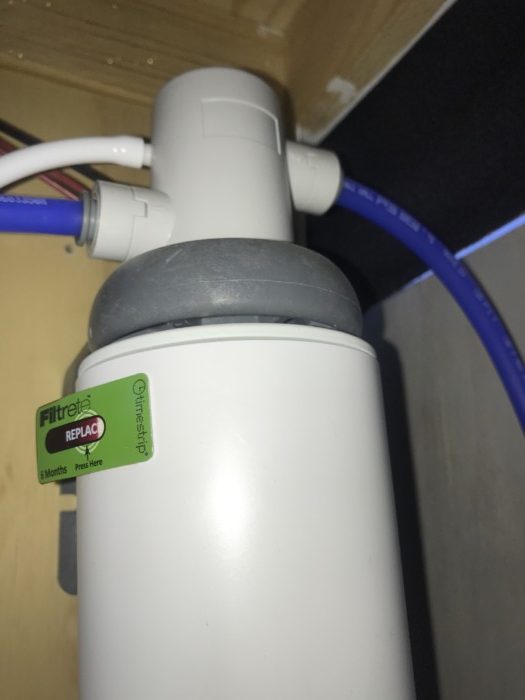
Filtrete Maximum Under Sink Water Filtration System

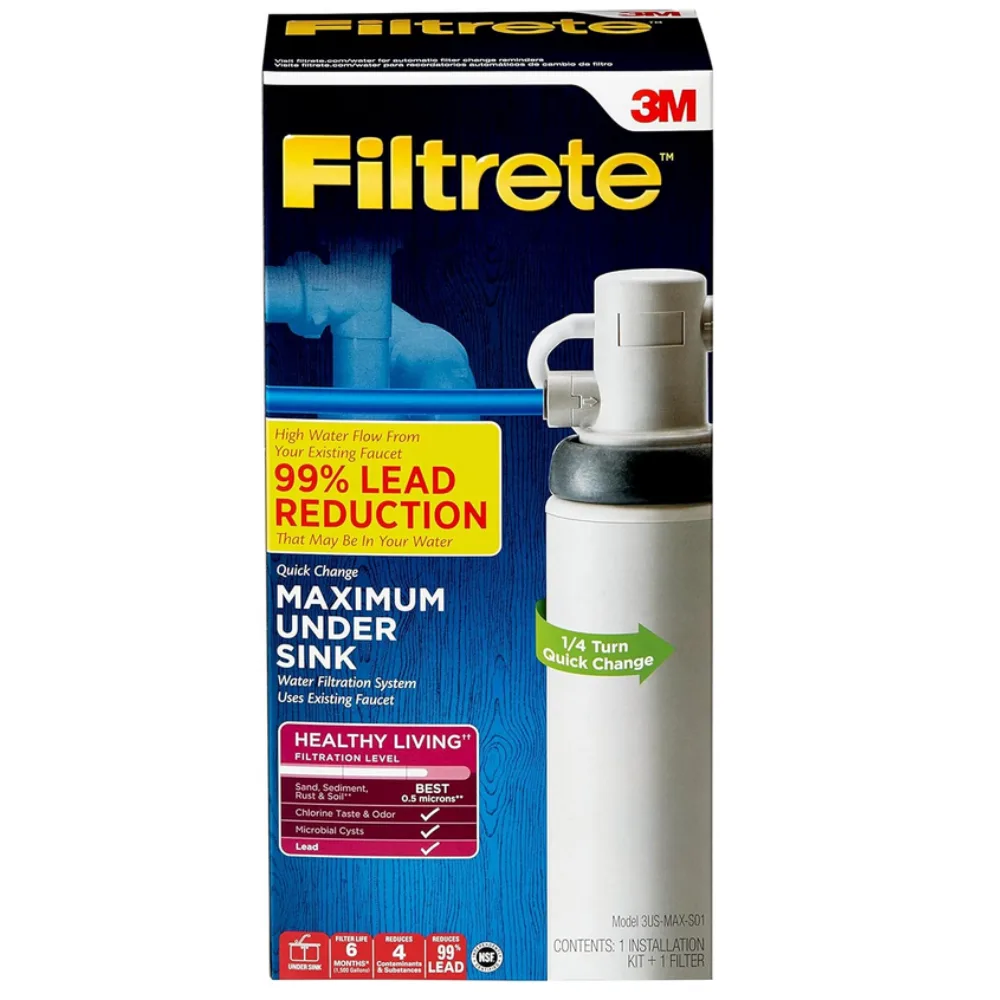
The Filtrete Maximum Under Sink Water Filtration System is the filtration system we found to be of good value for the price. This water filter system reduces 99% lead, 99% microbial cysts, 97% chlorine taste & odor, 0.5 microns of sand, sediment, rust & soil. Plus the cartridge can be found at most Walmart locations or picked up from an Amazon Locker. The filter cartridge needs to be replaced every 6 months if used daily.
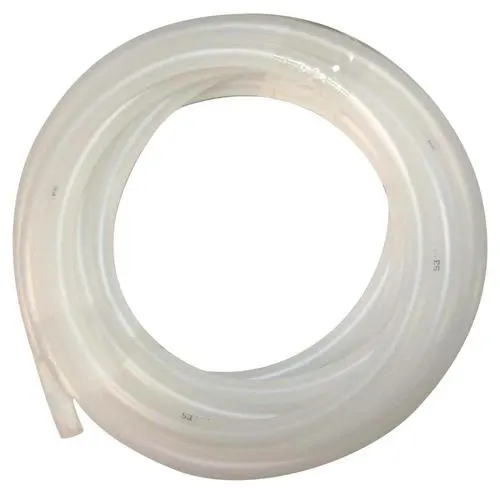
Sioux Chief 3/4″ OD x 10′ Braided Vinyl Tubing

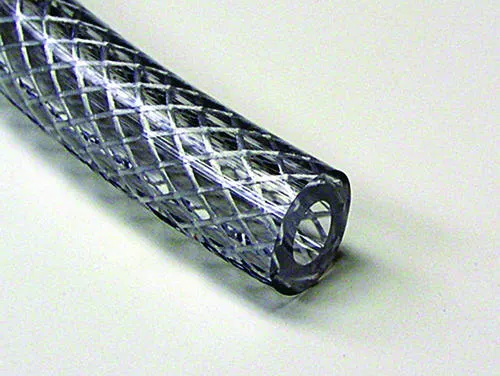
Sioux Cheif 3/4″ OD x 10′ Braided Vinyl Tubing connects the freshwater tank to the pump and then to the main faucet. This tube is fairly rigid and will hold its structure well.
Sioux Chief 3/8″ OD x 1/4″ ID x 10′ Clear Vinyl Tubing
This Sioux Chief 3/8″ OD x 10′ Clear Vinyl Tubing is used to connect the pump to the water filter. (You will only be using a few inches of this tubing.)
Sioux Chief 1/4″ OD x 15′ Polyethylene Tubing
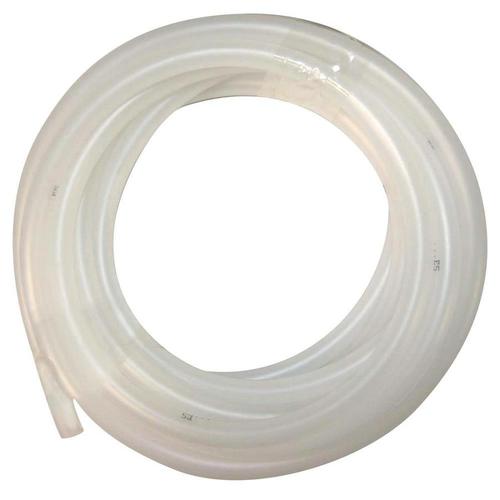
And this Sioux Chief 1/4″ OD x 15′ Polyethylene Tubing connects the water filter to the water filter faucet.
1/2 in. x 5 ft. White PEX Pipe
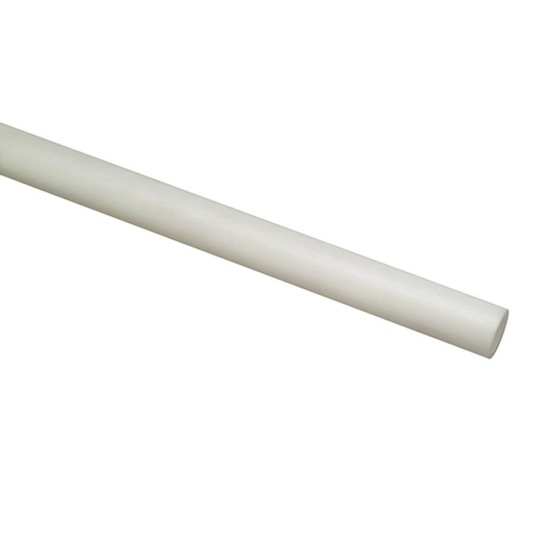
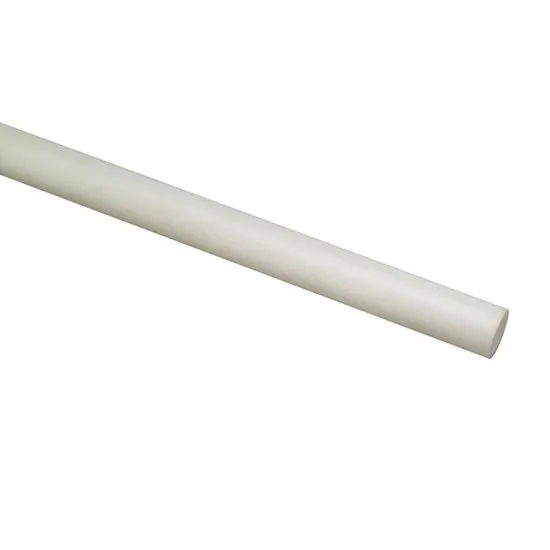
We used 1/2″ x 5′ White Pex Pipe for connecting to the flexible braided vinyl tubing to reach down to the bottom of our fresh water tank. We found that if you just stick the braided tubing in the tank, it curls up and doesn’t reach the bottom of the tank. So the water stops flowing long before the tank is actually empty.
This rigid plastic pipe will stay straight and ensure that you can always reach the water at the bottom of your holding tanks.
NIBCO® 1/2″ Poly PEX Adapter Fitting
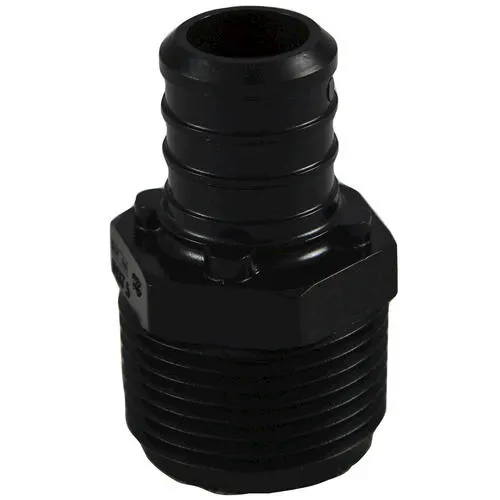
These NIBCO 1/2″ Poly PEX Adapter Fittings are used to connect the braided vinyl tubing from the pump to the faucet tubing.
NIBCO® 1/2″ Poly PEX Plug Fitting
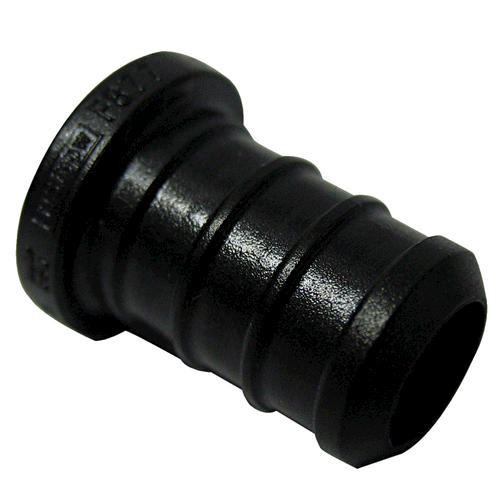
You need the Nibco 1/2″ Poly Pex Plug Fitting to plug up the hot water hose. (since there is no hot water in this setup)
Watts® 3/8″ OD x 1/4″ OD Plastic Quick Connect Coupling Fitting
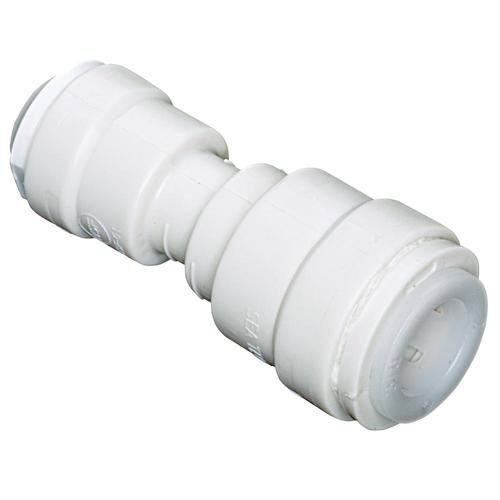
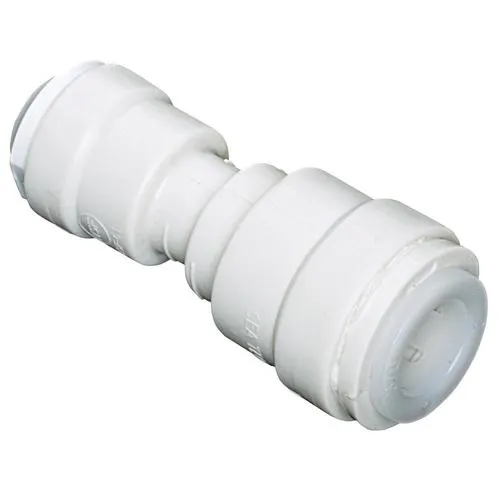
This Watts® 3/8″ OD x 1/4″ OD Plastic Quick Connect Coupling Fitting is used to connect the water filter tubing to the tubing that feeds the filtered water faucet.
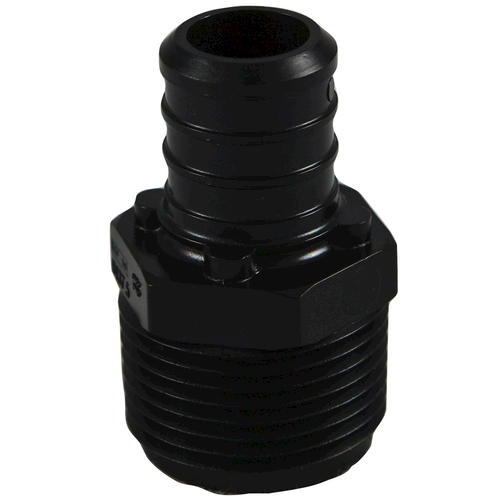
1/2 in. x 1/2 in. MIP Lead-Free Brass Hose Barb Adapter Fitting

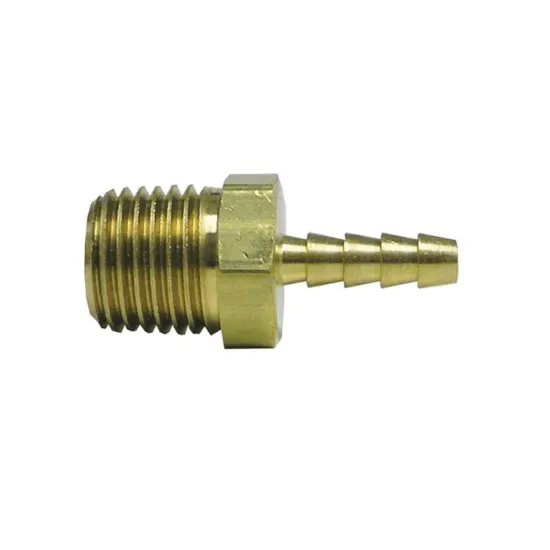
The 1/2″ x 1/2″ MIP Lead-Free Bradd Hose Barb Adapter Fitting is for connecting the braided vinyl tubing to the rigid pex pipe tubing that goes into the fresh water tank.
1/2″ ID x 1/2″ ID x 1/4″ ID Tee Fitting
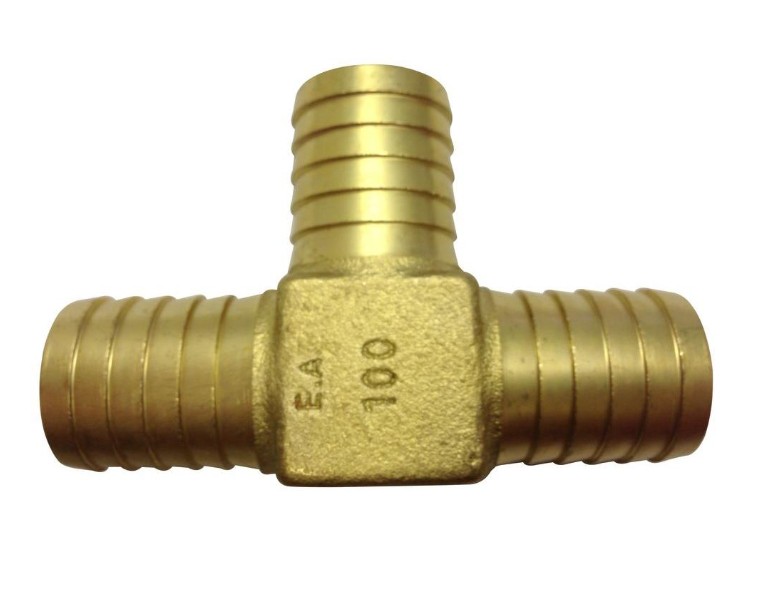

This Tee Fitting (not accurately pictured) will be the piece needed to split the fresh water so that it can feed the regular faucet and the filtered water faucet. Unfortunately, this piece is not sold online, and can only be bought in store. We bought this from ACE Hardware. Be sure to ask for a 1/2″ID x 1/2″ID x 1/4″ ID Tee Fitting.
Breeze™ 1/4″-5/8″ Hose Clamp
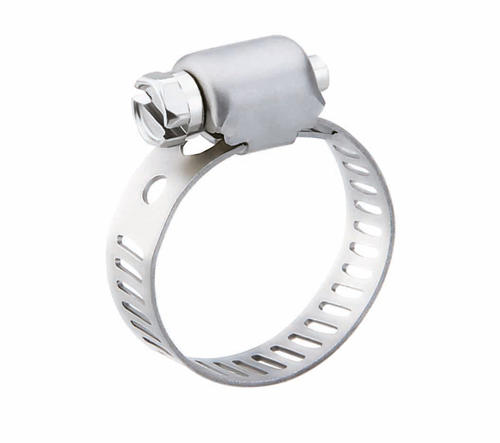
You will need 8 Breeze 1/4″-5/8″ Hose Clamp to hold the tubing onto its connectors.
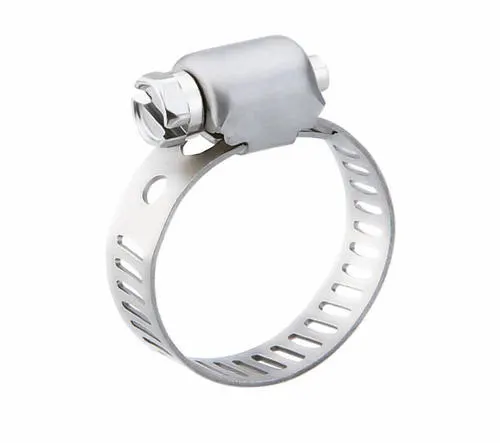
Breeze™ 1/2″-1-1/16″ Stainless Steel Hose Clamp
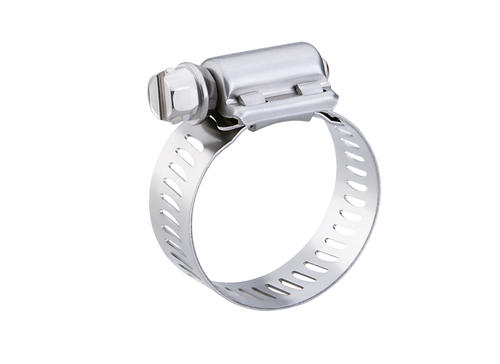

And 1 Breeze 1/2″-1-1/16″ Stainless Steel Hose Clamp for the smaller tubing connections.
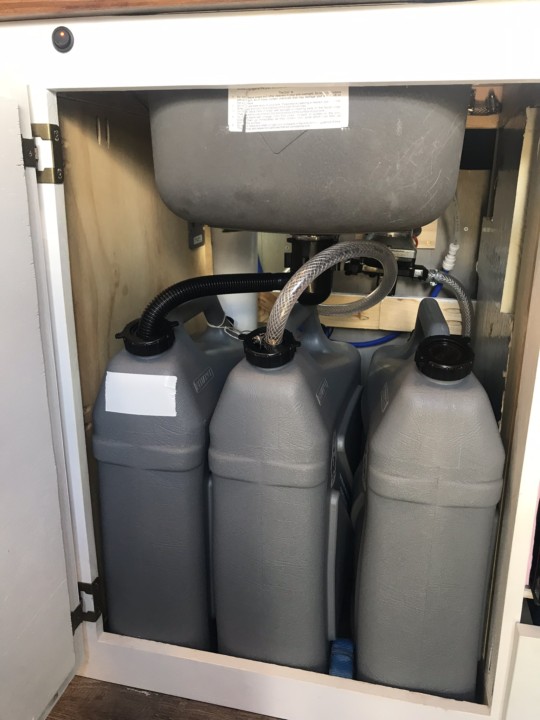
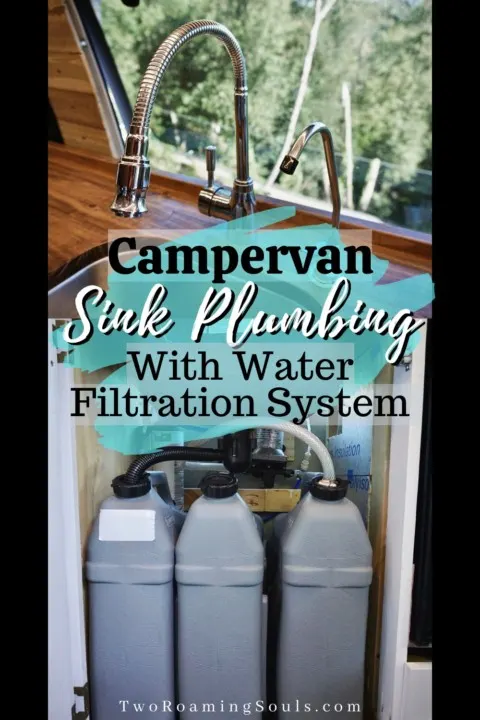
Reliance Rhino-Pak Heavy Duty Water Container
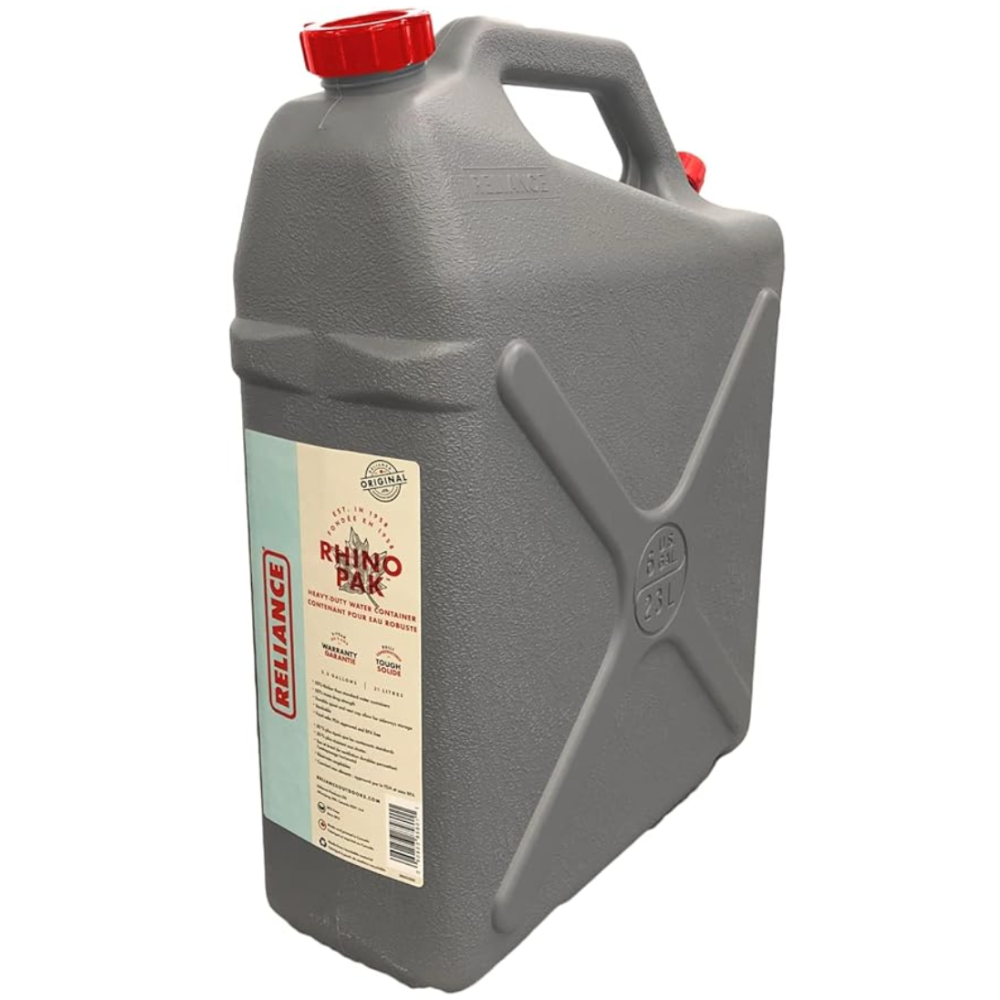

In our van build we have 11 gallons of fresh water. We purchased 3 Reliance Rhino-Pak Heavy Duty Water Containers, 2 for freshwater and 1 for our grey tank. They are super durable and BPA free. We wanted to make sure the tanks were big enough to fit a solid amount of water but not too heavy or awkward to carry.
GE Silicone Caulk, Clear
GE Silicone Caulk is used for sealing the crack between the sink and the countertop. It’s also used to create a waterproof seal between the sink and the drain.
Plumbers Water Sealant Thread Tape

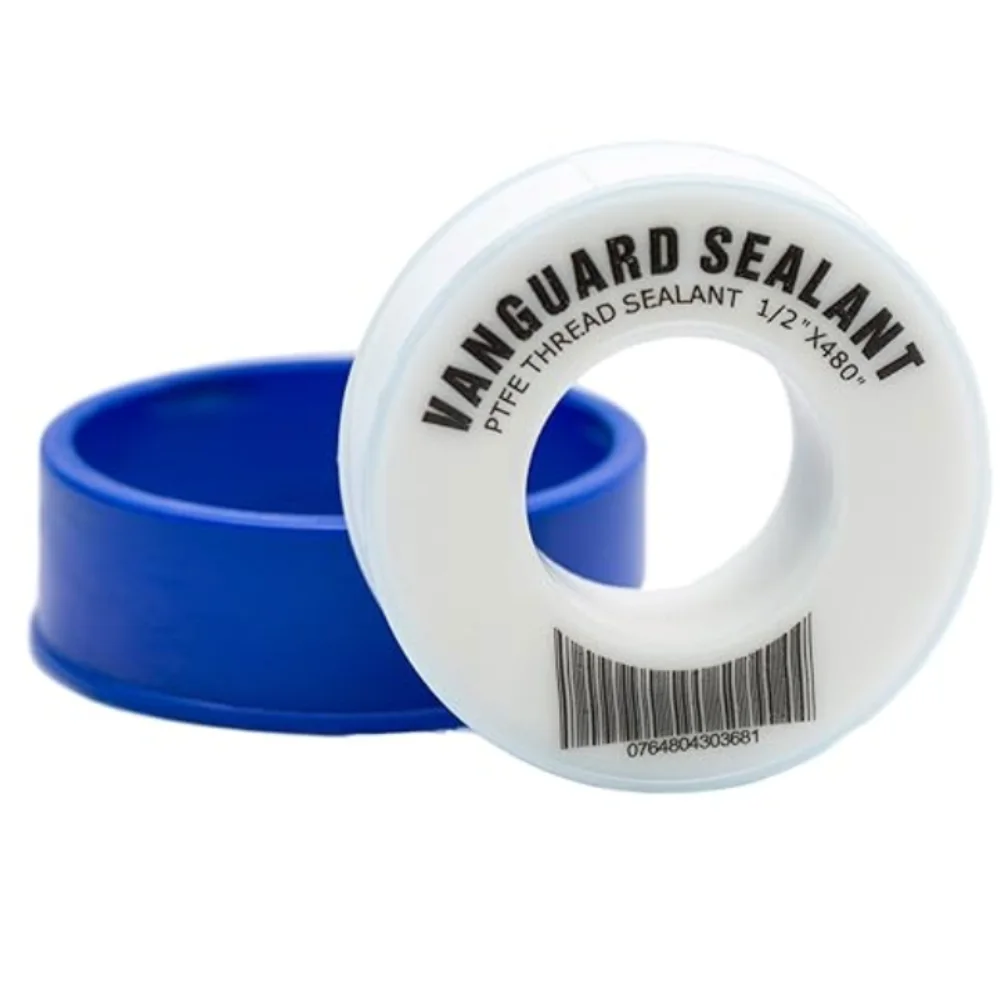
Plumbers Water Sealant Thread Tape is used to make the seal on threads extra water tight.
Be sure to plan your layout in advance. You will be working in a small space and you will want to make sure the holding tanks will fit under the sink. Also make sure you have something solid you can attach the water pump and water filter to. (usually the wall or the inside of a cabinet)
Step By Step Guide For A Campervan Water System With Water Filtration System:
This step by step guide details the installation of your campervan sink plumbing starting from the faucets to fresh water tank.
Please Note: this guide is specifically for the products we used (listed up above). You may need different lengths of tubing depending on where exactly you mount your faucets, pump, filter, etc.
OR if you purchase different products, just note that not all installations and fittings will be the same. But you still may be able to adapt certain parts of the system for your needs.


Step 1: Mount The Sink & Drain

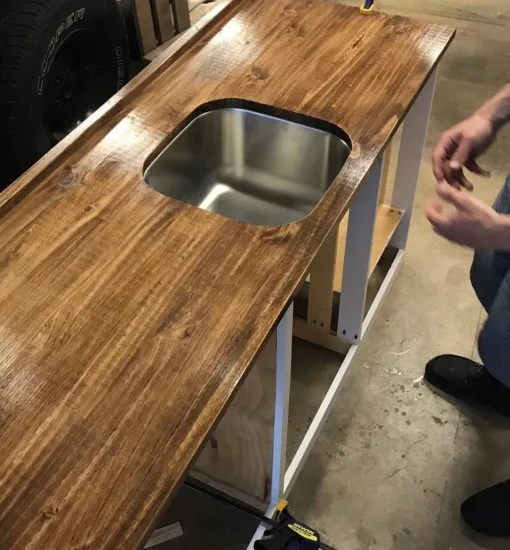
The first step for this campervan water system is to install the sink by mounting it to the countertop.


If you are interested in our countertop, check out our:
The sink doesn’t have to match our exact model, but for compatibility, we suggest using the drain we purchased and the Camco Flexible Camper Drain Hose. We know that they are all compatible.
For our campervan water system, we installed the sink with the screws it came with. Then added a layer of Silicone Caulk on the inside of the sink, right where the sink and countertop meet so no water could leak through.
Once your sink is installed, next, install the drain. You want to make sure you seal the drain well, so you have no leaks. Therefore, coat the underside of the outer circle of the drain with the silicone caulk and place it down in the hole of the sink. One ring of caulk around the whole flange should be enough. If you use too much it will squeeze out. Let it dry for at least 12 hours.
Step 2: Install Faucets

Next step is to drill holes into the countertop for the two faucets heads. We went with the Chrome Pull Down Single Handle Kitchen Sink Faucet for our main faucet & Aquaboon Water Filter Purifier Faucet for the filtered water faucet.
Both faucets come with screw-on methods for securing them to the countertop. The main faucet has a black plastic flange that screws on from underneath to secure it. There is also a threaded collar that can be flipped to accommodate different countertop thicknesses.
The filtered water faucet comes with a standard nut that tightens a plastic washer to secure it from underneath.
For drilling holes into the countertop, you will need 2 circular drill bits. You will need a 1 1/2″ hole saw bit for the main faucet and a 1/2″ hole saw bit for the water filter faucet. If you don’t have circular hole drill bits, you can pick up a set here.
But since this will most likely be the only time you will use these bits, we suggest trying to borrow from family or friends. Both come with cover plates, so they will cover up any rough edges.
For the Pull Down Single Handle Kitchen Sink Faucet: Before you tighten the screw-on flange underneath the countertop, screw both the cold and hot water hoses (included) into their respective holes. You won’t be able to do it after the flange is screwed on.
You can see in the picture how the hoses are stick up into the screw-on flange.
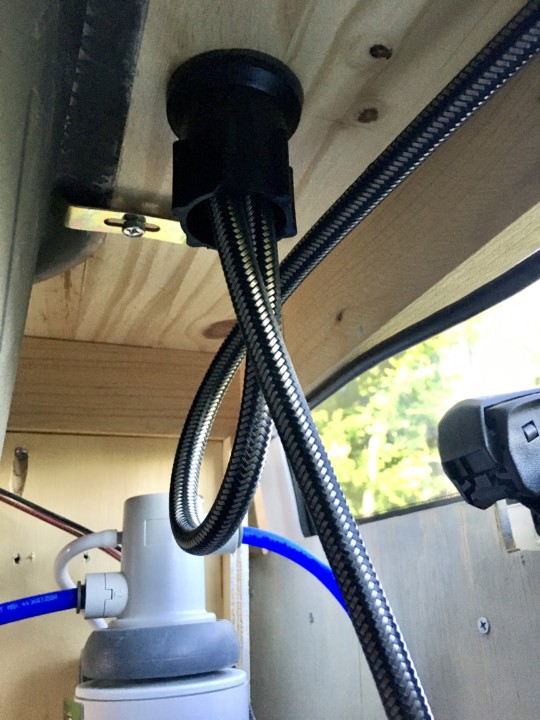
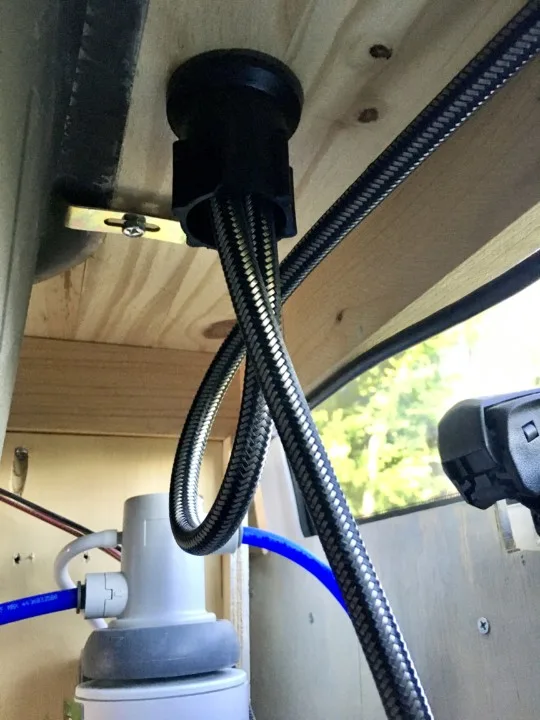
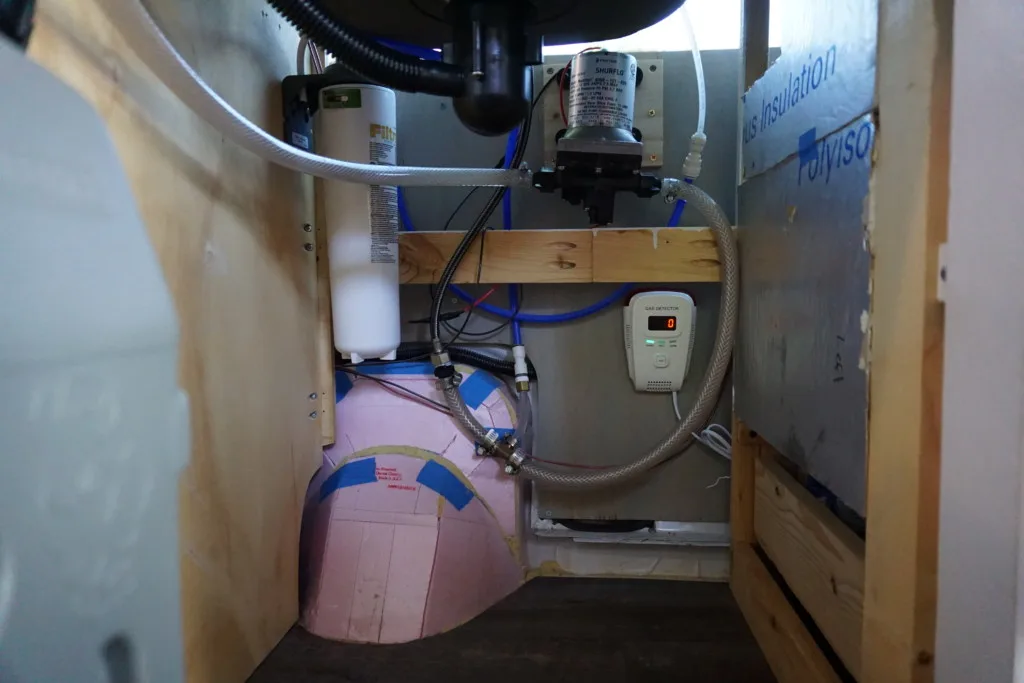
Step 3: Mount Pump & Filter

First, plan out where everything will go under the counter. Since you likely only have a small space, you need to make sure everything will fit. Make sure that there’s room for your water jugs, water filter, and water pump. And remember that the sink and drain will extend below the surface of the counter and take up space under the counter.
To minimize tubing distances and increase flow pressure, it’s best to mount the pump and filter close to your faucet and water tanks. But don’t mount everything so close together that it’s hard to access for maintenance or repairs.
The Shurflo pump can be mounted in any orientation, but the water filter needs to be mounted vertically.
Also the water filter needs to be mounted high enough that you can change the filter without removing the mounting. It requires at least 2 1/2 inches below the filter cartridge for proper clearance.
Once you plan where both the water pump and filter will go, attach them to the cabinet or wall.

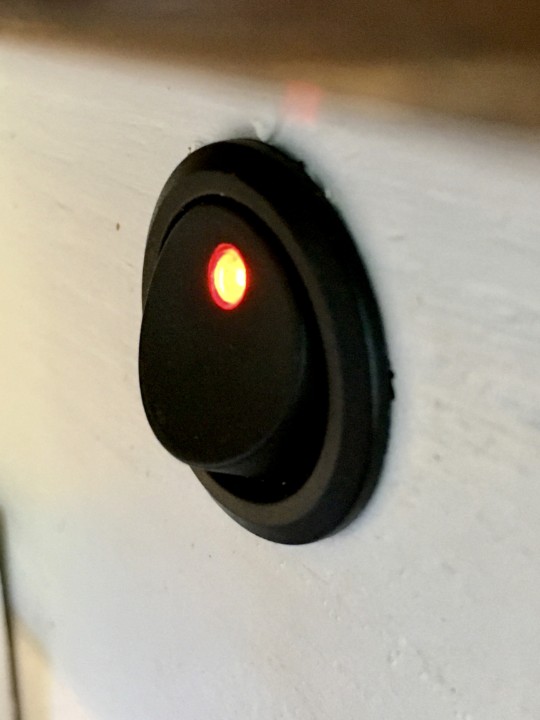
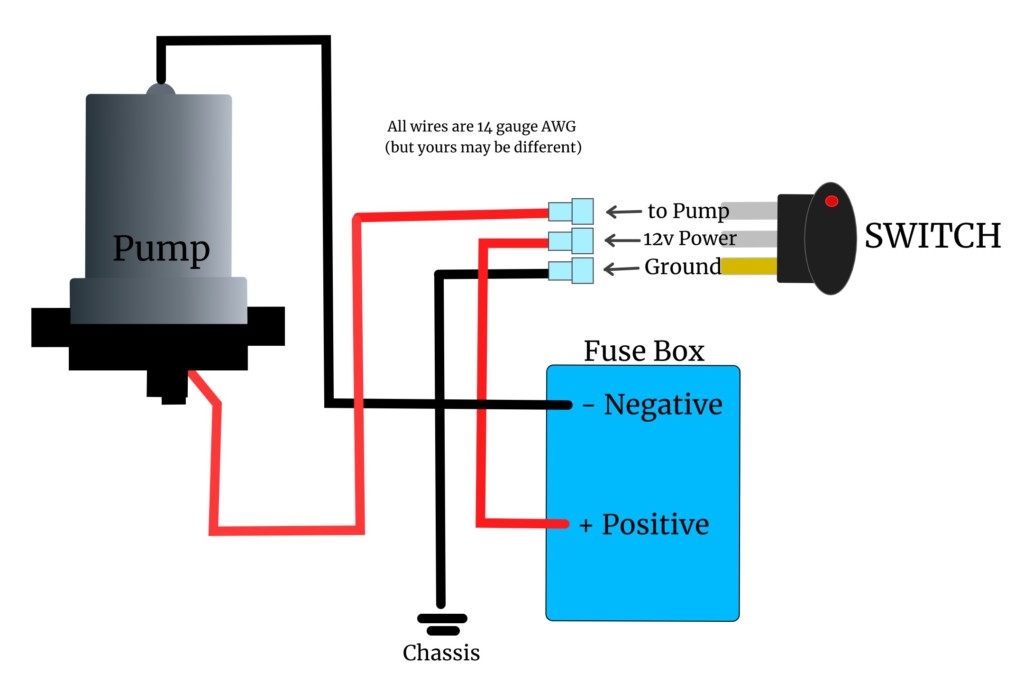
Next wire the pump to a 12-volt power source and include a 15Amp fuse and an on/off switch. There are short red and black wires that come attached to the Shurflo pump. But you will most likely need to connect additional wiring to complete the circuit with a power source. To choose appropriate wiring size please refer to this wire calculator. Here is a diagram of how our pump is wired.


If wiring is scary or confusing to you, check out Jake’s post which explains everything you need to know about wiring and how to connect a circuit.
Step 4: Plug The Hot Water Tubing
The Chrome Pull Down Single Handle Kitchen Sink Faucet comes with two braided hoses. Those two hoses will attach underneath the faucet (screw on).
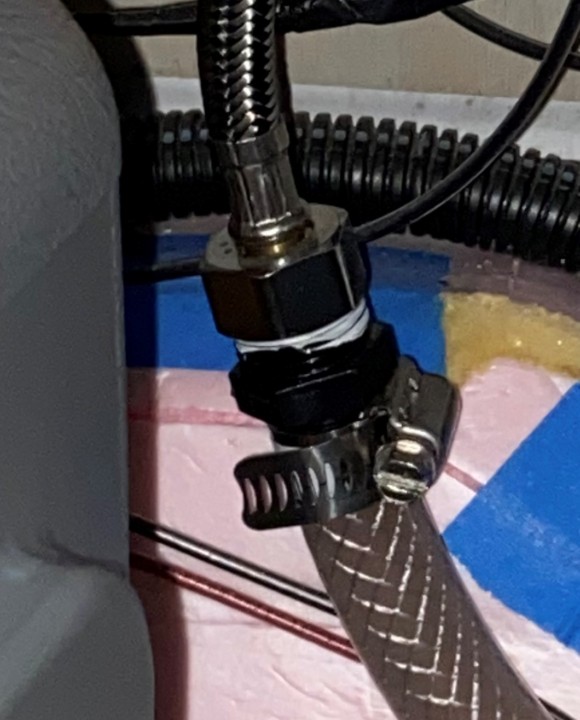
Next, we will plug the hot water hose since we don’t have a hot water heater. We are intentionally creating a “dead-end”. Once the braided hose is attached to the faucet, add a NIBCO 1/2″ Poly PEX Adapter Fittings to the end, attaching a piece of Plumbers Water Sealant Thread Tape around the threads.
It’s important to wrap the tape clockwise around the threads and use only one layer of tape (less is more). This ensures that the tape doesn’t unravel when you tighten the fitting.
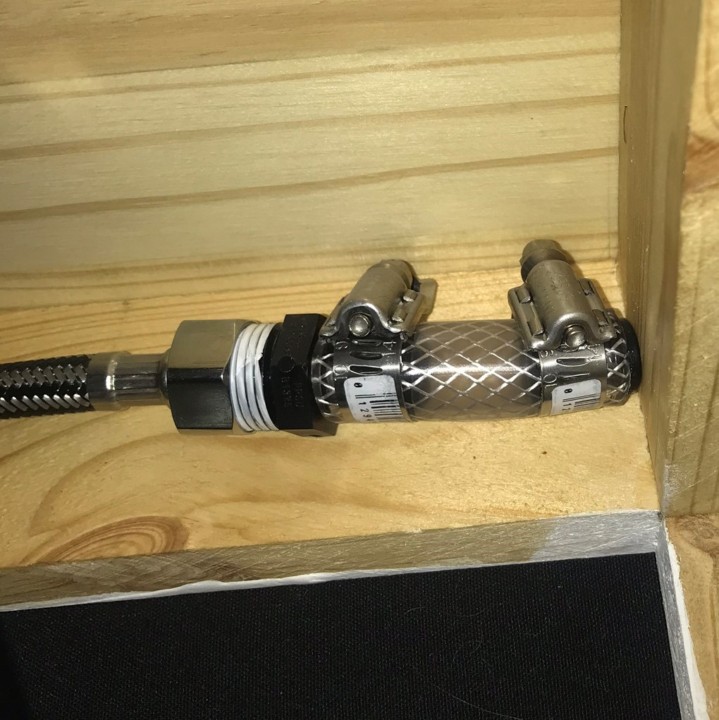
Cut off 3 inches of the Sioux Cheif 3/4″ OD x 10′ Braided Vinyl Tubing. Add the tubing to the pex adapter fitting with a hose clamp. Then, add the Nibco 1/2″ Poly Pex Plug Fitting to the other end with a hose clamp. You now have successfully plugged the hot water hose. We attached the plugged end right up under the countertop so that it’s out of the way.
Step 5: Connect Cold Water Tubing To Pump

Now we will connect the cold water braided hose (from the main faucet) to the pump.
First, add the NIBCO 1/2″ Poly PEX Adapter Fittings attaching a piece of Plumbers Water Sealant Thread Tape around the threads (again, clockwise). Then, screw it onto the braided hose.
Cut 3 inches of Sioux Cheif 3/4″ OD x 10′ Braided Vinyl Tubing. Attach it to the pex adapter fitting with a hose clamp.
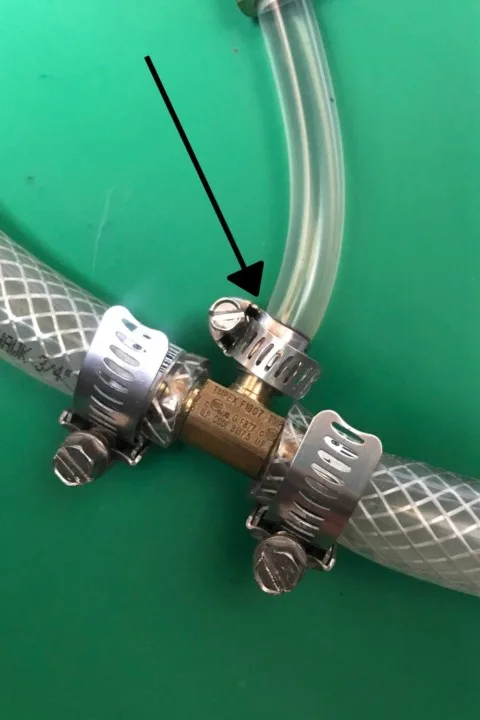
It’s a good idea to keep the screw on your hose clamps facing you. If you ever need to change or adjust them, it will be much easier to access the screw heads.
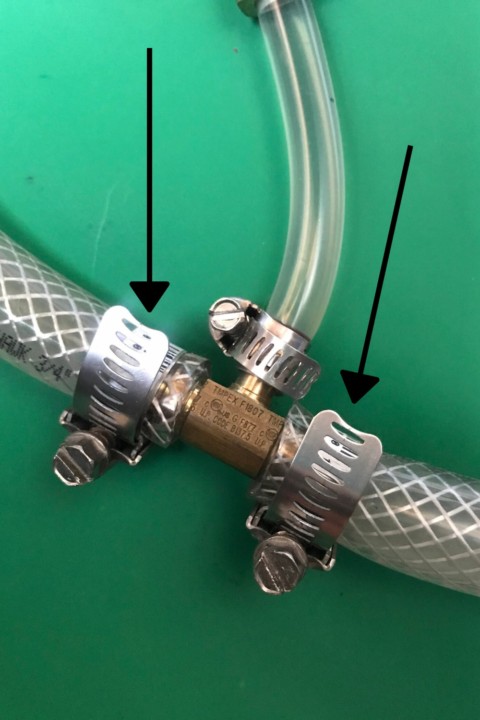

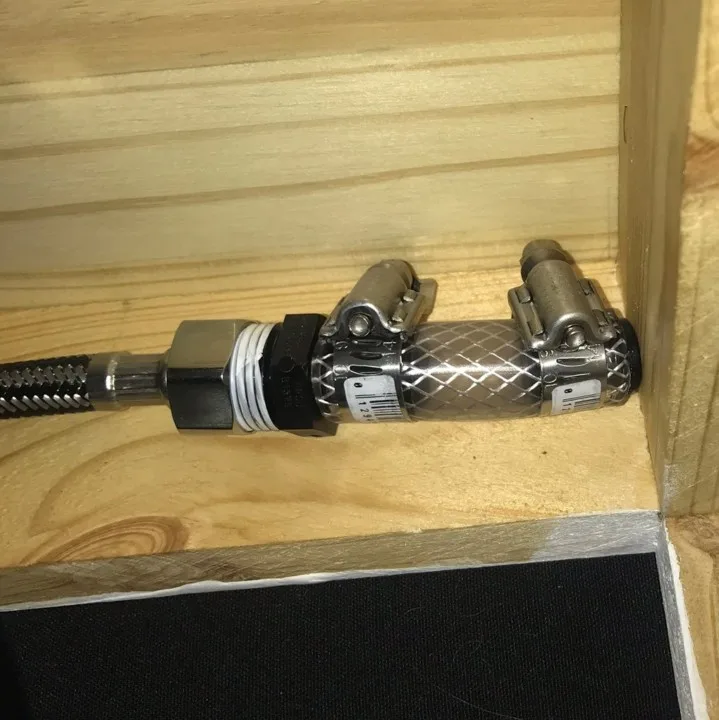
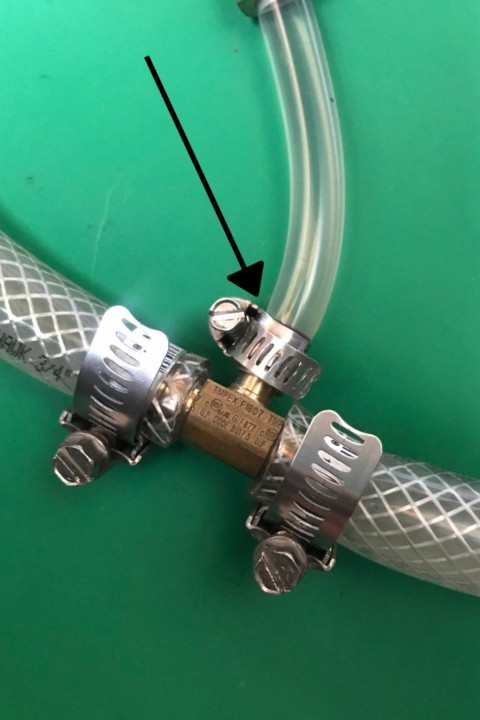
Attach the other end of the braided vinyl tubing to the 1/2″ ID Tee Fitting with a hose clamp. Then, cut the braided vinyl tubing and add it to the other side of the Tee Fitting with a hose clamp.
Cut as much as you need to reach the right side of the Shurflo water pump. The water flows through the pump from left to right, (there are arrows on the pump that illustrate this).
(I will explain the other small perpendicular tube in just a moment)
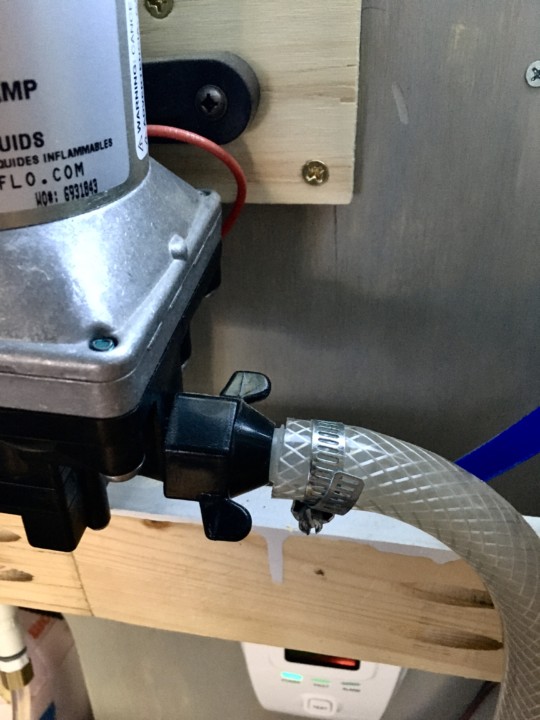
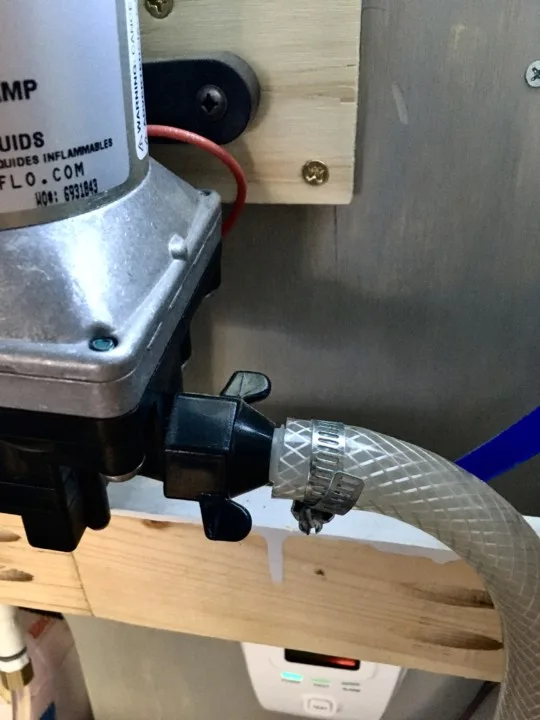
Next, attach the braided vinyl tubing to the right side of the Shurflo RV Water Pump. The pump comes with a barb attachment that fits snugly inside the 1/2″ ID tubing. Then secure the tubing with a hose clamp.
Step 6: Attaching The Water Filter To The Water Filter Faucet

We’re going to switch gears for a sec and connect the tubing for the water filter and filtered-water faucet.
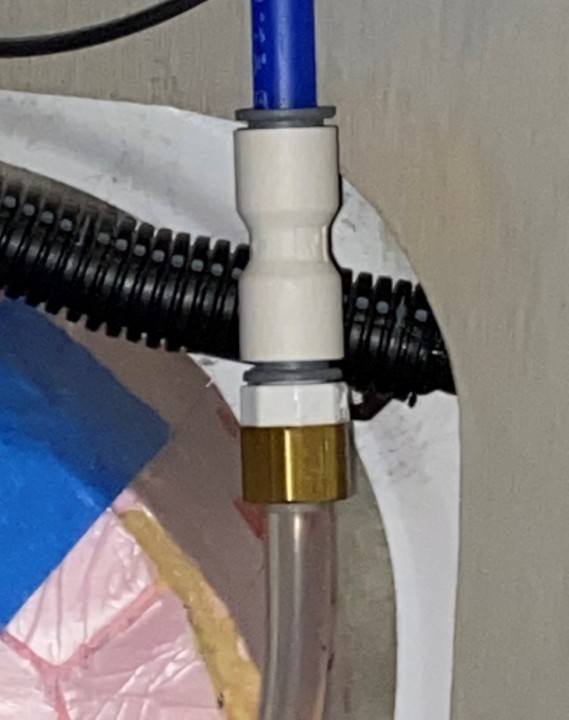
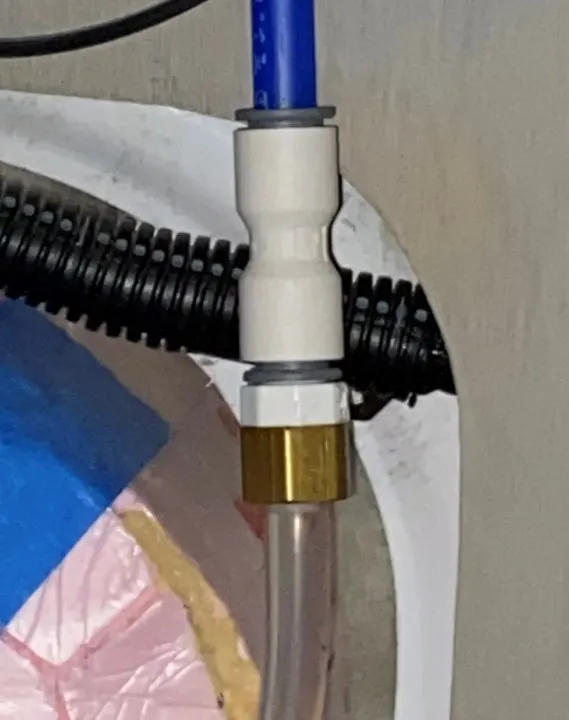
Begin by taking the Sioux Chief 1/4″ OD x 15′ Polyethylene Tubing and feed it through the long metal threading on the bottom of the Ronaqua Reverse Osmosis Water Filter Faucet. A nipple, sleeve and compression nut will come in the package. Secure the tubing by tightening the compression nut around nipple, sleeve, and tubing.
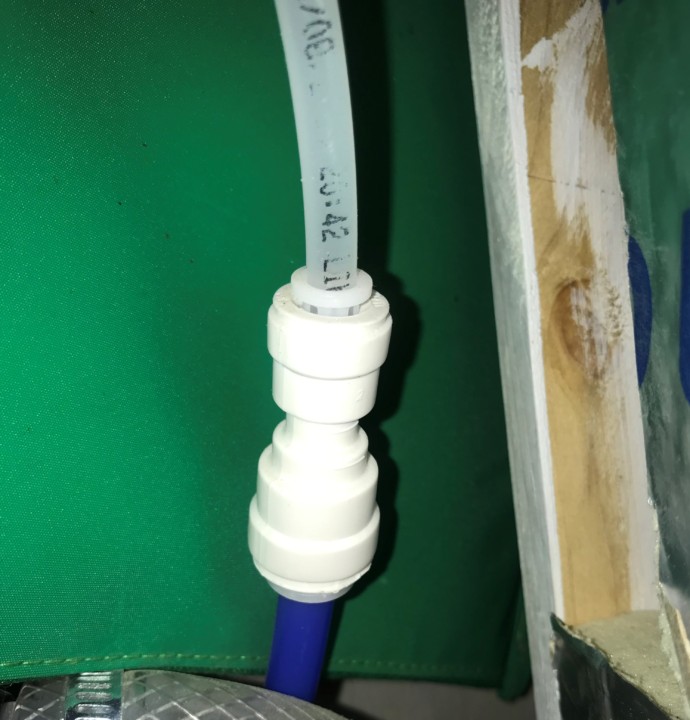
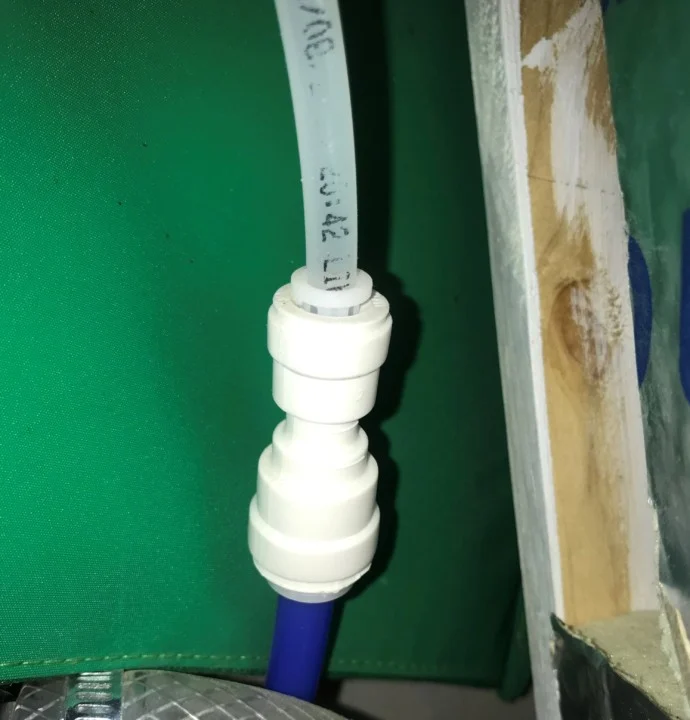
Now take the Watts® 3/8″ OD x 1/4″ OD Plastic Quick Connect Coupling Fitting and push the tubing in the 1/4″ OD side until it stops. Then tug on the tubing gently to “set” the connection. This action drives the teeth into the tubing.
Then, take the blue pex tubing that comes with the Filtrete Maximum Under Sink Water Filtration System and push the tubing into the 3/8″ OD side of the fitting. Repeat the same tug outwards to “set” the connection. Now insert the other end of the blue pex tubing into the “output”, or right side, of the water filter until it stops.
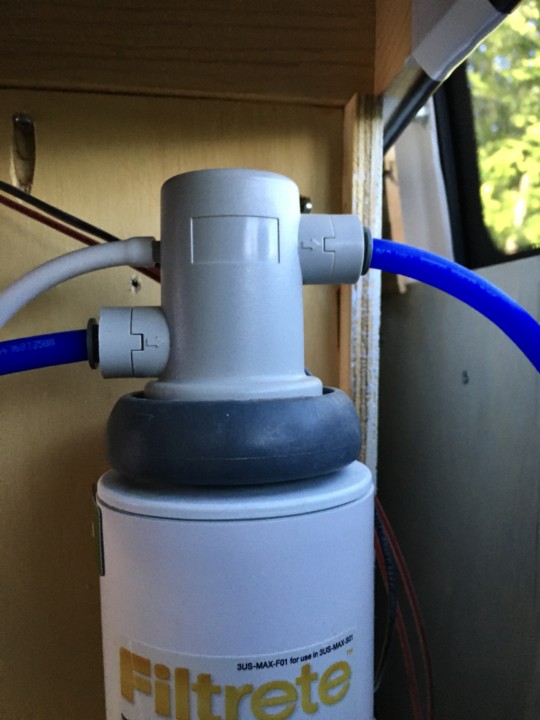
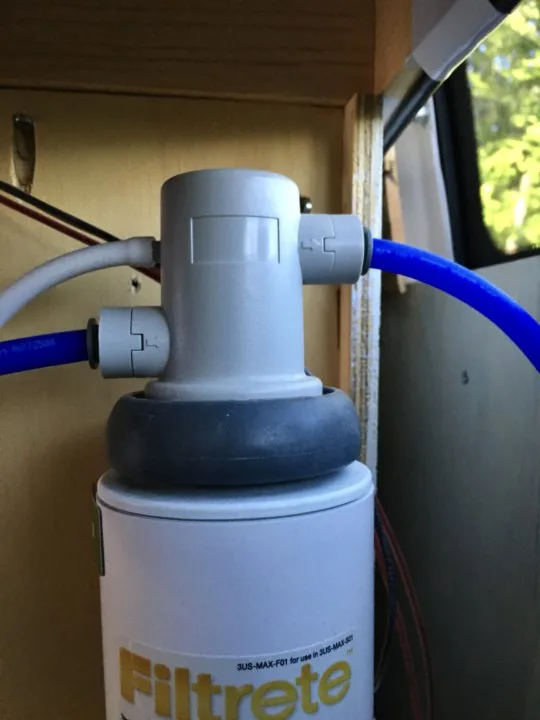
Step 7: Attaching The Water Filter To Pump
Take the other blue pex tubing that came with the Filtrete Maximum Under Sink Water Filtration System and push it into the “intake” hole, or left side, of the water filter until it stops.
Take the connector that comes with the Filtrete Water Filter system and insert the other end of the blue pex tubing into it until it stops. Tug gently to “set” the connection. Now cut 3 inches of Sioux Chief 3/8″ OD x 10′ Clear Vinyl Tubing and attach it to the other end of the connector with the nipple, sleeve and compression nut provided in the package.
Connect the other end of the clear vinyl tubing to the 1/4″ ID Tee Fitting with a hose clamp.
Getting the tube to fit over the barb is a challenge and you might need to force it a little bit, but it will fit!
Again, it’s a good idea to keep the screw on your hose clamps facing you. If you ever need to change or adjust them, it will be much easier to access the screw heads.
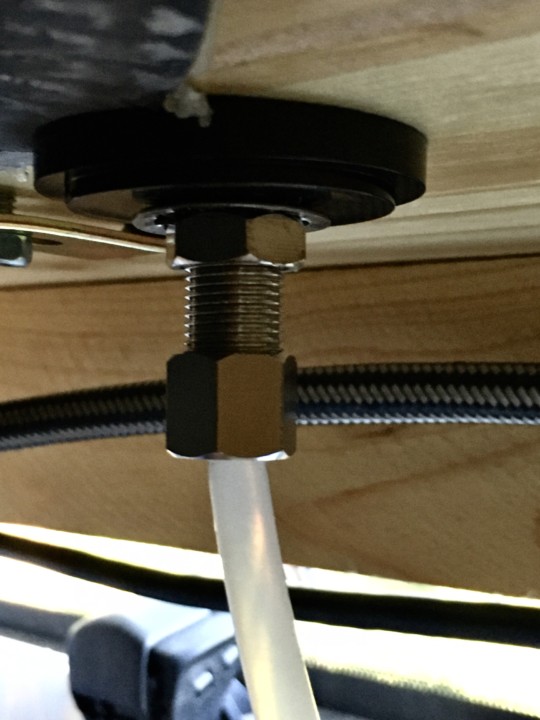
Step 8: Connect Water Pump To Fresh Water Tank
Next, cut 3-4 feet of the Sioux Cheif 3/4″ OD x 10′ Braided Vinyl Tubing and attach one end to the left side of the pump with a hose clamp.
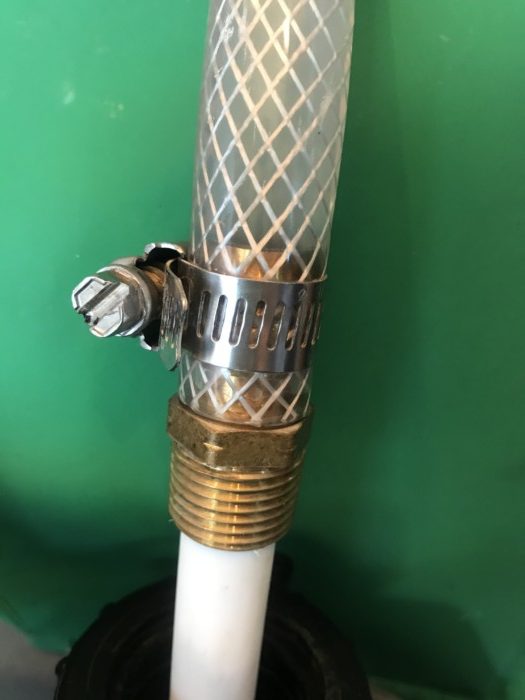

For the other end of the braided vinyl tubing, you will insert the “barb” side of the 1/2″ x 1/2″ MIP Lead-Free Bradd Hose Barb Adapter Fitting into the tubing. Next, grab the 1/2″ x 5′ White Pex Pipe, measure the height of the the pex tubing up against the height of your water jugs. Then cut the pex tubing with a saw.
Then, add a tiny amount of silicone caulk around the end of plastic of the pex tubing. It’s a very close fit, so it doesn;t take much caulk to fill the “gap”. Insert it into the threaded part of the barb adapter fitting. Let the silicone dry 12 hours before testing the water! Plus, your drain isn’t hooked up yet anyway, so let’s take care of that.
Step 9: Connect The Drain To Grey Water Tank

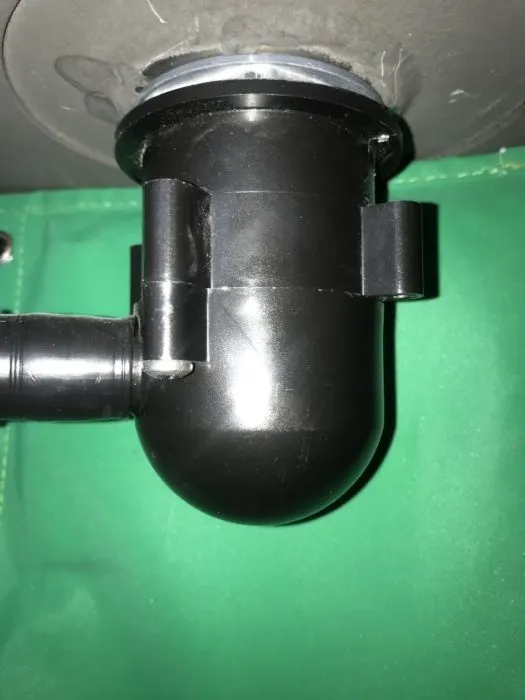
Once the drain is sealed and dry, twist on the Camco Flexible Camper Drain to the threads of the drain. Add Plumbers Water Sealant Thread Tape around the threads to protect for leakage.
We then cut the black tubing in half, because the tubing was too long. The black hose should flow with gravity, and not ever go higher than the drain itself. The ideal conditions are just a couple of inches extending into the top of the grey water tank. You don’t want it do go too deep because it will get all dirty if it’s sitting in the water.
For the black tubing to fit flush to the lid of the grey water tank, we cut a hole in the cap disk.
To protect from odor we use a diluted solution of Porta Pak Deodorizer.
Step 10: Test It Out!

Now it’s time to test the campervan water system. Turn on the faucets one by one and see if the whole campervan sink plumbing system works! Fill up the fresh water tanks and let it rip! It’s a good idea to have a towel nearby in case any of your connections aren’t watertight.

Takeaway | Campervan Sink Plumbing With Water Filtration System:
Hopefully you find this step by step guide helpful and you can install your plumbing worry-free! We have been living in the van for almost a year and we have not had any leaks or problems! We are so thrilled to have campervan water system with water filtration and an electric pump. It’s one of the comforts that makes our little home on wheels more comfortable to live in. Let us know if you have any questions.
A Few Tips For Your Campervan Water System:
Don’t let your grey water tank get too full. There isn’t any system in place to warn you when its about to overflow. So be diligent about checking it so that it doesn’t overflow in your van.

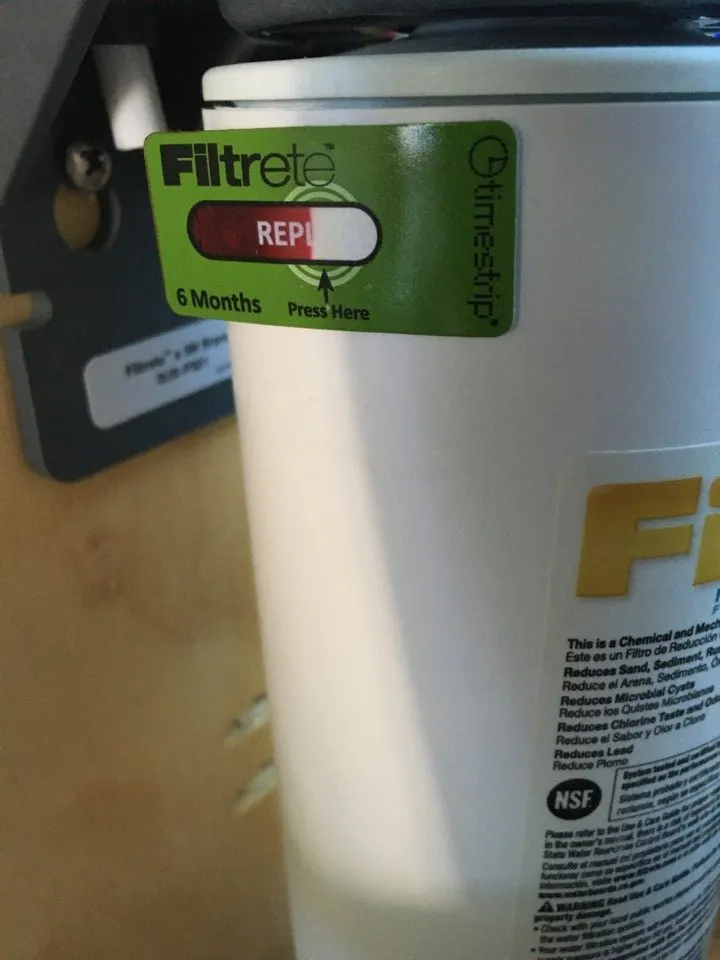
There’s a helpful little sticker on the water filter that lets you know when it’s time to replace (about 6 months). Mount the sticker somewhere on the filter that’s easy to see.
Help Us Share ‘Campervan Water System With Water Filtration System’ On Pinterest:

Best Portable Showers For Vanlife & Camping - tworoamingsouls
Tuesday 4th of April 2023
[…] water. But if you often have access to hoses or have a way to power a 12 V pump (such as you van sink plumbing), this can be taken anywhere along your […]
Van Conversion Build Order | Step By Step Guide - tworoamingsouls
Monday 23rd of January 2023
[…] help others avoid the same frustration, we put together a step-by-step guide for how to copy our campervan sink plumbing with water […]
How Much Does It Cost To Build a Camper Van? – Hivan
Thursday 7th of October 2021
[…] Two Roaming Souls has an incredibly detailed breakdown of how they installed their camper van sink, including a filtration system. Water filtration means you don’t have to be as picky about the source you use to refill your water tank. You can fill your tank with a hose or spigot at a campsite without fear of drinking dirty water. […]
10 Vanlife Essential Items You Must-Have - tworoamingsouls
Wednesday 6th of October 2021
[…] Campervan Sink Plumbing With Water Filtration […]
Where To Refill Water For Campervans, RVs, or Campers - tworoamingsouls
Tuesday 14th of September 2021
[…] If you are picky with the taste of water, then you might want to consider getting filtered water or have a water filter system in your campervan. Check out our campervan water filtration system step-by-step guide. […]