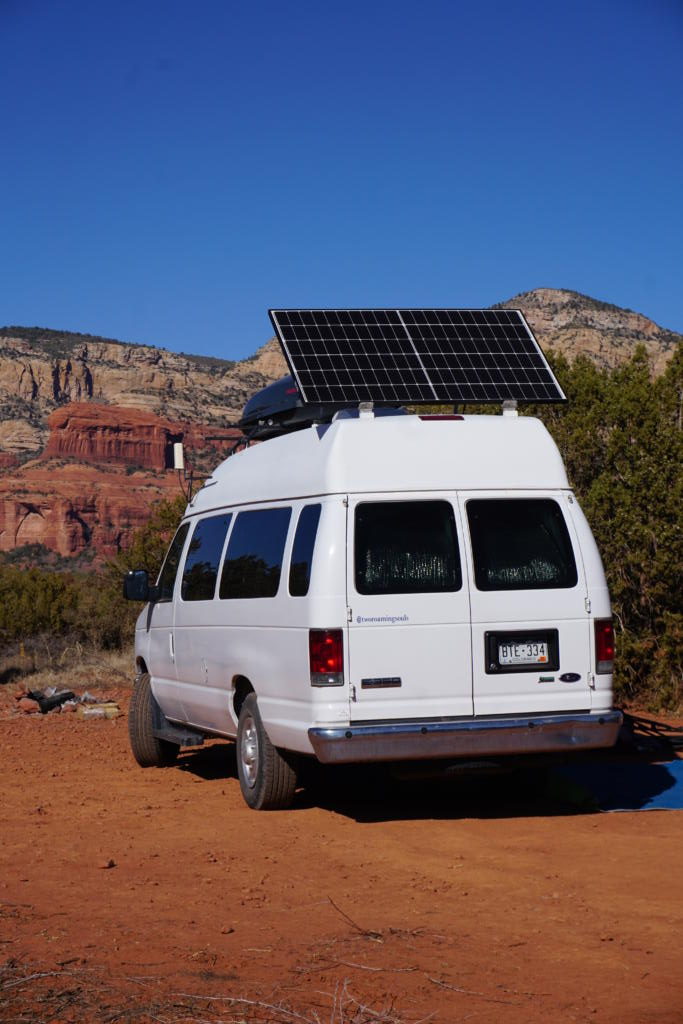
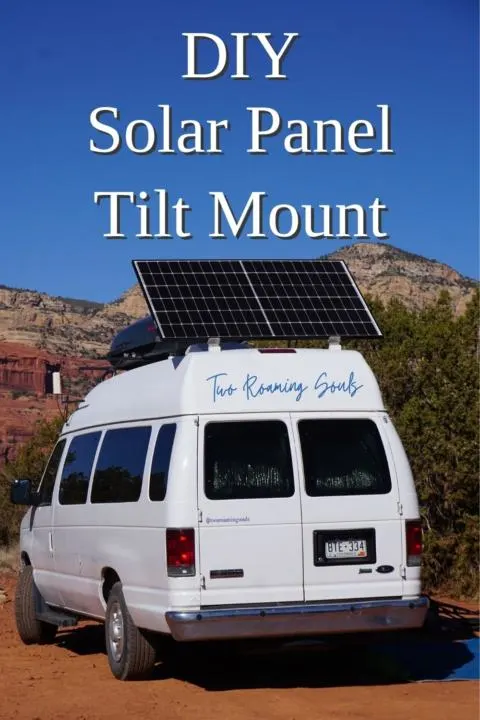
Halfway through our second winter living in our campervan, we decided to create a DIY solar panel tilt mount for our campervan. We were tired of running low on electricity in the winter months because of the shorter days and low angle sun. So we decided to design our own budget-friendly DIY solar panel tilting system.
Angling your solar panels towards the sun is a very effective way to boost your solar power collection without having to buy any new panels. Simply maximize the performance of the panels you already own. So we got to work devising a plan to tilt our solar panel. Our key requirements of the design were roadworthiness, budget-friendly, and tool-free operation. Here is how we made our own DIY solar panel tilt mount and completed the whole project in one morning at a Home Depot parking lot.

Note: This DIY solar panel tilt mount is for use when the van is parked only. We don’t drive with the solar panel tilt-up.
This post may contain affiliate links. Disclosure policy.
Our Solar Setup
For reference, these are the primary components of our off-grid solar setup.
- Rec N-Peak 320w Mono. Solar Panel
- 2X – 100Ah Battle Born Lithium Battery Bank
- Victron 100/30 MTTP Charge Controller
- Victron BMV-12 Battery Monitor
- Xantrex 1000W Pure Sine Inverter
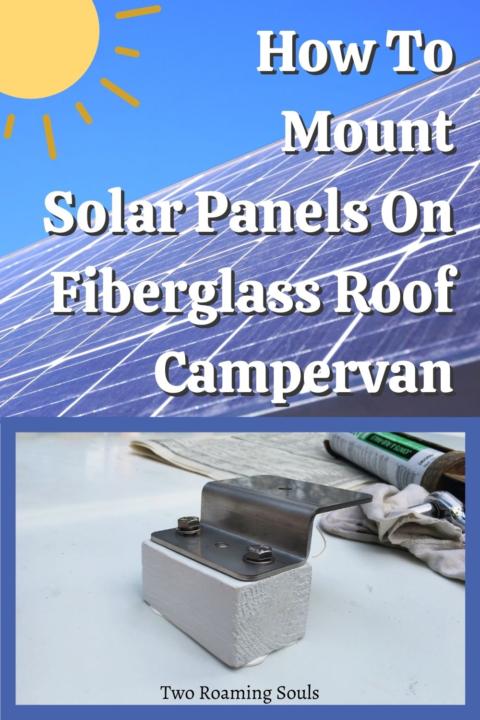

This project was completed after we already mounted our solar panel on our fiberglass roof van. This post describes the initial mounting process.
Why We Needed A Change
In the Spring, Summer, and Fall, we never really had power issues. However, unsurprisingly, the winter months have proved a little challenging. And especially with COVID, we haven’t been able to take advantage of grid power at coffee shops and libraries.
We have been primarily snowbirds in the winter, and end up spending most of the winter months in the sunny Southwestern US. But even the Southwest has its share of cloudy days in the winter. Plus, you still have to reckon with the short days and low-angle sun.
Another issue is that bad weather is typically when we want to spend time inside our campervan working on our computers or just staying cozy in bed and watching TV. So we tend to use the most power, on days when we are collecting the least.
So finally we decided to build a solar panel tilt mount to maximize the sunlight in the winter.
DIY Solar Panel Tilt Mount
We got to work designing a solar panel tilt mount. The process for us was simplified by the fact that we have just a single large 320-watt solar panel on our van. Logistically, we only had to deal with tilting one panel, rather than an array of smaller panels.
The Basic Design Elements
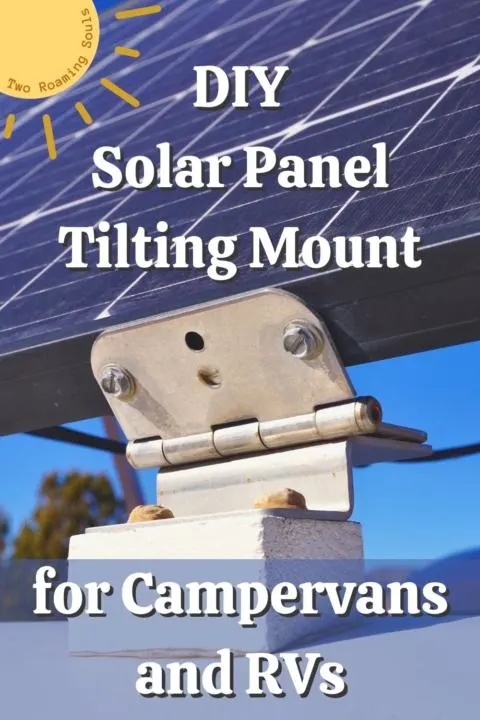
However, our large aluminum-framed solar panel is big and heavy, so any tilt mount we designed had to be quite sturdy. The basic design we landed on was using two stainless-steel hinges on one side, and aluminum support bars on the other side to hold the panel up. Then we made one side of the solar panel detachable with a clevis pin and hitch pin. The clevis pin and hitch pin are the critical element that makes it really easy to detach one side of the solar panel without tools.
Primary Components Used
- Stainless Steel Hinges [x2]
- Universal Clevis Pin [x2]
- Hitch Pin [x4] (only need 4, but I keep a couple spares on hand)
- Aluminum Angle Bar [x2]
- Various Stainless Steel Nuts, Bolts, and Washers (some I had, some I purchased)
Installing the Hinges
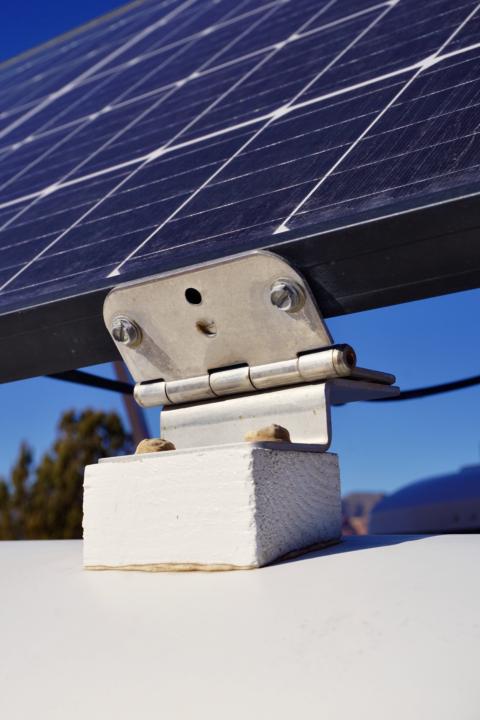
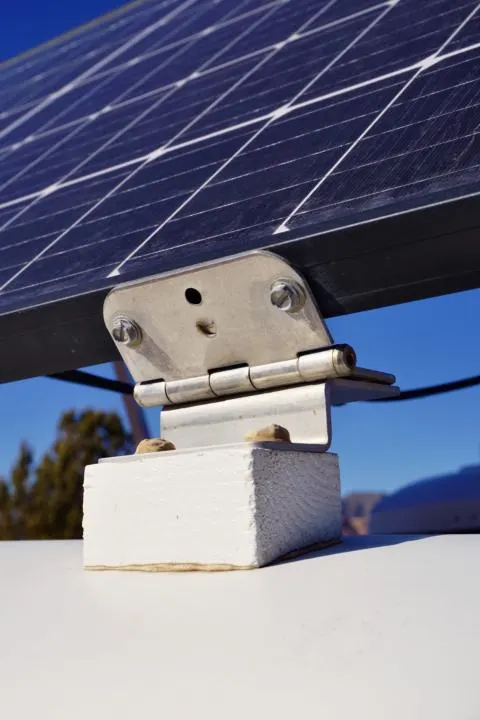
The first step was installing the hinges on one side. on the solar panel We chose to have the panel hinge towards the rear of the van. This way, our Maxxfan and rooftop cargo box wouldn’t cast shadows onto the solar panel when it was tilted. And we used stainless steel for all the components on the hinge side, to ensure their survival of the elements.
We removed the original mounting nuts and bolts and drilled new holes on the edge of the panel for attaching the hinges. We couldn’t use the existing mount holes on the panel, because the hinge wouldn’t be able to lay flat on itself because of the securing nuts and bolts.
So, mounting the hinges in a 90-degree orientation allowed room for the nuts and bolts to secure everything. Be careful when drilling through the solar panel that you don’t damage the solar cells or any wiring that may be present in the frame.
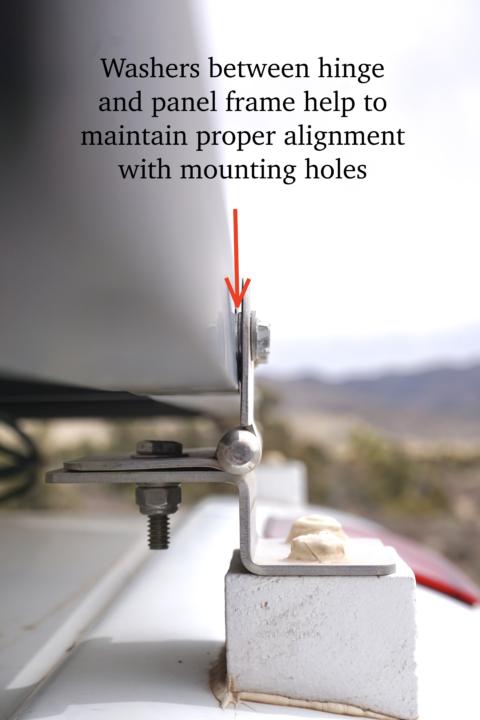
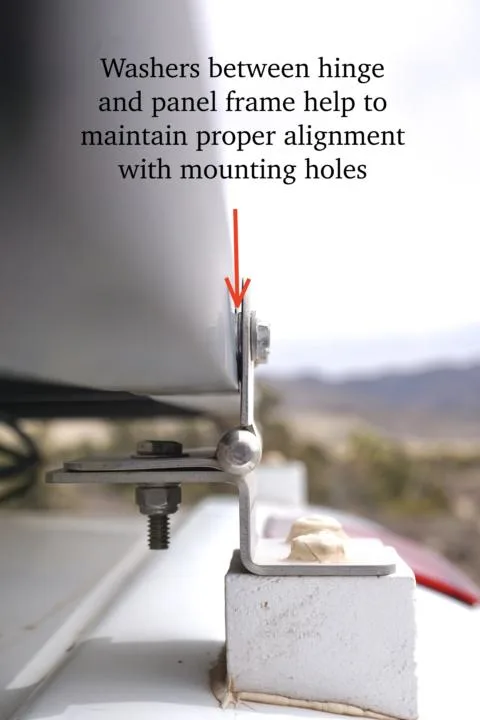
The bottom part of the hinge was attached to the original mounting brackets with the original nuts and bolts. Then we had to purchase new stainless steel nuts, bolts, and washers, to attach the upper part of the hinges to the edge of the panel. We used nylon lock nuts because they resist vibration, and thus are fit for life on the road.
The washers were used to help achieve the perfect lateral alignment so that the mounting holes on the opposite side of the panel would still line up. It required a little bit of trial and error to determine the right number of washers to achieve the right spacing.
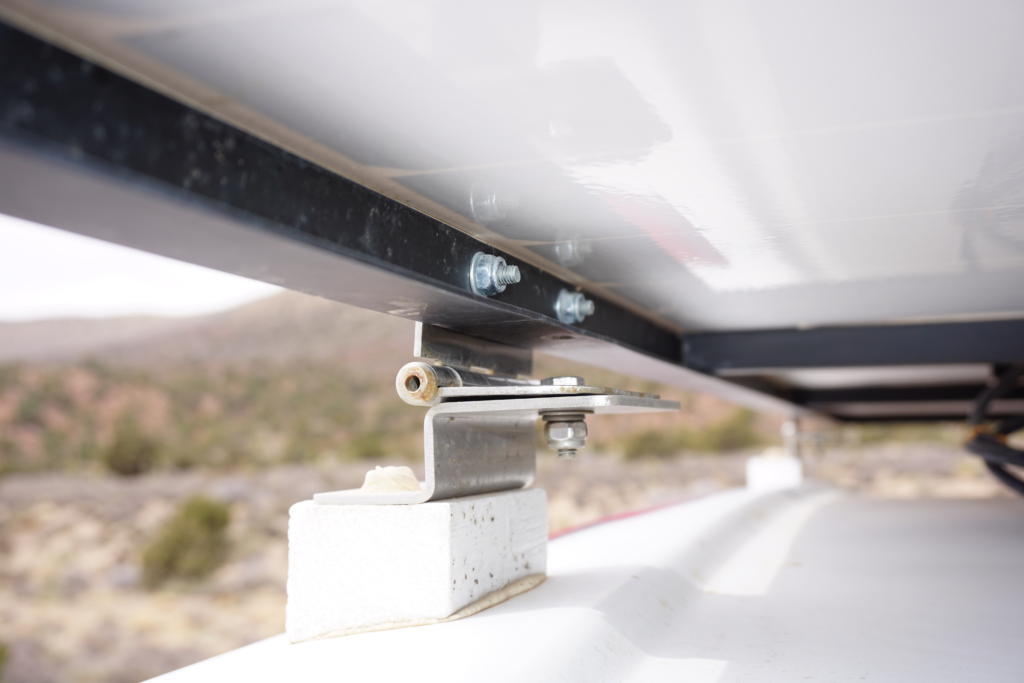
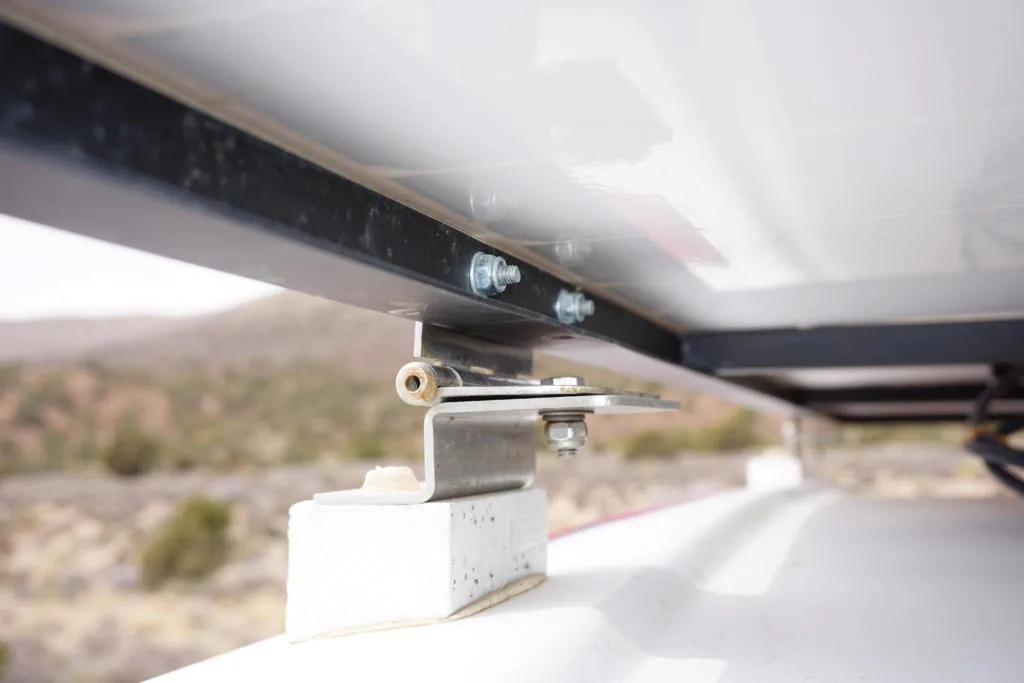
Installing Detachable Clevis and Hitch Pins
But the next challenge was figuring out how to make the other side of the solar panel easily detachable. We eventually settled on using clevis pins and hitch pins. They are perfect because they function much the same as nuts and bolts, but the removable pin makes it easy to detach without tools.
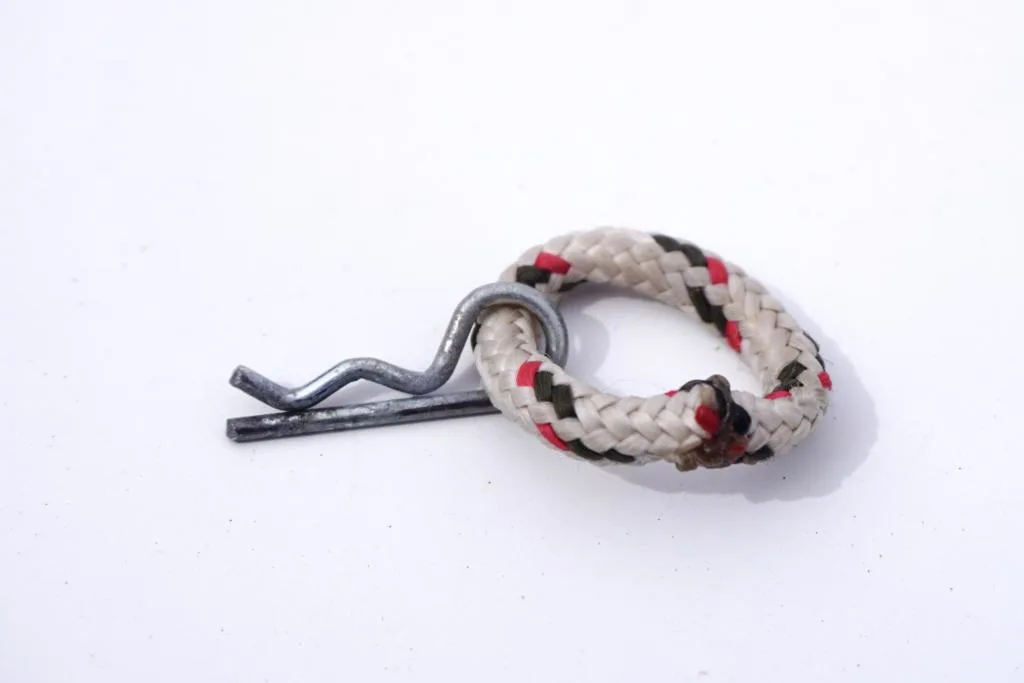
Being able to tilt our solar panel without needing tools, was super important to us. We didn’t want to be digging up tools and fumbling with them on the roof of the van every time we wanted to tilt the panel. The hitch pins are a bit of a pain to handle, especially in cold weather, so we added little paracord loops to make it easier to pull the pins out.

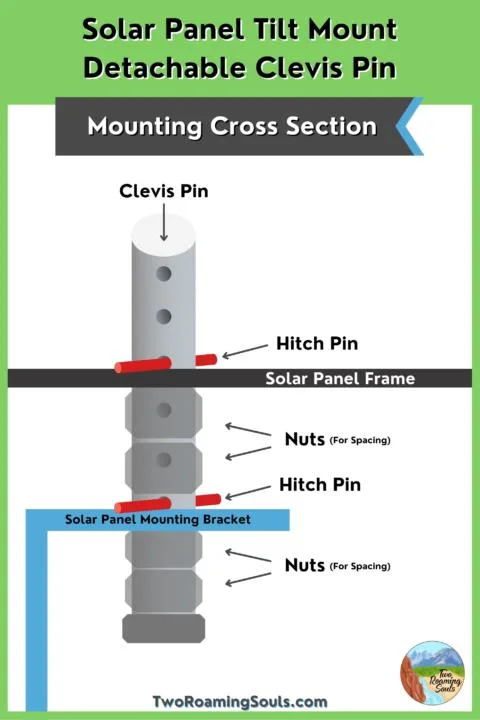
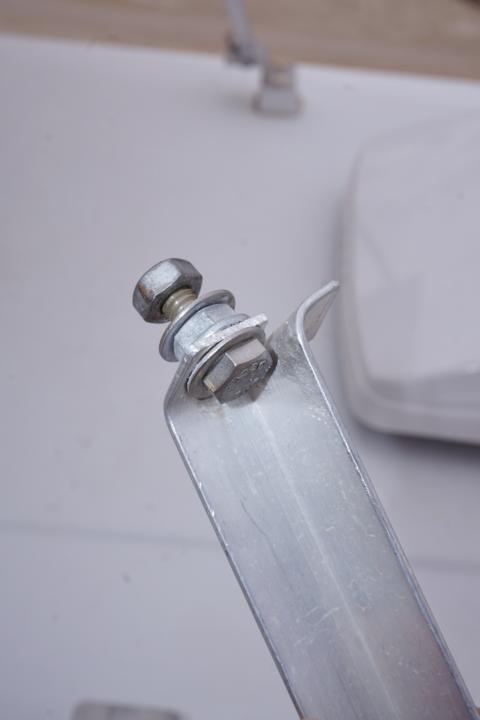
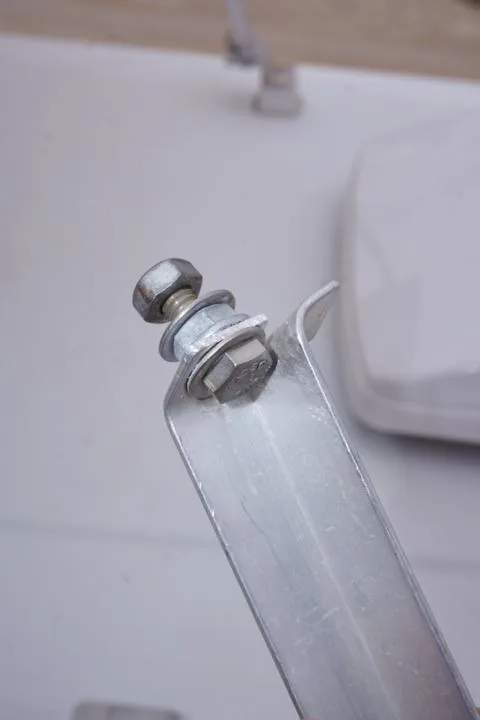
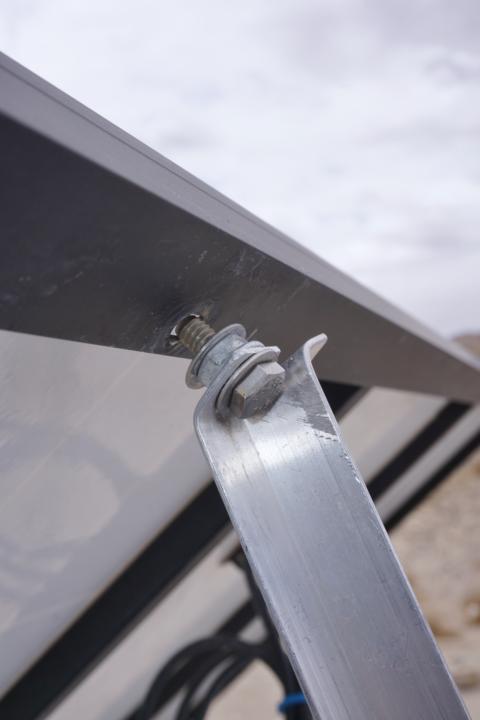
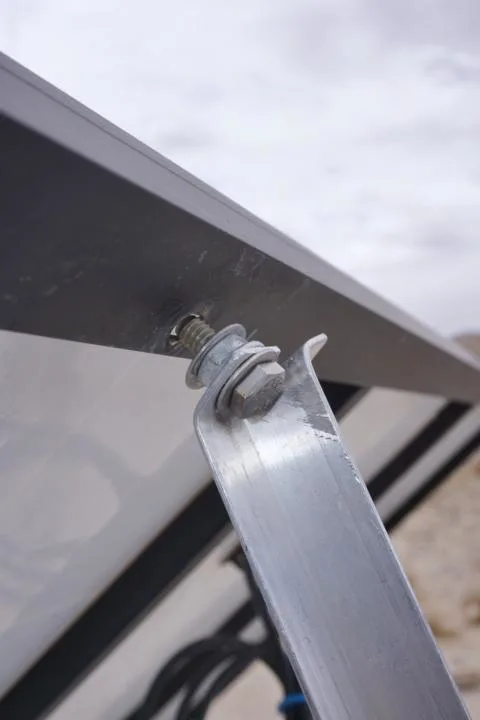
We used universal clevis pins because they have many holes. This allowed us to use two hitch pins on each clevis pin. One hitch pin secures the clevis pin to the solar panel mounting bracket. And the other clevis pin secures the solar panel itself.
The various holes on a universal clevis pin allowed us to account for the height change created by the hinges on the opposite side. The hinges raised the panel up about a 3/4″, so we used a couple of nuts as spacers to raise up the panel to match the other side.
It did take a little trial and error to find the right size nuts to space out the holes on the clevis pin. We had several nuts lying around to test different combinations. And we intentionally did this job at the Home Depot parking lot so that we could easily go in for any additional hardware we needed to finish the job.
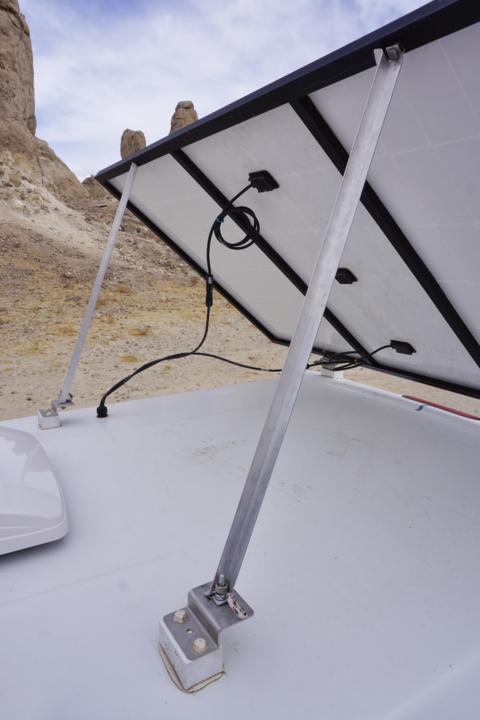
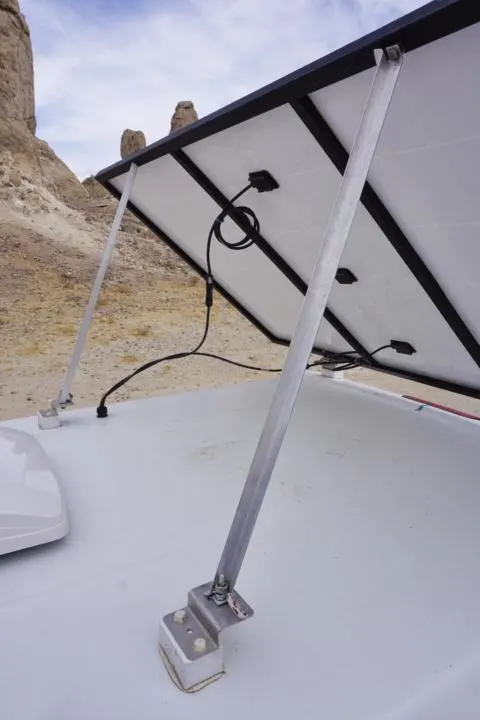
I’m sure this is all very hard to visualize, so here’s a picture and a diagram.


Making The Panel Tilt Bars
We used aluminum angle bars to create our stilts for holding up the panel. Aluminum is very lightweight and the right-angle structure makes them incredibly strong. We held the panel tilted at about a 45-degree angle to measure the distance between the panel mount holes and the clevis pin. Then we cut the aluminum bars to that length.
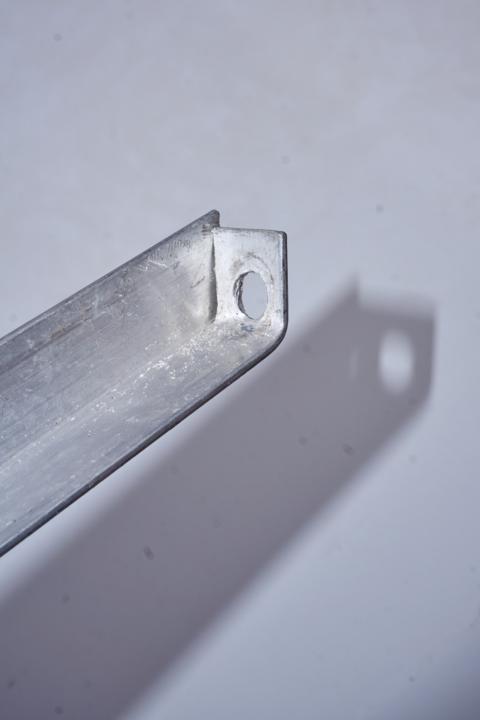
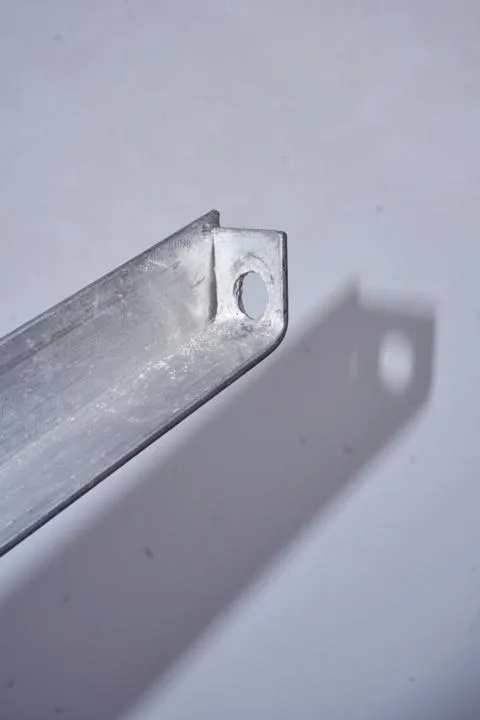
To prepare the ends, we cut slits along the corner with a hacksaw. Then we could fold the remaining “flaps” to the proper angle. We then drilled a hole in each end of the aluminum bars. The “bottom” hole would simply slide over the clevis pin, and on the other end, we attached nuts and bolts that could insert into the original mounting holes on the solar panel.
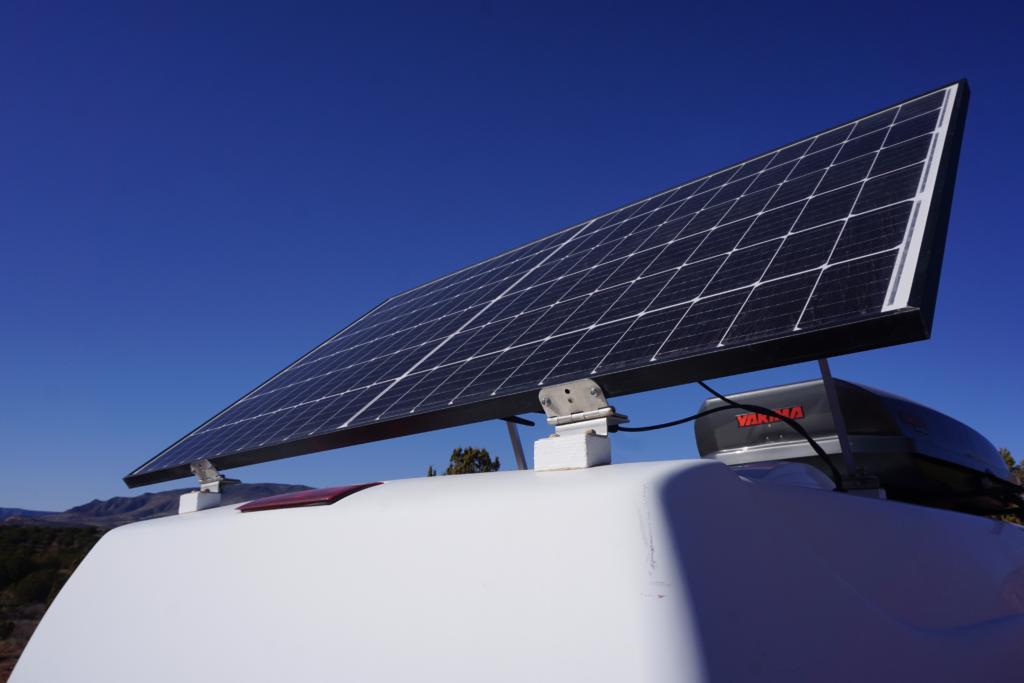
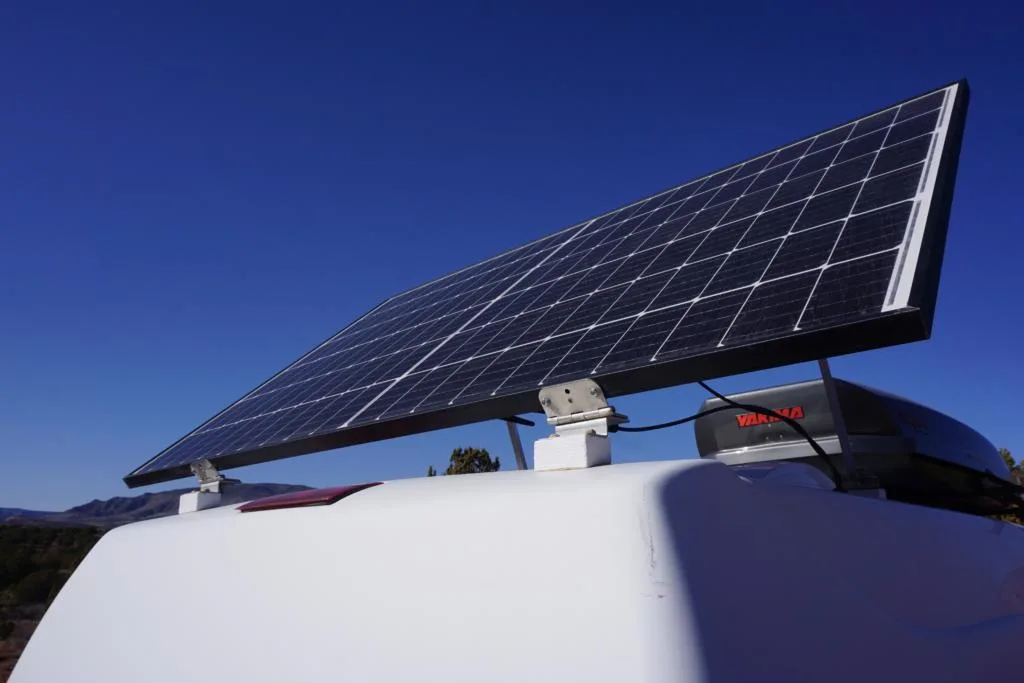
So……Does The Solar Panel Tilt Mount Work?
Yes, it is a complete game-changer! We basically haven’t had problems with power since we switched. It of course requires that we actually take the time to tilt the panel, and park our van the right way. But in mid-day winter sun, we were able to go from collecting about 120 watts to nearly 300 watts. So it’s not double, but it’s pretty close.
It feels pretty good to get nearly twice as much electricity from the sun (during peak hours) without having to purchase new panels. We simply get the most out of the money that we have already invested in our off-grid solar setup.
And we are excited that even in spring, summer, and fall this will allow us to camp in places with more shade. That means less worrying about cloudy weather and more camping amongst trees. Happy Campers.
What We Like
- Greatly improves solar collection
- No-tool operation
- This solar panel tilt mount is budget-friendly
- Sturdy enough for highway and wind (when it’s in the down position)
What We Don’t Like
- Has to manually be put up and down between uses
- Requires a ladder and some back’n’forth
- Small metal components are hard to handle with cold fingers
- Stilts need to be stored when not in use.
- Must remember to put the panel down for driving
Some Notes For A DIY Solar Panel Tilt Mount
Tilting the panel is a little annoying
The process to tilt the panels requires a ladder and some switching back and forth. First, we climb up one side of the van and pull out the hitch pin. Then we move the ladder to the other side of the van and pull out the hitch pin on that side.
Next, we put the first aluminum tilt support in place. We then secure it by hand tightening the nut and bolt to the solar panel, and then putting the hitch pin back in. Finally, we move the ladder to the other side and repeat those steps for the other aluminum support. The whole process only takes about 2 minutes. But when it’s really cold out it’s tough to have the fine-motor skill needed to assemble all the small metal parts.
Sun collection vs Warmth
Our panel tilts towards the back of the van, which means we need to park with the rear of the van facing south to maximize our sun collection. However, this is the worst orientation for using sunlight to warm our van through the windows. Our van warms up much faster in the morning when the windshield or side windows are facing south. Not something we can necessarily change about our van now, but if someone is in the planning stage, you may choose to have your panel tilt towards the front (or side if you have side windows).
Zinc components corrode over time
Our clevis pins and hitch pins are zinc-plated so they won’t rust, but they do corrode. Technically the corrosion of the outer layer is what protects the metal underneath. But they have definitely lost their shine, and the hitch pins are harder to slide in and out. When we went to the ocean in Texas, heavy corrosion happened almost overnight. We would have sprung for stainless steel, but I don’t think Home Depot carries the pieces we needed in stainless.
Wind can be an issue
When the solar panel is tilted it makes our van shake more in the wind. And anyone who has slept in a van knows that wind can make sleeping really difficult.
And even though the tilt mount has held up in some pretty strong winds (35-40mph), I do still worry about it. So if heavy wind is on the way, I try to remember to put the panel down.
Single Solar Panel vs Array
Since we had a single large panel, the installation of this solar panel tilt mount was relatively easy. If you have an array of smaller panels, we would recommend attaching them all to a roof rack and then tilting the entire rack, rather than making tilt mount for each individual panel.
Conclusion | DIY Solar Panel Tilt Mount
For a simple, budget-friendly solar panel tilt mount, we are thrilled. The bottom line is that it has dramatically improved the amount of solar power we can collect. And since we live 100% off-grid with no other means to charge our batteries (like an alternator charger), we are completely dependent on how much electricity our solar panel can generate. This means more power for laptops, TV, smoothies, and have even been able to run a small electric heater.
And as far as DIY projects go, we were thrilled to have completed the entire project in a single morning. And the total cost was about $50. A reasonable price for such a substantial increase in performance from our $3,000 off-grid solar kit.
I hope you found this information helpful.
If you’re struggling to get enough power, check out these other ways to charge your battery without solar: Vanlife Electrical WITHOUT SOLAR
Help Share ‘DIY Solar Panel Tilt Mount’ On Pinterest


Ultimate Camper Van Hacks To Make Vanlife Easier - tworoamingsouls
Friday 10th of February 2023
[…] one of the best camper van hacks in to tilt our solar panel. Jake came up with a unique DIY way to tilt our solar panel to get in that extra juice! And […]