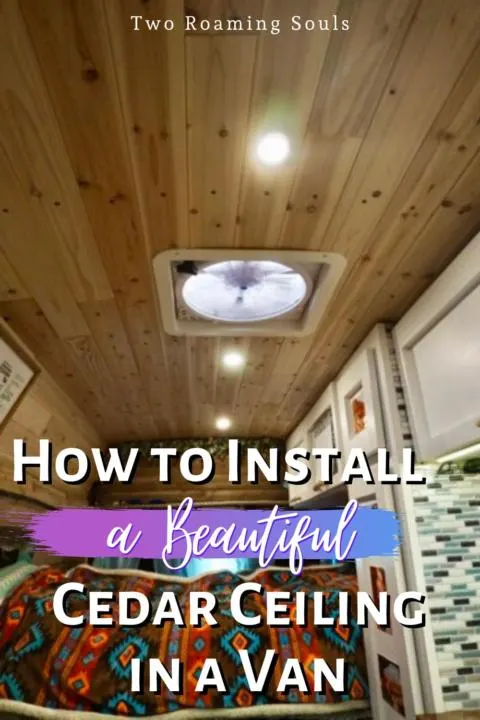
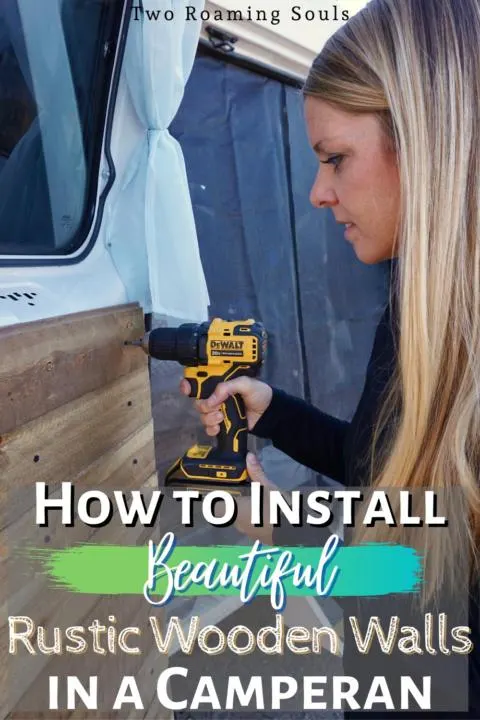
You might have noticed by now that the walls of a campervan aren’t straight. So you have to get creative with the way you install your campervan walls. There are a few different ways you can install a wall in your own DIY campervan, but in this guide we are going to explain how to install rustic wooden plank walls in your campervan.

But first you are going to need some supplies and tools so you can successfully install rustic wooden plank walls in your campervan. Our van build walls are broken into a few different categories: doors, between windows, above the windows, and above the bed. We used a few different techniques to attach the rustic wooden plank walls in each section.
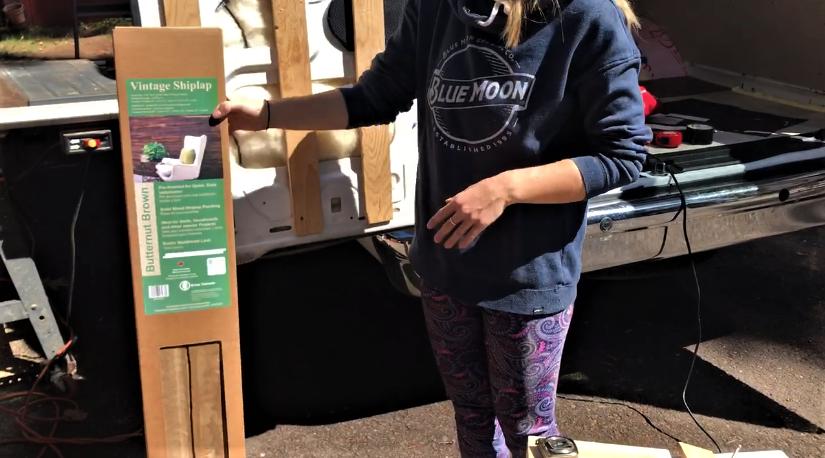
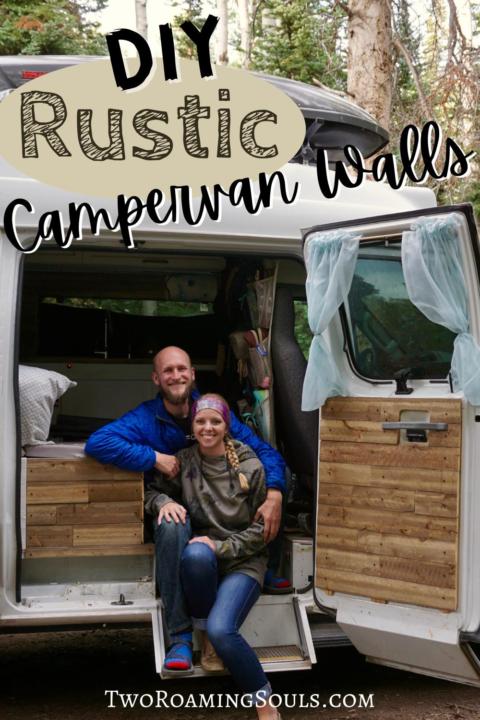
We used shiplap planks, which help the board fit together so that each board overlaps the one below. We also went with black screws to fit with the rustic theme.
This post may contain affiliate links. Disclosure policy.
Supplies:
- Random Lengths Butternut Brown Vintage Shiplap Planks
- Black Decorative Screws: 1/2 inch or 3/4 inch
- Scrap Wood
- Random screw lengths to install scrap wood to campervans metal frame
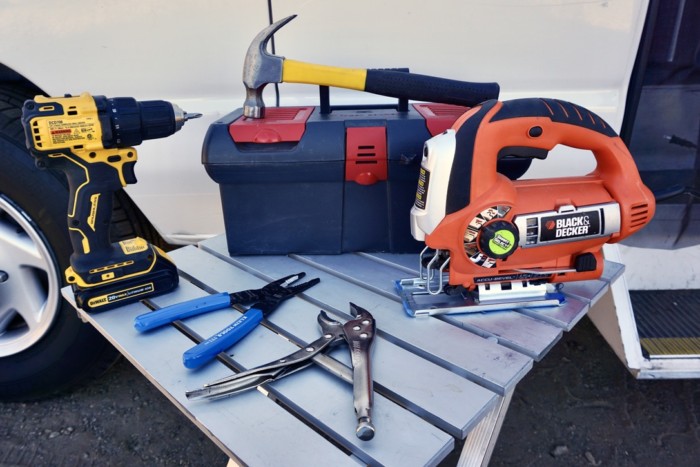
Tools:
- Jigsaw
- Finetooth Jigsaw Blade
- Power Drill (preferably 2 –> Explained later)
- Drill Bits
- Drill Driver Bits
Terms:
Pilot Hole: when you drill a hole before the installation of a screw to prevent wood splitting.
Step 1: Finding scrap wood to Attach To Campervan’s metal frame

The problem with campervan walls is that they are metal and not wood or drywall like most homes. And they usually aren’t flat, so you need to find a way for the walls to sit flat over any weird bumps/ribs that the metal frame of your van might have. For example, we have a big rib where the top of the van meets the fiberglass hightop. So for this section of our rustic wooden plank walls, we had to go around the metal ribs.
The rustic wooden planks are fragile, so if you try to flex them around areas that aren’t flat, they will crack in half. So you have to add in this extra step of adding scrap pieces of wood between each bulge in the metal frame, to make attaching the rustic wooden plank to your campervan wall lie mostly flat.
And not to mention how much time it saves, to only have to pilot hole into the wood scraps. Rather than pilot holing into the metal frame for each screw to hold the wooden planks to the wall (more details below). Therefore, you will need to add scrap wooden pieces to make installation easier and to make the wooden planks sit flat on the wall.
The first thing you will need for this project is some scrap wood. And since you’re probably building out your campervan, you will probably have some wooden scraps you can use from other projects.
Finding the right sized scraps:

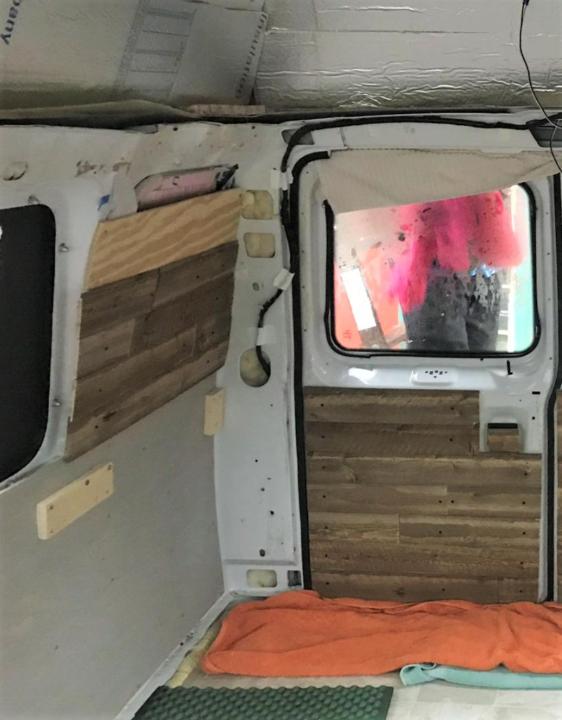
When searching for the wood scraps, you might be wondering what size you should be looking for. We used leftover ¼ inch plywood we had leftover from our flooring, for our doors, above the bed & between the windows. Which was basically the areas that were mostly “flatter” with no weird curves or ribs.
But for sections that have thick ribs, which is the sections above the windows (pictured above) where the old metal frame meets our fiberglass hightop, we had to use 1 inch thick scraps. This part is kind of trial and error, because not all vans are the same. Find which scraps will work best for the section of wall you are installing. In some places we just installed a few blocks or strips of wood, and in others we just attached ¼ inch plywood over the whole area.
Step 2: Attaching Wooden Scraps To Campervan’s Metal Frame:
Once you found the right sized wooden scraps, it’s time to attach them to the metal frame.
The Doors:

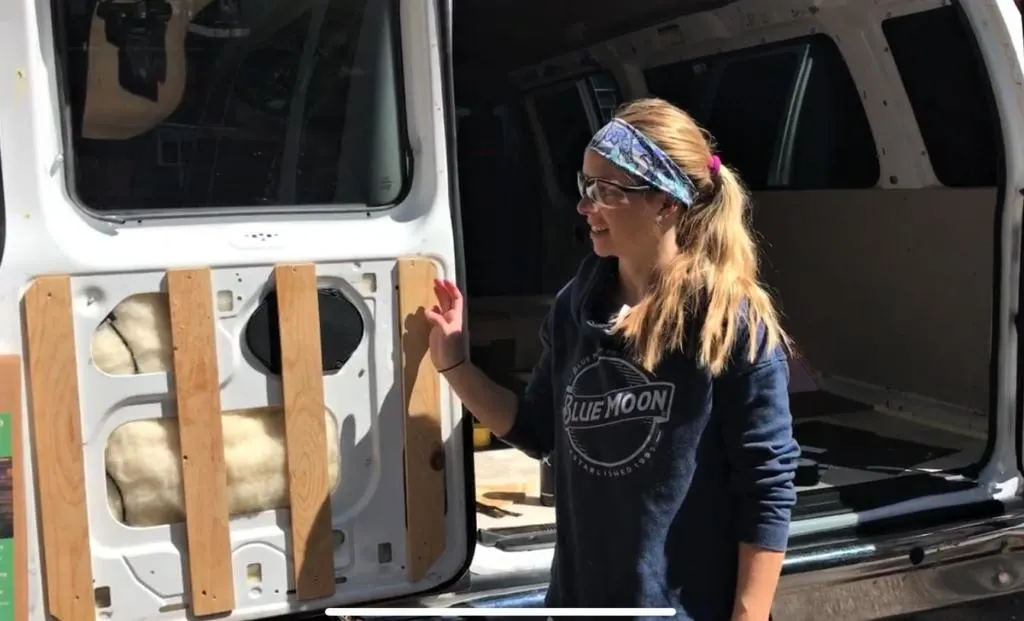
Like mentioned above, for the doors we used scraps from our ¼ inch plywood. We cut the scraps into long strips the size of our door frame. Attaching the wood scraps to the metal can be a challenge. If you don’t have self-drilling screws, then you should pilot hole through the metal before attaching the wooden scraps. And if you have soft insulation then you may need to be careful not to catch it on the drill bit.
Finding The Right Size Pilot Hole
To find the right drill bit, you can use this Pilot Hole Chart, or just eyeball it (like us).
To “eye-ball” it hold up the drill bit to the size of the screw you plan to use. The drill bit and the screw shaft (imagine the screw without threads) should look around the same size. Once you think you found a match, then try out the match on a scrap piece of wood.
Drill into a scrap wood block, and see if the screw fits into the hole to make a tight fit. You should still have to drill the screw in, but it should go in pretty easily. If it works then you found the right drill bit, if it is too big or too loose, go a size up or down in your drill bit. If you are looking for a large assortment of drill bits, check out this assortment package.
Attaching The Wooden Scrap To Campervans Metal Frame
Once you find the right drill bit size, then drill your first hole into the metal frame. You should spin the drill slowly but with firm pressure. If you drill fast, you wont actually get through the metal faster and the extra friction will dull your bits. Also, be sure you are only adding pressure from behind. If you accidentally add pressure to the drill bit from up, down, left or right, you might break the drill bit in half.
It doesn’t exactly matter where you drill your pilot hole into the metal frame, just make sure you have enough space to attach the rustic wooden piece over it without hitting the screw you are going to attach it to. But, also be sure there are no important wires or mechanics behind the metal frame.
Do this to the top and bottom of the door’s metal frame and the also to the wooden scrap. We used 4 scraps on the door frame, so we had 4 different spots to attach the rustic wooden planks at random lengths.
Especially with attaching the first few, take your time. The wooden scraps can flex if the metal frame isn’t completely straight, so be sure to account for a little flex. Which can sometimes make the holes on the wooden scrap you pilot hole move up or down a bit when securing it to the metal frame.
Note: If you do find that your pilot holes don’t line up perfectly, you can always drill a bit bigger hole in the wooden scrap. Just make sure the whole doesn’t exceed the size of the screw head. Or you can drill a different hole into the metal frame and redo the hole in the wooden scrap. But make sure the wooden scrap is held secure to the metal frame, because you will be adding additional weight.
Walls Between The Windows:
The walls between the windows are very similar. Just like the doors, we cut long strips of ¼ inch plywood that was the length of the section. Although, this part of the wall did have some curve, so make sure to allow for flex when you pilot hole the metal and wooden scrap. It’s helpful to have a second pair of hands to help hold the flexed position while you drill.
Above The Window Walls:
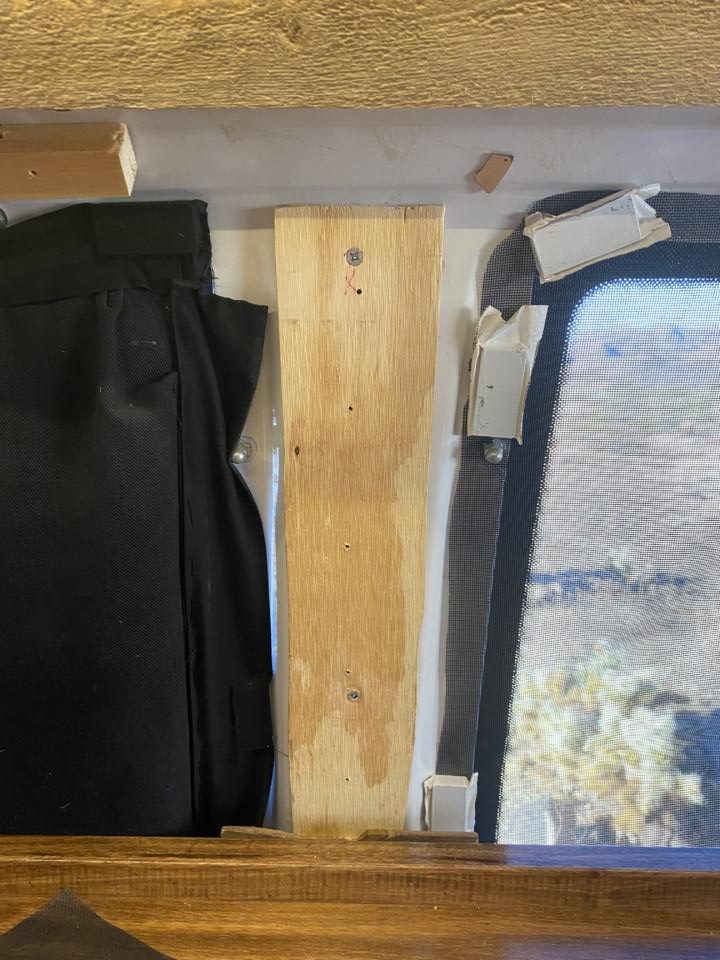
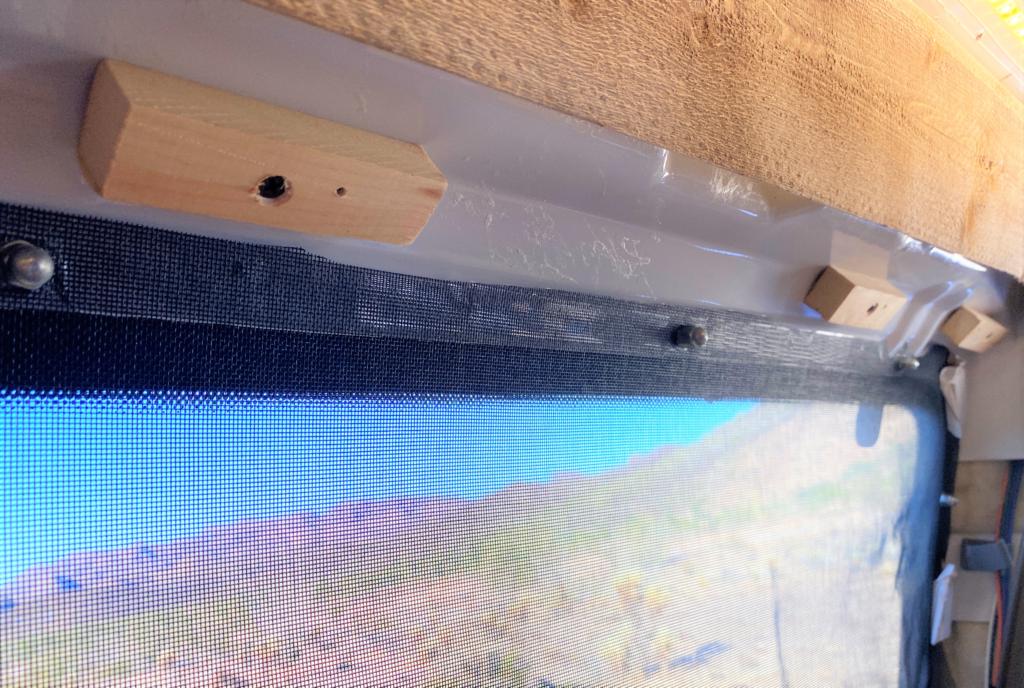
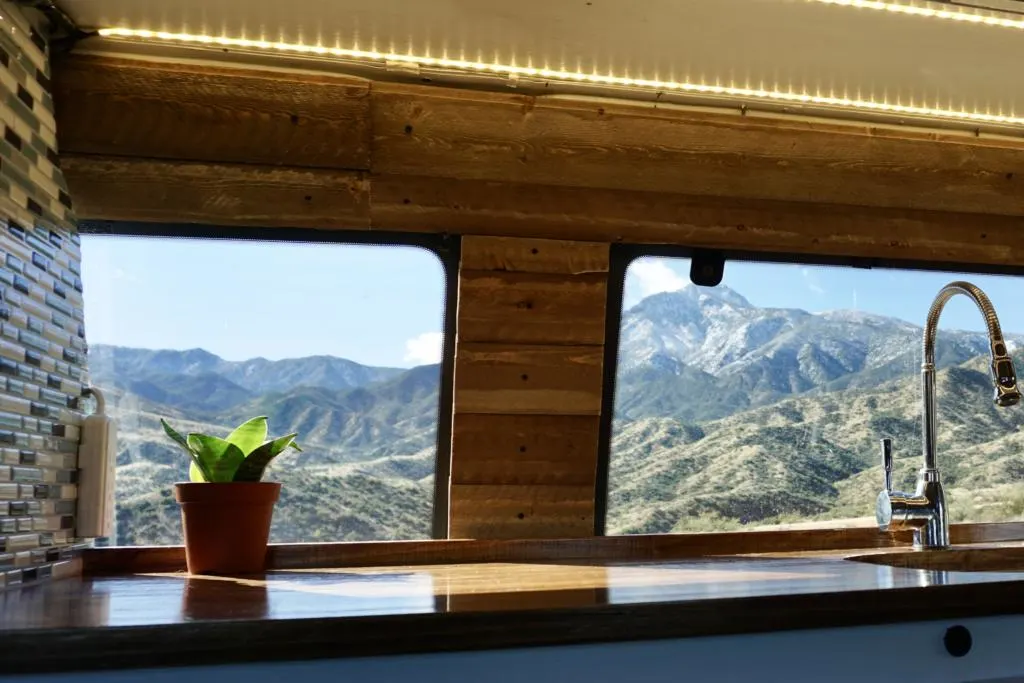
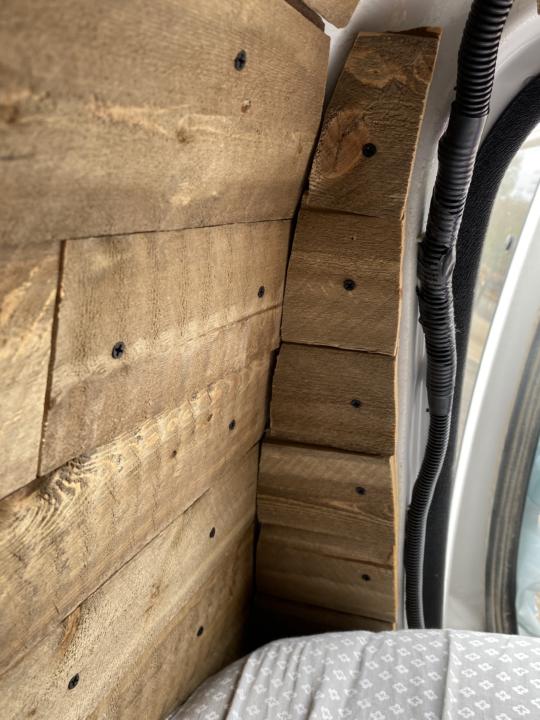
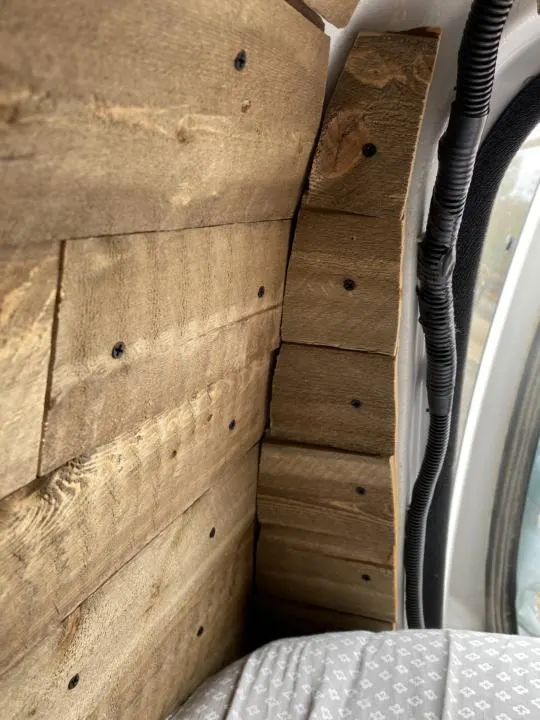
The next step got a little harder in our campervan because we have windows that surround our van and an after-market fiberglass hightop roof. So there was metal framing around each window that was not flat and bulges out quite a bit. So we had to go around the window by adding small blocks of wood scraps to attach the rustic wooden planks to the campervan wall.
For example, above our kitchen window (pictured above) we had to use 1 inch blocks, so that the rustic wooden planks would fit over the metal framing that was sticking out. But this large gap turned out to be a blessing, because it allows us to use attach window covers with magnets to the metal frame. If it fit perfectly, then we wouldn’t have access to the metal for our magnets.
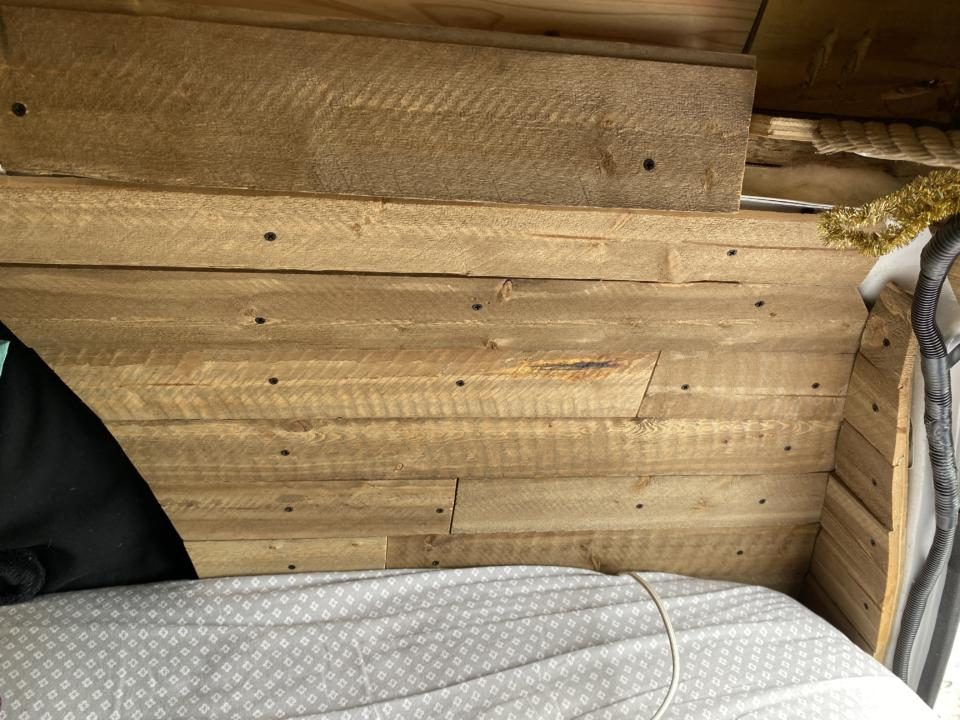
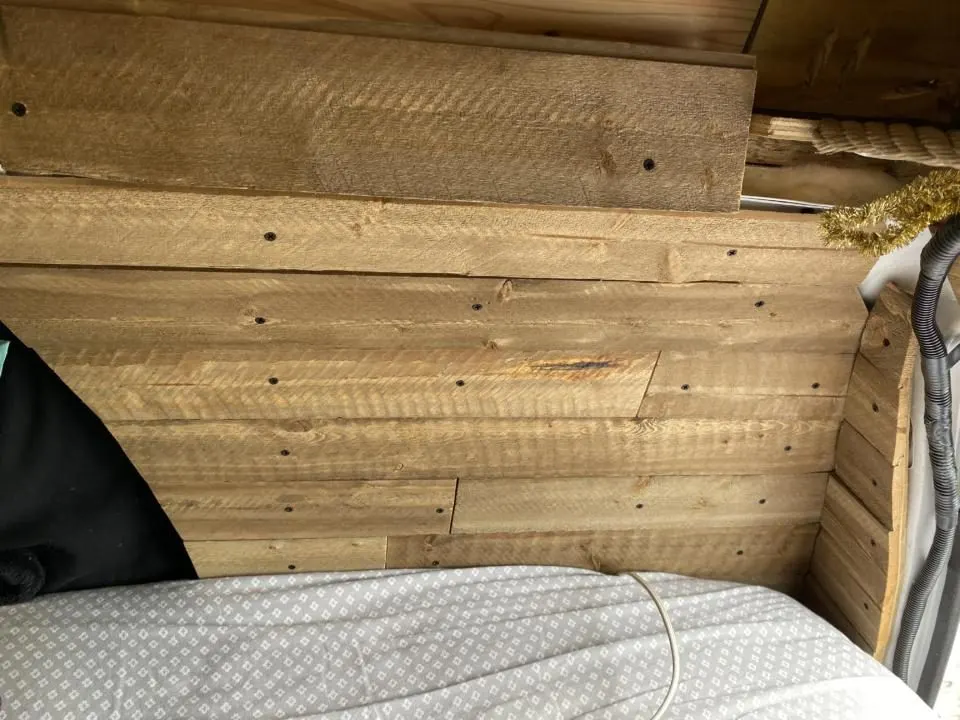
Bed Walls:
The last section we did was covering the walls above our bed. We also went with the ¼ in plywood, but there weren’t enough places to attach just strips, because there would be too much flex in the wood if we attached it at the top and bottom of the wall.
So, we cut out full size plywood patterns that were the size of the area. That way we could securely attach the scrap plywood on both sides. This also made attaching the random length pieces easy because you had plenty of surface area.
Step 3: Cutting The Rustic Wooden Planks

The packages of Rustic Wooden Shiplap Planks we purchased come at random lengths. But you still need to cut many pieces to the the (often shorter) sections of a campervan’s walls.
Begin by sorting the pieces of wood into different sections. The full length pieces will most likely need to be cut into multiple pieces. And the smaller ones might be a great size for starting the beginning random length pieces of your campervan walls.
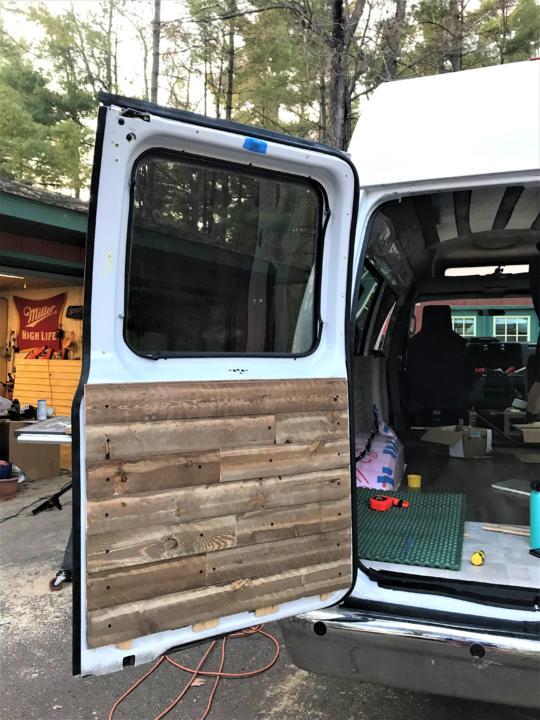
We first started with the doors since it was the flattest section in our campervan build. And essentially we are making a square with the rustic wooden planks. So measure the length of the door and go a little smaller, because you don’t want the wood pieces to get in the way when you close the doors.
Once you find the right length for the width of the door, then cut one piece the full width of the door (like our top plank in the picture above). Then you can use that piece as the “template” to match lengths with all rows below. We wanted our rustic wooden planks to be all different lengths, so seams wouldn’t be all in a line.
This begins a bit of trial and error. Choose a random length plank and measure it to the length of the first “template” plank. Then find a second piece that might be a good match to complete the row. The goal is to minimize wasted scraps. So the best strategy is to find pieces that are way too long or just barely too long. If they are barely longer, then when you cut it to size, the resulting scrap will be tiny and not much wood is wasted. If the piece is much too long, then the resulting “scrap” will be a long piece that you can easily use in another section.
Note: Try to have at least two points of attachment for each rustic wooden plank. That is, they need to be at least long enough to cover two of the plywood backing strips. We tried really hard to minimize short pieces with only one screw, because they are prone to sag or wiggle.
How To Cut The Rustic Wooden Planks:
This is where it is important to have a fine-tooth blade for the jigsaw. The pieces of rustic wooden planks are fragile, so if you use too coarse of a blade, the cut won’t be smooth and might split pieces off at the edges exposing the raw wood.
Trace where you want to cut the rustic wooden plank on the backside, so the pencil/pen marks doesn’t accidentally show through on the front side. The best tool to make your lines is a speed square because they make perfect 90 degree lines.
It’s good to cut the planks over the edge of a workbench and use clamps to hold them steady.
Once you have the right length of pieces, it is time to install your rustic wooden plank walls in your campervan! (More details in step 4).
Finding The Right Length For The Remaining Areas:

Between Windows: Finding the right length between the windows was very easy. We just measured the length between the two windows and cut each piece to the same length.
Above Windows: We used the full-length pieces above the windows because we didn’t have as many places to install the wood scraps into the metal frame. Which made it harder to make them random lengths. But overall we are happy with the look.
More details about installing the rustic wooden plank walls above the bed in Step 5.
Step 4: How To Install rustic wooden plank walls in your campervan


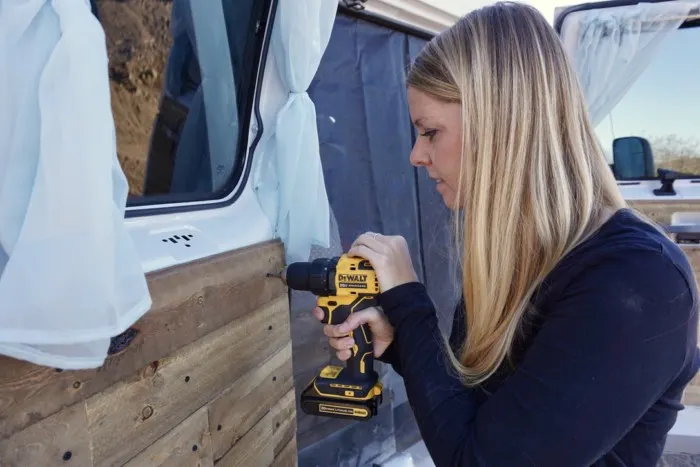
Now that you found the right length pieces to add to your campervan wall, it is time to install the rustic wooden planks. Like mentioned above, the pieces of wood are fragile, so if you just drill into the wood, you might crack it in half. So we had to pilot hole into the rustic wooden planks first before attaching it to the wood scraps.
This is where it is super convenient to have two power drills, so you don’t have to keep switching back and forth between the drill bit and screw driver bit. And it also helps to have a helper hold the planks in place while you drill the pilot hole through the plank and the wooden backer at the same time.
Step 5: Shaping the rustic wooden planks to fit in round areas
Our bedroom wall was rounded at the back (like most vans). And we also had to shape the wall around our window too. So instead of having a rectangular piece that we could attach to the wooden scraps, we had to curve each end to fit perfectly.
To find the right angle to cut for each piece, cut out a pattern of the wall first. We just taped pieces of paper together and cut out a template of the shape we needed to match.
Now match each wooden piece to the pattern, so you know what angle to cut for each wood piece. We also labeled the pieces on the back so they didn’t get mixed up as we were cutting them.
Step 6: What to do with the unfinished sections?

Adding a wall to your van might not look as glamorous as if you were to attach them to a wall in your home. You might have a few undesirable gaps that still show some metal. So there are a few ideas that you can do to make the unfinished areas look “finished”.
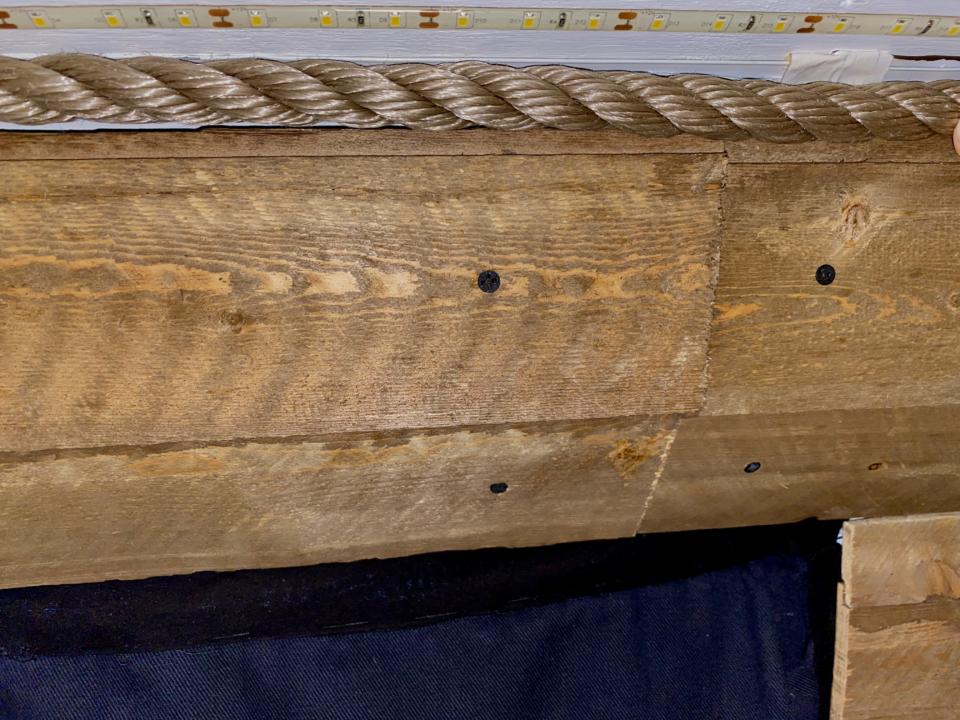
If you are using the rustic wooden shiplap planks we did, then I’m assuming you are also going with a rustic theme in your campervan. So adding a rustic rope to the edges can really tie in the whole theme.

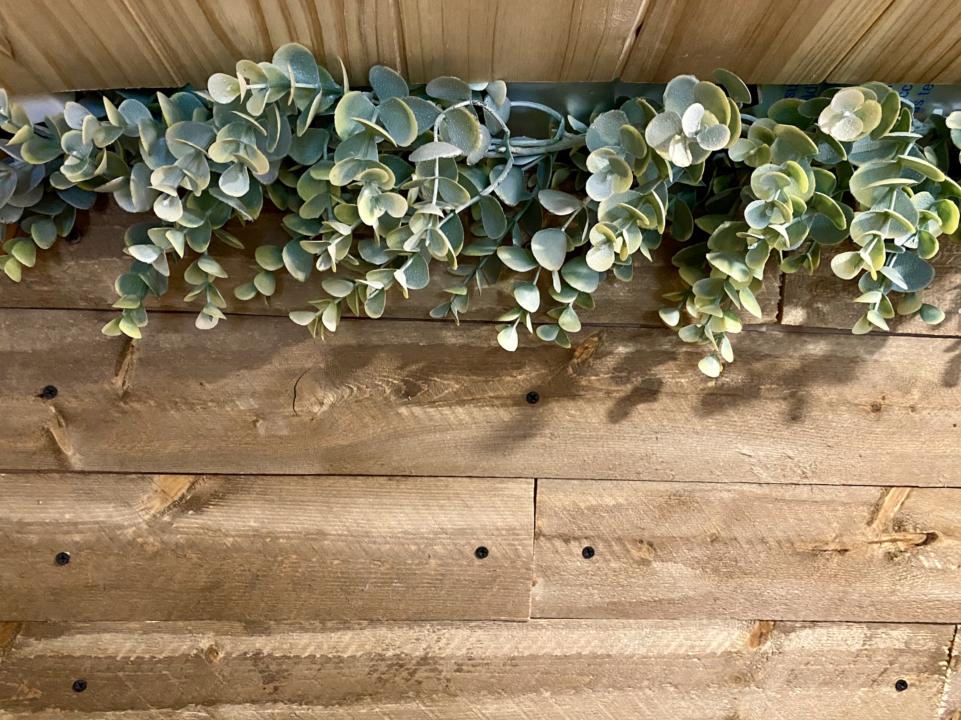
Or another great idea is adding fake plants (or real) to those unfinished areas.
If you want to stick with the Rustic theme Check out our other posts:


Takeaway | How To Install Rustic Wooden Plank Walls In Your Campervan

We love the look of our rustic wooden planks in our campervan. As they can be a hassle to install, the extra work was worth it. It makes our campervan feel more like a cozy home. You can simply follow this tutorial with other wood planks than the ones we used. The steps should be relatively similar. We hope this step by step guide on how to install rustic wooden plank walls in your campervan is helpful!
Save This Post For Later


How To Budget For Vanlife | Van Conversion & Monthly Budget - tworoamingsouls
Sunday 21st of May 2023
[…] that you need to purchase for your van build. This probably includes things like solar, flooring, lumber, fridge, bed, etc. You can use these numbers to get a rough estimate for the total price of your […]
Van Conversion Build Order | Step By Step Guide - tworoamingsouls
Friday 15th of October 2021
[…] This guide explains how we installed rustic wooden walls in our campervan. […]
How To Install Vinyl Flooring In A Campervan - tworoamingsouls
Tuesday 26th of January 2021
[…] […]