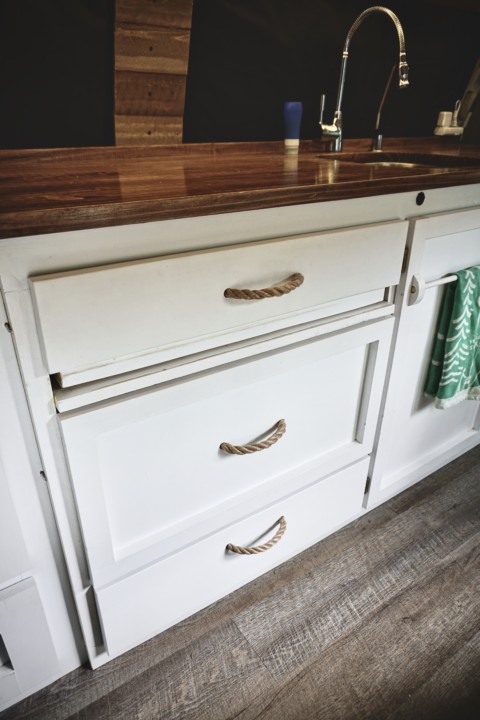
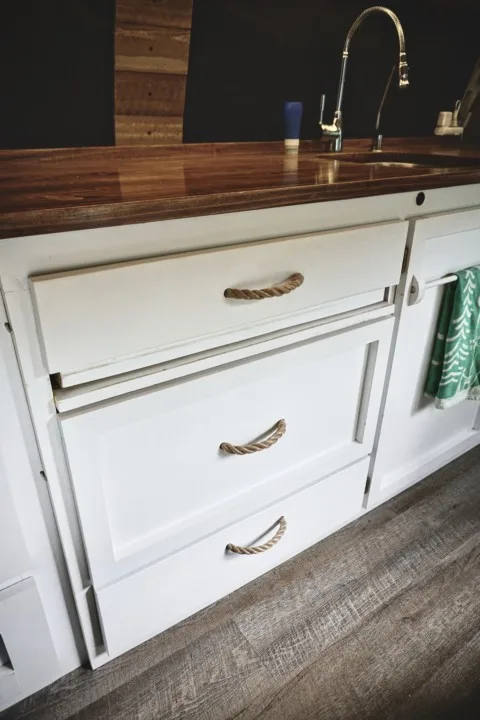
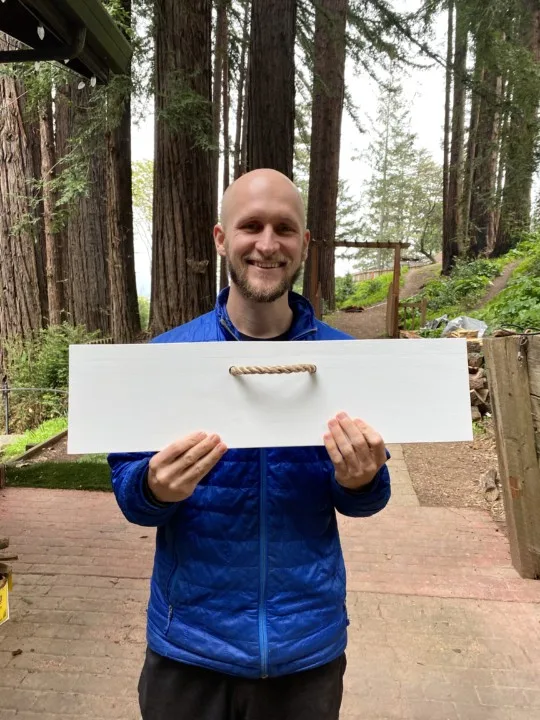
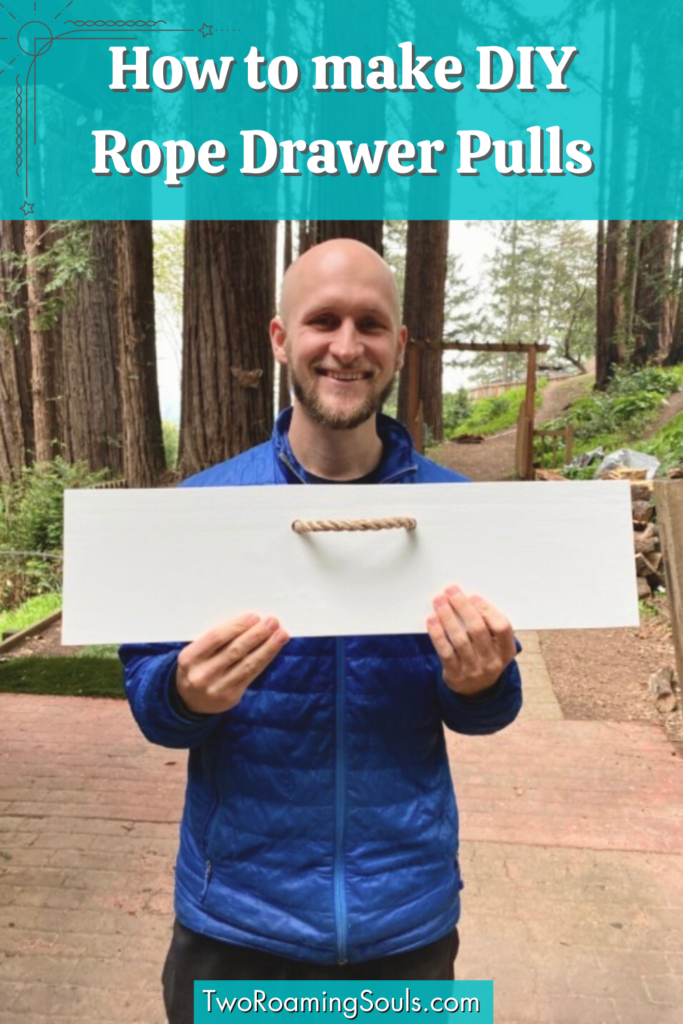
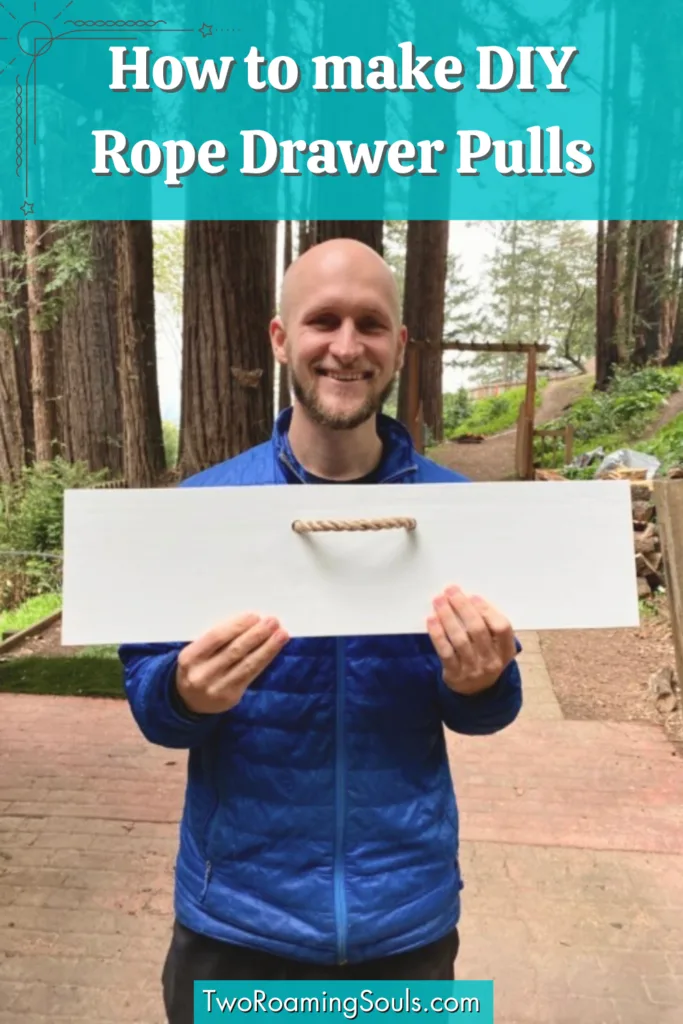
This instructable shows you how to make DIY Rope Drawer Handles. Making DIY rope drawer handles can add a charming and unique aesthetic to any living space. They can be used for dresser drawers, kitchen drawers, cabinet faces, and more!
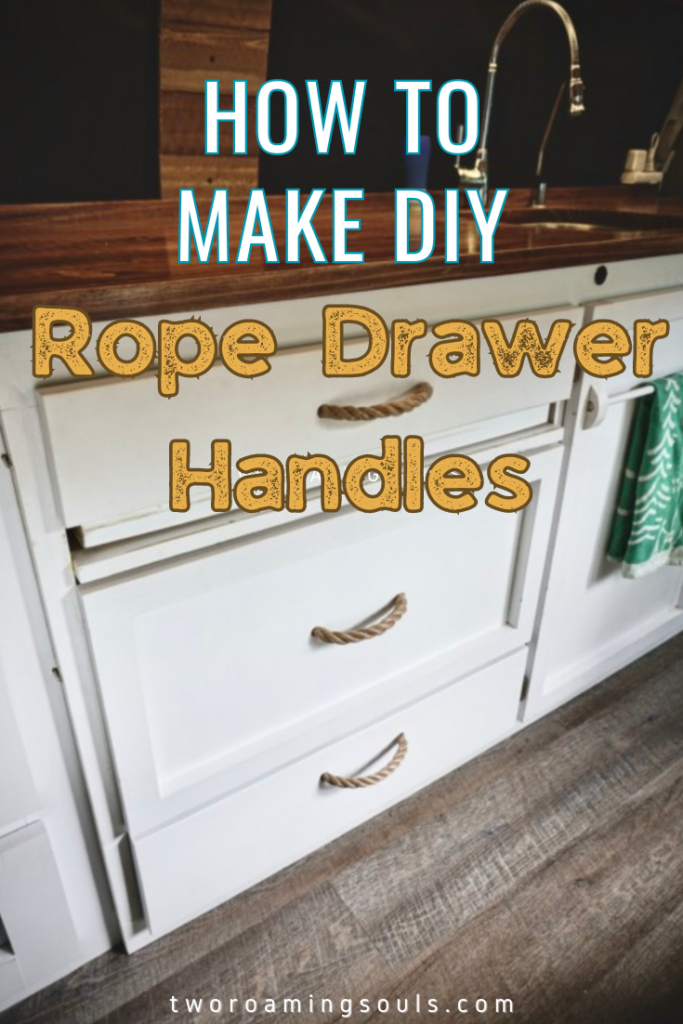
We made these custom rope pulls for our campervan to match the rustic, cozy vibe. They really complement the wood on our walls and ceiling.
The installation is easy and can even save you money over traditional handles. Each rope handle costs less than a dollar!
In a small space like a campervan, it’s nice to have soft handles that won’t snag your clothes or hurt you if you hit one by accident. But despite their “softness”, they are still very strong. Our pots & pans drawer weighs over 50lbs, and the rope handles it no problem. (pun intended)

I chose brown polypropylene rope because it mimics the decorative qualities of natural fiber rope, but has the physicals properties that make synthetic ropes so popular. It’s inexpensive, widely-available, water resistant, and wont change appearance overtime.
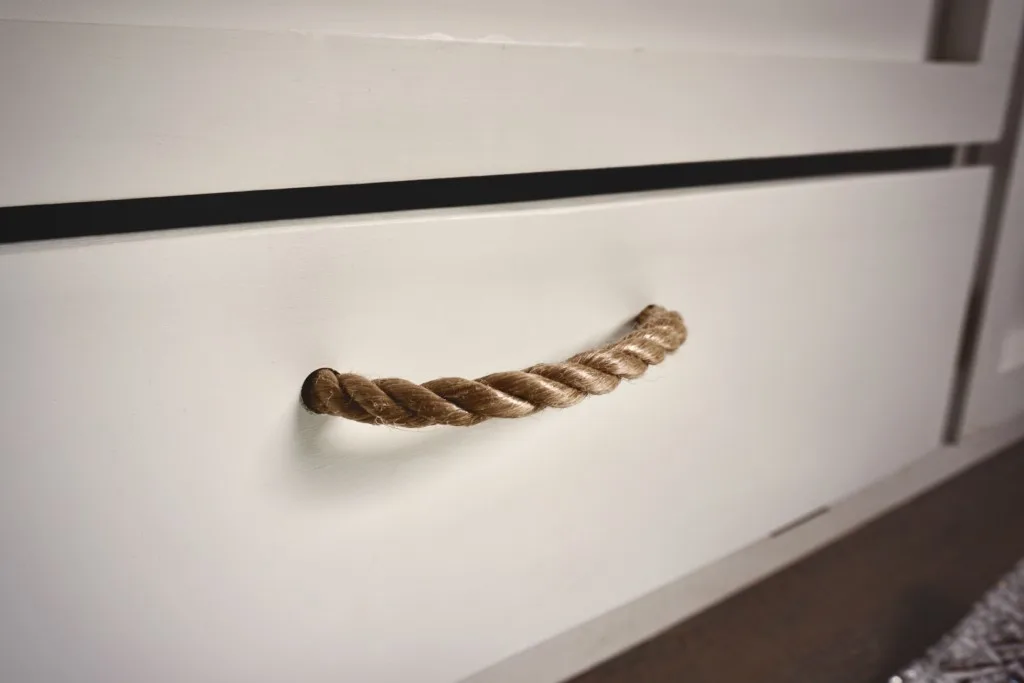
My design is superior because the rope ends will never fray. The front of the drawer face looks clean. And the handles lay flush with the inside of your drawer face, so they don’t take up any space inside your drawer.
Here’s what you need…
This post may contain affiliate links. Disclosure policy.
Tools & Supplies
♦ ½” Polypropylene Rope, Brown ( ≈ 8 inches per handle)
♦ Synthetic String (Nylon, Poly, etc)
♦ Painters Tape
♦ Pencil & Eraser
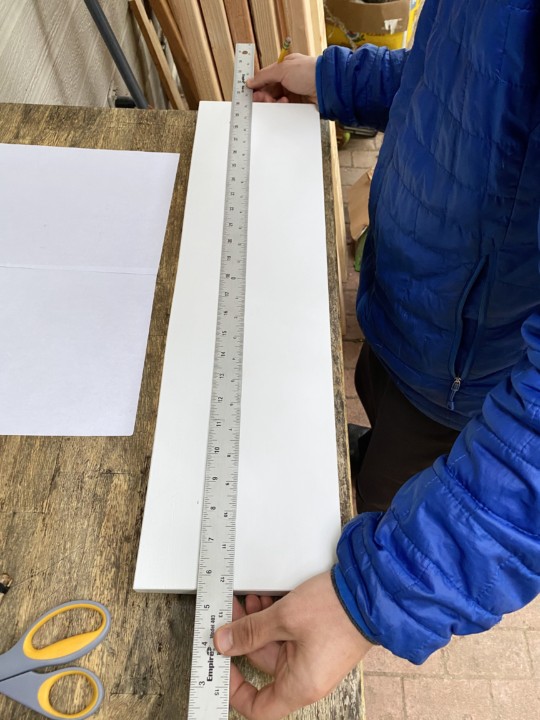
♦ Tape Measure or Long Ruler
♦ Scissors
♦ Power Drill – Shop: Home Depot | Amazon
♦ Spade Drill Bits (½” & ⅝”) – Shop: Home Depot | Amazon
♦ Small flat piece of scrap metal
♦ Spare scrap wooden board
Where To Source The Rope
The specific product that we used is sold by the foot at ACE Hardware. They sell it online but only in 50ft increments. Or a similar product is available at The Home Depot, but only in 5/8″ diameter which could be used by slightly tweaking these instructions. The 5/8ths rope is available “by the foot” for online purchases.
You can substitute any synthetic fiber rope (polypropylene, polyester, nylon).
The key is that synthetic ropes are made of plastic and can be melted. This is important to copy the method I use for finishing the ends of the DIY rope handles.
If you try to use natural fiber ropes (manila, sisal, hemp, etc.) they will just burn instead of melting.
A comfortable thickness for your rope handles is between ½” and ¾”.
This tutorial is specifically designed for ½” thick rope and ¾” thick drawer faces. (see instructions at the end for modifying for other materials)
Warning!
Complete this task outside or with plenty of ventilation. We are going to melt the ends of the plastic rope and string, creating harmful fumes. Also, the hot plastic can burn skin, so be careful not to touch it until it cools.
Assembly: DIY Rope Drawer Handles
Section 1: Prepping the Rope Handles
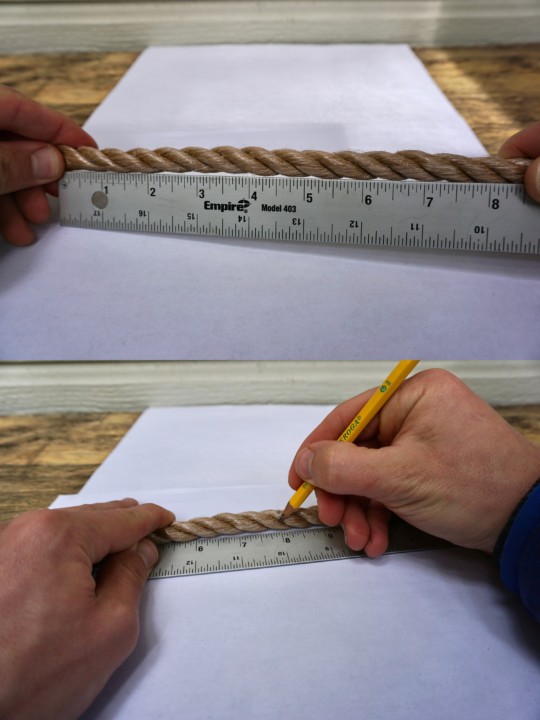
Step 1:
Measure and cut 8 inches of brown poly rope for each handle using the scissors.
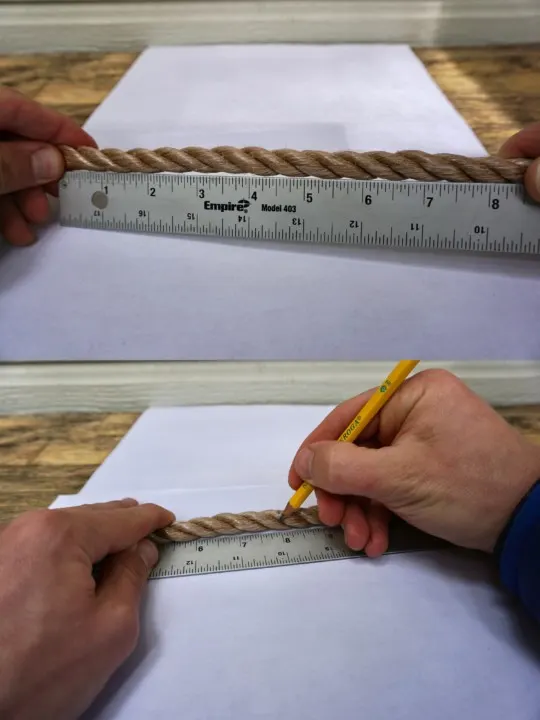


Step 2:
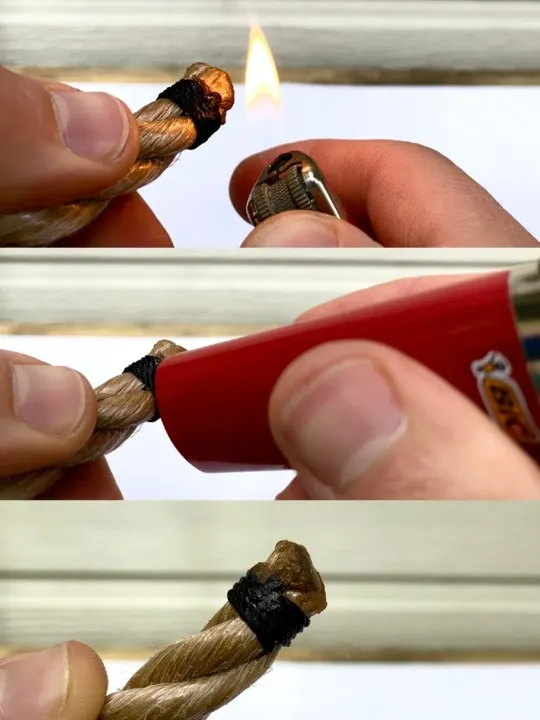
Lightly melt the cut ends of the rope with the lighter. Don’t over-do it, or deform the rope too much.
This is just to keep the rope from fraying. (We will properly finish off the ends later).
I prefer to hold the lighter to the side of the rope rather than directly underneath because it makes it easier to control the heat, and easier to see what you’re doing.
Step 3:
Then using the string, we are going to do a simple rope whipping technique to prevent the ends from fraying over time. Untwist the rope slightly towards one end to separate the individual strands, and stick the end of the string through in between the strands.

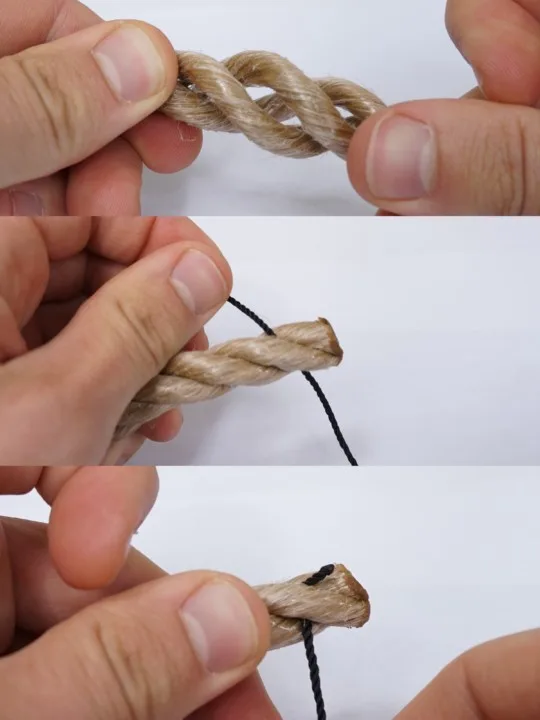
Step 4:
Release the rope so that the strands clench around the string end about ½” from the end of the rope. Leave the end on the string pointing towards the end of the rope.
Step 5:
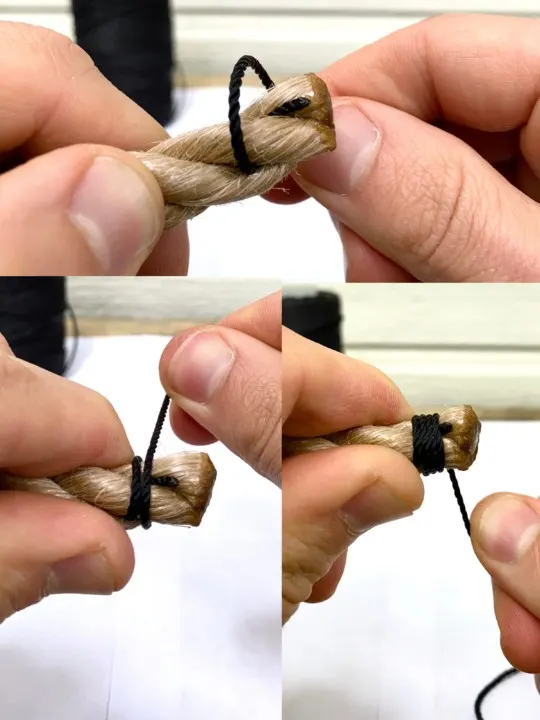
Now tightly wrap the string around the end of the rope 4 times. This should clench down the rope strands so that they hold the string tightly without pulling out. Then cut the string so that there’s about 3 inches hanging loose.

Step 6:
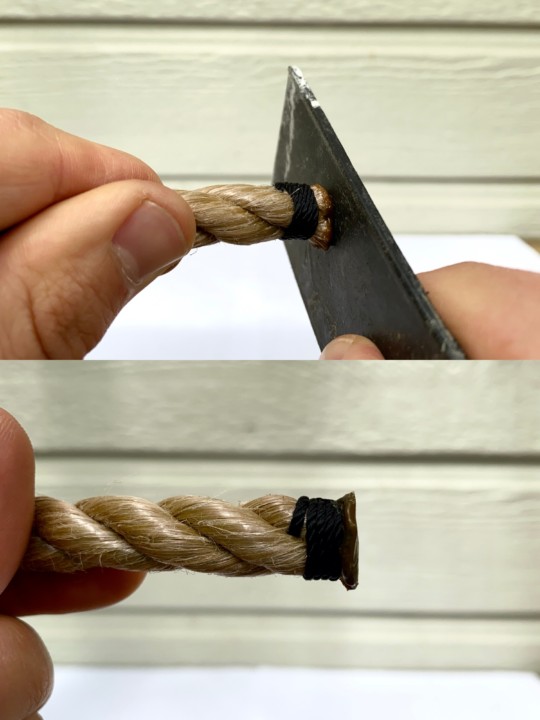
Finish off the string by doing a single “overhand knot”. Heat up the end of the string and then use the butt end of the lighter to press it onto itself.
You may need to repeat a couple of times to really melt the layers of the string together. But don’t melt it so far that the string falls apart.
(When you are finished there should be about ¼” of rope exposed beyond the string.)

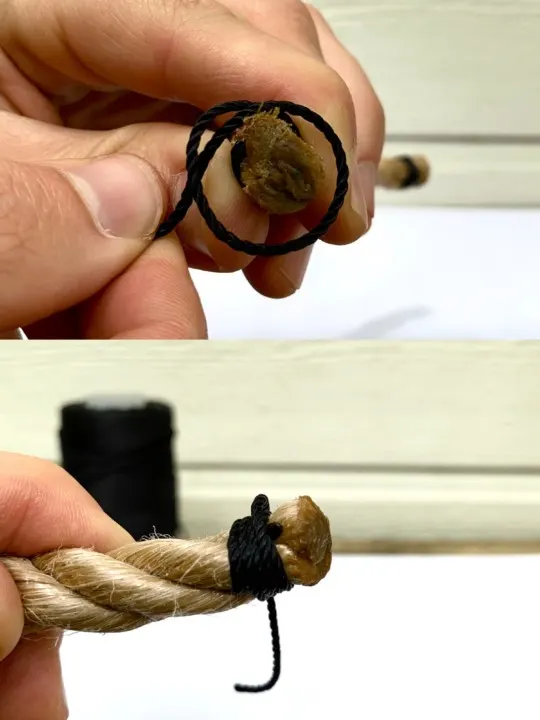

(Repeat steps 3-6 for the other end of the rope)
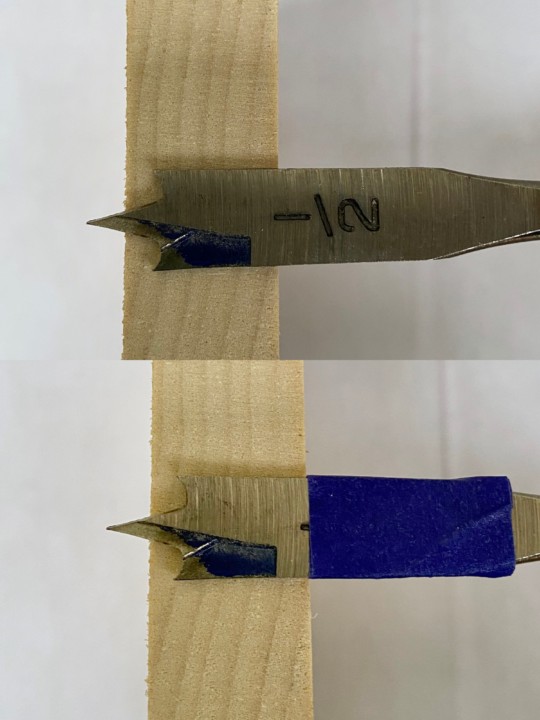
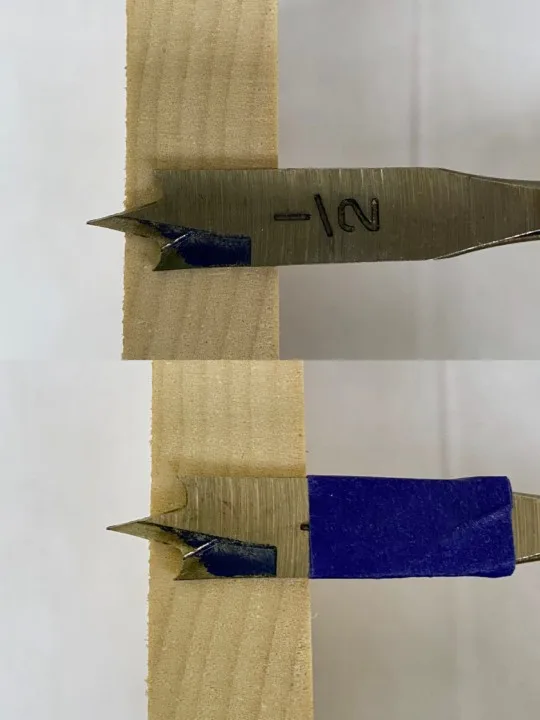
Step 7:
Take the rope handle and heat up one end until it begins to melt (just before it catches fire). Then press it perpendicularly against the small piece of flat metal. The goal is to flatten the end so that it forms a solid “butt-end” that’s wider than the thickness of the rope.
Do NOT do this to both ends yet (just one side) otherwise you wont be able to feed the rope handle through the drawer face.
Repeat Steps 1-7 for as many handles as you need.

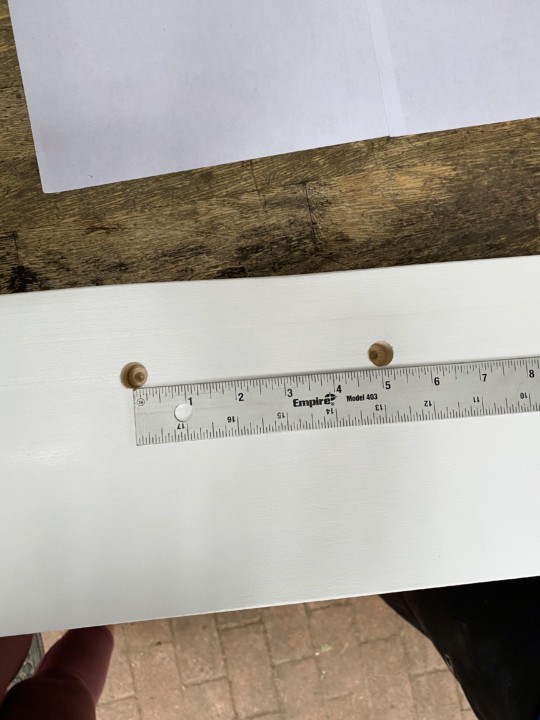
Section 2: Measure The Handle Placement
In this section, we are going to measure where to make the holes for the handle.
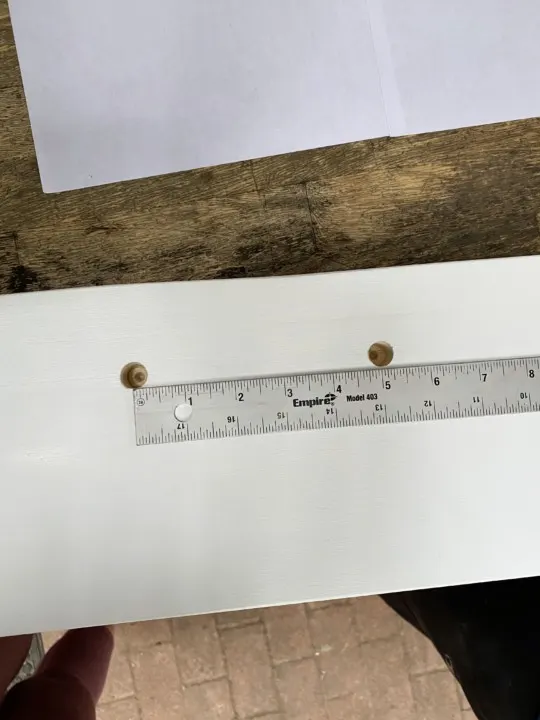
Two holes, 5 inches apart, is a good comfortable distance. It’s most common to place the handle right in the center of the drawer face, or in the top half. But it’s a matter of preference.
Step 1:
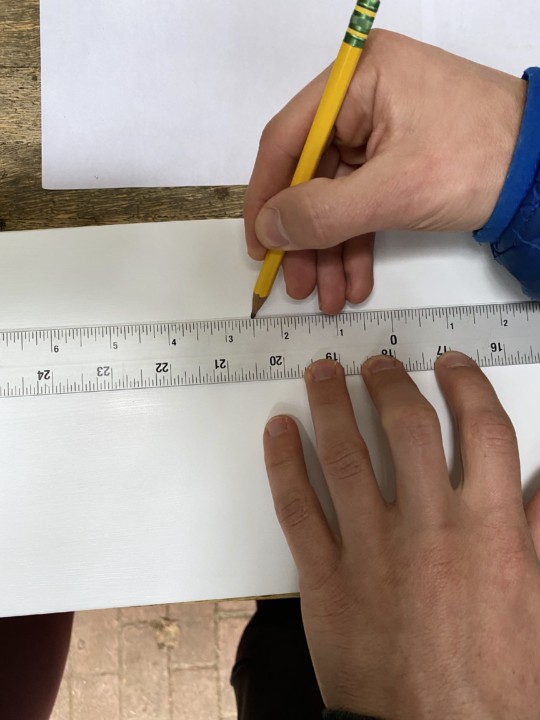
Once you’ve decided the height to place your handle, make a light pencil mark on the left and the right side of the drawer face at that height. In my case, the handle will be 1 ¾” from the top of the drawer face.


Step 2:
Line up the ruler (or tape measure) along both pencil marks. (It will be a horizontal line at the height you chose.)

Step 3:
Next, measure the total width of your drawer face and divide by 2. (This gives you the center point)
Step 4:
Make a pencil mark at 2 ½” left and 2 ½” right of the center point. Then erase the two pencil marks from Step 1.


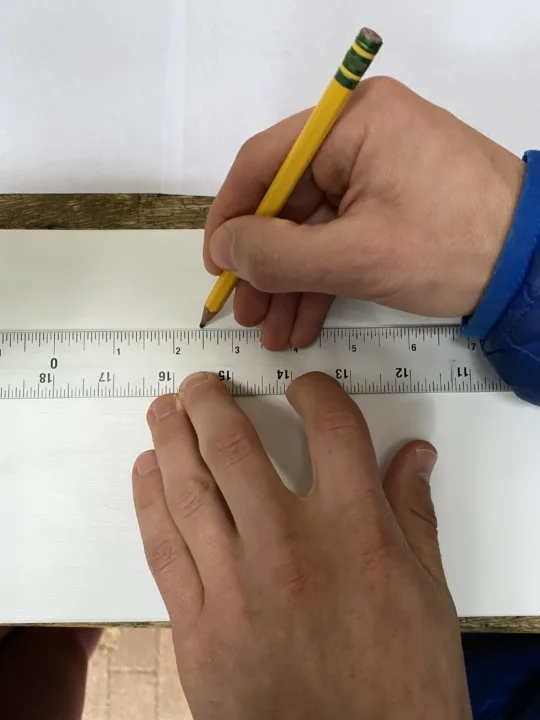
You now have two points (5 inches apart) for drilling holes for the DIY rope drawer handle.
Repeat Steps 1-4 for as many drawer faces as you have.
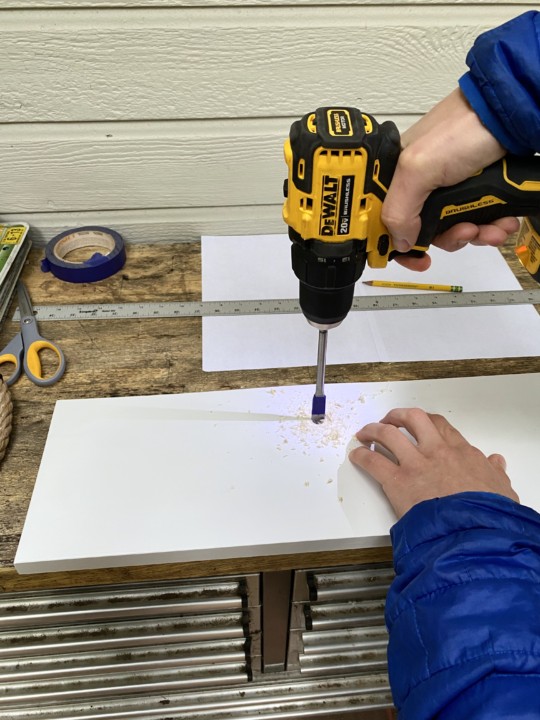
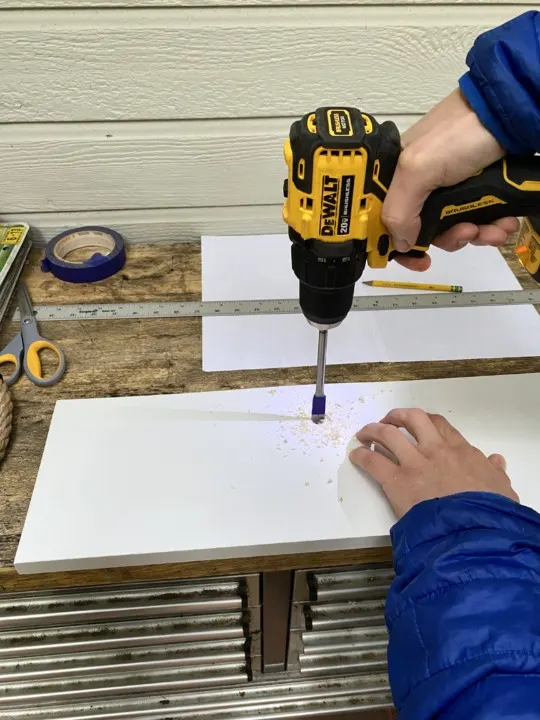
Section 3: Drilling Holes
It’s a good idea to test these next steps on a scrap piece of wood that’s the same thickness as your drawer faces.
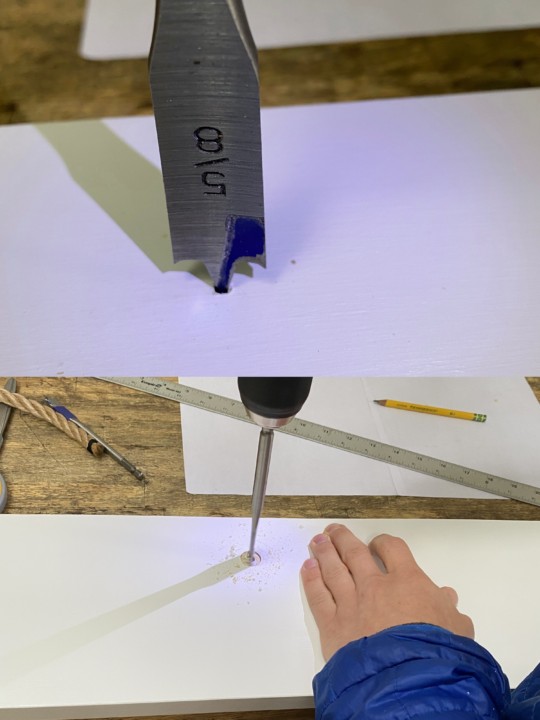
Step 1:
Place your spare piece of wood flush behind your drawer face. This will act as a backer to prevent “tear-out” and also to protect your work surface from holes. (If your drawer face has already been mounted, you can attach the spare wood backer using clamps)
Step 2:
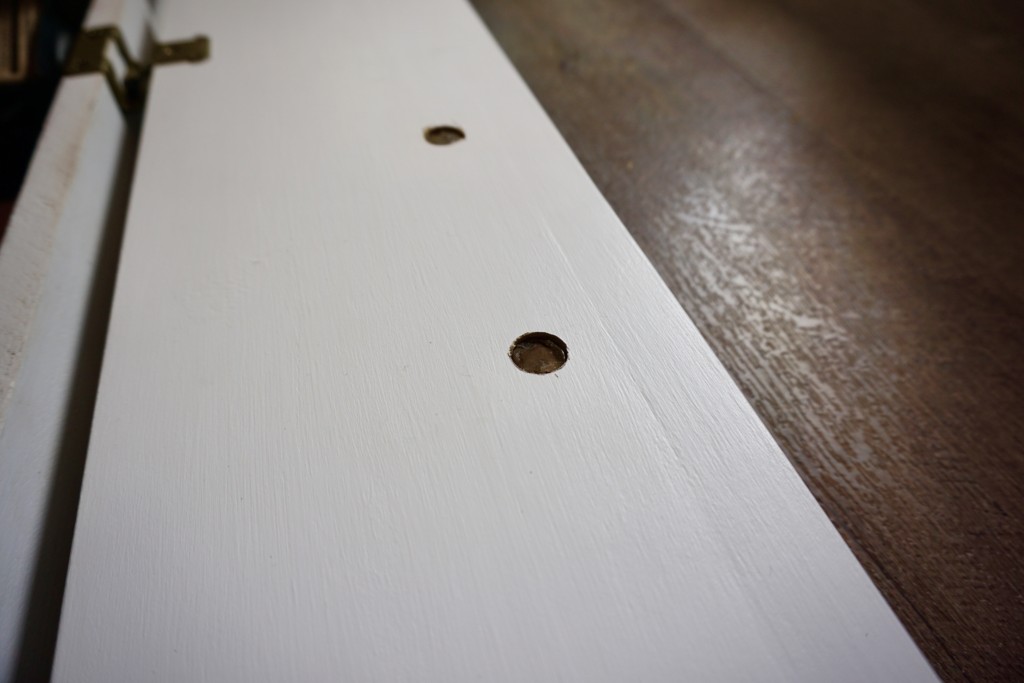
Hold your ½” spade bit up to the edge of your drawer face. Line up the bit so that the point barely extends past the edge of the drawer face, but the paddle section does not. Then place a piece of tape around the “paddle” where it lines up with the drawer face edge.
The goal here is to find a depth to drill into the drawer face where just the pointy center pokes through the other side. But not so deep that the paddle section drills all the way through.
Step 3:
Using the ½“ spade bit, drill a hole on each of the pencil marks from the previous section. (This should be the front face of your drawer face).
(IMPORTANT! Don’t drill all the way through, only up to the tape from the previous step.
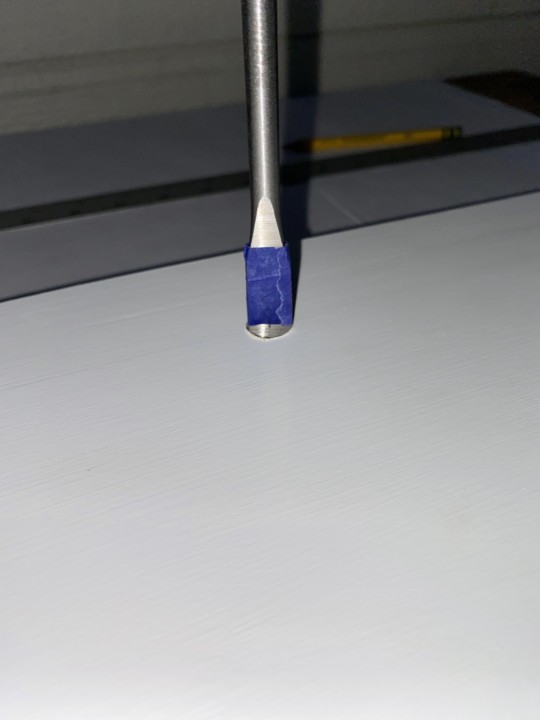
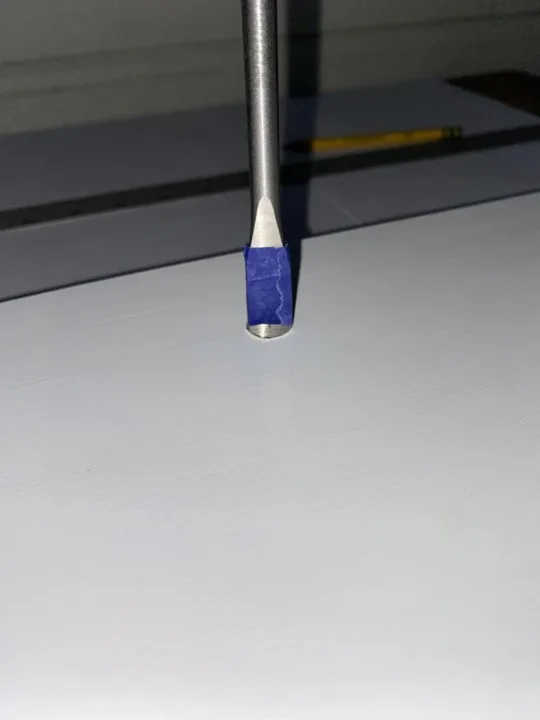
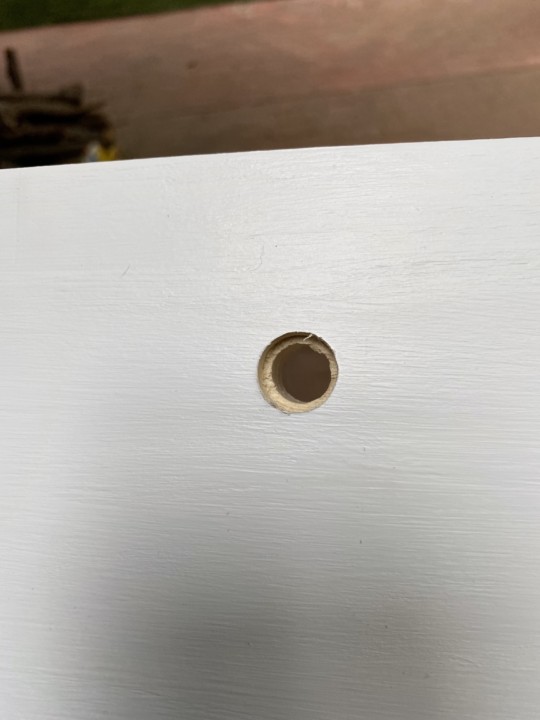
Step 4:
Remove the spare wood backer and inspect the holes. There should only be two small holes on the backside of the drawer face (from the tip of the spade bit). These little holes allow you to easily line up the drill bit for the next step.
Step 5:
Flip the drawer face over and line up the point of the ⅝” bit into the small hole left by the ½” drill bit. This ensures that your ⅝” hole will be aligned with the same centerpoint. Then drill with the ⅝” spade drill bit until you meet the ½” hole left by step 3.

If your drill isn’t spinning fast enough the bit has the tendency to “jump” out of the hole. The best technique is to run the drill near full speed, but provide strong, slow, and controlled pressure downward.
The ⅝” bit creates a recessed area for the flat “stopper” end of the rope handle to sit flush in the drawer face.
Repeat steps 1-5 to create the second hole for your DIY rope handle

Section 4: Finishing The Rope Handle
Step 1:
Take the DIY rope drawer handle you prepared in the first section and feed the “skinny” end through both holes on the drawer face, starting and ending on the backside.


Step 2:
The end of the rope that is already melted flat should act as a stopper and prevent the rope from pulling through the hole completely.
Step 3:
Now melt the “skinny” end so that it matches the other end that has already been melted flat. (Section 1: Step 7)

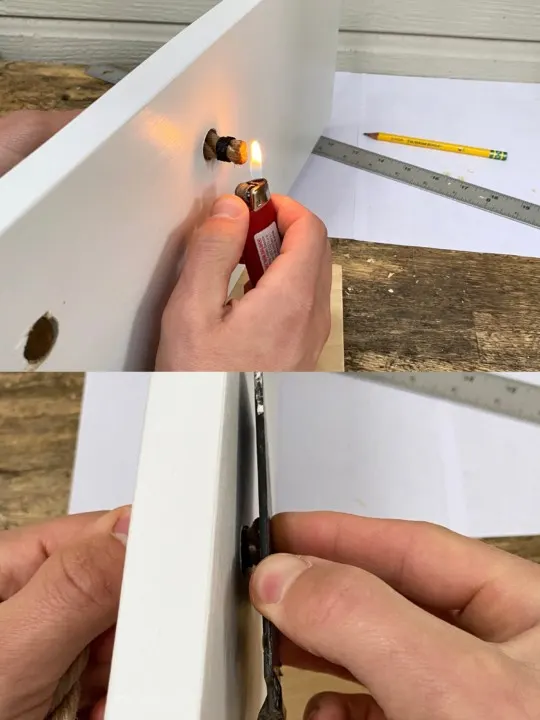
Step 4:
Pull on the handle from the front side to ensure that the ends don’t pull through the holes.
Repeat Steps 1-4 for any other handles.

Step 5:
Enjoy your beautiful new DIY rope drawer handles!

Get Crafting!
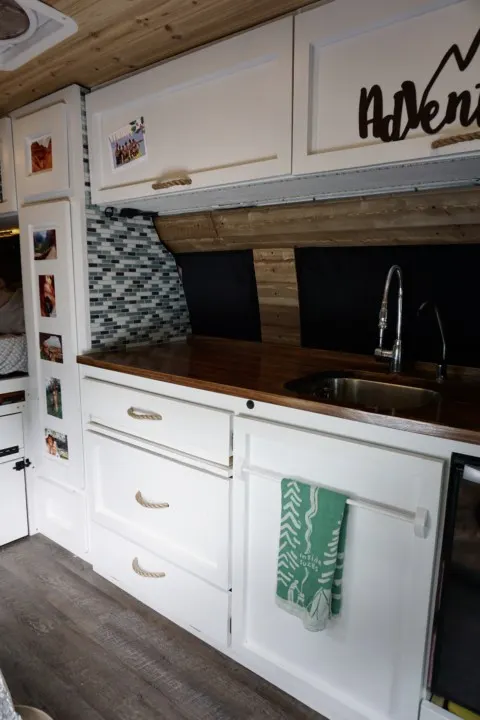
These custom DIY rope drawer handles are easy to make and cost a fraction of store bought handles. They provide a unique look that compliments both painted surfaces and bare wood.
They won’t snag clothing or hurt anyone with accidental bumps. And despite their “softness” they are strong enough for heavy drawers.
Notes:
If the thickness of your drawer face is different than ¾”, then you need to make adjustments to the sizing. First, alter the rope length you cut for each handle. Add or subtract the thickness difference multiplied by 2 (because the rope passes through the wood twice). For example: a 1” drawer face is ¼” thicker than ¾” drawer face. [ ¼” x 2 = ½” ] So each rope handle should be cut to 8 ½” instead of 8”.
If your rope thickness is different than ½” then you should use different spade drill bits to make your holes. The smaller bit should be the same thickness as your rope, and then the other bit should be the next size up.
Related Posts:
- Best Drawer Slides For Vanlife
- Sleek Wooden Countertop For Under $100
- Woodworking Tips For Converting A Campervan
- Creative Ways To Decorate Your Van Conversion
Share This Guide For ‘DIY Rope Drawer Handles’ On Pinterest!

How To Install Vinyl Flooring In A Campervan - tworoamingsouls
Wednesday 5th of April 2023
[…] […]
Best Latches for Campervans Cabinets and Drawers - tworoamingsouls
Tuesday 4th of April 2023
[…] Or check out my super affordable DIY Rope Drawer Handles […]
Fun Ways To Spruce Up Your Camper Van To Feel Like Home - tworoamingsouls
Thursday 22nd of July 2021
[…] […]
How To Install Rustic Wooden Plank Walls In Your Campervan - tworoamingsouls
Tuesday 29th of December 2020
[…] […]
10 Vanlife Essential Items - tworoamingsouls
Sunday 10th of May 2020
[…] then you will probably want something more permanent. Such as real wooden cabinets and drawers with custom DIY rope handle pulls. But if you are doing short time van life then you could either get by with plastic drawer or even […]