
People interested in Vanlife are often curious just how much money it costs to buy and convert your own campervan. And honestly, the price can differ significantly between each DIY van conversion.
Whether you have the skills to DIY your own camper van or need some help from a professional builder, this guide for how much our van conversion cost will help you get an idea of what a DIY van conversion can cost for a basic build.
There is obviously a wide range of money you can spend, but we think that our van conversion strikes a good balance between price, features, and comfort. In this guide we will provide a detailed record of the price breakdown of exactly how much our van conversion cost.
Converting our van was by far the biggest project we ever took on. We had little to no experience before building out our own campervan. But with thorough research online and watching endless DIY Youtube videos, we grasped a decent knowledge base for building out our little tiny home on wheels.
Our main goal was to make our van as functional and comfortable as possible while staying under $20,000. We kept a detailed log of all purchases and receipts.
Below you will see the full cost of our self-converted campervan from the van itself, repairs and the whole conversion including additional accessories to make the van feel like home.
Cost Of Vehicle

What Kind Of Van Do We Have:
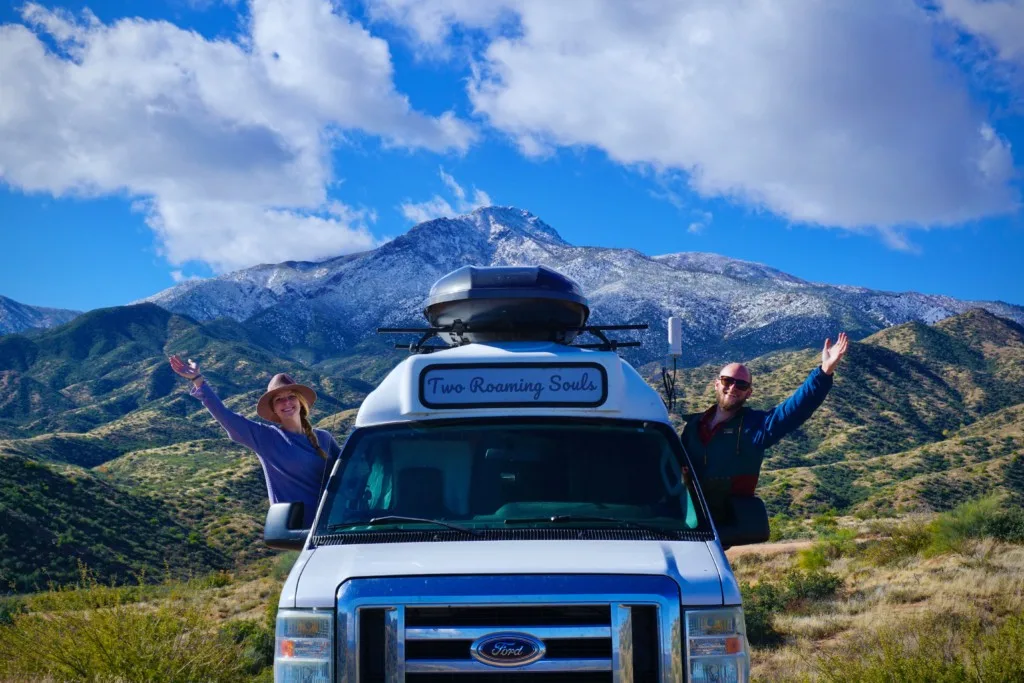
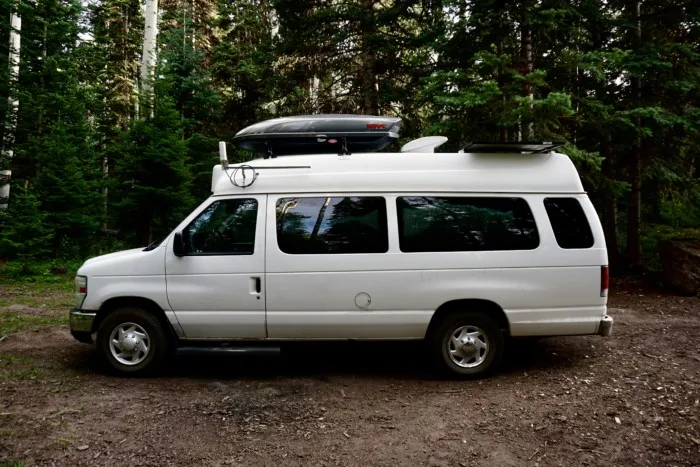
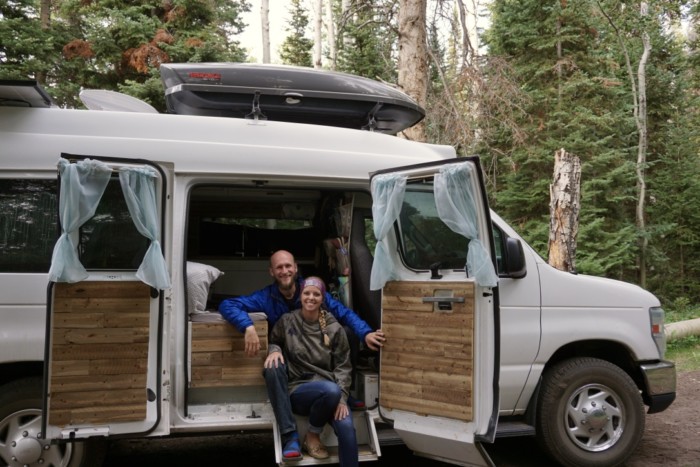
We chose a 2010 Ford E-350 Super Duty Extended XLT with an aftermarket fiberglass high top. Our gas engine is a V8, 5.4 Liter. We also have a flex fuel gas tank (which means our tank accepts E85).
A lot of research went into what kind of van we wanted. We were on a tight budget and knew we wanted to stay under $10,000 total cost for the van itself.
Our goal was to get a van with less than 150,000 total miles. We also knew we wanted a van tall enough to stand in, so we wanted the van to have a high top, or cheap enough to install a hightop (which start around $3,500+).
The process of narrowing our search was pretty simple.
We knew we needed a full-size van to fit the two of us and all our belongings.
We decided that any euro-style van (Mercedes Sprinters, Ford Transit, RAM Promaster) with a suitable number of miles was going to be above our price range. And didn’t really prefer vehicles with diesel engines.
So that left us to explore options of older domestic (US) vans.
That pretty much leaves the Ford E-Series, Chevy Express, GMC Savana, and Dodge Ram vans. But these were never produced with a high roof from the factory, so that narrowed the search to ones with aftermarket modifications.
The list narrowed to shuttles, handicap vans, and ambulances. From there, we were able to find vans that generally fit our criteria. And then it was just about finding the diamond in the rough.
So when we found this Ford E350 Extended with a hightop we took the plunge! We named her Delphie, and got to work on building our first home.
Why We Chose This Used Van For our DIY Conversion:
Delphie was an old airport shuttle for a hotel. So we assumed it was probably treated pretty well because it was normally driven around with passengers inside. Plus it probably received regular maintenance.
Our main priority was having a van that was tall enough for us to stand inside. And the extra length was a bonus that gave us a more comfortable living space inside for two people.
We also had a pre-purchase inspection done to the van before we bought it. The van was in decent condition and had many miles left! But, it did need some repairs due to the mileage on the vehicle such as ball joints, new tires, brakes, etc (all listed below).
But overall, it fit out criteria and we thought the price was amazing.
Where Did We Find Our Van:
We found our van on Facebook Marketplace. We were located in Vail, CO when we first started the van search, but weren’t having much luck finding our perfect van. So we broadened our search to 400+ miles and soon found Delphie for sale in Albuquerque, NM.
How Much Did Our Van Cost:
The cost of the van was $6,200. We felt it was a great deal, considering it’s the most powerful of the Ford E-series vans and was extended with a fiberglass hightop included!
Work Done On The Van:
Before purchasing our first van, we knew we needed to make a few BIG repairs to keep it running smoothly!
The tread on the tires were getting low, so we wanted to get tires that were quiet on the road, but would be able to get us deep out into the backcountry (which are usually long dirt roads).
So, we splurged on the top of the line tires, Michelin Defenders LTX M/S. They’re not the most capable off-road tire, but they are the longest-lasting, good enough to get us from A to B. After traveling for 6+ months, we feel we made the right choice!
We also were due for new front and rear brakes and since we were going to be traveling a lot around mountains, it was a necessary purchase for conquering big hills with confidence.
Another big expense was removing the auxiliary A/C unit which was already installed inside the van. This model was tied-in to the engine coolant system, so removing it ourselves was above our knowledge base.
The biggest expense for repairs were the ball joints which are what connect the wheel hubs to the base of the vehicle. Our ball joints had worn down and with the purchase of our new tires, they would wear down the tires much quicker than they should. It’s something that doesn’t always have to be replaced, but in the long run it would save us money over time.
Here is a list of all the extra work we had done on the van
| Pre-purchase Inspection | $92 |
| 4 Michelin Defender LTX M/S Tires | $1,097.78 |
| Oil Seal | $95.98 |
| Oil Change (5W-20 Valvoline Full Synthetic SAE oil with MaxLife Technology (BIB) | $49.99 |
| Front Brakes | $208.99 |
| Front Hardware Labor | $15.00 |
| Front Brake Rotor | $294.00 |
| Rear Brakes | $496.97 |
| Rear Harware Labor | $15.00 |
| Brake Flush | $49.99 |
| Ball Joints | $1,001.96 |
| Alignment | $47.00 |
| Anti-Freeze | $49.38 |
| Windshield Wipers | $33.37 |
| Air Filter | $10 |
| Auxillary Heater Uninstallation | $300 |
| Replacement sun visors | $17 |
| Re-sealing Door Weatherstripping | $32.94 |
Total Cost Of Vehicle w/ repairs: $10,107
Cost Of Our DIY Van Conversion
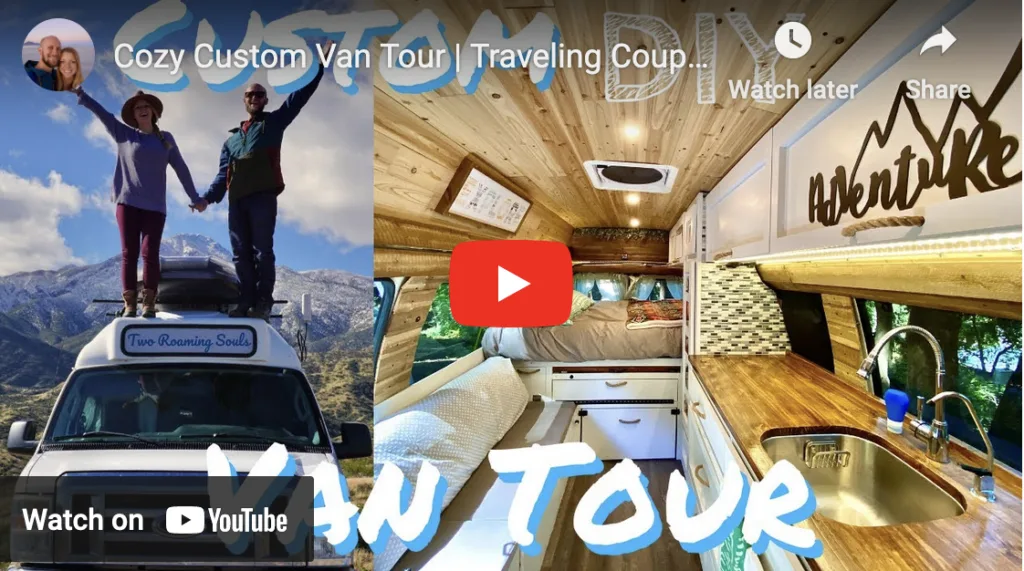
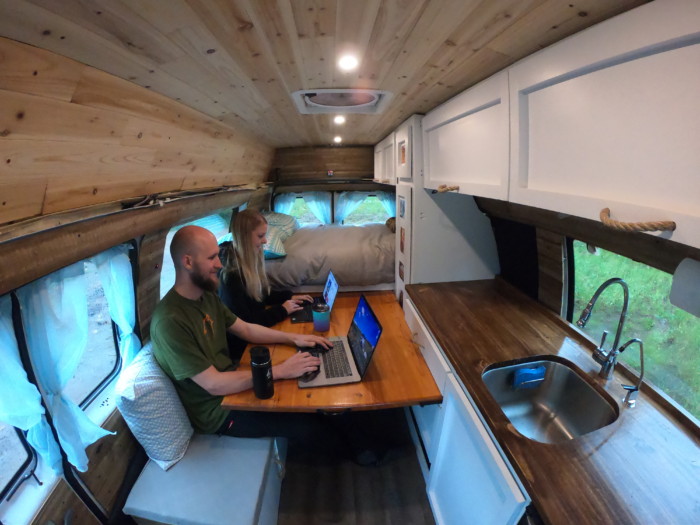
Take A Virtual Tour Of Our DIY Van Conversion!

This post may contain affiliate links. Disclosure policy.
Insulation
Insulating your van is extremely important for the climates you will be traveling in.
Jake and I decided we wanted to travel to moderate climates (45-80 degrees Fahrenheit). No extreme high temperatures or cold snowy winters. Therefore, we needed insulation but didn’t need a super high R-Value.
Another thing to consider when choosing insulation is moisture control. Moisture WILL be part of vanlife.
You will be living in a van, hence you create heat and moisture from breathing and cooking. And sometimes you have no control over condensation from the elements outside.
So having insulation that controls moisture is important when choosing the right insulation for your van build. Here are some tips for how to prevent mold & mildew in your camper van.
After much flip-flopping, we finally decided on a combination of 4 different insulation types for our van conversion.
Sheep’s wool:
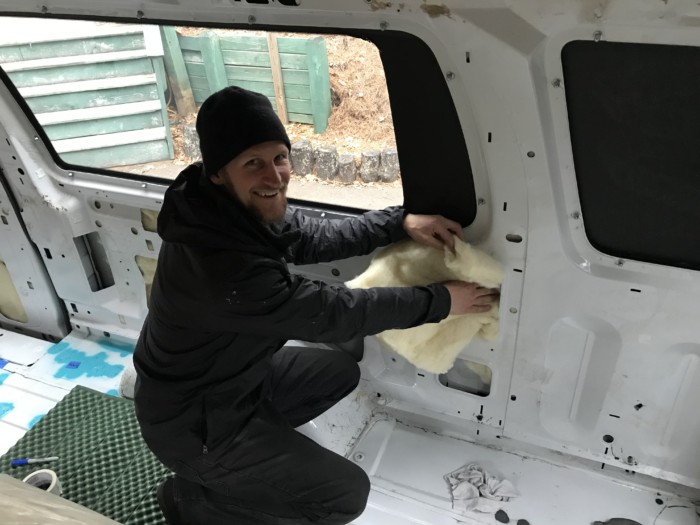
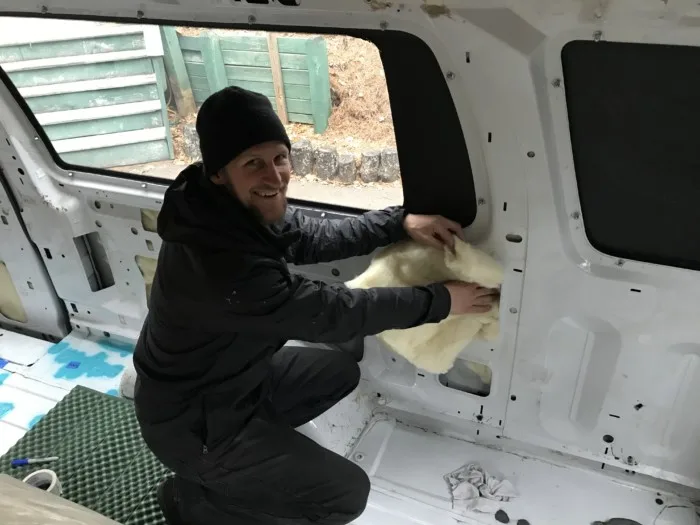
Our van walls had a lot of nooks and crannies, therefore putting rigid foam boards into awkward holes wasn’t going to work well. So after thoroughly researching different types of insulation we decided to go with sheep’s wool.
It’s flexible enough to stuff into all the awkward holes, but resilient enough to rebound again.
Plus, there are many benefits of sheep’s wool, such as, it passively filters the air in your van, controls moisture, is mold resistant, and has sound absorption qualities.
Plus it is easy to install, so it was a no-brainer for us!
Materials:
| Havelock Wool w/shipping | $177 |
Foam Board:

Because foam board is quite rigid, we used it for our ceiling and flooring. It was a very time consuming project because neither the floor or ceiling were perfectly flat.
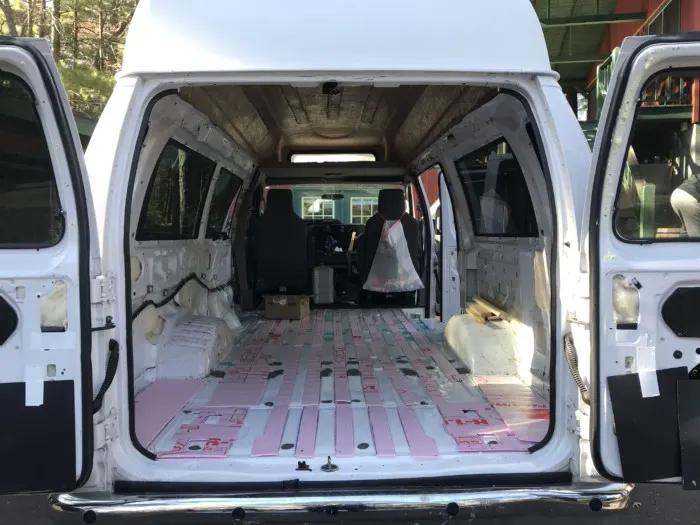
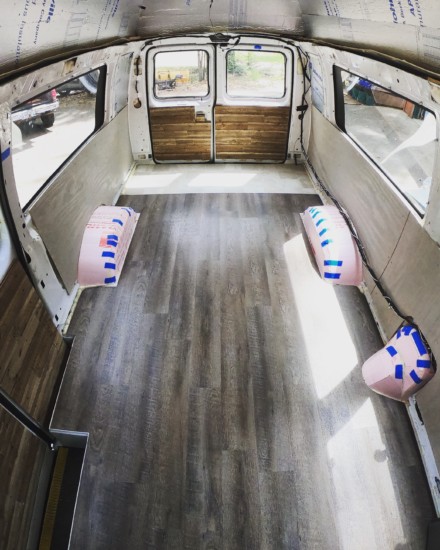
Flooring:
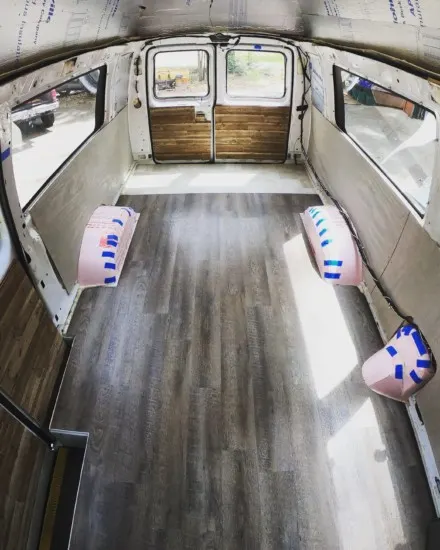
For the floor and wheel-wells we used ¼” XPS Foam Paneling. I had to cut out odd shaped strips to fit into the narrow ribs on the floor (pictured above).
We then added a full layer on top of this that extended wall to wall for the whole length of the interior. So some area’s have ½” insulation and others had ¼”. It probably helps a little but, the van floor is almost always cold!
Ceiling:
Our van came with a high roof fiberglass high top, which makes it even harder to insulate because it is very curvy and comes with strips of wood that line the top for attaching things to the ceiling.
So we used ½” Polyiso for the cracks between the wood strips. We then covered that insulation and the sides of the high top with 1” Polyiso. We attached the Polyiso to the ceiling using Great Stuff Spray Foam (listed below in the next section).
Materials:
| 1/2″ Polyiso (2 sheets) | $21.16 |
| XPS Foam Panel | $29.98 |
| 1″ Foil Faced Polyiso (2 sheets) | $32.18 |
Spray Foam:
We used The Great Stuff Spray Foam for all the hard spots we couldn’t get with the sheep’s wool and as the glue for all the Polyiso installation. Therefore, most of the spray cans went into the doors, and super small nooks and crannies on the wall where it was impossible to fit anything larger than 1 inch.
Materials:
| The Great Stuff Spray Foam (14 cans) | $41.81 |
Reflectix:
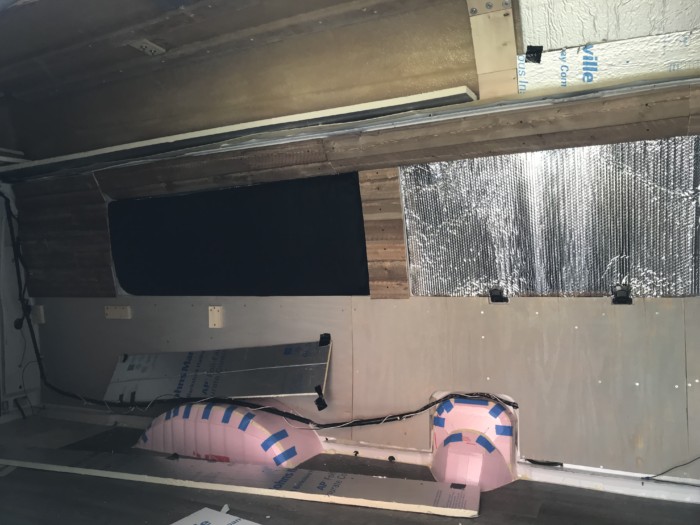
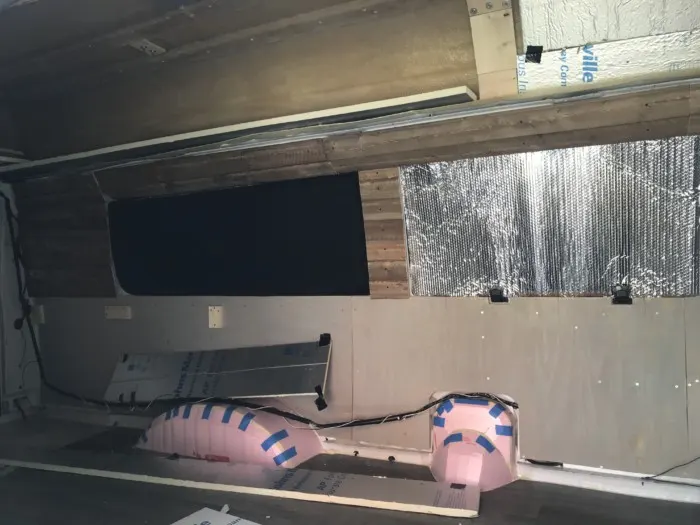
Reflectix was used for all the windows around the van. Windows literally wrap around our whole van so we wanted to make sure we insulated the windows well.
They are definitely the weakest link in our insulation. I cut out the shape of the windows with paper and then traced it onto the reflectix before cutting out.
We knew if we just used reflectix on the windows our R-Value would be low and it would be hard to maintain the inside temperate, whether it was hot or cold.
So, we used the leftover sheep’s wool to attach to the back of the reflectix. I then sewed black fabric around the reflectix to hold in the sheep’s wool. Then we added magnets surrounding the edges of the reflectix to stay attached to the metal frame surrounding the windows. (Finished product is the window to the left pictured above).
Tip: We definitely feel the reflectix with sheep’s wool works great for the windows, but if I were to do it again I would cut out the reflectix to be bigger than just the size of the window. That way there is extra insulation around the metal edges that holds in the window. Then you can just glue the magnets onto the reflectix, rather than sewing them on with the fabric.
Materials:
| Reflectix | $43.98 |
| Sun Shade | $8.99 |
| Magnets to hold up insulation (Extra Strength) (2pk) | $24.92 |
| Leftover Sheeps Wool | $0.00 |
| Black Fabric (Already Owned) | $0.00 |
Total Van Conversion Cost Of Insulation: $380
Kitchen

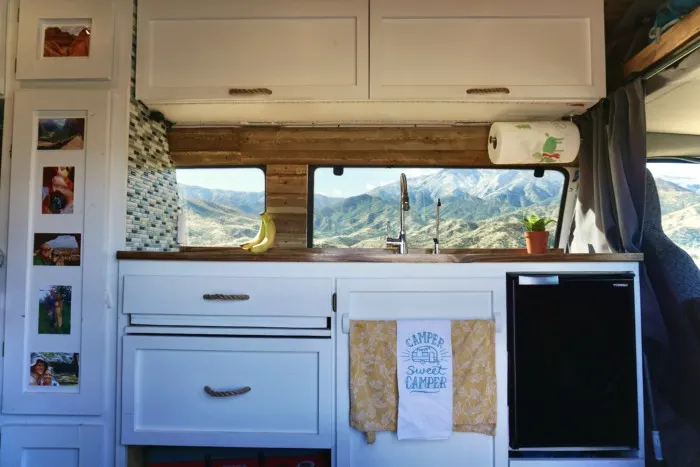
We wanted our kitchen feel homey but without spending too much on it! And personally, I feel like we struck a great balance between the two.
Kitchen Frame:
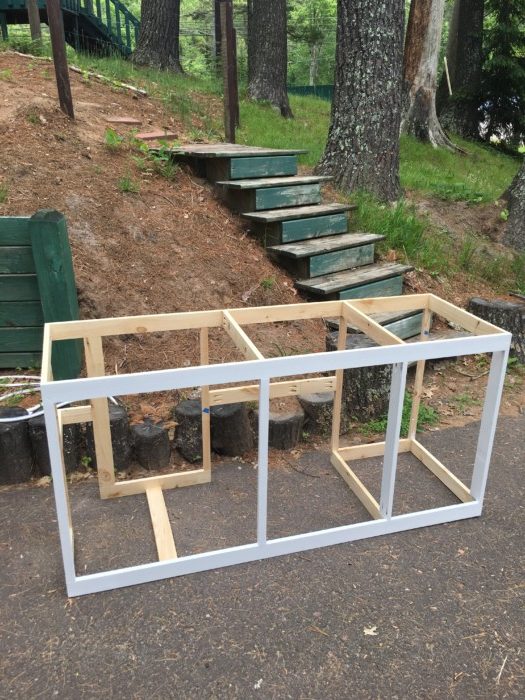

The frame of the kitchen was made out of 1″x 3″ pine boards and leftover ply-wood we had from our cabinets. So the overall frame of the kitchen was inexpensive.
It was built in such an odd shape because the wheel-well and fuel tank intake extend a couple inches from the wall.
However, we do regret building it this way (skeletal frame) because when it came time to install drawers, we had to add extra wood for mounting drawer slides.
Materials:
| 1-1/4″ Screws | $4.48 |
| 1″x 3″x 8′ (7) Pine Boards | $11.13 |
Countertop:
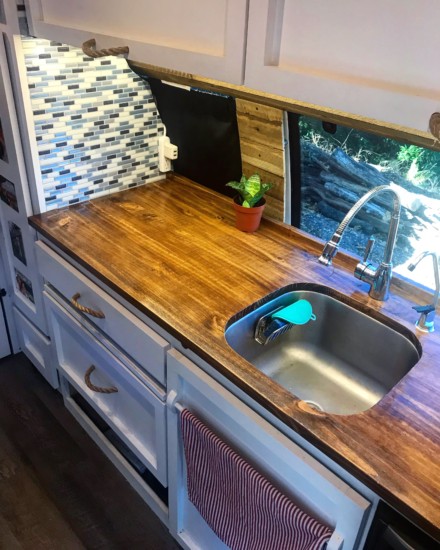

The countertop is something we are very proud of because we made it ourselves and it looks magnificent.
We used pine which is usually not recommended because it is soft and can dent easily, but we were living in a van, so we knew it was inevitable.
We then stained it and coated with polyurethane to make it to look professional! Our only regret is that it shows wear rather quickly, but you cannot beat the price!
Learn how to DIY your own wooden countertop for under $100.
Materials:
| Pine Countertop | $38.59 |
| Pre-Stain Wood Conditioner | $5.48 |
| Dark Walnut Stain | $8.98 |
| Gloss Polyurethane Top Coat | $15.97 |
Sink/Plumbing:
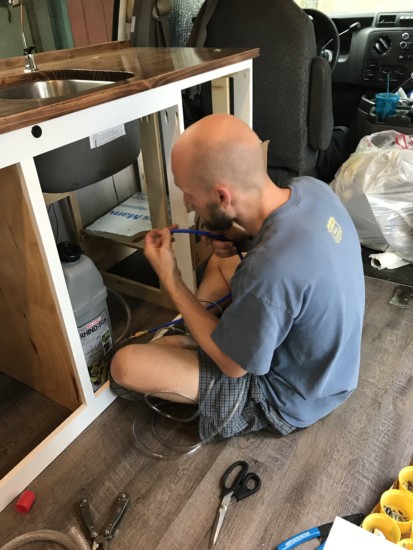

The least fun part about the kitchen build was the sink install and the plumbing for the water system. There are so many different sizes for everything in the plumbing department. And for a while it felt like nothing would fit together as advertised.
But when building out the sink we knew we wanted to have a filtration system so we could get our water from unfiltered water sources such as campgrounds, peoples hoses, etc. We didn’t want to worry about the quality of water.
We now have better tasting drinking water in our van conversion than every apartment we’ve lived in.
Here is a step by step guide for:
Campervan Sink Plumbing With Water Filtration System
Materials:
| Sink | $68.57 |
| Sink Drain | $12.73 |
| Sink Strainer | $1.97 |
| Campo Flexible Drain Hose | $7.41 |
| Faucet | $27.95 |
| Water Pump | $69.61 |
| Filtered water spicket | $12.99 |
| Water filter system | $41.99 |
| 5.5 Gallon Reliance Rhino-Pak Jugs (3) | $60 |
| 1/2″ Hose Clamps (8) | $4.20 |
| 1/4″ Hose Clamps (1) | $3.60 |
| 3/8″ x 1/4″ Reducing Coupling | $4.39 |
| 1/2″x1/2″ MPT Poly ADT | $2.19 |
| 1/2″ Poly Insert Plug | $0.93 |
| 1/4″ Tubing | $1.09 |
| 1/2″ ID Vinyl Braided Tubing | $7.19 |
| 3/8″ OD x 10′ Vinyl Tubing | $2.58 |
| Silicone | $6.59 |
| White Pex Pipe | $1.86 |
| 1/2″ x 1/2″ Brass Adapter | $4.93 |
Kitchen Table:

The kitchen table was something we wanted to be big enough to eat and work at but could easily stow away. We were fortunate enough to get gifted an old table from my parents old business.
So we only paid for the sliding mechanism which was built into the bed frame (listed in a different section) and some finishings.
Instead of drawer slides (which are really expensive for this size) we opted to have the table roll on caster wheels, guided by wooden rails.
And then we added a handle to pull it out with and the bolt we use to lock it in while driving.
| Kitchen Table (Gifted) | $0.00 |
| Table Handle | $1.89 |
| Table lock Bolt | $4.69 |
| Caster Wheels For Table | $6.09 |
Fridge:


For the fridge, we did extensive research on all the different mini fridges people use in building out a van.
We wanted a fridge that would run on DC, had a freezer and be small enough to go into our kitchen frame.
The Vitrifrigo VF51 1.8 CU Ft (read our review) is what we decided on and have been very happy with it.
Also, check out our guide for best fridges for camper vans to find the best fridge for your camper van build.
We also have fridge options if you are on a tight budget that are budget-friendly but also offer good value. Or fridges with freezers so you can have as much ice cream as you please! 🙂
Stove:

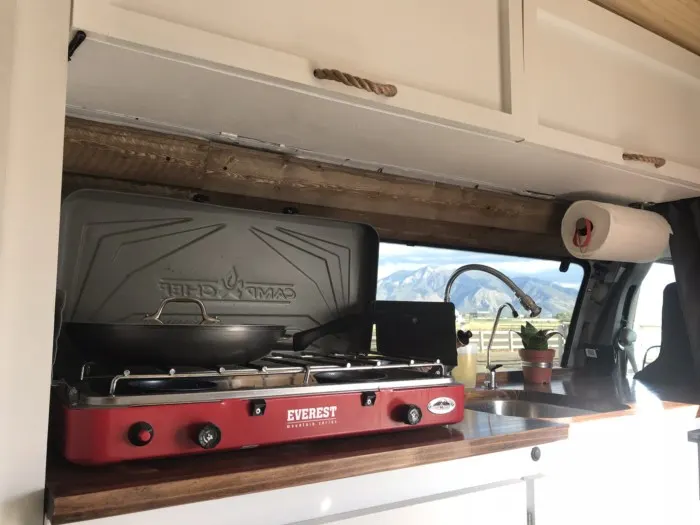
Deciding on a camp stove for our van conversion was also an interesting task.
We weren’t wild about having a propane stove, but for the price and use of electricity, it was the way we decided to go. The Camp Chef Everest Mountain Series was the stove we have been using and it really works great! You can simmer food on low temperatures or bring liquid up to a boil in just a few minutes!
But it is important to have proper air flow through the van when running the propane, so we have two different detectors for detecting propane and carbon monoxide. But it’s best to cook with the doors open, or have a window open with the fan running to make sure you are getting enough air flow to dissipate any propane gas.
| Camp Chef Camp Stove | $108.79 |
| Carbon Monoxide Detector | $19.59 |
| Propane/Natural Gas Detector | $29.99 |
Additional Items:
| Paper Towel Holder | $6.84 |
| Ice Tray (2) | $7.92 |
| Tick Tac Tile Backsplash | $23.97 |
Total Van Conversion Cost Of Kitchen Build: $1,196.17
Solar

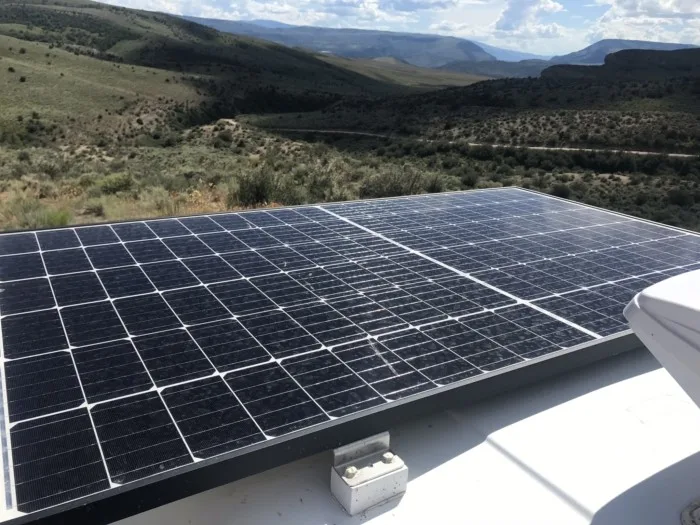
Solar was by far one of the biggest expenses of our DIY van conversion. Jake did A LOT of research on different panels, batteries, etc. and we came to the conclusion of getting two 100 Amp hour Lithium batteries with one 320 Watt panel. We felt it was going to be the best set up for us!
We got our solar panels and electrical system from Northern Arizona Wind & Sun. Their customer service was beyond amazing and they helped us every step of the way!
Materials:
| Panels, batteries & wiring | $2,590.73 |
| Bolts/nuts/washers | $13.24 |
Total Van Conversion Cost Of Solar: $2,603.97

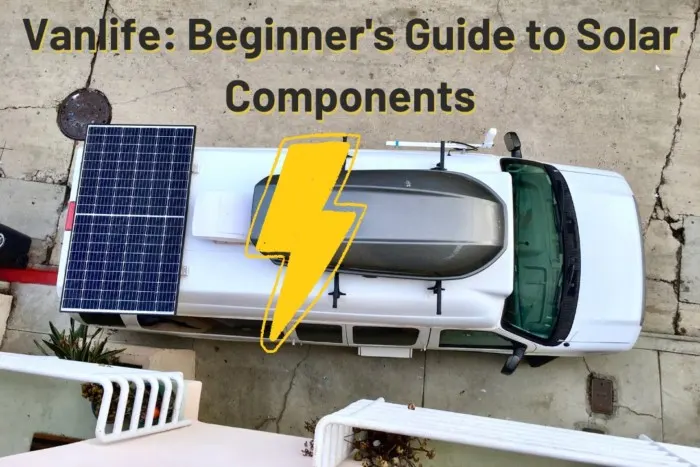
Want to add off-grid solar to your van, but you’re getting lost among all the products and jargon? It can get confusing quickly, especially for a novice. That’s why I created:
Vanlife Solar: Beginner’s Guide To Solar Components.
Electrical:
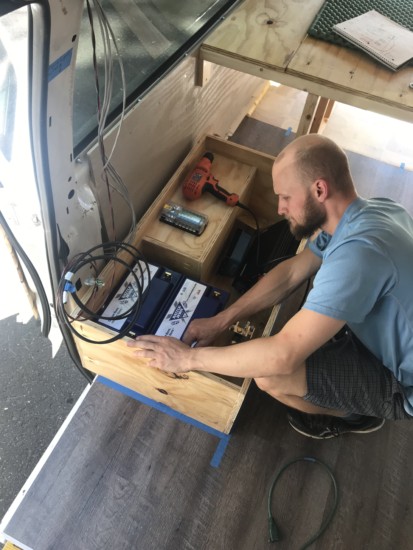

The Electrical System is definitely the most intimidating part of the van conversion. There is a lot that goes into hooking up the electrical, and it’s definitely one of the biggest projects of a van build.
Jake had experience from college working with electrical, so we felt confident he could successfully set up the electrical.
But it definitely is a time consuming project, and you want to take your time to make sure all the wires are correctly and safely set up. Setting up an electrical system can be very dangerous. So if you have no experience with setting up electrical, consider outsourcing your work.
There are many different sizes of wires and connectors that go into the electrical build out. You will also need an inverter for the devices you have that plug into AC power, such as laptops, blenders, camera battery chargers, etc.
Materials:
| Maxxair MaxxFan (Check out our Maxxair Fan Review) | $239.79 |
| Battery Isolator | $53.12 |
| Xantrex 1000W Inverter | $266.79 |
| 100 Amp Circuit Breaker (2) | $49.58 |
| Bussmann 150 Amp Type III Circuit Breaker | $25.57 |
| Puck Lights | $32.99 |
| LED Strip (2) | $29.98 |
| Fuse Block | $39.89 |
| Switches | $12.99 |
| Wire Nuts | $4.59 |
| D-rings for battery | $4.97 |
| Wire Securers | $0.75 |
| 18 AWG. Stranded, Shielded, GP | $6.80 |
| 14 AWG Red Stranded Wire | $10.28 |
| 14 AWG Red Stranded Wire | $10.28 |
| 120pc Assorted Blade fuses | $9.99 |
| LUG Xtreme 6 AWG (1/4″ & 3/8″) (6 total) | $31.96 |
| Tubing Heat Shrink | $14.36 |
| Insulated Clamps | $2.98 |
| Screws | $0.22 |
| Electrical Connections | $36.46 |
| 3 OL Power Strip | $2.44 |
| Connector 15G-10pk | $3.99 |
Total Van Conversion Cost Of Electrical: $890.77
Learn how to install lighting in a campervan via our guide:
How To Install 12-Volt Recessed Lighting
Walls

Building the walls is where you can really create the vibe of your van. We knew that we wanted a rustic vibe the incorporated weathered wood texture.
But, the walls aren’t like a home (straight and square), they have curves and it definitely adds some difficulty to the van conversion.
We divided our walls into two different categories: unseen walls and seen walls.
Unseen Walls:
The “unseen walls” are all the walls under the bed, behind the kitchen and behind our bench seat.
Therefore, we felt plywood would get the job done, because no one would really see it. We quickly covered it with a coat of stain and called it a day.
Materials:
| Sunbleached Stain | $8.98 |
| Wipe-On Polyurethane | $11.97 |
| Sanded Plywood 1/4″ (3 pieces) | $58.86 |
| Fastener Screws | $4.84 |
Seen Walls:
The “seen walls” are everything above the bed, above the kitchen countertop/bench and the doors. We decided to go with a rustic look so we splurged on the Butternut Brown Vintage Shiplap.
From the metal that surrounds the windows on the doors, we used light blue curtains to give it a homey look!
Materials:
| Butternut Brown Vintage Shiplap (4 boxes) | $103.00 |
| Black Screws (3 boxes) | $17.37 |
| Curtains (2pk) | $9.74 |
| Curtain Rods (2pk) | $3.94 |
Closing Off The Front Cab Of The Van:
We wanted a way to close off the front cab with a curtain for privacy or to control the temperature.
And with the curtain closed sometimes you even forget for a moment that you are living in a vehicle.
It’s best to get blackout, heat resistant curtains so it can keep out the light and heat at the same time!
Materials:
| Blackout Curtains | $12.97 |
| Curtain Rod (Already Owned) | $0.00 |
Total Van Conversion Cost Of Van Walls: $232
Ceiling:

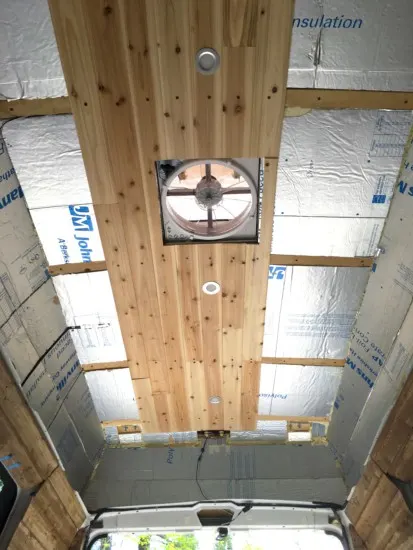
The ceiling is one of our favorite parts of our van conversion. We went with the Knotty Cedar Edge Tongue and Groove. It was super easy to install and it is only ¼” thick so we were able to keep a lot of height in the van.
Materials:
| Knotty Cedar Edge Tongue and Groove (4 boxes) | $81.52 |
| Red Deck Screws for Ceiling | $6.60 |
Total Van Conversion Cost Of Ceiling:
$88.12
For a step by step guide to install Tongue and Groove Cedar Planks in your van conversion check out:
How To Install A Beautiful Cedar Ceiling In A Van
Floor:
The flooring is broken into two categories: flooring and sub-flooring
Sub-Flooring
We got lucky with our sub-flooring because when we ripped everything out from the van, there was already a plywood sub-flooring.
But the plywood was pretty gross so we decided to replace it. The lucky part was that we were able to simply use the old flooring as a template to trace onto our new plywood and cut it out.
We decided not to secure it down because we would have to drill through the vans metal frame. We figured if we added the weight of the kitchen, closet, bed and bench, it would stay put.
We haven’t had any issues after living in it full time for 3+ years.
Tip: We have heard horror stories of vanlifers experiencing mold on their flooring. Resulting in them having to tear out their flooring and start from scratch.
So we took their advice and covered both sides of the plywood first with Mold Control Spray, let it dry and then covered both sides in Bull’s Eye 123 Primer. Because trust me, water will spill on the floor, accidents happen.
Materials:
| Sanded Plywood 1/4″ (2 pieces) | $39.24 |
| Bulls Eye 123 Primer For Mold Control (2 cans) | $21.99 |
| Mold Control Spray | $12.99 |
Flooring:
For the top visual part of the flooring we went with vinyl planks.
We wanted to stick with the rustic look, but needed the floor to be waterproof and durable.
Vinyl planks are cheaper than wood flooring and are waterproof. They also come in many different styles.
Vinyl planks are easy to install, and you can cut the planks to size with a sharp razor blade. We love how it turned out!
Materials:
| Ingenuity Vinyl Planks | $107.97 |
Total Van Conversion Cost Of Flooring: $182.19
Bedroom:

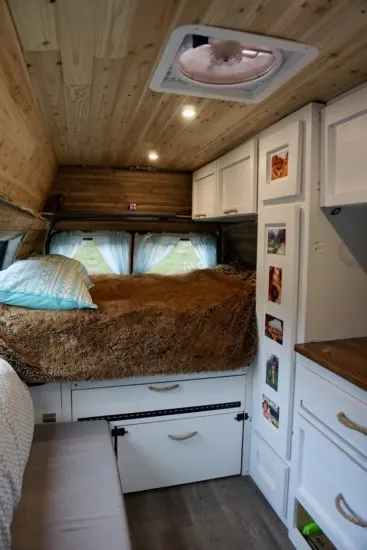
There are multiple ways to set up your bed, either stationary, couch/bed, Murphy bed etc.
Jake and I both hate making the bed, so we wanted a stationary bed that didn’t require daily shuffling.
Mattress Ventilation:
Ventilation under the bed is super important! You need air to circulate under your mattress because you create moisture when you sleep. Don’t make the same mistake as we did the first time and have mold grow under your mattress.


Learn how we prevent moisture under our bed:
How To Prevent Mold Under our Mattress | DIY Hypervent
Materials:
| Hypervent | $57.99 |
Bed Frame:
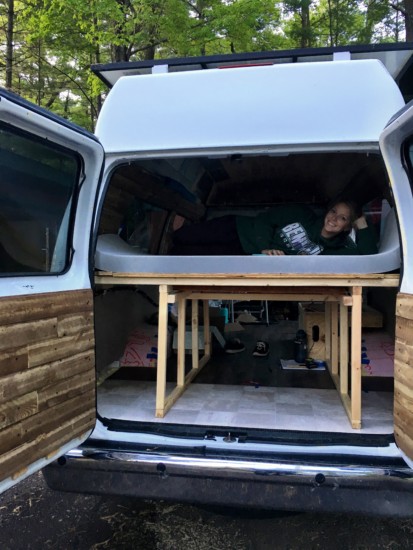

Our bed frame was super simple and put together by furring strips. We then topped the frame with ¾” plywood to hold the mattress.
We covered the plywood with leftover Mold Control Spray and Wipe-on Poly, so the wood wouldn’t mold underneath in case of moisture issues.
We also wanted a way to access the garage without having to open the back doors.
So, we divided the plywood into 3 sections. The middle section is stationary, but the outer sections can open. We added hinges to the plywood so it could flap up and we could get into the garage. (To be honest: we rarely use it)
Materials:
| 2″x3″x8′ Furring Steips | $6.00 |
| 2″x2″x8′ Furring Strips | $7.08 |
| 3/4″ RTD plywood (2 pieces) | $44.96 |
| Construction screws | $3.79 |
| Hinges | $4.00 |
| Screws for hinges | $0.24 |
Bedding:
For our bedding we have a 3” memory foam topper on a 2” high density upholstery cushion. I gotta say our bed is mighty comfortable!
We had to custom cut each piece to fit our specific bed size (which is slightly smaller than a full). Check out our post:
Best Mattress Options For Your Camper Van Conversion
Materials:
| 3″ Lucid Bamboo Charcoal Mattress Topper | $89.99 |
| 2″ Firm Foam Cushion | $71.98 |
| Cuddleduds Down Comforter (Already Owned) | $0.00 |
| Sheets | $7.00 |
Total Van Conversion Cost Of Bedroom: $293.03
Cabinets, Closet & Drawers:
Building out cabinets and drawers in a self-converted campervan is one of the hardest tasks. Because van walls are not straight, they curve in toward the top.
And you cannot use a bubble-level because the van may not be parked on a level surface. We followed Vanessa & Adams “How To Build Cabinets In A Van” to help build our cabinets, and slightly modified their design to fit our van.
We wanted to use a little nicer wood for the cabinets, closet and drawers because it requires wood that is straighter and has less imperfections. More durable hardwoods don’t dent quite as easily as pine. We decided to go with a higher grade plywood and poplar which is pretty much the cheapest hardwood you can buy.
Then we painted everything white.
Materials:
| Ultra Interior Paint | $22.97 |
| Bulls Eye 123 Paint Primer | $17.77 |
| Spackle | $3.88 |
| Euro Overlay Hinge | $4.99 |
| Hinge Template | $9.59 |
| Blue Kote Kreg Screws | $6.29 |
| Panhead Kreg Screws (3 boxes) | $16.85 |
| 1″x3″x12′ Poplar Board | $42.87 |
| 1″x2″x12′ Poplar Board (2) | $18.70 |
| 1″x3″x4′ Poplar Board | $3.96 |
| 1″x2″x4′ Poplar Board | $3.12 |
| 1/2″x2″x4′ Poplar Board | $2.79 |
| 1″x3″x8′ Poplar Board | $7.92 |
| 1″x4″8′ Furring Strip | $2.39 |
| 1/2″ ACX Plywood (2) | $57.18 |
| 1/4″ ACX Plywood | $24.99 |
| Pipe Insulation (for sharp fiberglass edges) | $2.36 |
| Double Roller Catch (8) | $7.92 |
| 20″ Center Mount Drawer Slide | $6.19 |
| 20″ Full Extention Soft Close Drawer Slide (2) | $33.96 |
| Poly Rope Handles | $4.13 |
Total Van Conversion Cost Of Cabinets, Closet & Drawers: $300.82
Supplies/tools:
We were very lucky when it came to supplies and tools for our total van conversion cost. My dad already had tons of tools that would help us build out our DIY camper van conversion.
So we didn’t have to buy or rent a bunch of tools that we would only use once.
A couple of my dad’s tools that were particularly helpful (but not essential): a table saw, drill press, circular saw, angle grinder, and table-mounted vice.
For more information on tools you might want for your DIY campervan conversion, check out our article:
15 Essential Tools For Your Campervan
Materials:
| 3M 4200 Sealant | $19.50 |
| Butyl Tape | $13.97 |
| Duct Tape (2 Rolls) | $6.96 |
| Rustoleum White Spray Paint (2 bottles) | $7.44 |
| Acetone | $7.47 |
| Paintbrush | $3.00 |
| Sandpaper | $2.38 |
| Titebond Wood Glue (2 bottles) | $9.44 |
| Dewalt Cordless Drill | $99.00 |
| Self Drilling Screws | $4.03 |
| Black & Decker Jig Saw | Gifted! |
| 8 pc Clamp Set | $19.99 |
| L brackets | $7.98 |
| Beesley Bar Clamp | $19.99 |
| Kreg Pocket Hole System | $29.97 |
| Pocket hole screws | $5.99 |
| Blade Jig (2) | $6.18 |
| Square Driver Combo Set | $4.99 |
| Cable Cutters | $24.99 |
| Deck Screws | $6.99 |
| Electrical Supplies | $9.60 |
| Hardware | $0.66 |
| Double ended Drive Bits | $3.99 |
| C Clamp | $4.99 |
| Painters Tape | $2.99 |
| 21pc Titanium Drill Bits | $29.68 |
| 7″ Aluminum Rafter Angle | $7.94 |
| Hacksaw 12″ Stanley | $3.89 |
| 8pc Speedbor Bit Set | $19.98 |
| Screws | $1.40 |
| S-Hooks | $2.94 |
| SS Clamp | $0.98 |
| Empire 36″ Aluminum Straight Edge Ruler | $3.97 |
Total Van Conversion Cost Of supplies/tools: $393.27
Miscellaneous Items For Our DIY Van Conversion:
Miscellaneous stuff is items that didn’t fit into any of the above categories or items that aren’t necessary for a van build, but are things we added.
Pre-build Repairs:
Our van was previously a hotel shuttle van before we purchased it. Therefore, it came fully furnished with the car seats bolted into the floor.
So, when we removed the seats, we had holes through the vans metal floor to the ground exposing raw metal. So we spray painted around the holes both on the top and under the van with rustoleum spray paint. And then, covered the topside of the holes by covering fiberglass patches with Bondo (often used to repair boats).
We also had a leak in our side window, so we removed the window and added new sealant between the window and metal of the van. It was not an easy task, but we no longer have a leak!
Materials:
| Bondo (Body Filler Kit) | $7.99 |
| Window weld | $19.04 |
Roof:
We decided to add a cargo box for extra storage on our roof. Because our van came with a fiberglass hightop, we couldn’t just add our roof rack like you normally would to most any other car. (Learn how to install a cargo box on a fiberglass hightop)
And we weren’t positive that the fiberglass would be able to hold the weight of the cargo box once full of stuff. So, we reinforced the hightop inside with wood blocks and added t-brackets to the outside of the hightop to hold the roof rack.
So far it has worked great!
Materials:
| T- Plates | $13.88 |
| Shims | $1.49 |
| Bolts/nuts/fastner | $16.54 |
| Exterior White Paint | $16.99 |
| Yakima Skybox (Used) | $160 |
| Thule Roof Rack (Already Owned) | $0.00 |
Miscellaneous Items:
Here you will find a list of items we added for comfort.
For example our Mr. Buddy Heater. Honestly we weren’t going to get a heater for the van, but have had a couple cold nights where it has really saved us.
We expect to find ourselves in situations where it might not be easy to always avoid the cold.
We also added a WeBoost (review: Should you buy a WeBoost Cell Signal Booster?) so we could boost our signal to use our mobile hot spots in areas that service isn’t strong enough.
We have mixed feelings about this product. It’s not a cheap item, and honestly, we aren’t sure if it is a great value for the price. Don’t get us wrong, it does work but we were hoping it would work better in those spots where you have 1x.
Since this review, Starlink Mobile has since been introduced. We hope to add this to our camper van conversion soon!
| Mr. Buddy Heater | $64.00 |
| Solar Shower | Gifted! |
| Plastic Carrying Case For Solar Shower | $9.99 |
| WeBoost: | $499.99 |
| Laundry Bag | $13.99 |
| Toilet | Gifted! |
| Bug Net | $23.90 |
| Pillow For Bench | $8.27 |
| Telescoping Ladder | Gifted! |
| Hinges for Bench | $1.98 |
| Habitat For Humanity | $2.50 |
| Hangers Slim | $3.94 |
| Trash Can | $19.98 |
Total Van Conversion Cost Of Miscellaneous Items:
$884.47
Total Cost of Van Conversion Materials:
After totaling everything in our DIY van conversion. The whole conversion (not including the van) cost:
Total Cost Of Van Conversion: $7607.45
Grand Total Cost(Including Van & Conversion): $17,714
One thing to consider is labor costs. Since we built our our own DIY camper van conversion, we didn’t include the labor costs. So if you were to have a professional build out, there would be an extra cost for labor.
Professional builders often cost a lot of money and you must have your own van. Plus they often only build out newer van models. Some professional builders exclusively only build out Sprinter camper vans.
The price range for a professional build out costs anywhere from $15,000-$200,000+.

Check out our Vanlife Shop for our favorite Van Conversion products!
DIY Van Conversion Cost Summary:
Overall, our van conversion took 2 months of working long hours from 7am to 10pm. We are extremely happy with how it turned out! Our budget was between $15,000 and $20,000, so we ended right in the middle.
We are proud that our campervan matches the beauty and function of some higher-end camper vans, but with a significantly lower price-tag.
Our total campervan conversion cost comes from a combination of stores such as Amazon, The Home Depot, Menards and Ace Hardware. We added links to a lot of the products we used in our van build in case you were interested in incorporating them into your own DIY van conversion.
Since writing this post we have created more detailed posts about each van build section. Including the van build conversion process by order.
Please reach out to us if you have any other questions about our van conversion cost DIY cost analysis breakdown, we would be happy to help!
Got Questions About How Much Full Time Vanlife Costs?

Check out our guide:
How To Budget For Vanlife | Van Conversion & Monthly Expenses
Or
Vanlife Monthly Expenses: How Much Does Vanlife Actually Cost
Help Us Share with other van lifers ‘How Much Did Our Van Conversion Cost’ On Pinterest:

How To Choose A Van For A Campervan Conversion - tworoamingsouls
Sunday 7th of May 2023
[…] can check out How Much Our Van Conversion Cost (van included) to get a rough idea. But keep in mind that we did our conversion completely by […]
2023 Ford Transit Trail | Is This Upfit-Ready Campervan Worth It For Vanlife? - tworoamingsouls
Wednesday 1st of March 2023
[…] professional van conversion will bring your total cost up over $100,000. However, a pretty basic DIY van conversion could get you ready for vanlife for around $10-15 thousand dollars. Not counting your own […]
The Ultimate Guide To Grand Staircase Escalante National Monument - tworoamingsouls
Tuesday 6th of December 2022
[…] Jake and I went as far as the Reflection Canyon Trailhead (50 miles) on this road in our 2010 Ford E350 campervan. […]
How Much Does A Professional Camper Van Conversion Cost? - tworoamingsouls
Friday 12th of August 2022
[…] the best option if your budget is much lower than this. For example, Jake and I spent around $17,500 (including the van) on our camper van conversion. But we both had a mix of skills and time to build out our own camper van, which many people might […]
How Much Does It Cost To Make A Van Home? | Justdownsize
Monday 6th of June 2022
[…] for Van Life: Sprinter vs Transit vs Promaster Van Conversion Cost for our 2008 Sprinter Van How Much Did Our Van Conversion Cost Categories Camper Vans, RVs Tags How much does it cost to make a van home? Post navigation How […]