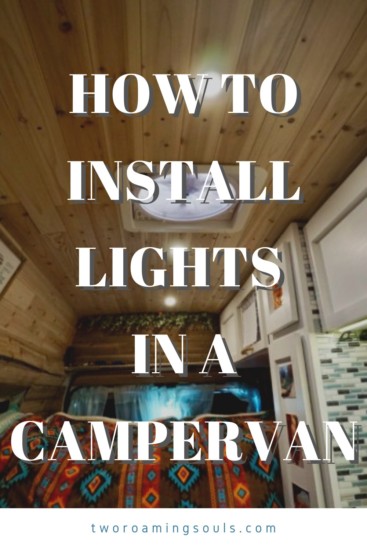
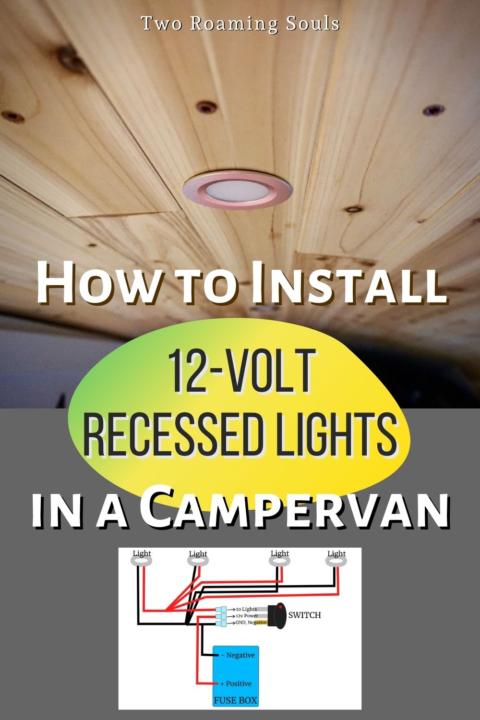
This post will show you how to install 12-volt recessed lights in a campervan ceiling. Sometimes called puck lights, they are little disks that are easy to install in ceiling planks.
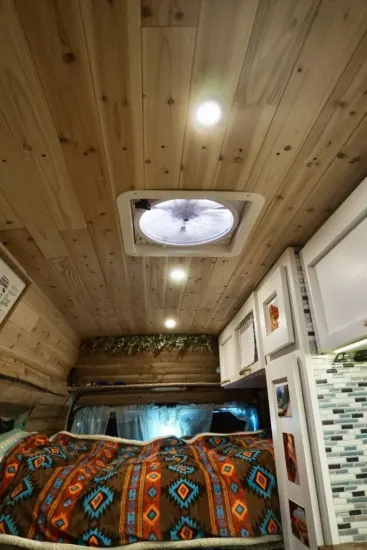
We did this installation in our campervan in tandem with our wooden cedar plank ceiling, and the combination works well together.
They are a crucial part of our van conversion that makes the living space feel like a true home. And just like any home, we can turn on lights with the flip of a switch.

This post describes how we installed and wired the Aceegoo brand lights in our DIY campervan with a fiberglass roof. But the steps and methods can serve as a general guide to install 12-volt recessed lights in any campervan.

This post may contain affiliate links. Disclosure policy.
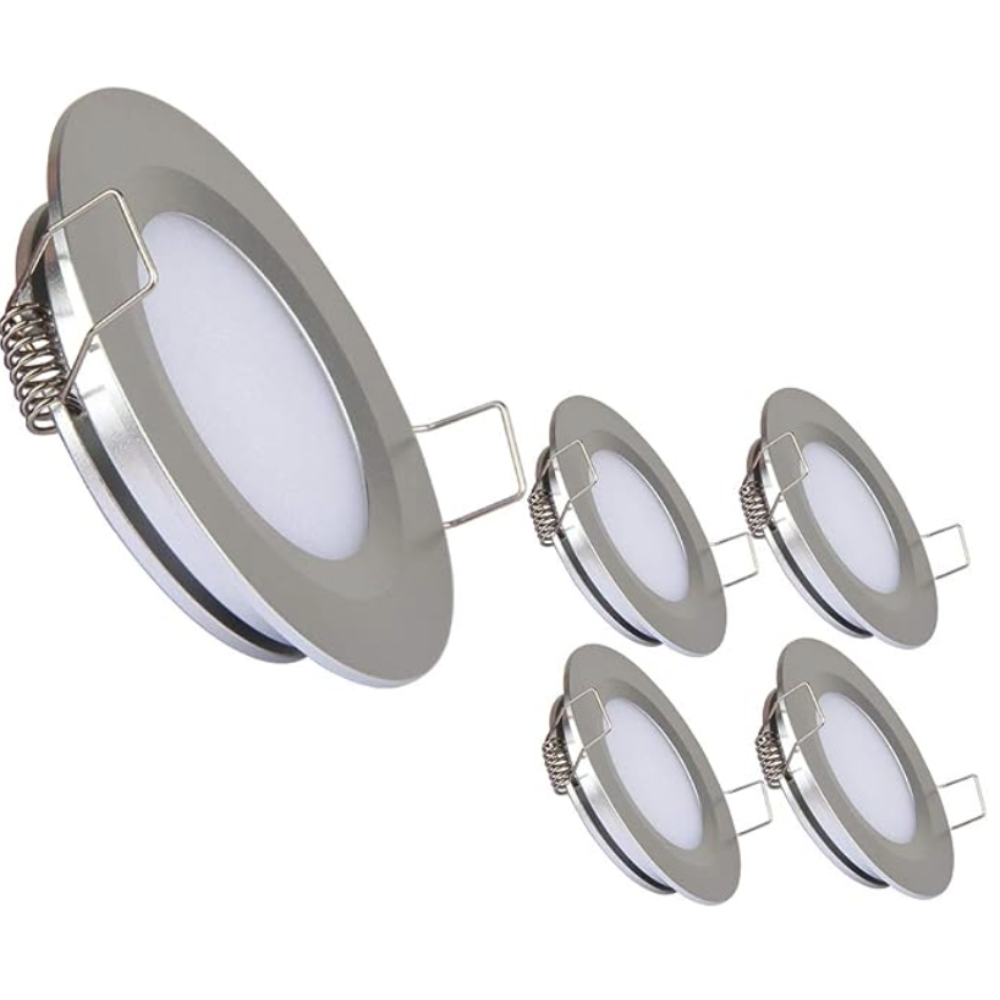
Acegoo 12 Volt Recessed Lights
The brand we used are these Acegoo 12 volt recessed lights.
They are a popular choice for van conversions, skoolies, rvs, etc, because of their low-profile, energy efficiency, and easy installation. The cloudy filters diffuse the light a little bit so they give off a softer glow, rather than a harsh direct light.
We personally have the silver finish and warm white light. We find the light to be very pleasant, not too yellow, and not too blue.

Note:
These lights are typically installed alongside the conversion/build process. This is due to the fact that wires need to be installed “under” the ceiling and holes drilled for the lights.
Though, if you’re willing to remove parts of a ceiling installation, it is possible to install them after a build. (Ceiling installation guide here)
These lights require 12 volt DC power, which is typically supplied by a separate “house” or “leisure” battery. If you are still planning an electrical system, check out my beginners guide to solar components
Supplies
Acegoo 12 Volt Recessed Lights (4 pack)
Electrical tape
Ceiling Planks or similar
Wiring (usually 14-18AWG)
Connectors
Tools
Measuring Tape
Steps to Install 12-Volt Recessed Lights
Step 1: Planning
Begin by deciding how many lights you want and where to place them. The most common arrangement is to space the lights out evenly around the living area of the van. For example, just a single row down the center of the ceiling, two parallel rows, or some other symmetrical arrangement.
We chose to use a 4-pack and install them evenly spaced along the centerline of our ceiling. To achieve even spacing, simply measure the total length of your ceiling and then divide by 5 (one more than the number of lights in the row).
The result will be the total length in between each light, as well as from the front and back end of the ceiling.
Then mark where each light will go with tape or a pencil.
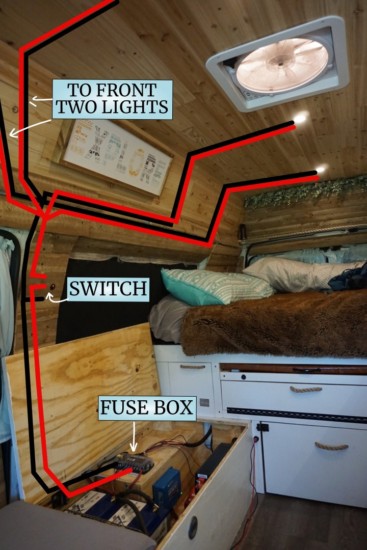
Here’s a simple diagram of the wiring for our lighting setup.

Step 2: Run Wiring
To ensure the wires are hidden, they should be installed before the ceiling and walls, but after any insulation or sound deadening.
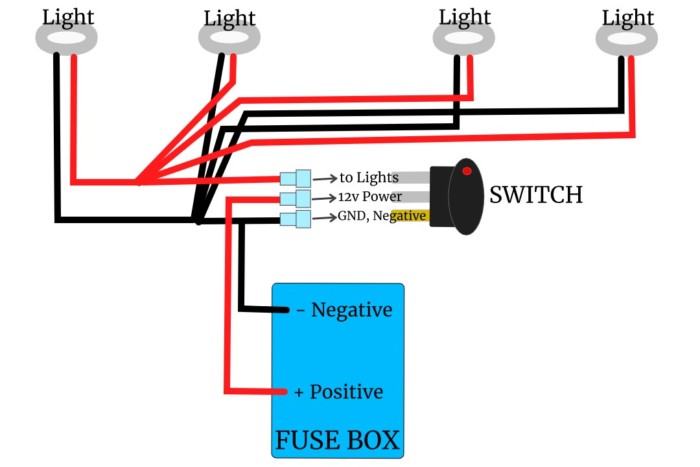
We made the decision to wire each light separately. So each light has one red and one black 18AWG wire. The wires start where our switch is mounted, run up the wall of the van and then across the ceiling to the spots marked for each light.
To determine how much wire length is needed for each run, measure the path that each wire will take. This is best done with a measuring tape. Always leave several extra inches on each side in case you make a mistake.
And once these wires are laid, they will just remain unconnected until later in the installation once the lights are installed.
To determine the correct wire gauge for the lights we used the Blue Sea Systems Circuit Wizard Calculator.
We used polyiso foam boards for our ceiling insulation. These provide an excellent means to secure the wires in place. We either wedged the wires in the cracks between foam boards. Or we cut slits in the foil surface of the foam boards using a utility knife. We cut along the route that the wires needed to travel.
Then, using a flathead screwdriver, pushed the wires into the cracks. They hold really snug and also don’t stick out above the insulation.
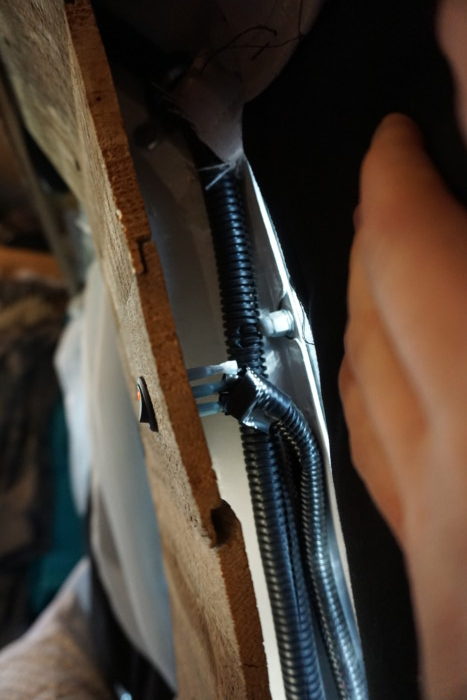
For the rest of the wire runs, like up the wall, we used flexible plastic conduit and cable clamps. Below is a peek behind our walls where you can see the backside of our light switch and the black plastic conduits that carry our wires up the wall.

Step 3: Mark the Light Spots on Ceiling Planks
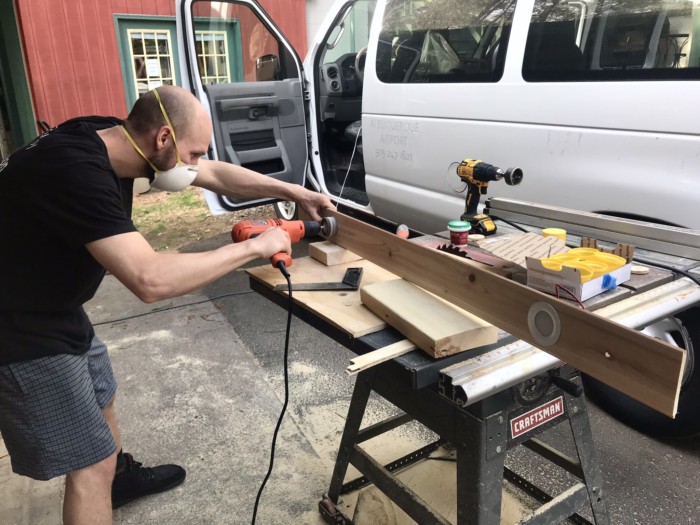
Now we continue with the rest of the ceiling installation. We used ¼” Tongue and Groove Cedar Planks from Home Depot.
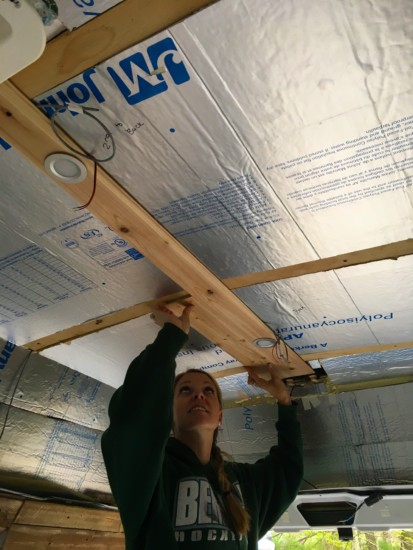
We began the ceiling installation with the center pieces of wood. By briefly holding them in place, we could transfer the marked location of each light (from step 1) onto its corresponding spot on the ceiling plank.
Step 4: Cut Holes for the 12-Volt Recessed Lights

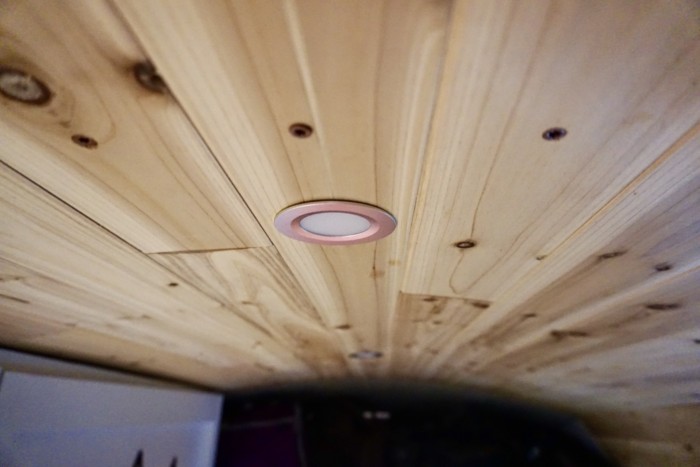
Then using a hole saw drill-bit, we cut out the 2.4” (60mm) diameter hole for each light. It’s best to drill starting from the front side, so that any tear out on the backside won’t be visible when installed.
Then place a light in each of the holes. The spring-loaded metal tabs can be pulled inwards and then snapped back to hold the lights in place.
You can wait to install the lights until after the ceiling plank is installed. But it’s easier to test the fit before the planks have been installed. So I recommend installing the 12-volt recessed lights in the holes right now.
Step 5: Affix Center Ceiling Planks
Attach the ceiling planks in their proper places. Be sure that the wires from the lights and the wire runs from step 2 are sticking out on the same side so you can connect them.

We did notice that our ¼” ceiling planks are just a tad too thin for these lights. So when we first installed them, they stuck out just a little bit, rather than laying flush with the wood.
But behind our ceiling is foam board insulation, so we were able to indent the foam boards a little to make the lights lay flush.
Step 6: Butt Splice the Wires
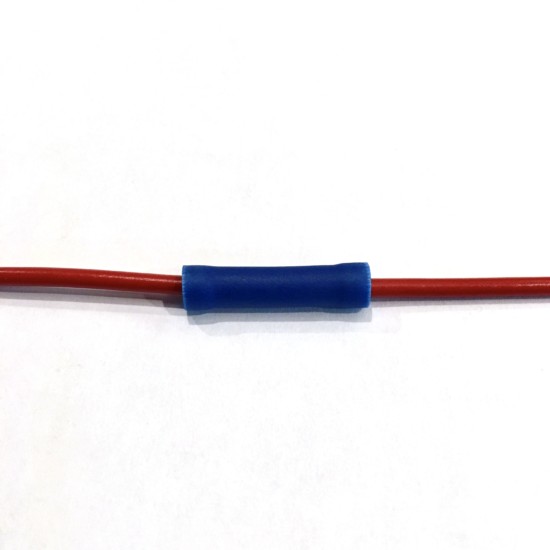
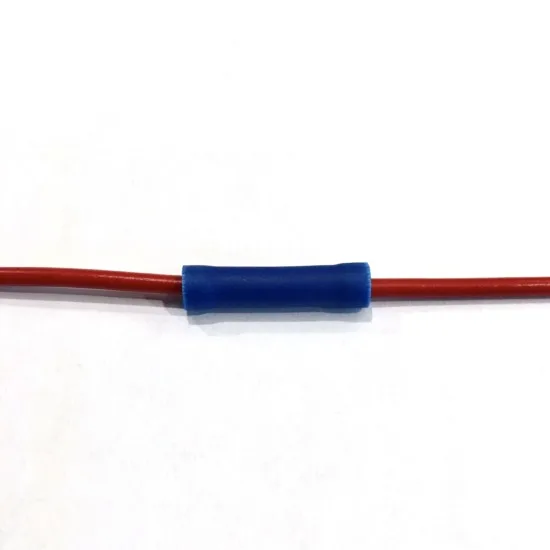
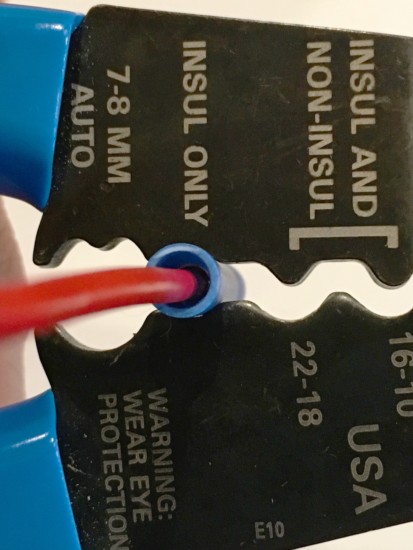

Connect the red and black wire from each light to its corresponding red and black wire run. Use butt splices of the appropriate size, and then electrical tape each connection for safety. T
his is where it’s imperative to use the correct tools and techniques. If you’re getting a little lost in the electrical jargon, please refer to my post on Wires, Connectors, and Crimping to review the proper tools and methods.
Step 7: Merge Wires Together
So, now we have four red and four black wires coming from our lights. To wire all 8 of those wires to a switch, we first need to merge them down to just one red wire and one black wire.
We used this wire combination calculator to determine that four 18AWG wires are equivalent to one 12AWG wire. So then it’s time to combine them.
The optimum way to do this is with a multi-wire step-down connector. But they tend to be expensive and/or hard to order in small quantities.
So most people try to find a hacky workaround. We used a series of 12-14 AWG butt splices to accomplish this. By merging four wires down to two and then again down to one, we were able to create just a single red and black wire for connecting to the switch.
Step 8: Wire a Switch Or Dimmer
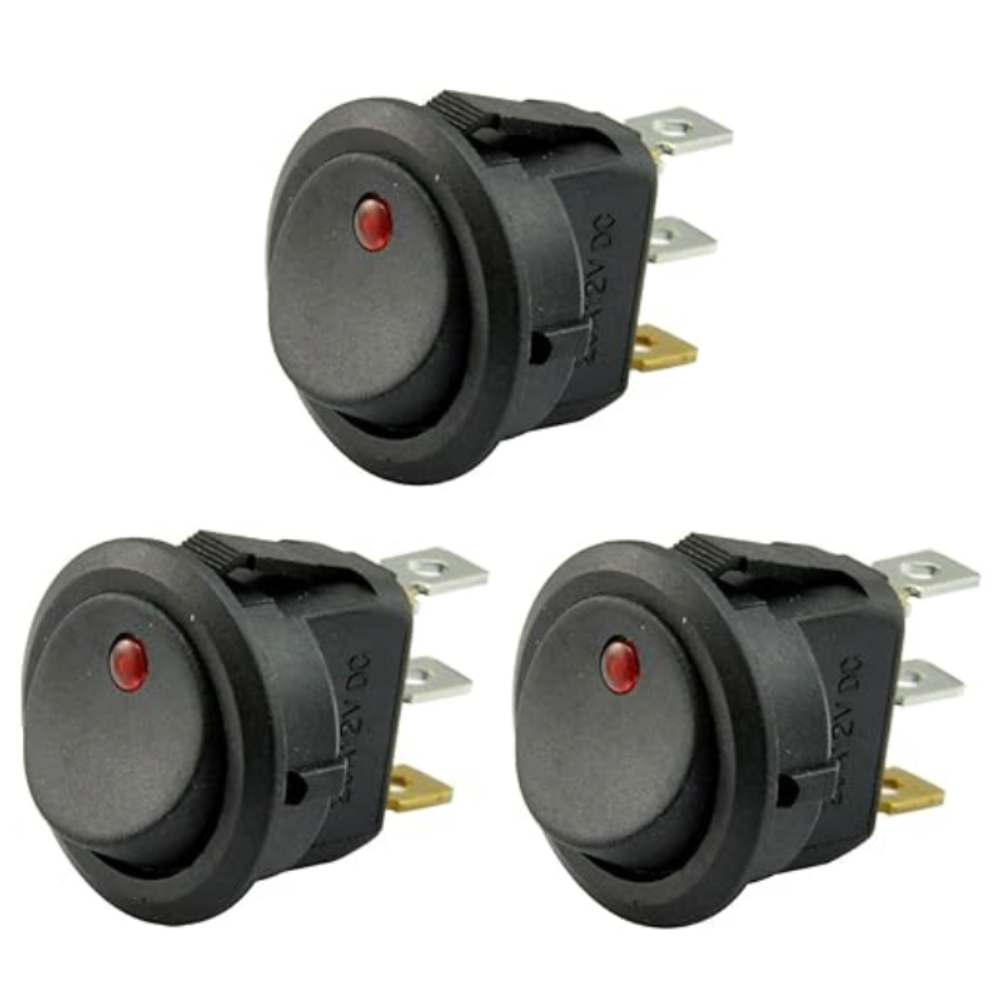
We used a simple 12-volt toggle switch to control our lights. The switch is installed in our wall in a place that is easy to reach from almost anywhere in the van.
The switch has 3 blades for input/output; 12v power in (from battery), 12v power out (to device), and negative (ground). We connected female blade terminals to the ends of each wire, and they fit snugly on the male blades of the switch.
Installation for these switches is pretty simple. The gold blade connects to the negative bus of the fuse box and also the black wires coming from the lights, the middle blade connects to the battery (or fuse box in our case), and the top blade connects to the red wires coming from the lights.
Then the black wires coming from the lights connect to the negative bus on the fuse box.

What We Love
The lights are a great value
They look really professional
Installation was easy
They barely use any power
What We Don’t Love
Need specialized hole saw drill bit
Didn’t quite lay flush initially
Our Final Thoughts | Install 12-Volt Recessed Lights
With the switch wired, the lights are easy to flip on and off. We can see why these Aceegoo pucks lights are so highly rated. Their energy efficiency makes them great for campervans, when power is usually limited. Each light only draws about 0.18 amps.
They are a breeze to install, that is, if you have some knowledge of basic electrical wiring. They fit well into most wooden plank style ceiling installations and have a sleek professional look. We can’t see using any other product for our next van conversion!
Heres our Ceiling Installation Post Again
And If you feel overwhelmed by any of the wiring or electrical stuff, you can learn all the skills you need in my other posts about…
Vanlife Solar: Wiring, Connectors, and Crimping
Vanlife Solar: A Beginner’s Guide to Solar Components
Save ‘How To Install 12-Volt Recessed Lights In A Camper Van’ For Later


How Much Did Our DIY Camper Van Conversion Cost - tworoamingsouls
Monday 10th of April 2023
[…] How To Install 12-Volt Recessed Lighting […]
Vanlife: Campervan Lighting - tworoamingsouls
Wednesday 23rd of March 2022
[…] Guide for installing 12-volt recessed lights in your campervan. […]
Van Conversion Build Order | Step By Step Guide - tworoamingsouls
Saturday 16th of October 2021
[…] you are installing recessed lights in your ceiling, then you can do that as the ceiling goes up. (Or check out other great lighting […]
How To Install Cedar Ceiling In A Campervan | Fiberglass Roof - tworoamingsouls
Saturday 2nd of May 2020
[…] How to Install 12 Volt Recessed Lights […]