This is a collection of our tips and tricks to help prepare you for your van build. During the process of converting our van from an airport shuttle into our comfortable little home on wheels, we learned many lessons. Some things we got right from the beginning, other things we definitely learned the hard way.
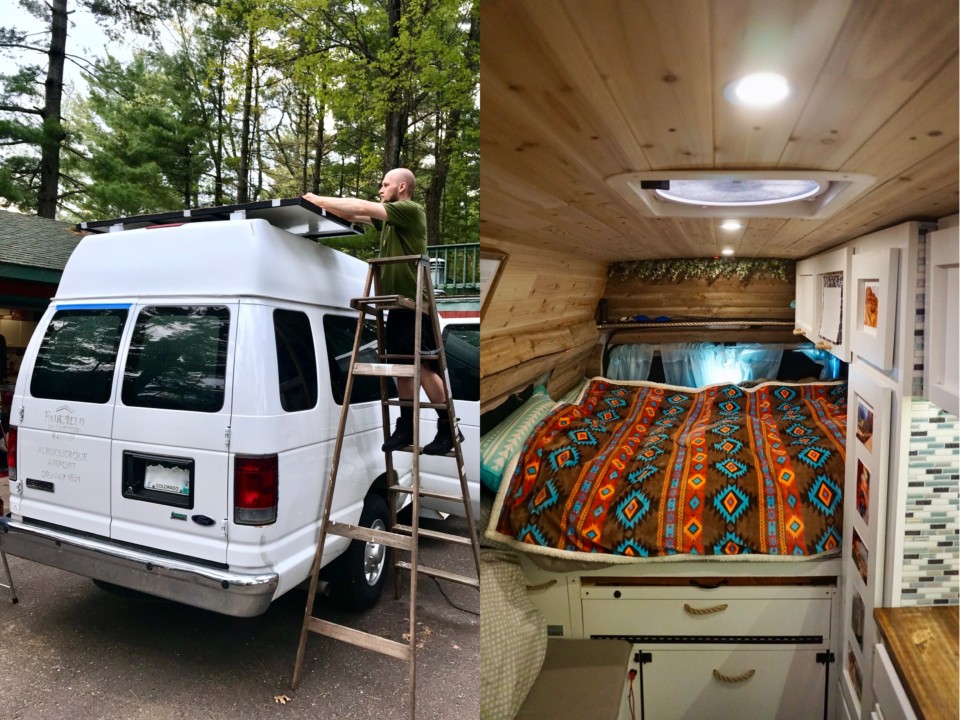

To help others we assembled this collection of unique tips and tricks to save you time, money, and headaches. We hope that you find them useful as you prepare for your own van conversion build.

If you have yet to purchase your van, check my guide:
This post may contain affiliate links. Disclosure policy.
Hang On To Some Old Clothes For Your Build
The first item on the list of van build tips and tricks is to keep some clothes for getting dirty.
In the process of trimming down my wardrobe for vanlife we were really focused on keeping only our favorite clothes (which is definitely the right technique). The problem is, once we started our van conversion, we realized that we didn’t want to mess up my favorite/best clothes during the build.
Working with paint, sawdust, glue, and other dirty supplies can really destroy your clothes quickly. So make sure to hang onto some clothes specifically for wearing during your build. If at all possible, stick with tougher clothes because they can withstand more abuse and protect you from dust, debris, and injuries.
My go-to was an old pair of jeans and a light rain jacket. The rain jacket was especially nice for keeping paint, sawdust, etc. from seeping into layers underneath.

Be Prepared, Be Thrifty
Write a list of things you know that you will need for your build ahead of time (it helps to break it down into categories). Not only will this help you figure out a budget, but it will also prepare you to be on the lookout for good deals. When you come across something for cheap, you will know to buy it and stash it.
Keep an eye out on Craigslist, Facebook Marketplace, Construction Sites, Yard Sales, Thrift Stores, Habitat for Humanity, etc. Items like a camping stove, 12V Fridge, lumber, paint, tools, countertops, and various hardware and finishings.
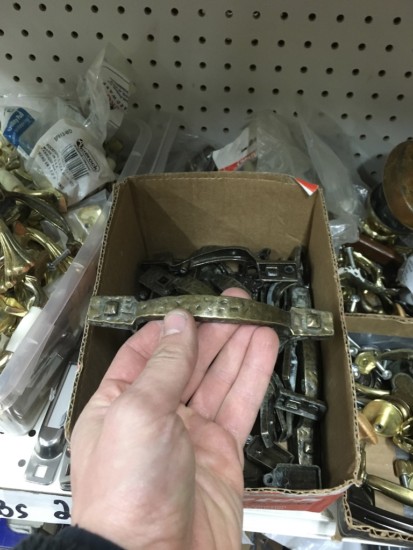
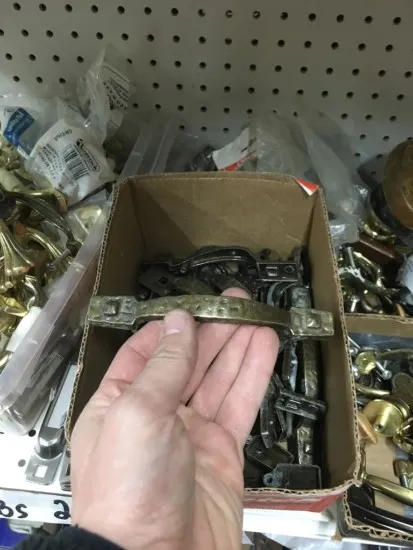
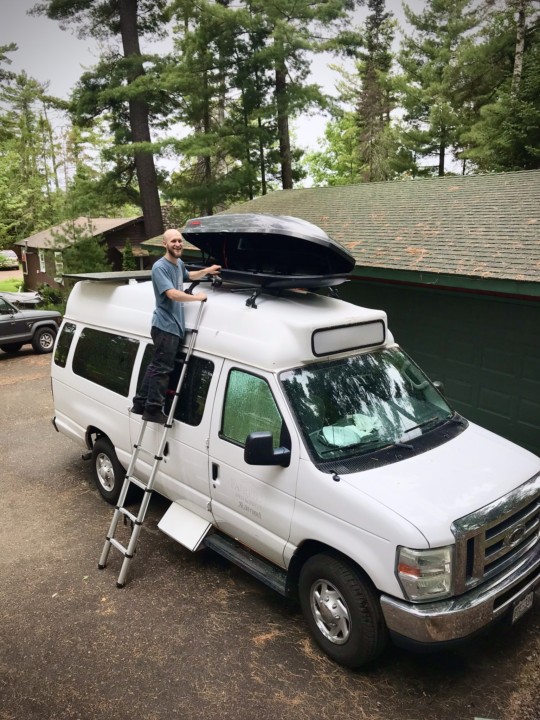
A couple of examples of things that we managed to pick up for cheap are a rooftop ski box (Facebook), cabinet/drawer hardware (my workplace was throwing them out), electrical components, and tools (Habitat for Humanity).
Even our little bit of foresight on a few purchases added up to big savings. Our Yakima cargo box sells for about $600 new, and we got ours for $160. Drawer slides and hinges are like $15 bucks a pop, and we got almost a dozen for free. You get the point.

A van build can get really expensive, so being thrifty will really help you save some quiche. But it all starts with making that list of supplies so you’re prepared and ready to capitalize when the opportunities present!
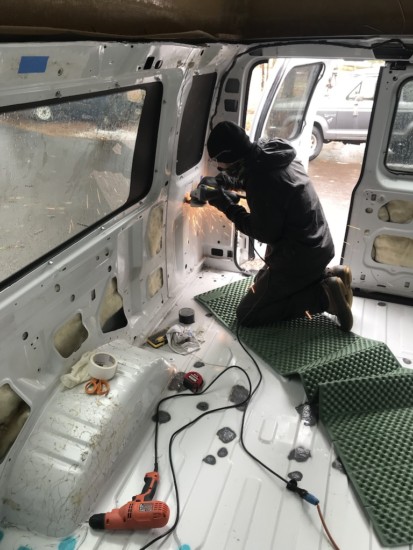
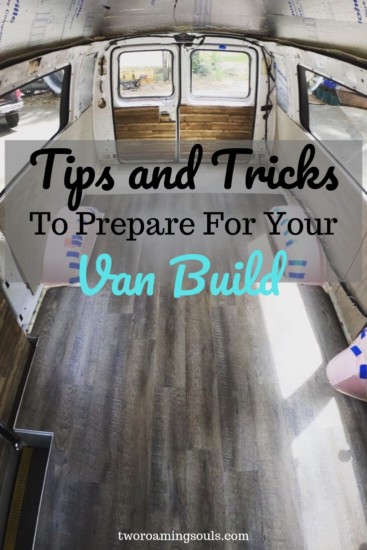
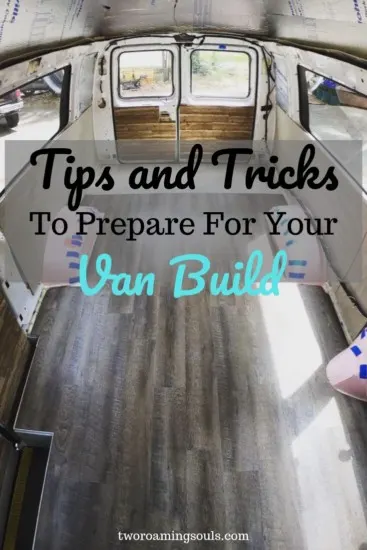
Take Pictures Of Your Bare Interior
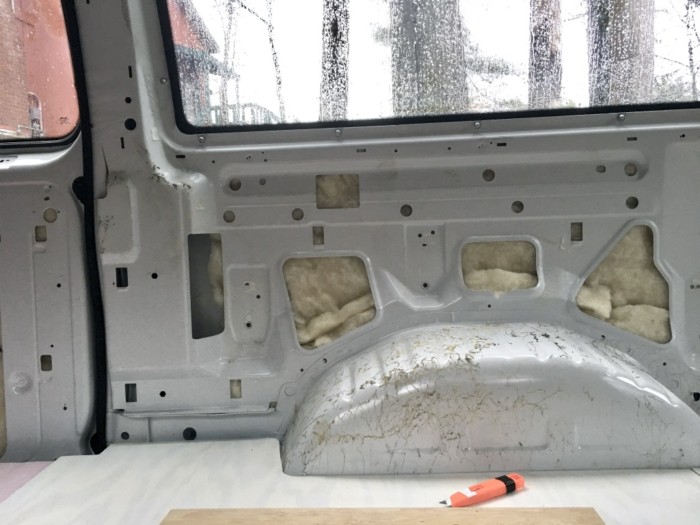
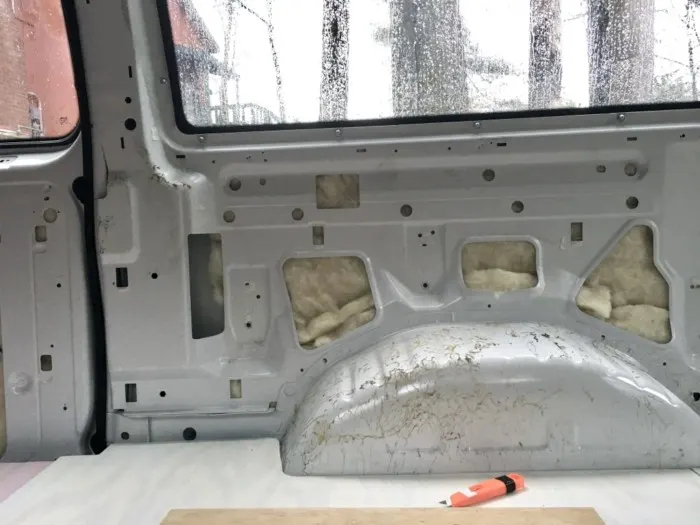
Take lots of pictures of the bare interior of your van to use as a reference once it has all been covered up. Because after you install your flooring, walls, and ceiling, you won’t know what is underneath. That way when it comes time to affix your furniture to your van, you can locate sturdy anchor points.
In our case, our furniture is only attached to the walls and the ceiling because we didn’t want to put any holes through our flooring and compromise its waterproof………ness.
This is one of the more underrated van build tips and tricks.
And you may be wondering why you cannot just attach furniture to the walls (likely plywood, or wood siding). The reason is that most van builds will use thin materials in the name of weight and space-saving. The result of this is that your walls may not be strong enough to anchor furniture in a moving vehicle.
Our furniture is secured using screws that pass through the thin walls or ceiling and into the vans metal frame or thicker wooden supports underneath. Using photos of the original walls, I was able to locate the most sturdy places to secure furniture and also avoid drilling/screwing through any wiring that runs behind the walls.
So put your excitement and ambition on hold for just a second before you begin your build and take photos of everything! I wish I had taken even more photos than I did because, in some spots that I missed, I had no reference and was just making my best guess of where to drive screws.
Just look at how many holes and irregularities there are in the picture above. I guarantee that you won’t remember what it looks like underneath once your walls go up.
Take Advantage Of gifts Coming Your Way
If anyone may buy you a present, try to make sure you’re getting things that you NEED for vanlife. It can be very painful and embarrassing to get gifts before vanlife and know that you will need to get rid of them shortly.
So kindly direct your friends and family away from buying you a deep-fryer and maybe towards LED lights, a camp stove, or this list of good gift ideas.
Additionally, a gift card to your local home improvement store is like gold! I cannot stress enough how much money you will be spending at home-improvement stores. Another option is to kindly ask for consumable gifts like food or drinks.
Consolidate Trips
You will be making an absurd amount of trips to buy supplies. So rather than running to the store every time you need just one more screw to complete the current job, you can save yourself hours by planning a few steps ahead.
Keep a running shopping list on paper or on your phone, so every time you think of something you need, add it to the list immediately before you forget. And before you head to the store, try to plan out what you need for the next couple of steps or even the entire next project.
This is one of the van build tips and tricks that I wish we had abided by during our van conversion.
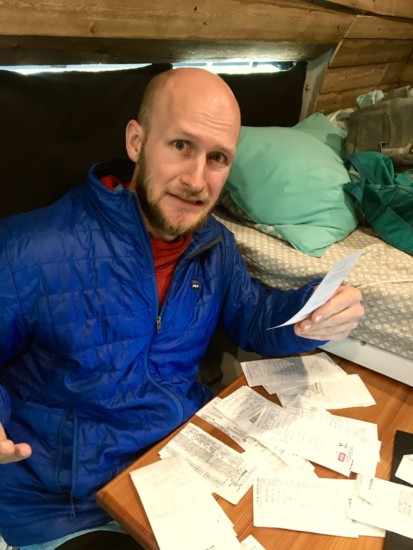
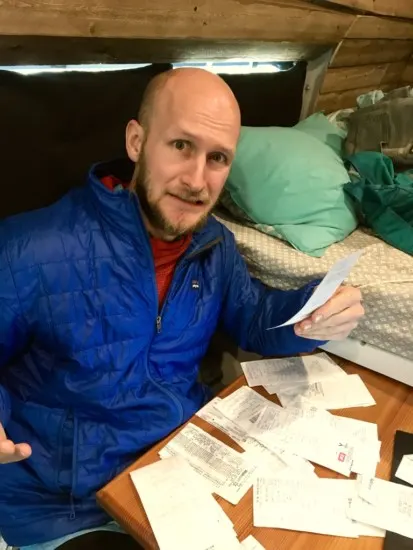
Keep Track Of Your Purchases
Set up a spreadsheet to keep track of your purchases as you build your van. It’s best to make categories to help stay organized.
For example, insulation, furniture, electrical, plumbing, etc. If you have an interest in insuring the items that you put into your van, then having these records is critical. Make sure that you keep up with cataloging your receipts daily because the names of items on receipts are extremely hard to decipher sometimes.
I would often struggle to figure out items on a receipt even immediately after leaving the store. Don’t count on being able to remember days later each little item you bought at which store and on which date.
For your convenience, here is a template of a spreadsheet we use on Google Sheets. Once you have opened the link, you need to create your own copy to be able to enter your own info. Click on “File” -> “Make a Copy”, then rename the file whatever you like and start keeping track of your purchases.

If you are interested in how much our entire van conversion costs, from the vehicle itself to repairs, to all the conversion materials………. check it out here.


Good Luck!
I know a van conversion is a little scary and overwhelming at first. So go forth, armed with your new knowledge and crush it with these van build tips and tricks. They will save you time, money, and frustration.
Do you have any tips and tricks to share that can help others? Please leave a comment below.
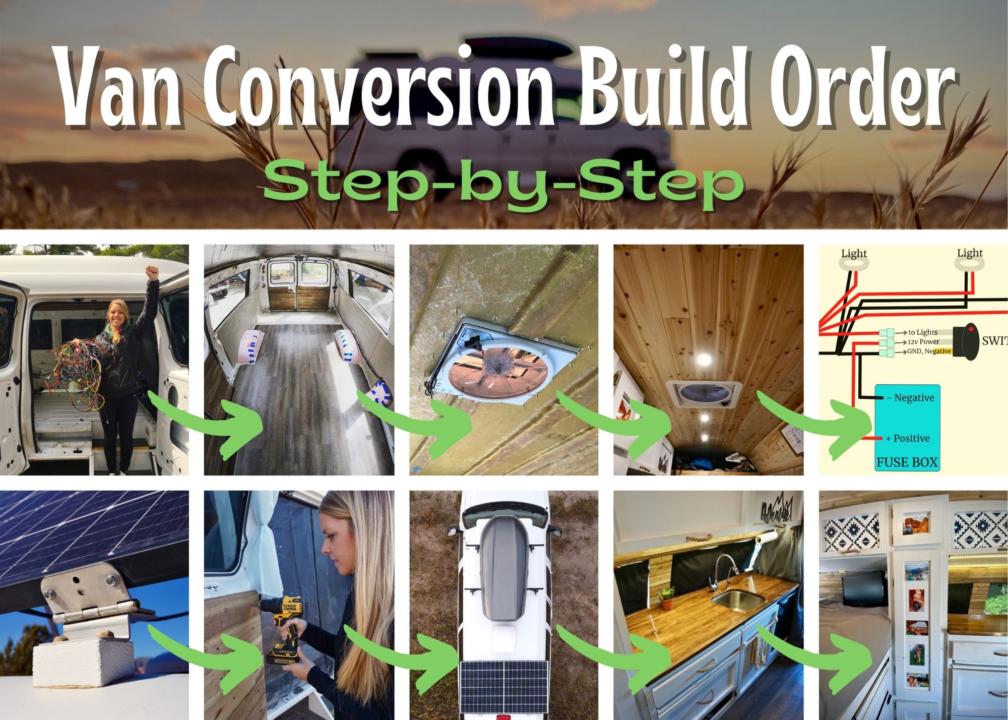

Now it is time to start building out your campervan. Use our helpful resource for our van conversion build order, step by step guide.
Help Share “Van Build Tips and Tricks” Pinterest!

10 Woodworking Tips For Van Conversions - tworoamingsouls
Tuesday 4th of April 2023
[…] […]
How Much Does It Cost To Convert A Campervan - tworoamingsouls
Friday 11th of March 2022
[…] The following two tabs change content below. […]
Anne
Sunday 7th of June 2020
Thanks for the tip about taking tons of photos! No matter how many videos I have watched, and articles read, I still find helpful nuggets of information! I am applying sound deadening this weekend, so I’ll take tons of reference photos now! Safe travels!
Emily Schroeter
Sunday 7th of June 2020
Glad you found it useful! Happy Building! :)
Moondog
Sunday 9th of February 2020
HI. I've recently purchased a e350 extended length with aftermarket top not unlike yours and am having trouble getting my head around the build (particularly framing around the windows). I"m considering covering some of the windows and framing over them as you've done. Any tips? What is the black stuff you used to cover the very back small side windows a parts of some of the other windows? Any help you could give would be much appreciated. If you're willing to share some photos to my email address I'd really appreciate that as well.
Emily Schroeter
Monday 10th of February 2020
We just replied via email! We hope that helps! :)
T.M.
Monday 7th of October 2019
I would have never thought to create a tutorial on a van build! What an intriguing post and well written. Thanks for sharing. My father would have loved a post like this back in the day.
Emily Schroeter
Tuesday 8th of October 2019
Thanks!